A floating text box in Excel is a movable text container that sits above the worksheet and is not tied to a specific cell. It allows you to display important notes, instructions, labels, or titles without affecting your actual data. Unlike cell text, a floating text box can be placed anywhere and adjusted in size and style independently.
Using floating text boxes is helpful when creating dashboards, interactive reports, or forms where you need to highlight key information. You can use them for explanations, warnings, titles, or dynamic messages linked to formulas or cell values.
In this article, you’ll learn how to create a floating text box in Excel step by step.
Here’s how to create a floating text box in Excel quickly:
➤ Open your dataset in Excel.
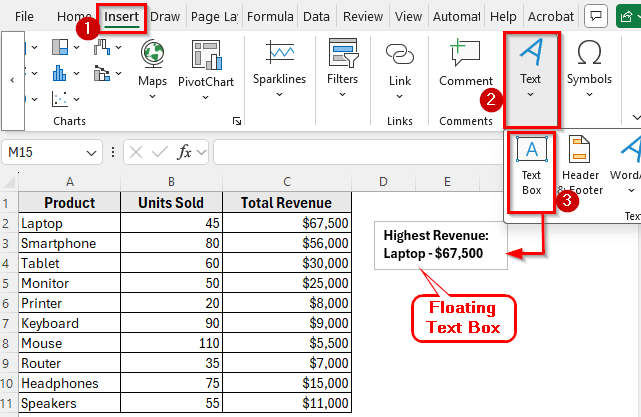
➤ Go to the Insert tab on the Ribbon.
➤ In the Text group, click on the Text Box.
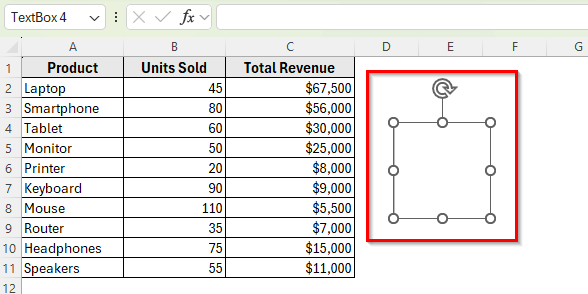
➤ Your cursor will change into a crosshair. Click and drag anywhere on the sheet to draw the text box.
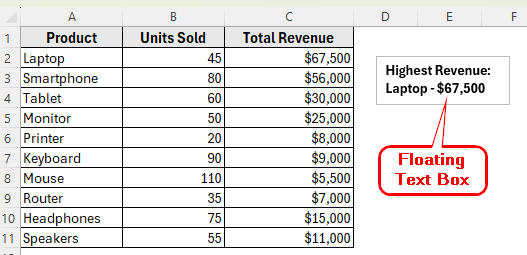
➤ Type your text. For example: Highest Revenue: Laptop – $67,500.
➤ Now, you can drag the text box to any position above your dataset. It will stay floating even if you scroll or adjust cells.
Using the Insert Tab to Create a Floating Text Box in Excel
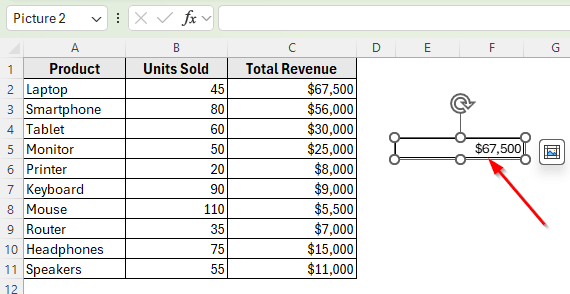
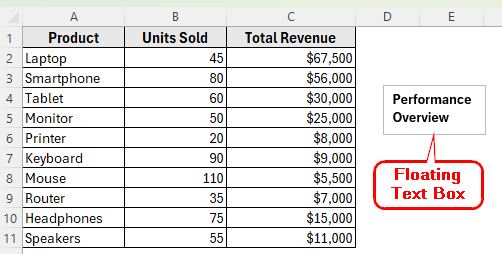
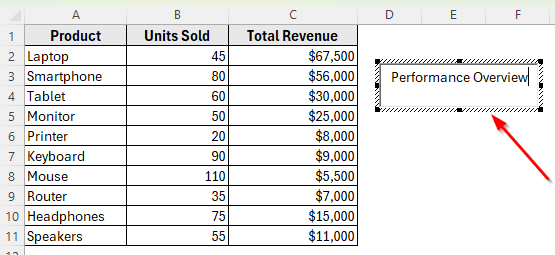
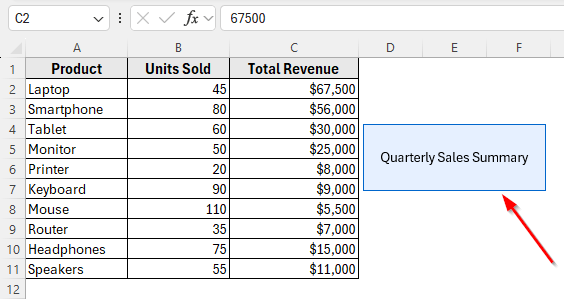
In the following dataset, we have a simple monthly sales report. Column A lists the Product Names, Column B shows Units Sold, and Column C displays Total Revenue. We’ll use this data to demonstrate how to add a floating text box for additional insights.
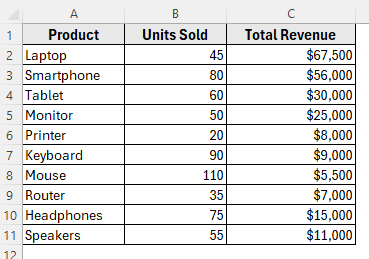
We’ll create a floating text box on this sheet to display a summary message or note.
The easiest way to insert a floating text box is by using the Insert tab. This built-in feature allows you to add a movable text container without affecting any cells.
Here’s how to do it:
➤ Open your dataset in Excel.
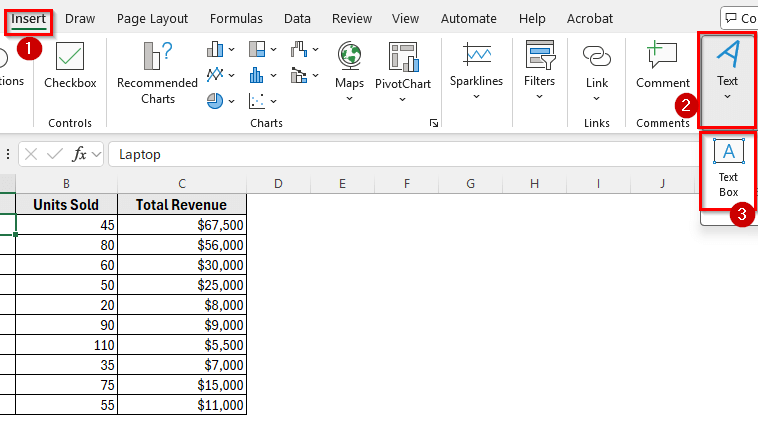
➤ Go to the Insert tab on the Ribbon.
➤ In the Text group, click on the Text Box.
➤ Your cursor will change into a crosshair. Click and drag anywhere on the sheet to draw the text box.
➤ Type your text. For example, type Highest Revenue: Laptop – $67,500.
➤ Now, you can drag the text box to any position above your dataset. It will stay floating even if you scroll or adjust cells.
Insert Text Box Using Copy as Picture in Excel
Another smart way to create a floating text box is by using the Copy as Picture feature. This method turns any selected range of cells into a movable, floating image.
Here’s how to do it:
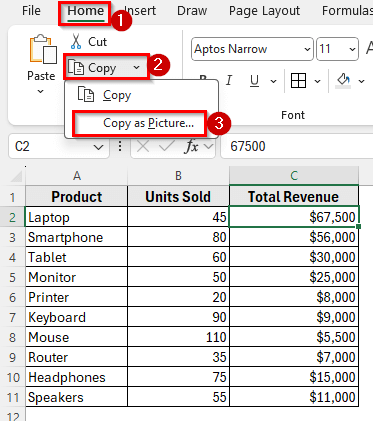
➤ First, select the cell or range of cells that you want to convert into a floating text box. For example, select cell C2 containing the total revenue.
➤ Go to the Home tab on the Ribbon.
➤ Click the small dropdown under the Copy button and choose Copy as Picture.
➤ In the dialog box, choose As shown on screen and Picture as the options, then click OK.
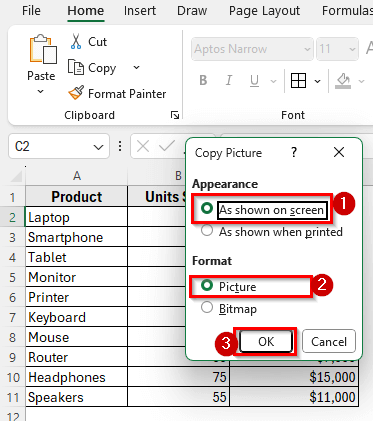
➤ Now, click anywhere on the worksheet and press Ctrl + V to paste it.
➤ The selected cell content will appear as a floating picture. You can drag and place it anywhere, resize it, or even use formatting options under the Picture Format tab.
Using the Shapes Tool to Insert Text Box in Excel
Another simple way to create a floating text box is by using the Shapes tool. Excel’s Shapes feature includes a built-in text box option that works just like a regular text box but gives you more control over the appearance and design.
Here’s how to do it:
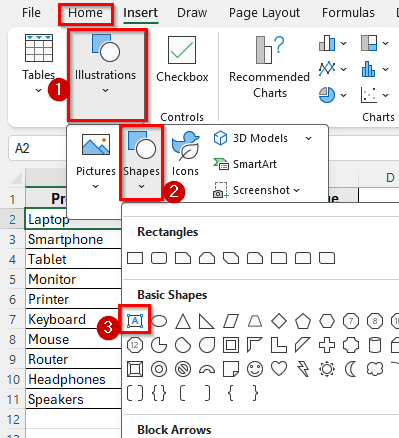
➤ Go to the Insert tab on the Ribbon.
➤ In the Illustrations group, click on Shapes.
➤ Under the Basic Shapes section, select the Text Box icon.
➤ Click and drag anywhere on the worksheet to draw the text box.
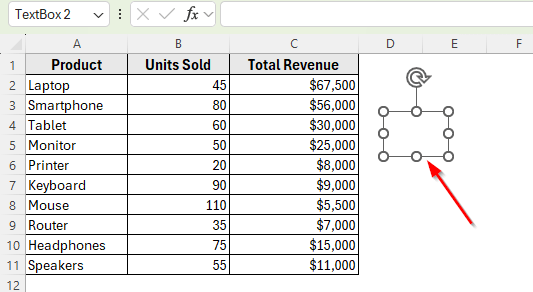
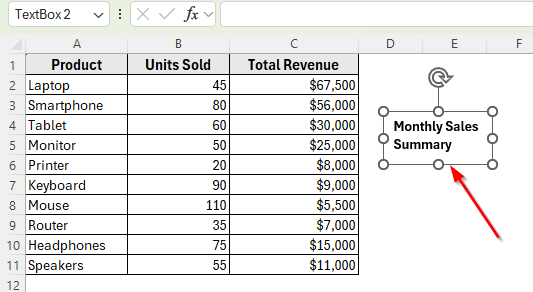
➤ Type your message, such as Monthly Sales Summary.
➤ Once the text box appears, you can format it just like any other shape. Go to the Shape Format tab to change the fill color, add borders, or apply shadow effects to make the text visually appealing.
Insert Text Box Using the Quick Access Toolbar in Excel
If you frequently use text boxes in your worksheets, adding the Text Box command to the Quick Access Toolbar can save you a lot of time. Instead of going to the Insert tab every time, you’ll be able to insert a floating text box with just one click.
Here’s how to do it:
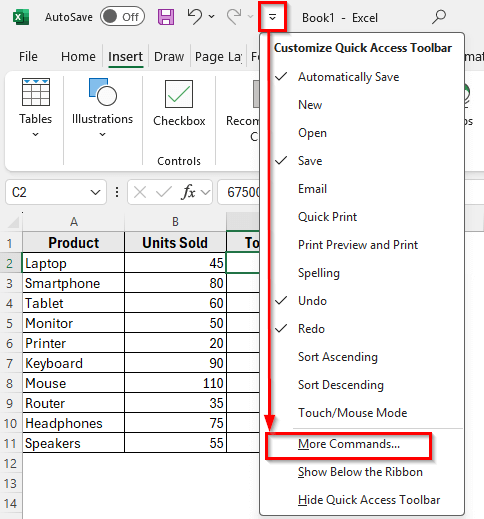
➤ Click the small drop-down arrow on the right side of the Quick Access Toolbar at the top of the Excel window.
➤ Choose More Commands from the menu.
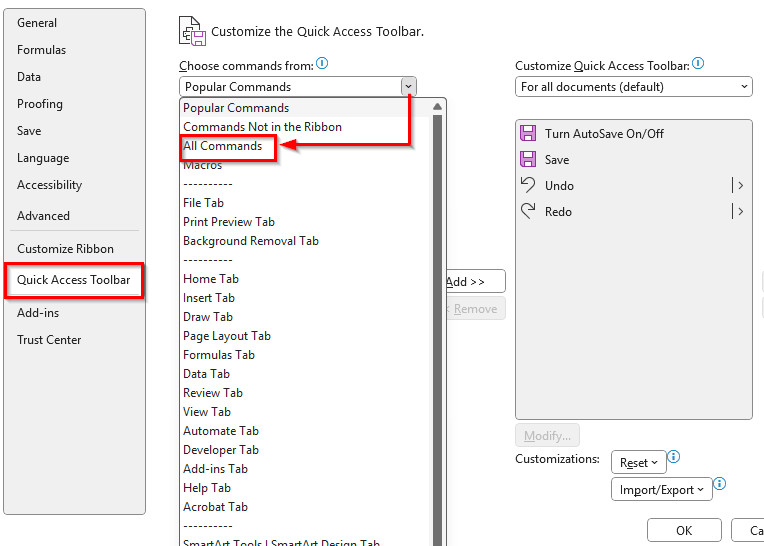
➤ In the Excel Options window, set the Choose commands from dropdown to All Commands.
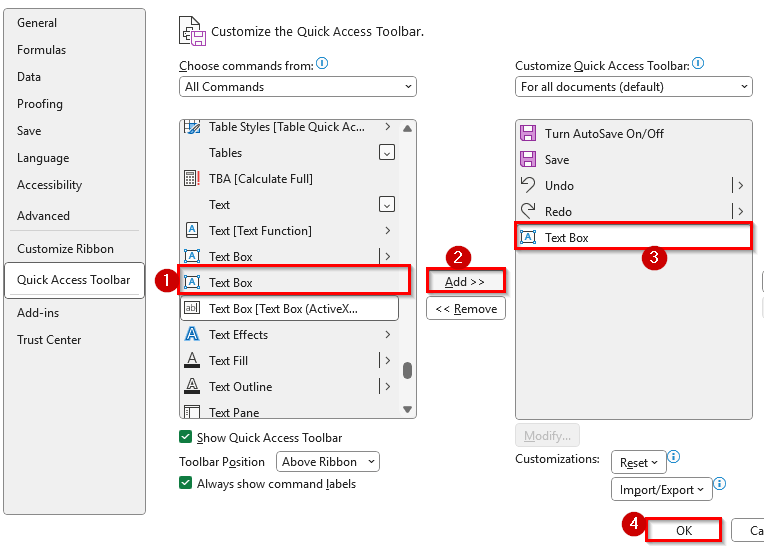
➤ Scroll down, find the Text Box, and click Add to move it to the toolbar list.
➤ Click OK to save changes.
➤ Now, you’ll see a Text Box icon directly on your Quick Access Toolbar.
➤ To insert a floating text box, click the Text Box icon from the Quick Access Toolbar.
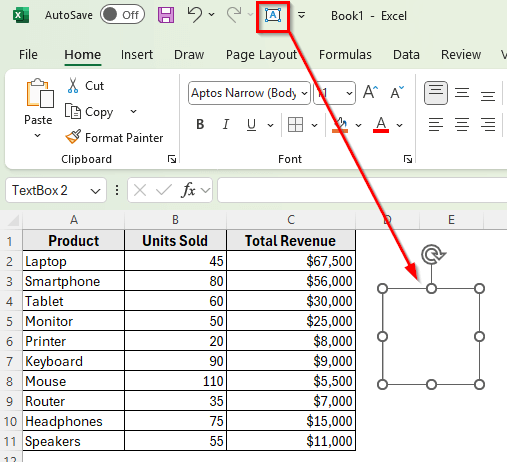
➤ Draw the text box anywhere on your worksheet.
➤ Type the message you want, such as Performance Overview.
Using ActiveX Controls to Insert Text Box in Excel
If you want your floating text box to be interactive and dynamic, using ActiveX Controls is a powerful option. Unlike regular text boxes, ActiveX text boxes can accept user input, respond to events, and interact with VBA code. This is especially useful for creating forms, dashboards, or user interfaces directly inside Excel.
Here’s how to insert a text box using ActiveX Controls:
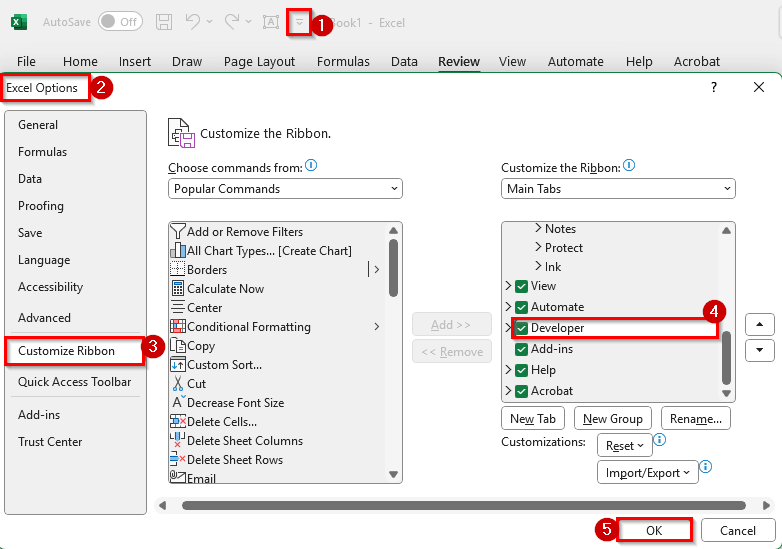
➤ Go to the Developer tab on the Ribbon.
➤ If you don’t see it, enable it by going to Quick Access Toolbar >> Excel Options >> Customize Ribbon, then check Developer. Click Ok.
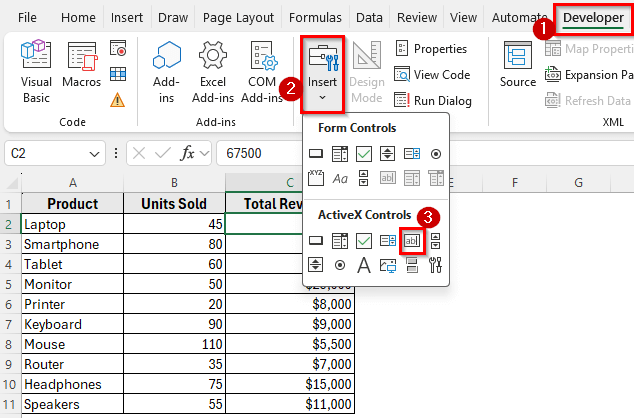
➤ Now, go to the Developer tab, click on Insert.
➤ Under ActiveX Controls, select Text Box (ActiveX Control).
➤ Click and drag anywhere on your worksheet to draw the text box.
➤ Right-click on the text box and click on the Text Box object >> Edit.
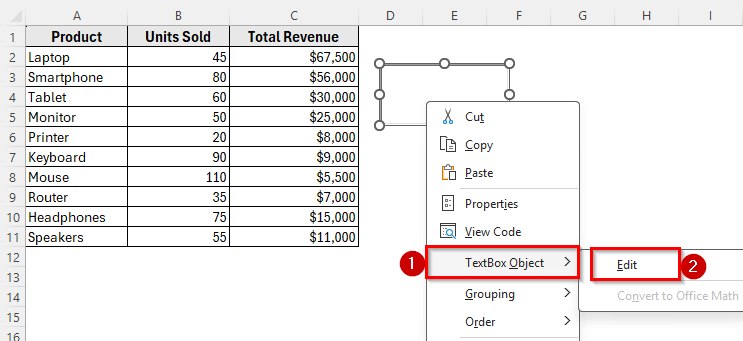
➤ Now, you can type directly into the text box. For example, type Performance Overview.
Insert Excel Text Box Using Excel VBA Editor
If you want to automate the creation of a floating text box or insert it with a single click, you can use the Excel VBA Editor. With a simple VBA macro, you can instantly generate a text box at a specific location, set its text, and even format it.
Here’s how to do it:
➤ Press Alt + F11 to open the VBA Editor.
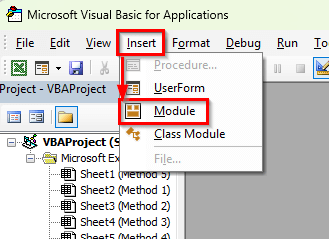
➤ Go to Insert >> Module to create a new module.
➤ Paste the following VBA code into the module window:
Sub CreateFloatingTextBox()
    Dim txtBox As Shape
    Set txtBox = ActiveSheet.Shapes.AddTextbox( _
        Orientation:=msoTextOrientationHorizontal, _
        Left:=100, Top:=50, Width:=250, Height:=50)
    txtBox.TextFrame.Characters.Text = "Quarterly Sales Summary"
    txtBox.TextFrame.HorizontalAlignment = xlHAlignCenter
    txtBox.TextFrame.VerticalAlignment = xlVAlignCenter
    txtBox.Fill.ForeColor.RGB = RGB(230, 240, 255)
    txtBox.Line.ForeColor.RGB = RGB(0, 102, 204)
End Sub 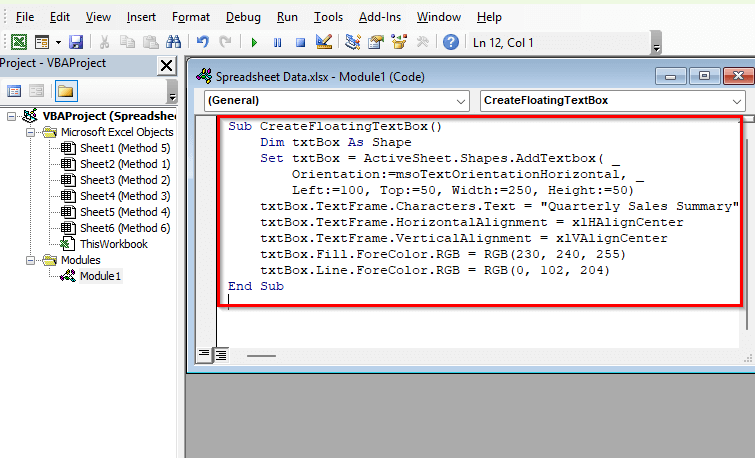
➤ Close the VBA Editor and return to Excel.
➤ Press Alt + F8 , select CreateFloatingTextBox, and click Run.
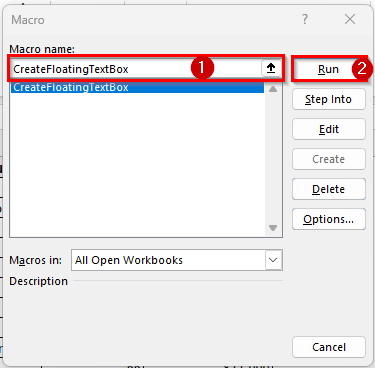
➤ A new floating text box will instantly appear on your worksheet with the text Quarterly Sales Summary. You can drag it anywhere, edit the text, or adjust its size.
Frequently Asked Questions
What is a floating text box?
A floating text box in Excel is a movable container that sits above the worksheet and isn’t tied to any specific cell. You can place it anywhere, add text, link it to cell values, and format it independently. It’s often used to display notes, labels, titles, or key metrics in dashboards and reports.
How to make a floating text box?
Go to the Insert tab and click on the Text Box in the Text group. Then click and drag anywhere on the worksheet to draw the text box. Type your text, and you can move or resize it freely. It will float above the cells and won’t affect the dataset underneath.
Can you have a floating cell in Excel?
Excel doesn’t support floating cells directly. However, a floating text box works the same way by letting you display information independently of the worksheet grid. You can even link the text box to a cell to show dynamic values while still keeping it floating.
Wrapping Up
Adding a floating text box in Excel is one of the easiest ways to make your worksheets more organized and visually appealing. It allows you to display important notes, highlight key insights, or show dynamic data without interfering with your actual dataset.
Once you start using floating text boxes, you’ll notice how much easier it becomes to build professional dashboards, reports, and interactive sheets. They help your data tell a clearer story and make your Excel projects look polished and presentation-ready.