Unnecessary blank cells in your Excel sheet interfere with data presentation, analysis, and calculations. Excel’s Go To Special feature allows you to select the blank cells, delete them, and shift data in the cell above.
➤ Select your data range, press F5 or CTRL + G , and click on Special. Or, go to the Home tab >> Find and Select >> Go To Special.
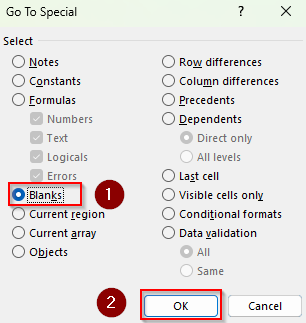
➤ Select Blanks from the given options and press Ok.
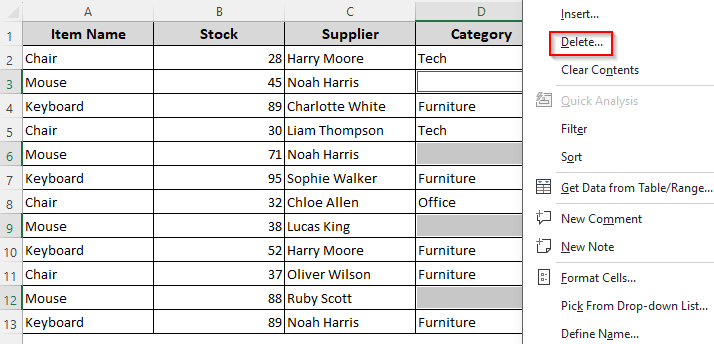
➤ As Excel highlights all the blank cells of the selected data range, right-click on any highlighted cells and choose Delete.
➤ From the new dialog box, select Shift Cells Up.
In this article, we’ll explain all the different ways of removing empty cells and shifting cells up with the Find command, Filter option, Sort feature, Power Query, and VBA coding.
Manually Delete Empty Cells and Shift Cells Up
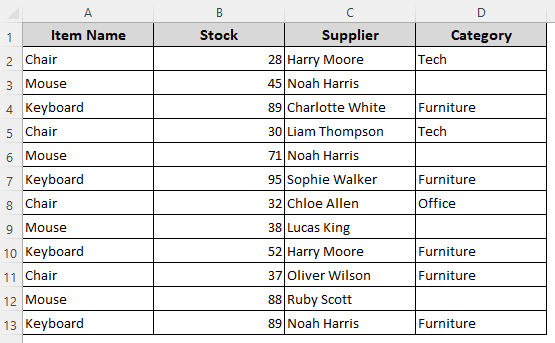
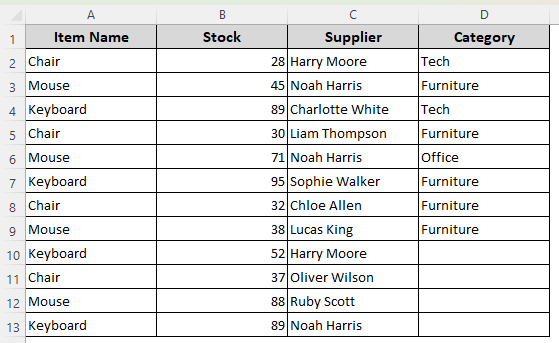
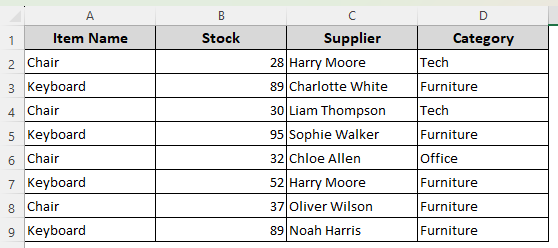
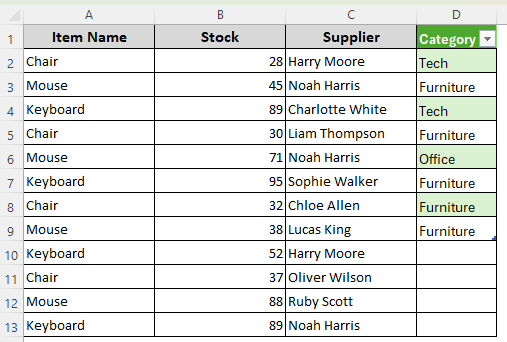
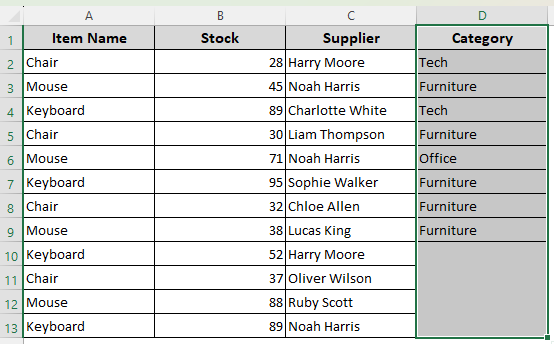
In our dataset, we have a product list with product name, supplier name, and other info. In column D(Category), we have some blank cells. We’ll remove these cells and fill the gaps with data from the cells right below.
For a small dataset with a few blanks, you can delete the empty cells manually. However, it’s a tedious task and unsuitable for large data ranges. Below are the steps for manual deletion:
➤ Press and hold the ENTER key on your keyboard and click on all the blank cells to highlight them.
➤ With all the empty cells highlighted, right-click on any cell and select Delete from the options.
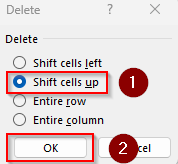
➤ As a dialog box appears, choose Shift Cells Up and click Ok.
➤ Here’s the final result:
Using the Go To Special Feature to Delete Empty Cells and Shift Data Up
With the Go To Special feature, you can highlight all the blank cells immediately to delete them later. Here’s how to do it:
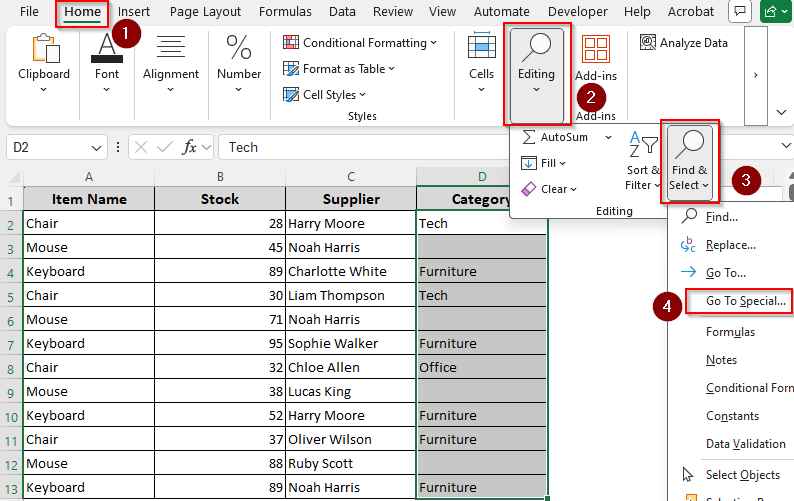
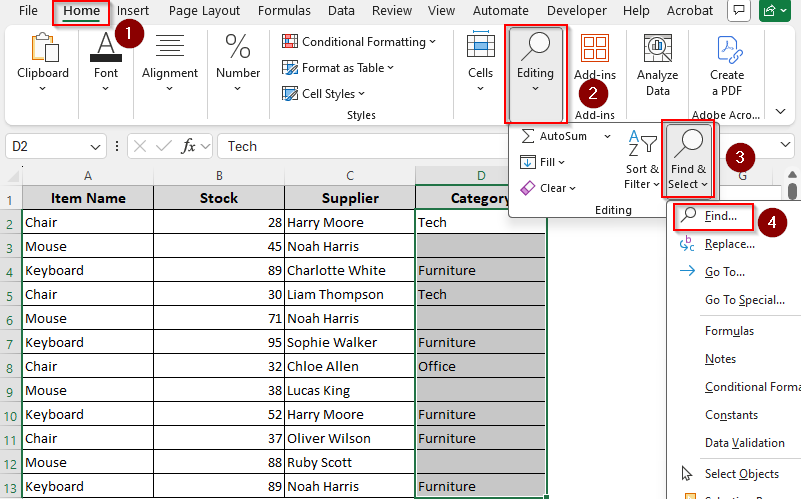
➤ Select the data range with the blank cells, and click on the Home tab. From the Editing group, choose the Find & Select option and select Go To Special from the menu.

➤ Or, press F5 or CTRL + G and select Special.
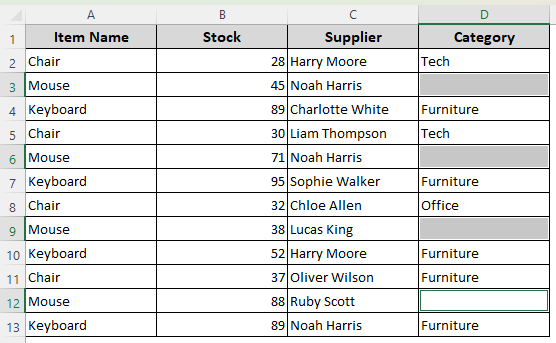
➤ When the Go To Special dialog box appears, choose Blanks from the options and click Ok.
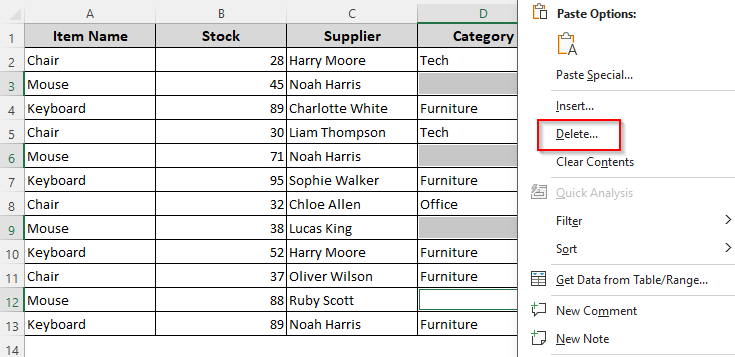
➤ Excel now highlights all the empty cells in your selected data range. Right-click on any of them, choose Delete from the menu, and select Shift Cells Up from the dialog box.
➤ Finally, press Ok to remove all the highlighted cells.

Delete Cells and Shift Data with the Find Command
Excel’s Filter feature helps you to locate and highlight all blank cells from your selected data range. Therefore, you can easily delete them in a few clicks. Here’s the detailed process:
➤ Select your data range and press CTRL + F . Or, click on the Home tab. From the Editing group, choose the Find & Select option. In the drop-down menu, click Find.
➤ As the Find and Replace box appears, click on Options if it’s not already expanded.
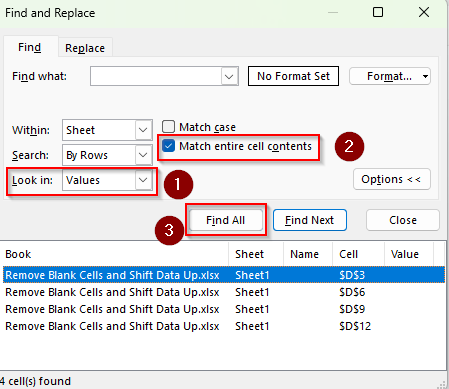
➤ Leave the Find What box empty to find blank cells. In the Look In dropdown, choose Values.
➤ Check the Match Entire Cells Content box and click Find All.
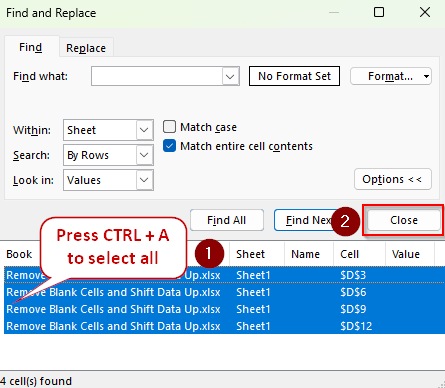
➤ Now, in the Result Window below, click on the top result and press CTRL + A . Press Close.
➤ As Excel highlights the blank cells, go to the Home tab and click the drop-down arrow under the Delete button.
➤ Choose Delete Cells, click on Shift Cells Up, and press OK.
![]()
Delete Entire Rows with a Blank Cell and Move Data
In this method, we’ll filter the rows with one or multiple blank cells and delete the entire row. However, if you don’t want to delete the entire row, you must avoid this method as Excel doesn’t delete only blank cells when a filter is applied. Follow the steps below:
➤ Select the data range and go to the Data tab. From the Sort & Filter group, select the Filter option.

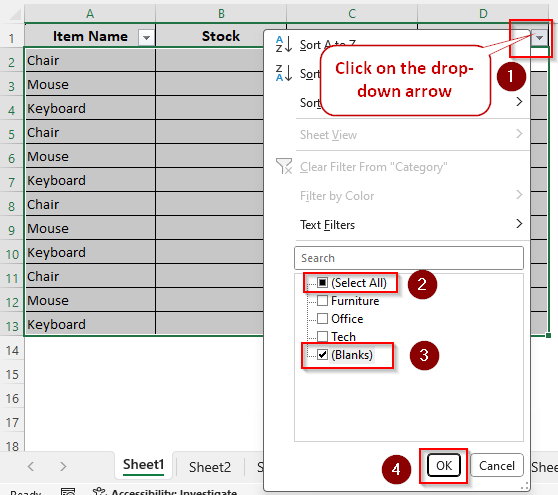
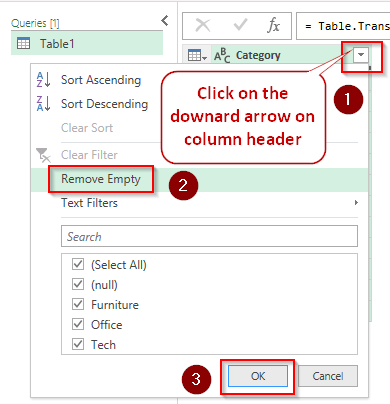
➤ Now, go to the column with the blank cells and click on the downward arrow sign on its heading cell.
➤ From the new menu, uncheck the Select All box, scroll down, and check the Blanks box. Press Ok.
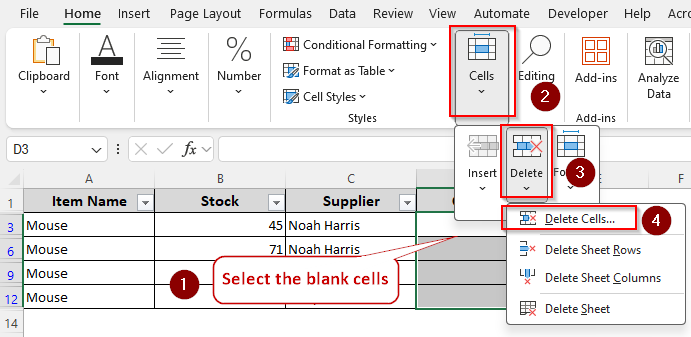
➤ As Excel highlights the empty cells only, go to the Home tab >> Cells >> Delete Cells >> Ok.
➤ Excel will now clear all the rows with empty cells. When you’re done, click Sort & Filter again and select Filter to bring your data back. Here’s our final dataset:
Using the Sort Feature to Delete Blank Cells and Rearrange Data
With Excel’s Sort feature, you can sort your data in alphabetical order. The sorting pushes down the blank cells and shifts data up. As it changes your original data order, only use this if the new alphabetical arrangement doesn’t bother you. Here are the steps:
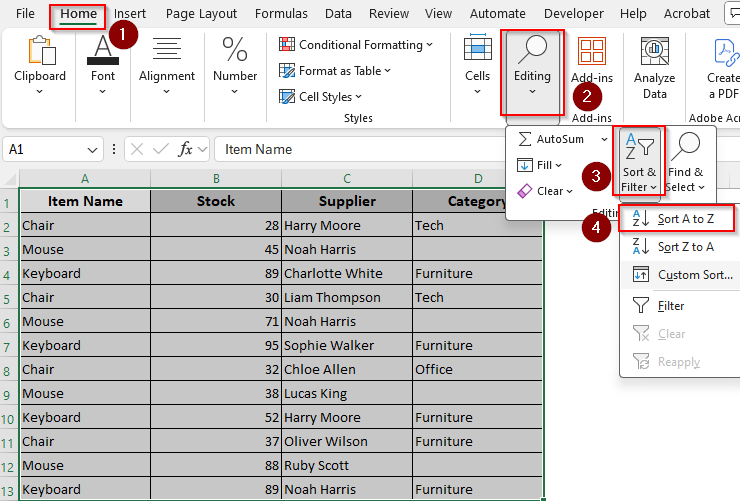
➤ Now, select your entire data range and click on the Home tab. Select Editing and select Sort & Filter.
➤ Choose Sort A to Z from the drop-down menu.
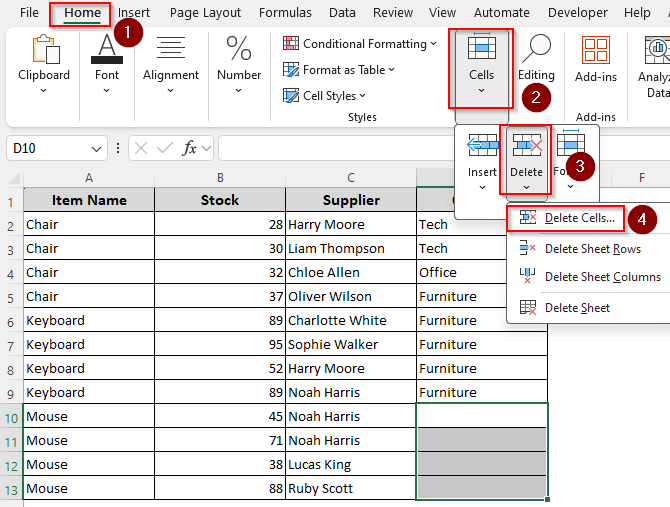
➤ After sorting, Excel pushes the blank cells down. To delete them, select the cells and go to the Home tab >> Cells >> Delete >> Delete Cells.
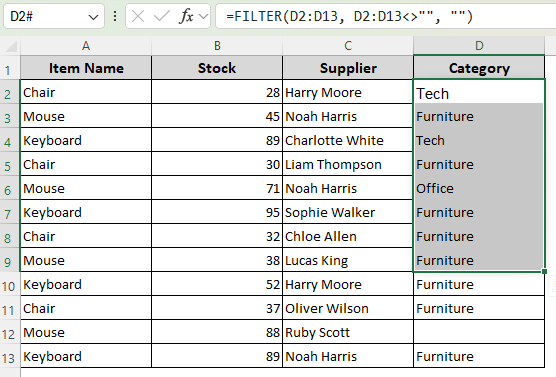
Extract Data from Non-Blank Cells with the FILTER Function
If you have Excel 365/2021, you can extract the data from the non-blank cells and put them in a different cell range. The FILTER function automatically excludes blank cells and compresses the results.
However, this formula works on only one column at a time. So, you need to apply it separately for every column, which can be time-consuming. To use this method, follow the steps below:
➤ Select a cell where you want to put the data from non-blank cells and enter the following formula:
=FILTER(D2:D13, D2:D13<>””, “”)
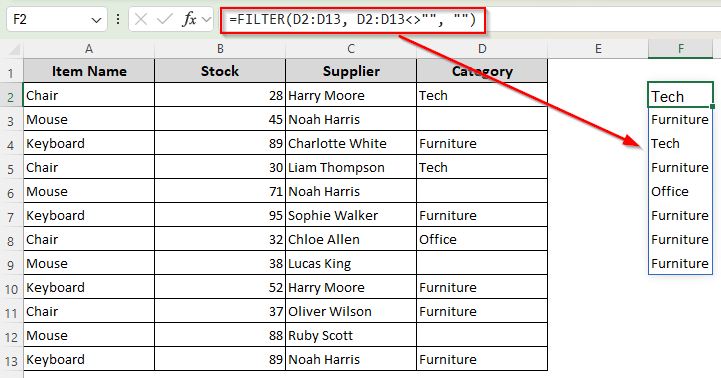
➤ Instead of D2:D13, use the cell range of your original data containing the blank cells.
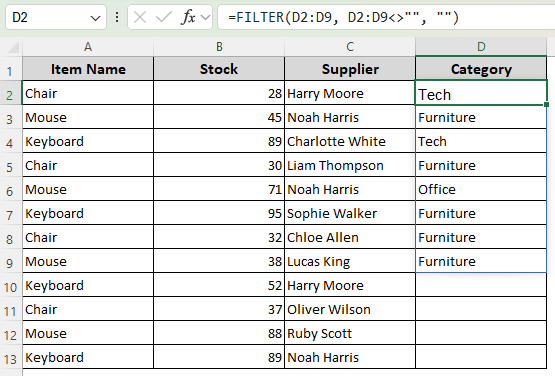
➤ Press Enter and Excel will fill the remaining cells. Repeat the process for other columns with appropriate cell ranges in the formula.
➤ You can either keep the old data range or replace it with the new one using the CTRL + X and CTRL + V shortcuts. Also, delete the extra cells that are left after the replacement.
➤ Here’s our final dataset after the replacement.
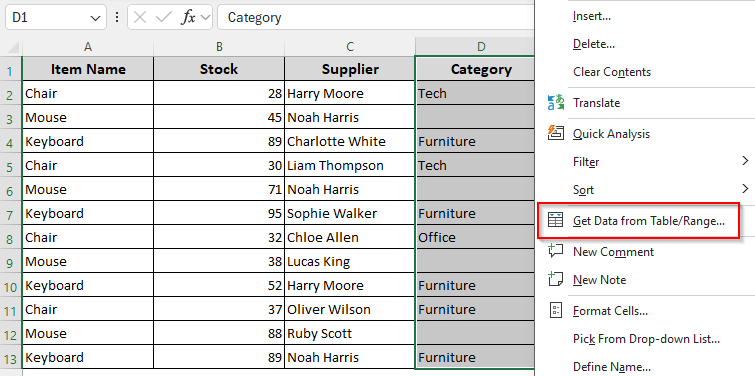
Deleting Empty Cells and Moving Data with Power Query
To easily remove blank cells for current and future entries, Excel’s Power Query is a reliable solution. Here’s how to use it:
➤ Select your data range, right-click on the cells, and choose Get Data from Table/Range.
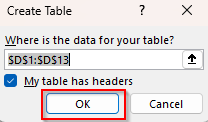
➤ When Excel prompts you to turn your data range into a table, click Ok.
➤ In the Power Query Editor, select the column(s) with blanks, click on the downward arrow sign on the column header, and choose the Remove Empty option.
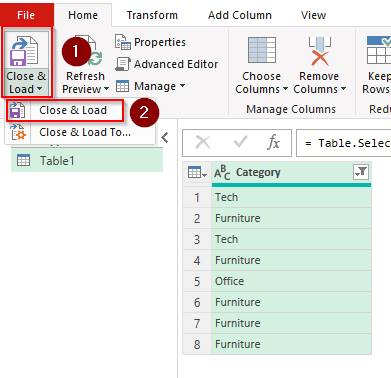
➤ Click on the arrow beside the Close & Load option on the Home ribbon.
➤ You can choose Close & Load to load the cleaned data to a new worksheet.
➤ Or, select Close & Load To for more options to load the data in a new worksheet or in the existing one.
➤ Now, you can copy and paste the cleaned data over your original dataset. Here’s our final result:
Custom VBA Macro to Remove Blank Cells and Shift Data Up
Following the steps given below, you can customize a VBA macro that removes blank cells and fills the gaps with data from the cells below.
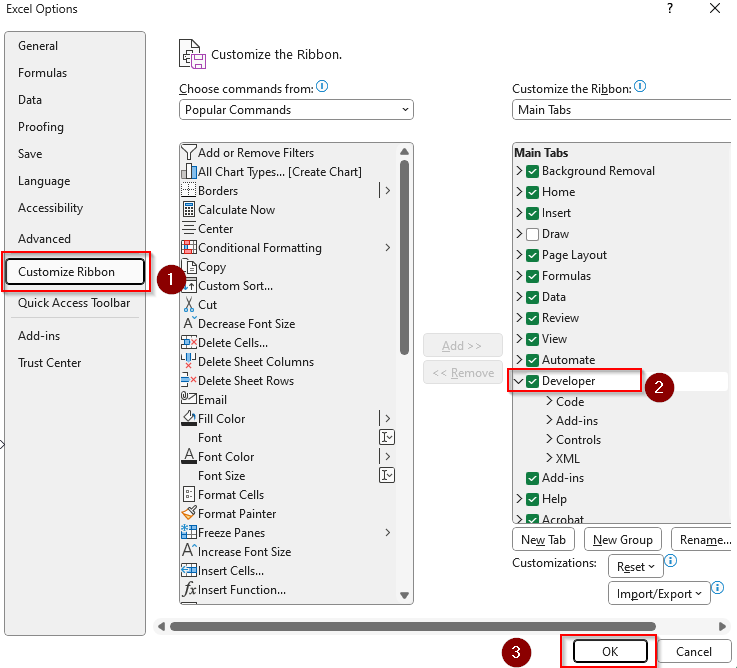
➤ If your main ribbon doesn’t have the Developer tab, click on File >> More >> Options.
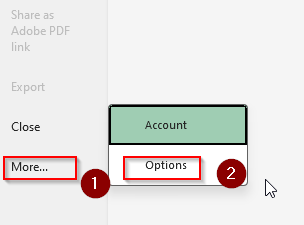
➤ From the new dialog box, choose Customize Ribbon from the side column and select Developer from the given options. Press Ok.
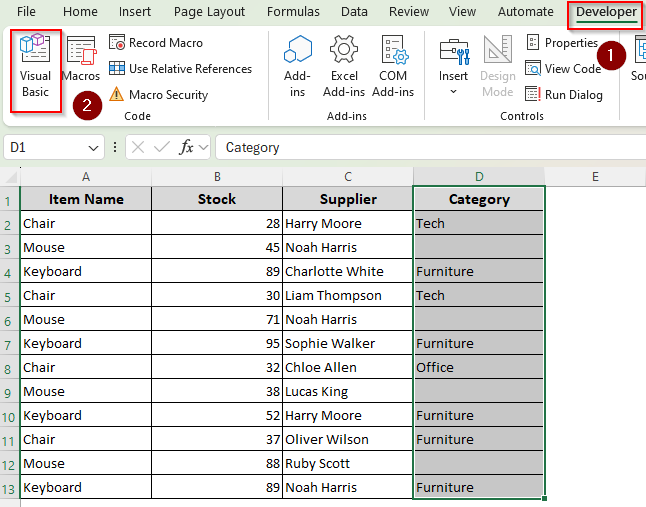
➤ Now, make sure you select your data range with the blank cells. Click on the Developer tab and choose Visual Basic.
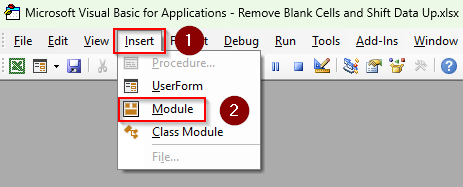
➤ In the VBA Editor, click on the Insert tab and select Module from the menu.
➤ In the new dialog box, paste the following code:
Sub RemoveBlanksAndShiftUp()
Dim rng As Range
Dim cell As Range
Dim delRange As Range
' Set the range to the current selection
Set rng = Selection
' Loop through each cell in the range
For Each cell In rng
If IsEmpty(cell) Then
' If cell is empty, add it to the delete range
If delRange Is Nothing Then
Set delRange = cell
Else
Set delRange = Union(delRange, cell)
End If
End If
Next cell
' Delete the blank cells and shift cells up
If Not delRange Is Nothing Then
delRange.Delete Shift:=xlShiftUp
End If
End Sub
➤ Press F5 or click on the Run tab and select Run Sub/UserForm.
➤ Go back to the Excel tab to check the result.
➤ Before you exit the tab, go to the File tab and click on Save As.
➤ Choose a location to save the file and click on the downward arrow beside the Save As Type box.
➤ Select Excel Macro-Enabled Workbook from the options and click Save.
![]()
Frequently Asked Questions
How do I delete extra blank sheets in Excel?
Start by pressing the keys ALT , then H , D , S one after another (not simultaneously). Now, from the bottom, click on the sheets that you want to remove. Another way is to right-click the blank sheet and click Delete from the Home tab. Choose the Delete Sheet option from the menu.
How do you shift cells without deleting them?
Select the cell or range where you want to insert a space to make room for more data. Right-click and choose Insert. In the dialog box, choose Shift Cells Right to move the selected cells to the right. Or, select Shift Cells Down to move the selected cells downward. Click Ok.
How to hide unused blank columns in Excel?
Click the first blank column header to the right of your table. Press Ctrl + Shift + Right Arrow to select all columns to the right. Press Ctrl + 0 to hide the selected columns.
Concluding Words
While choosing any of the methods mentioned above, consider the size of your data. Go To Special, Sort, Filter, and Find commands work best for smaller datasets.
For huge datasets with thousands of rows, they might not always work properly. In this case, you must use Power Query or a VBA macro.