Timestamps in Google Sheets often contain both date and time information (e.g., 2025-05-16 14:35:00). While this can be useful for logging events, many workflows only require the date portion. Google Sheets offers several easy ways to extract just the date from a full timestamp.
In this article, we’ll show you different methods to convert a timestamp to a date in Google Sheets using built-in functions and formatting options.
Steps to extract just the date from a timestamp using the INT() function in Google Sheets:
➤ Use a dataset with timestamps in Column A (e.g., “2025-05-16 14:35:00”)
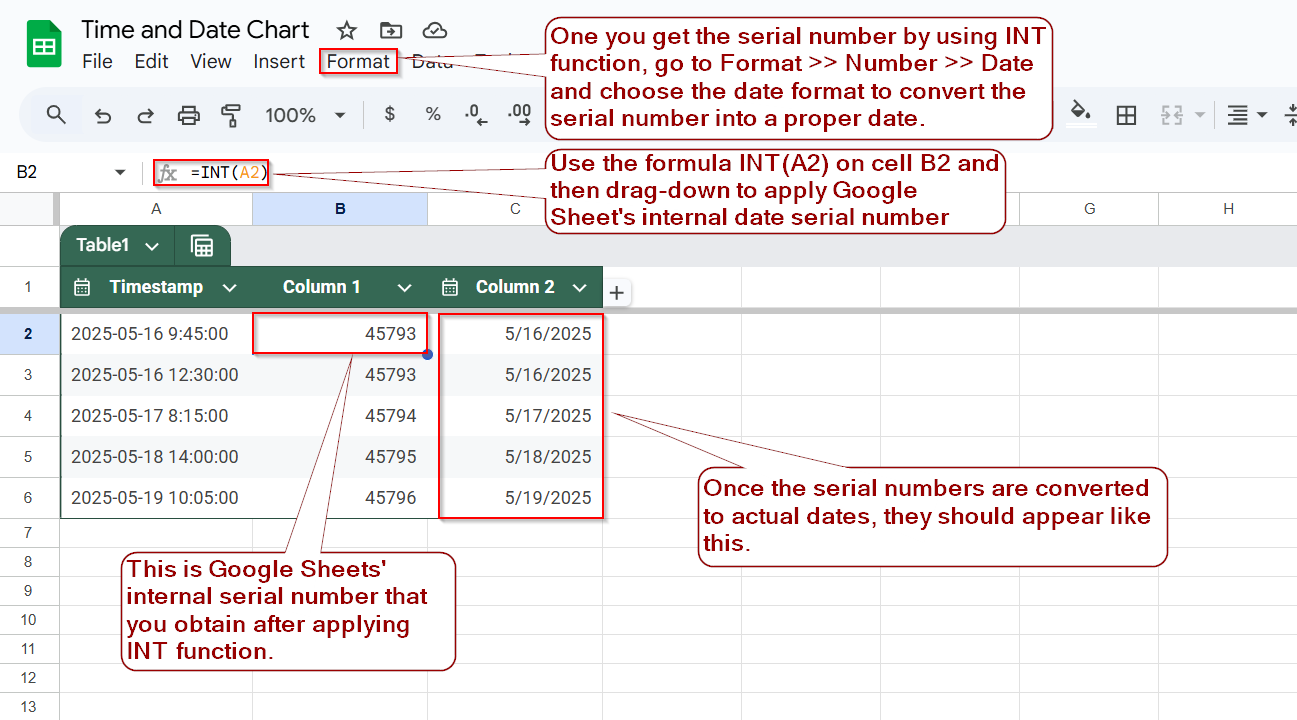
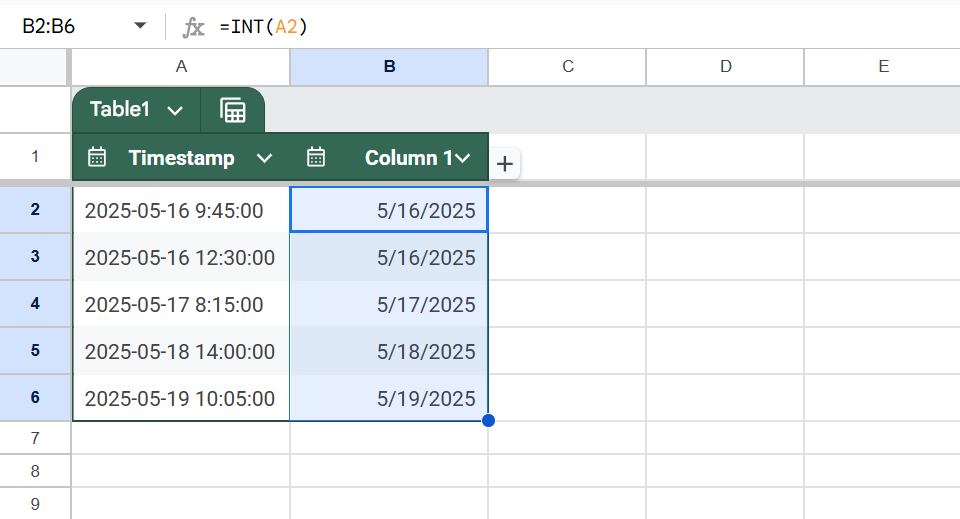
➤ In cell B2, enter the formula: =INT(A2)
➤ Press Enter to get the serial number representing the date
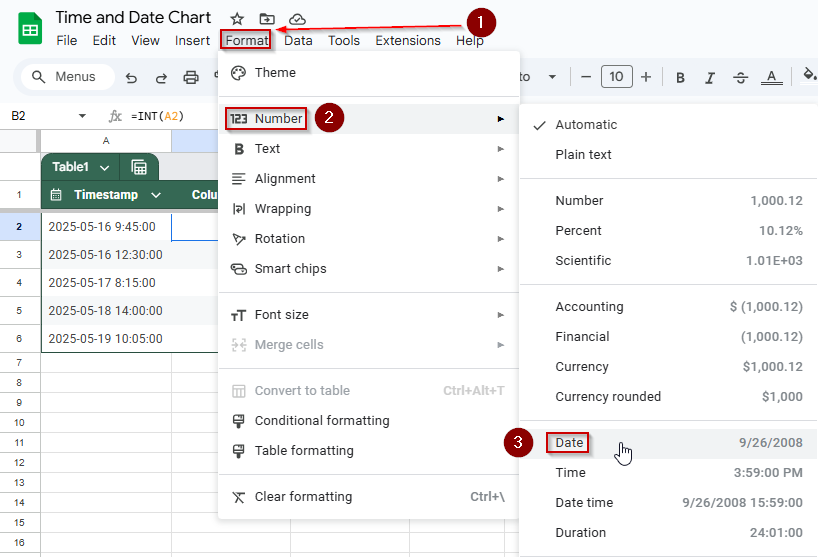
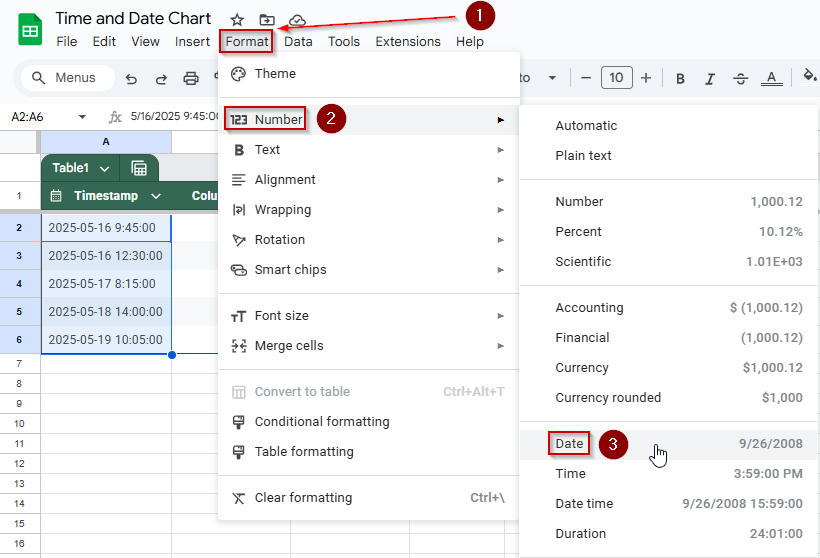
➤ Go to Format >> Number >> Date to convert it to a readable date
➤ Use the fill handle to apply the formula to the rest of the column
➤ You’ll now have clean date values separated from the time portion
Use the INT Function to Extract Just the Date from a Timestamp in Google Sheets
If your dataset contains timestamps (dates with times) and you only want the date portion, the INT() function is the simplest and most effective method in Google Sheets. It works by removing the decimal part of the timestamp, which represents the time.
We’ll use a basic project log with timestamps in Column A for this method. Here’s the dataset we’ll refer to:
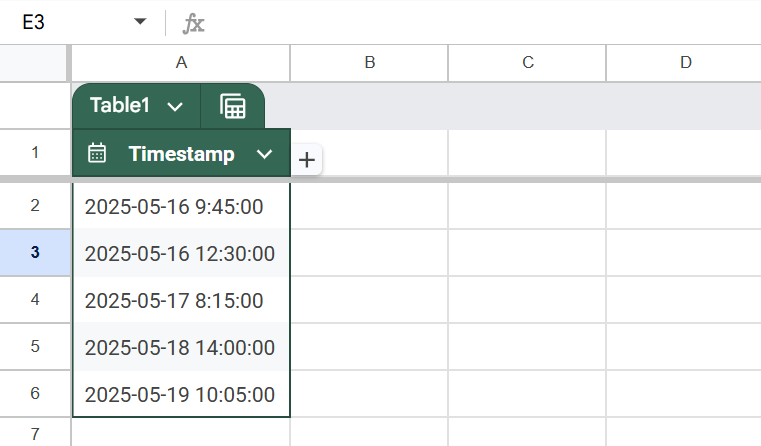
This data might represent when tasks were created or events were logged. Now, let’s convert those timestamps into clean, standalone dates.
Steps:
➤ Open your Google Sheet.
➤ Click on cell B2, where we’ll extract the date.
➤ Type the formula:
=INT(A2)
➤ Press Enter.
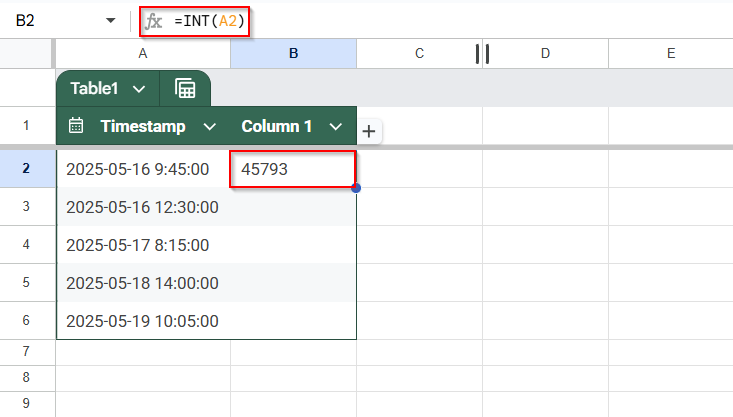
This will return a number like 45793, which is Google Sheets’ internal date serial number.
➤ With B2 selected, go to the menu and click on Format >> Number >> Date

This converts the number into a readable date format (e.g., 2025-05-16).
➤ Drag the fill handle down from B2 to apply the formula to the remaining rows.
Apply the TO_DATE Function to Convert Timestamps to Dates in Google Sheets
Another simple way to extract just the date from a timestamp in Google Sheets is by using the TO_DATE function. This function converts a number (including a timestamp) into a date format.
This method is helpful when you’re working with imported data or formulas that return numeric values, but you want to ensure the result is explicitly treated as a date.
Steps:
➤ Select cell B2, where you want the date output to appear.
➤ Enter the formula:
=TO_DATE(A2)
➤ Press Enter.
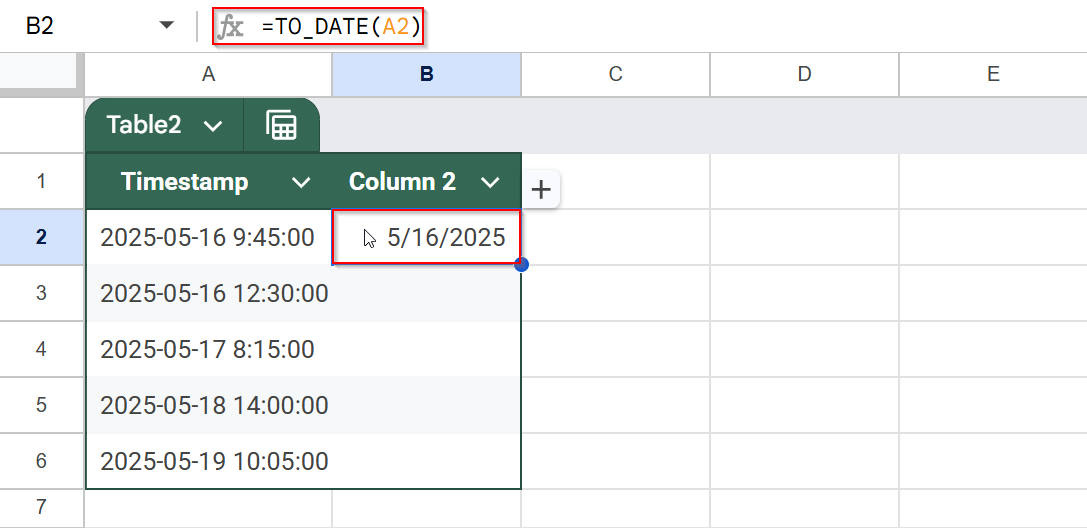
The timestamp will now be shown as a date, such as 5/16/2025.
➤ If the result appears as a number (e.g., 45151), apply a proper format by going to:
Format >> Number >> Date
➤ Drag the fill handle down to apply the formula to all the rows corresponding to your dataset in Column A.
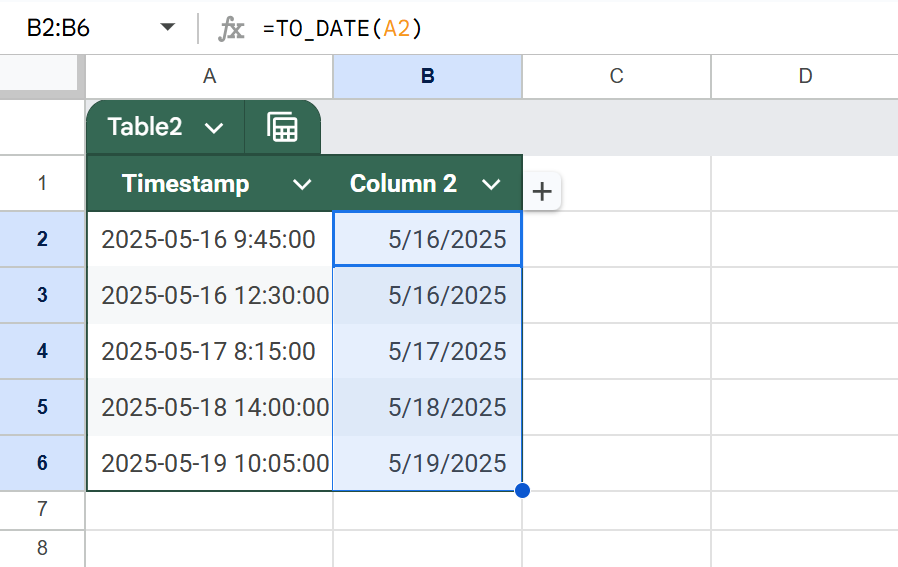
➤ You now have a clean column of dates, stripped from timestamps, using TO_DATE().
Format the Timestamp Cell to Display Only the Date in Google Sheets
If you don’t want to use a formula and just want to visually remove the time from a timestamp (without altering the underlying value), this method is for you. It simply changes how the timestamp is displayed, not the data itself.
We’ll keep using the same dataset in Column A, starting from A2:
Steps:
➤ Select the range of timestamp cells you want to change (for example, A2:A6).
➤ Go to the top menu and click: Format >> Number >> Date
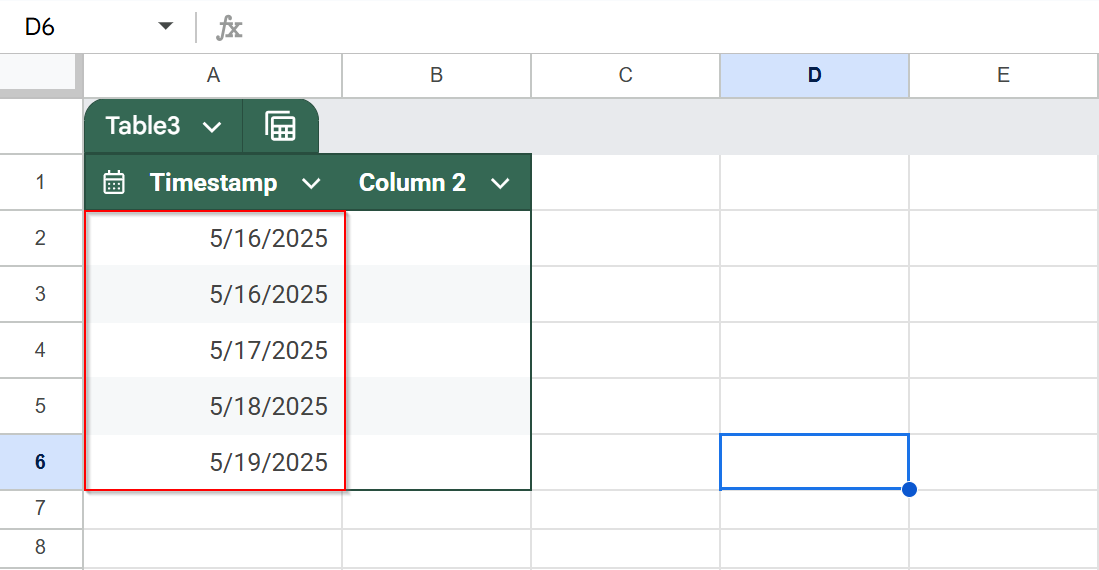
This will reformat the timestamp cells to show only the date part (e.g., 5/16/2025), hiding the time visually.
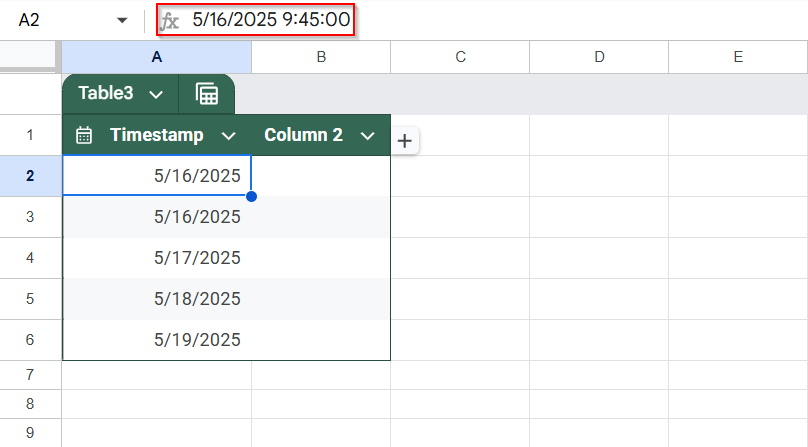
➤ The actual value still includes the time, and it’s just not visible. This is useful when the time isn’t needed for analysis or display.
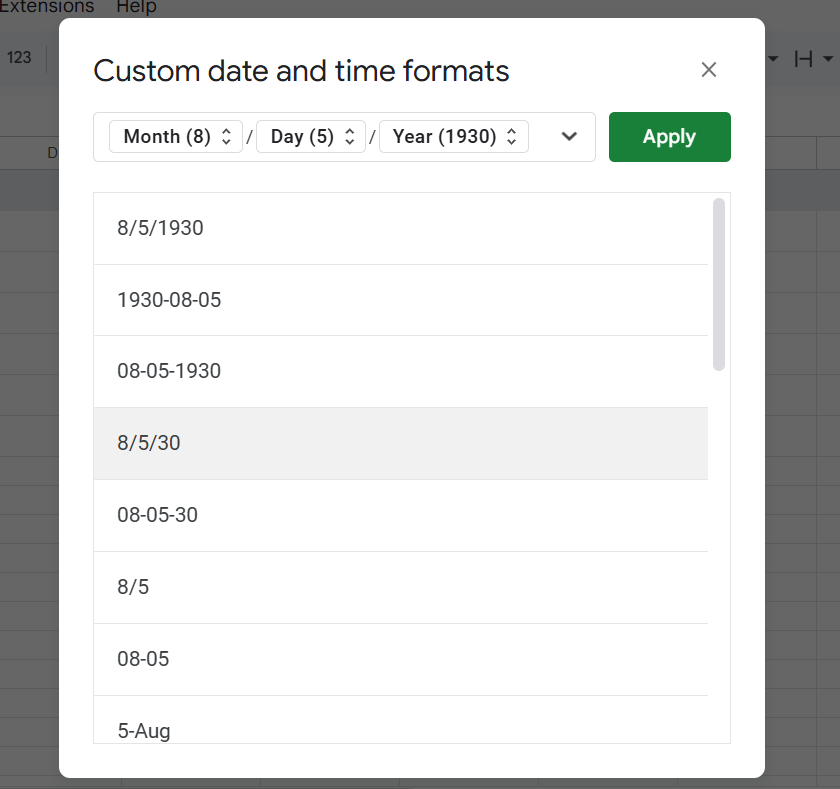
If you want a custom date format (like YYYY-MM-DD).
➤ Click on Format >> Number >> Custom date and time. Then choose or enter your preferred format.

You can then choose or enter your preferred format.
Convert Timestamp to Date Format Using TEXT Function in Google Sheets
This method converts a timestamp into a plain-text date using the TEXT function. It’s perfect when you need a consistent date format or want to export/share data without the time portion.
Steps:
➤ In cell B2, enter the following formula:
=TEXT(A2, “yyyy-mm-dd”)
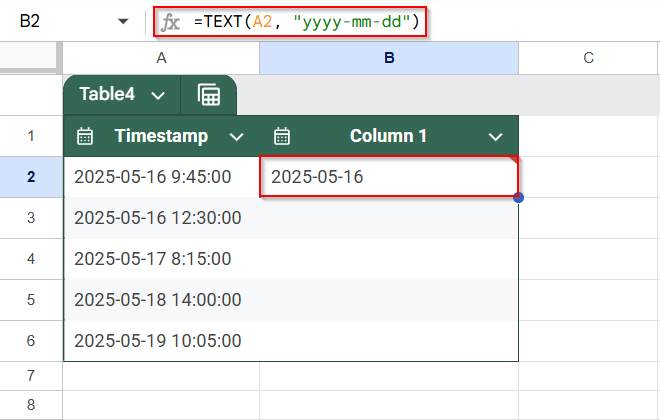
This converts the timestamp in A2 to a text version of the date, 2025-05-16.
➤ Drag the formula down to apply it to the rest of the column (e.g., B2:B6).
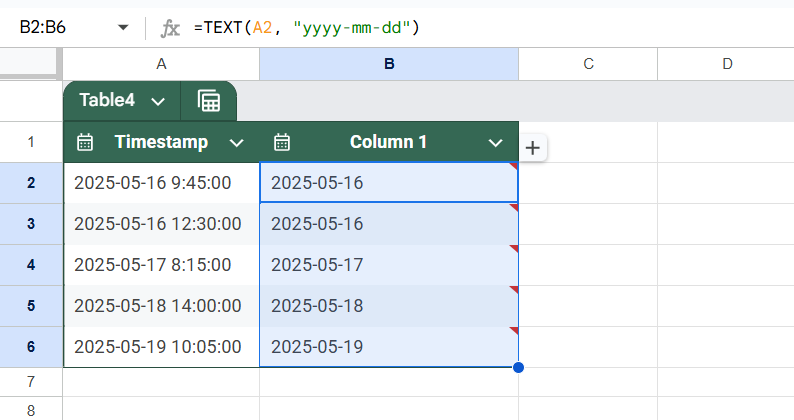
These values are now text, so you won’t be able to do date arithmetic (like subtracting days). Use this when the goal is to display or export.
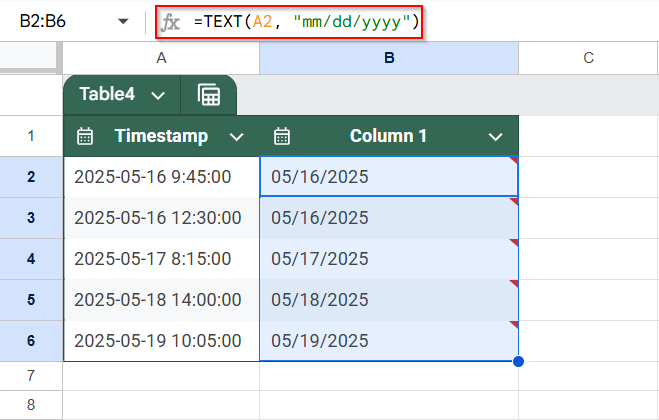
➤ If you want a different format (like mm/dd/yyyy), simply modify the pattern:
=TEXT(A2, “mm/dd/yyyy”)
Separate Date and Time in Timestamps by Using the SPLIT Function in Google Sheets
This method splits the timestamp into two parts, date and time, using the SPLIT function. It’s useful if you want to display or analyze date and time separately.
Steps:
➤ In cell B2, enter the following formula:
=SPLIT(A2, ” “)
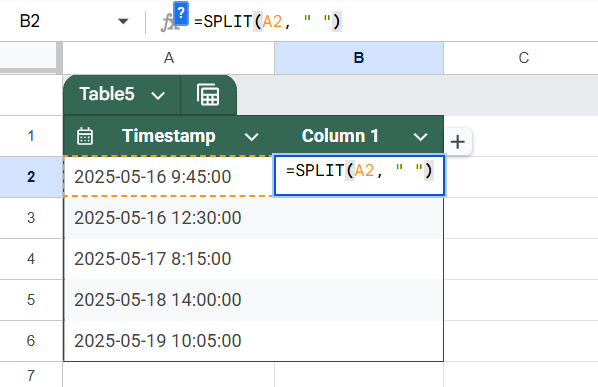
➤ This will split the timestamp into two cells:
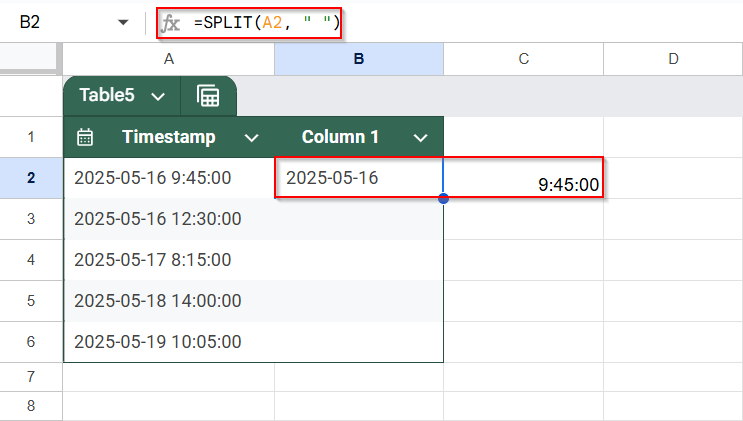
- B2 will contain the date (2025-05-16)
- C2 will contain the time (09:45:00)
➤ Drag the formula down to fill the rest of the rows (e.g., B2:C6).
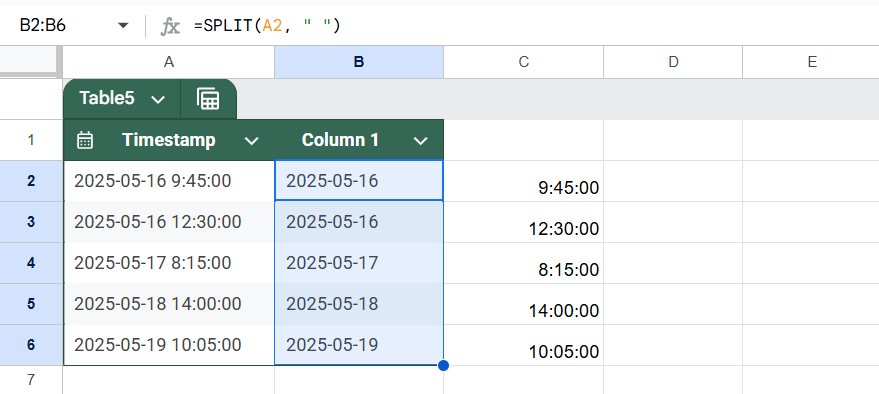
➤ You can now use column B for date-based filters, charts, or sorting, while keeping the original time in column C if needed.
Frequently Asked Questions
Why does =INT(A2) remove the time?
Because Google Sheets stores timestamps as decimal numbers. The integer portion represents the date, and the decimal portion represents the time. INT() function removes the decimal, leaving only the date.
What if I want both the date and time in separate columns?
Use =INT(A2) for the date and =A2 – INT(A2) for the time. Then, format the second column as “Time” under Format >> Number >> Time for proper display.
Can I automatically update the date when a timestamp is added?
Yes, use =ARRAYFORMULA(IF(A2:A<>””, INT(A2:A), “”)) to auto-populate dates when timestamps appear in a column. This is great for dynamic tracking and logging systems.
Is TEXT() better than INT()?
The TEXT() function is better for displaying a date in a specific format as text. The INT() function is better when you need to preserve the date as a numeric value for calculations.
Wrapping Up
Converting timestamps to just dates in Google Sheets is a simple but essential technique, especially when organizing schedules, logs, or reports. Whether you prefer the quick precision of the INT() function, the flexible formatting of the TEXT() function, or more advanced dynamic formulas like the ARRAYFORMULA function, Google Sheets gives you multiple ways to work cleanly with date-time data.
Using the correct method depends on your goal, stripping time for calculations, splitting values into columns, or displaying dates neatly for viewers. Now that you’ve seen the key approaches, you can confidently choose the one that fits your workflow best.