When organizing data in Google Sheets, you may come across cells containing multiple items separated by commas, spaces, or other delimiters. Splitting this kind of data vertically, so each item gets its row rather than being stored in a single cell, can make your spreadsheet much cleaner and easier to read.
In this article, we’ll show you how to split a cell vertically using formulas like the SPLIT and TRANSPOSE functions and how to automate the process using Apps Script. We’ll also provide a practical example to make everything easy to follow.
Steps to split a comma-separated list of skills vertically in Google Sheets using the SPLIT and TRANSPOSE functions:
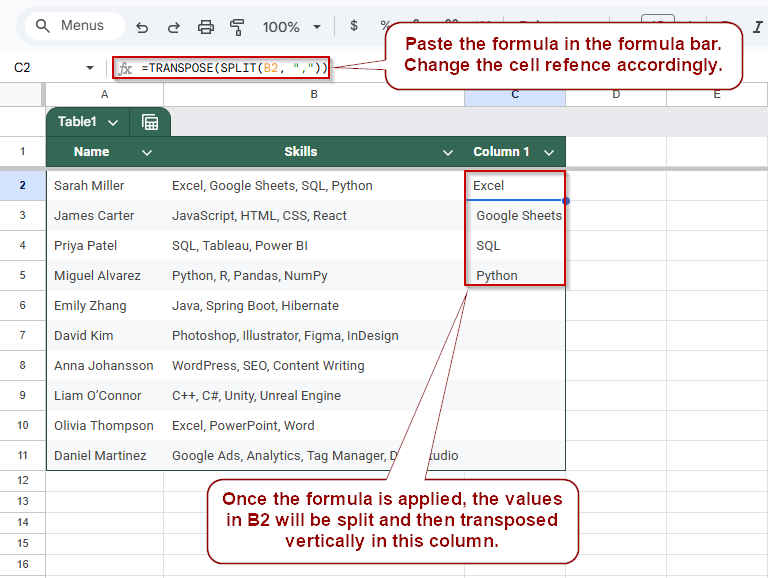
➤ In your worksheet, click on the cell where you want the first vertical skill to appear (e.g., cell C2, next to Sarah Miller).
➤ Enter the formula: =TRANSPOSE(SPLIT(B2, “,”))
➤ Here, B2 contains the comma-separated list of skills. The SPLIT function breaks the list at each comma, and the TRANSPOSE function arranges the results vertically.
➤ Press Enter. The skills from B2 will now appear one below the other starting from C2.
➤ Apply this formula manually to other rows (e.g., C7, C12) rather than dragging down, to avoid overlapping vertically split data.
Split Skills Into Rows Vertically in Google Sheets
If you’re managing candidate profiles or employee skill inventories, chances are you’ve seen skills listed together in one cell, separated by commas. That’s great for quick viewing, but not ideal when you need to filter, sort, or analyze individual skills.
Using SPLIT and TRANSPOSE functions, you can convert each comma-separated list into a vertical set of values, essentially “unpacking” each list downward into a column.
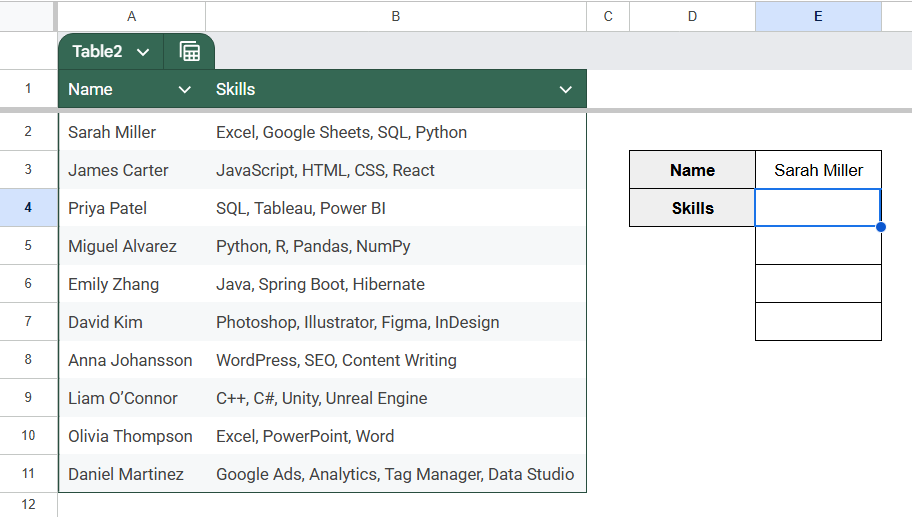
We will be using the following dataset for this method:

Steps:
Using the formula method, we’ll extract each skill and place it vertically next to the person’s name.
➤ Click on cell E4, where Sarah Miller’s first skill will appear.
This is the starting point for listing skills vertically from the “Skills” column.
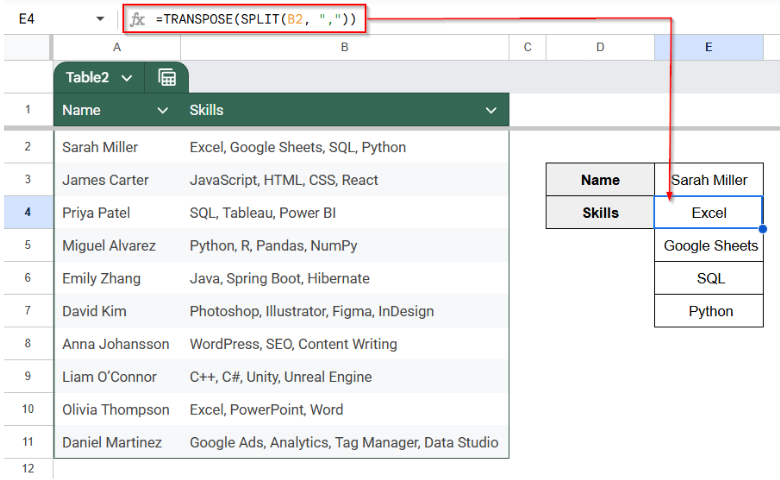
➤ Enter the formula: =TRANSPOSE(SPLIT(B2, “,”)) in the cell.
➤ Press Enter. The contents of cell B2 will be split and transposed.
Note:
Clean up spacing with TRIM (optional but recommended). If you notice extra spaces before each skill, update the formula like this: =TRANSPOSE(SPLIT(TRIM(B2), “, “)). This removes any extra space after each comma.
➤ Apply the formula to other rows by either copying the formula manually to C7, C12, etc., for each new person, or add vertical space between rows to prevent overlapping data
You can’t just drag the formula down like a horizontal fill, as each person’s data will expand vertically.
Use Google Apps Script to Split All Cells from a Column
Splitting those values into individual vertical entries can be useful when dealing with data like skill sets or tags in a single cell. While formulas like SPLIT and TRANSPOSE can handle this manually, Google Apps Script offers a way to automate the process, which is especially helpful when working with large datasets.
In this method, we’ll write a script that reads comma-separated values from the Skills column (Column B) and outputs each skill vertically into Column C, one below the other.
Steps:
➤ In your Google Sheet, go to Extensions >> Apps Script.
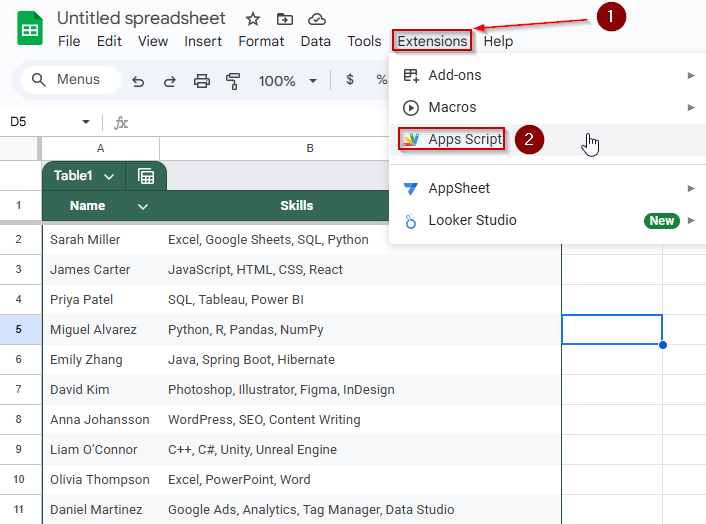
➤ Delete any default code, then paste the following script:
function splitSkillsVertically() {
const sheet = SpreadsheetApp.getActiveSpreadsheet().getSheetByName("Sheet1");
const dataRange = sheet.getRange("B2:B" + sheet.getLastRow());
const data = dataRange.getValues();
let outputRow = 2; // Start writing from row 2 in Column C
for (let i = 0; i < data.length; i++) {
const cellValue = data[i][0];
if (cellValue) {
const skills = cellValue.split(",");
for (let j = 0; j < skills.length; j++) {
sheet.getRange(outputRow, 3).setValue(skills[j].trim()); // Column C = index 3
outputRow++;
}
}
}
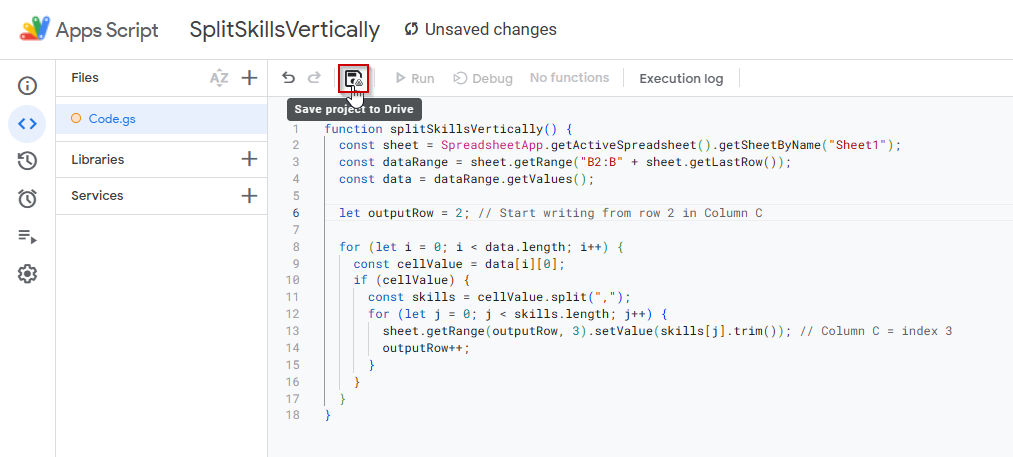
}➤ Click the floppy disk icon to save the script. Name it something like SplitSkillsVertically.
➤ Click the Run button in the toolbar.
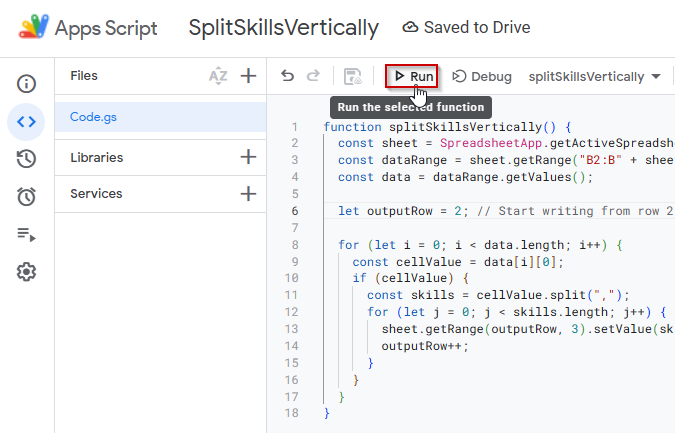
➤ If prompted, authorize the script to run on your sheet.
➤ Go back to your sheet to check the results.
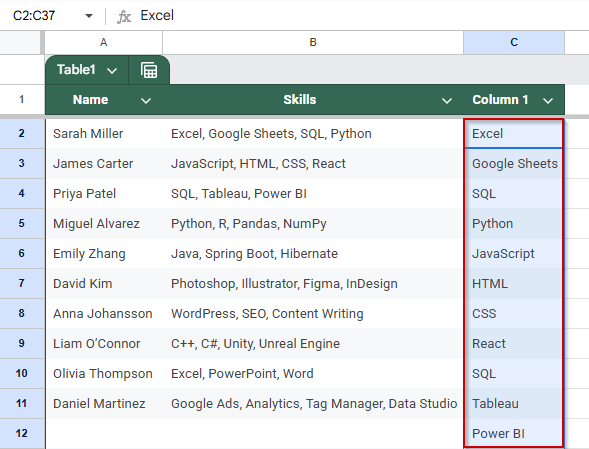
The script continues down for the rest of the dataset.
Frequently Asked Questions
How do I split a cell into multiple rows in Google Sheets?
Use =TRANSPOSE(SPLIT(A1, “,”)) to split comma-separated values in A1 into vertical rows starting from the selected cell.
Can I split a cell vertically without using formulas in Google Sheets?
Yes, using Google Apps Script, you can automate vertical splitting of cell contents into rows without manually entering formulas.
What’s the difference between SPLIT and TRANSPOSE in Google Sheets?
SPLIT separates content by a delimiter; the TRANSPOSE function changes the orientation from horizontal to vertical or vice versa. Together, they split and stack data vertically.
Can I split cells vertically based on other delimiters like semicolons or spaces?
Absolutely. Just replace the delimiter in the formula, e.g., =TRANSPOSE(SPLIT(A1, “;”)) for semicolons or ” ” for spaces.
How do I apply vertical splitting to an entire column in Google Sheets?
Use Apps Script to loop through a column, split values, and automatically output them vertically in another column or sheet.
Wrapping Up
Whether you’re managing skillsets, task lists, or multi-value entries in a single cell, knowing how to split cells vertically in Google Sheets can greatly enhance your data clarity and usability. From simple formulas like SPLIT and TRANSPOSE functions, to creating automated workflows with Google Apps Script, you now have multiple methods to organize your data into clean, readable vertical structures.
Choose the approach that best fits your workflow. You can effortlessly add structure to your spreadsheets, whether manual, formula-based, or scripted.