When working with structured data across systems, exporting data from Excel into a CSV format is a common requirement for data exchange, storage, and import/export. That’s especially useful when interacting with different applications or databases that don’t support Excel files directly.
CSV files are plain text. It makes them easily readable and transferable. Moreover, as CSV files take up less space, they are faster to transfer and store than Excel files. In this article, we’ll show you how to convert an Excel worksheet to a CSV file and check the output using Notepad.
➤ CSV, comma-delimited, ensures each cell value is separated by a comma for accurate import into other platforms.
➤ “Save As” Method: It quickly converts an Excel worksheet to a CSV comma-delimited file. Here, only one sheet is saved at a time.
➤ UTF-8 or UTF-16 Encoding: It converts the datasets that include special characters or non-English text.
➤ VBA code: VBA code converts all sheets in your workbook into individual CSV files automatically.
➤ Google Sheets: You can use the method for easy conversion or when Excel isn’t available.
➤ Third-Party Tools: Third-party tools offer a fast way to convert Excel to CSV.
What Does It Mean to Convert Excel to CSV, Comma-Delimited?
In simple words, converting Excel to CSV Comma Delimited means you will save the data from an Excel worksheet as a plain text file. In the plain text file, each cell value will be separated by a comma (as comma-delimited).
The CSV format removes all the formatting, formulas, and all other extra features. Here, only raw data will remain, and each row becomes a line of text with comma-separated values. Generally, we use this format to exchange data between programs and databases that don’t support Excel files.
Converting Excel Dataset to CSV Using "Save As CSV" Option
When you convert an Excel Dataset to a CSV comma-delimited file, it allows you to save your data in plain text format. This format is widely supported and so you can use it in other applications. It is especially useful for data import, export, integration, and so on.
However, keep in mind that this method saves only the active worksheet as a single CSV file. If you have multiple sheets in your Excel workbook and you are following this method, you have to save each sheet individually as a separate CSV file.
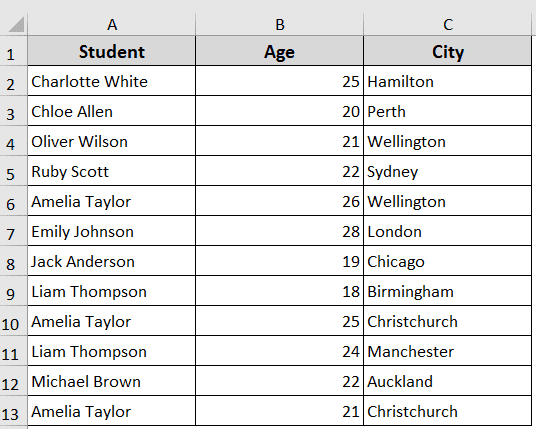
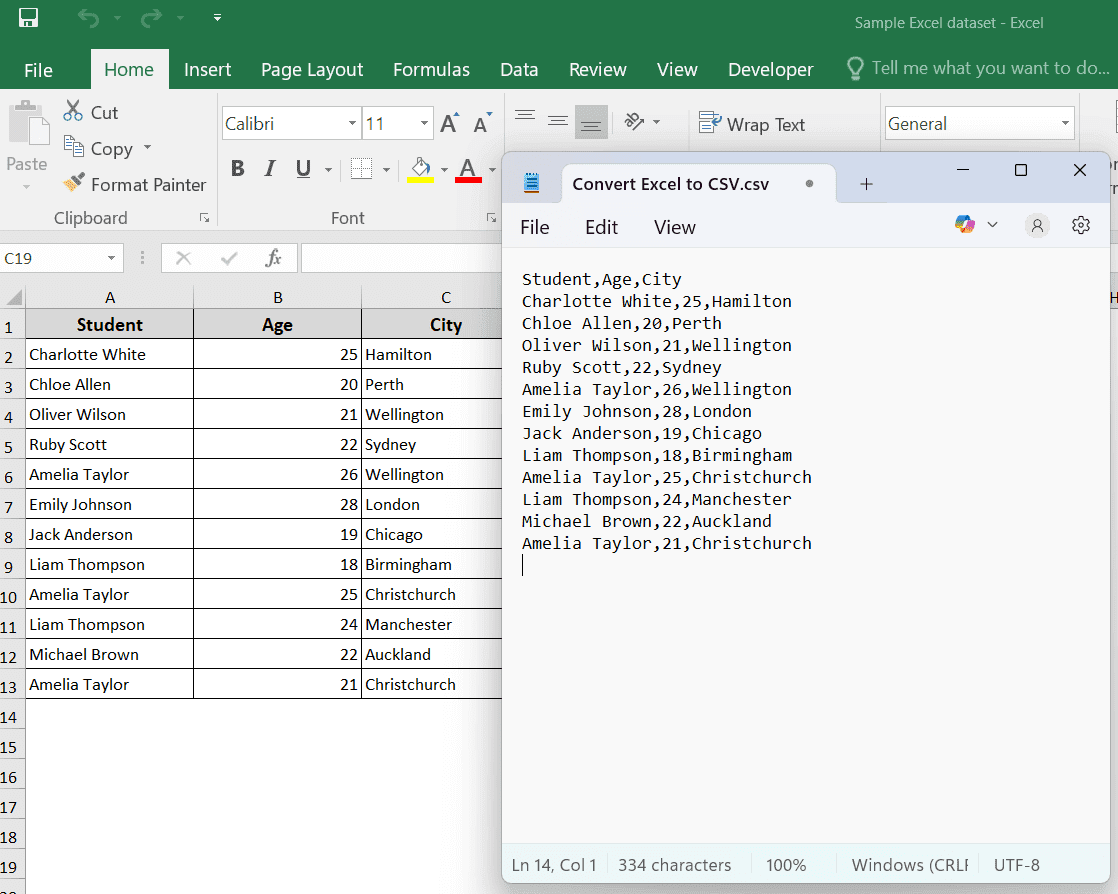
In the following Excel dataset, we have a list of students’ names along with their age and city. Now we will convert this Excel data set to a CSV comma-delimited file in a quick and easy way.
Steps:
➤ Open your Excel dataset that you want to convert to CSV, comma-delimited
➤ Click on the File menu >> Save As >> Browse.
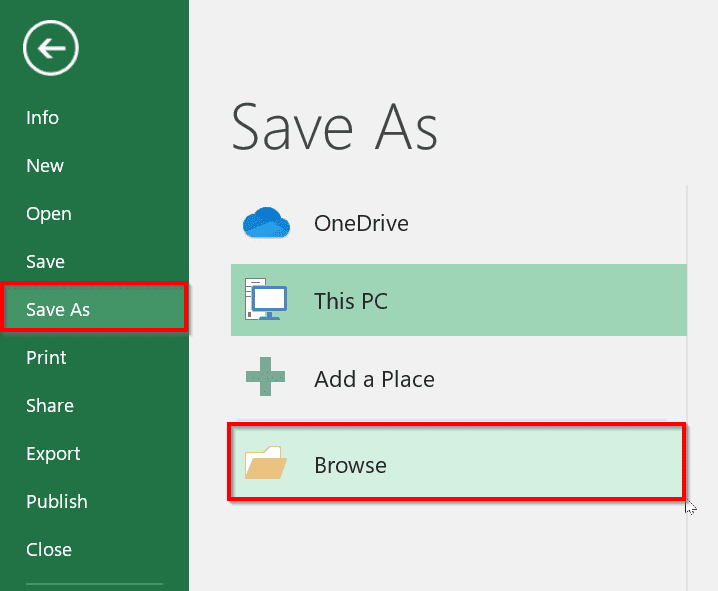
➤ It will open the classic Save As dialog box. Alternatively, you can press the fn + f12 key. It will directly open the Save As dialog box.
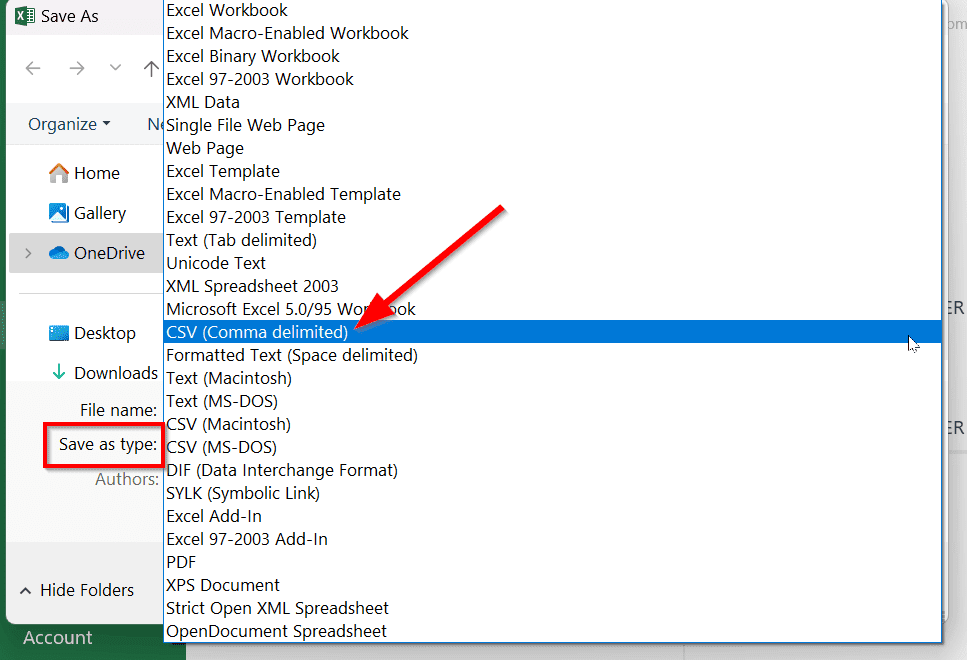
➤ In the Save as type dropdown menu, scroll and select CSV (Comma-delimited).
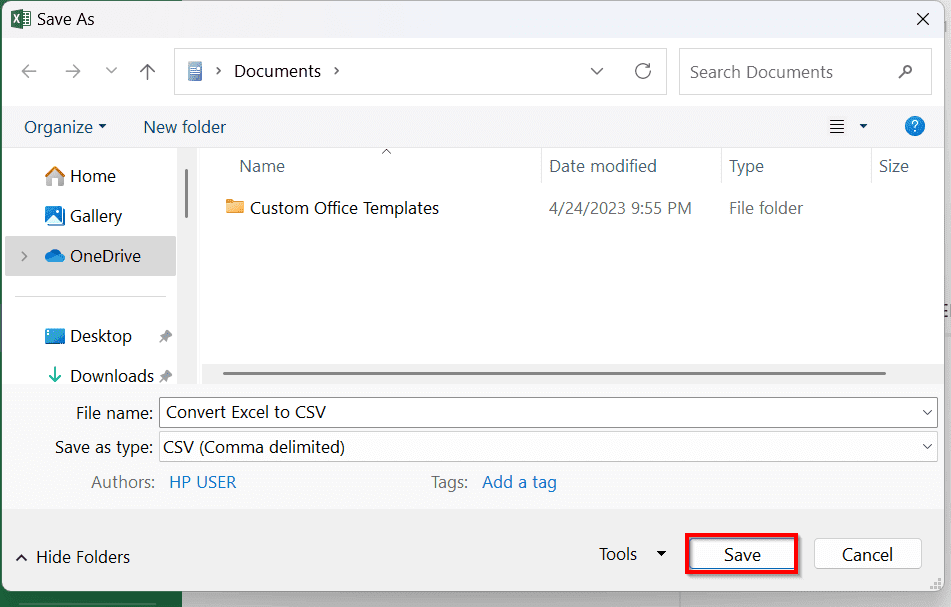
➤ Enter your desired File name and click Save.
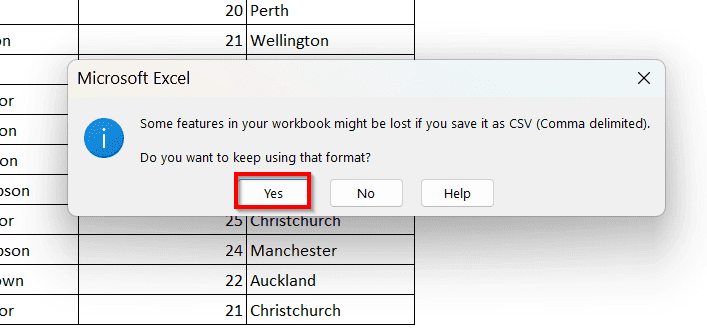
➤ When you click Save, Excel will show you a warning like Some features in your workbook might be lost if you save it as CSV (Comma-delimited).
This happens because a CSV file only saves the plain text separated by commas, not any formulas or formatting.
➤ Click Yes.
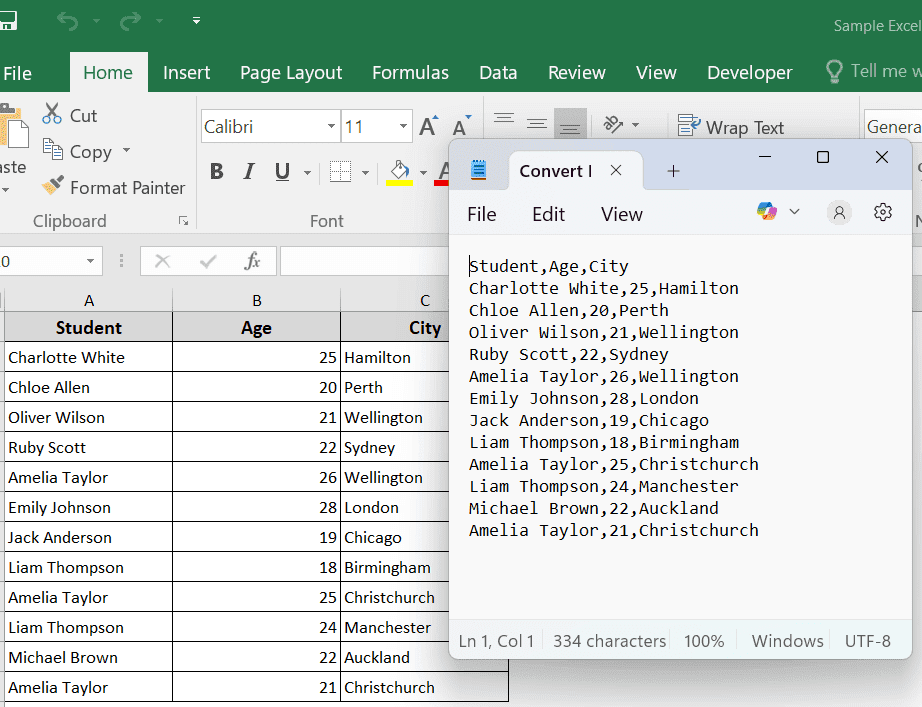
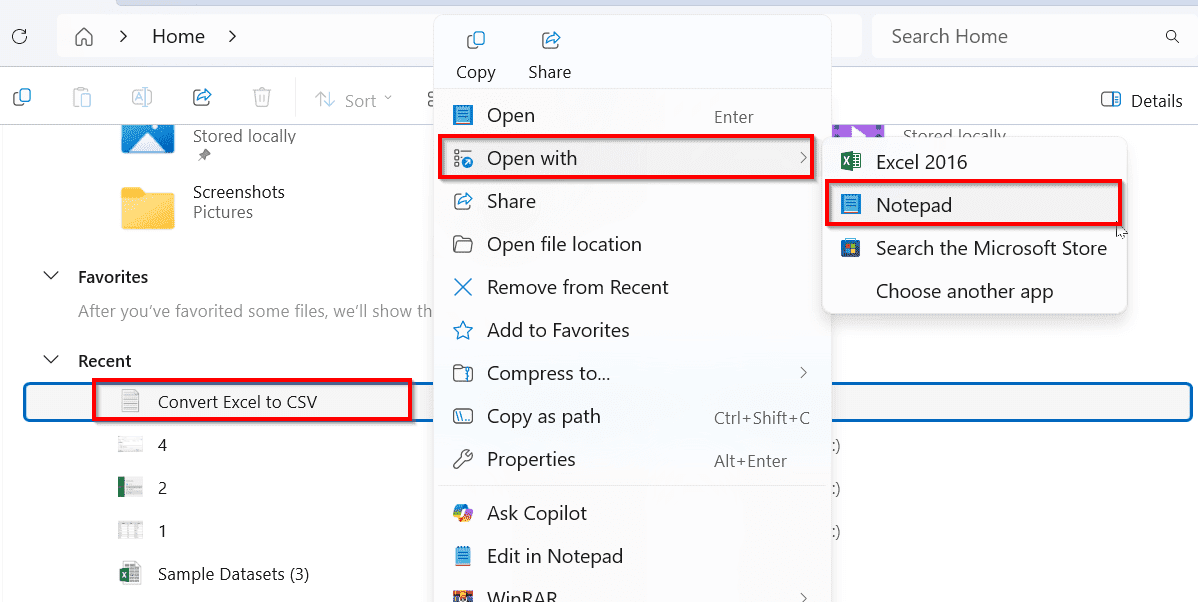
➤ If you want to see how the CSV file looks, you can check your CSV file in Notepad or any other text editor.
➤ Right click on the saved CSV file >> choose Open with >> Notepad or any other text editor.
➤ You will see the data separated by commas, like the example below.
Note:
Notepad shows exactly what is in the file. When you open the CSV file in Notepad, you can double-check whether the CSV file is correct and comma-delimited. It will help you find out issues and fix them before uploading or sharing.
Converting an Excel Dataset to CSV Using UTF-8 or UTF-16 Encoding
Sometimes, you may need to convert an Excel dataset to CSV that contains special characters, non-English text. In such cases, you can use UTF-8 or UTF-16 encoding. It ensures your data remains readable and properly formatted across different systems.
UTF-8 encoding: You can use it when your data includes special characters, accented letters, symbols, or foreign scripts.
UTF-16 encoding: It supports more complex characters. However, it is used if the system requires it.
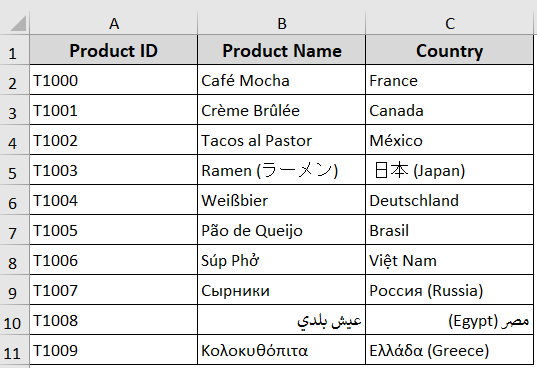
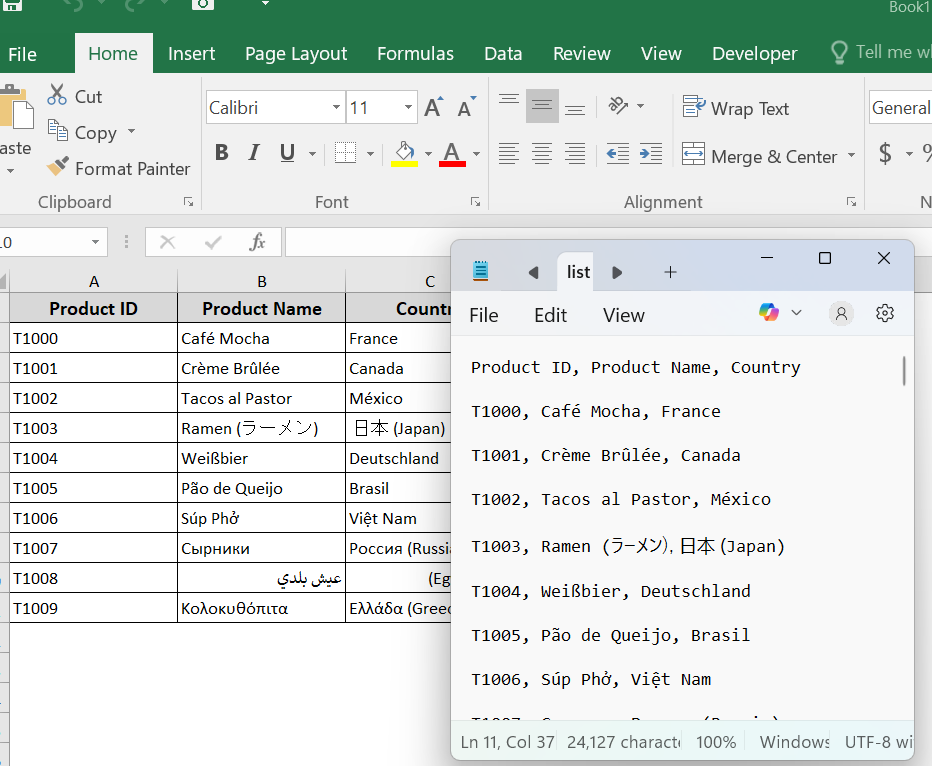
In the following dataset, we’ve a global product catalog with some special characters and languages. We’ll convert it to a CSV file using UTF-8 and UTF-16 encoding.
Steps:
➤ Go to File menu >> Save As >> Browse. The classic Save As dialog box will appear.
➤ In the Save as type dropdown menu, scroll and select “CSV UTF-8 (Comma delimited) (*.csv)“.
➤ It will save the file as a CSV while maintaining the UTF-8 encoding.
If it’s already not in the default set, follow the steps below.
➤ Go to File menu >> Save As >> Browse.
➤ In the Save as type dropdown menu, scroll and select Unicode Text (*.txt).
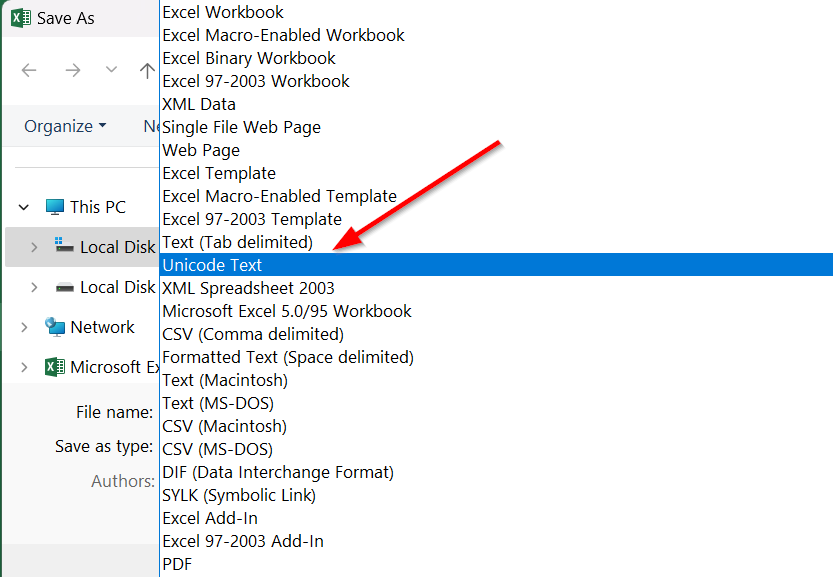
➤ Choose your desired file name and click Save. It will save the file in UTF-16 encoding by default.
➤ Now to convert the file UTF-8 comma-delimited file, first of all, open the saved file using Notepad
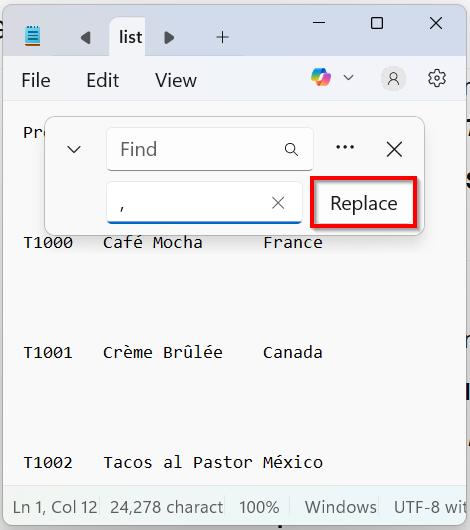
➤ Press Ctrl + H to replace all tabs with commas. In “Find what”, just press the Tab key once. In “Replace with“, type: ,.
➤ Click Replace All.
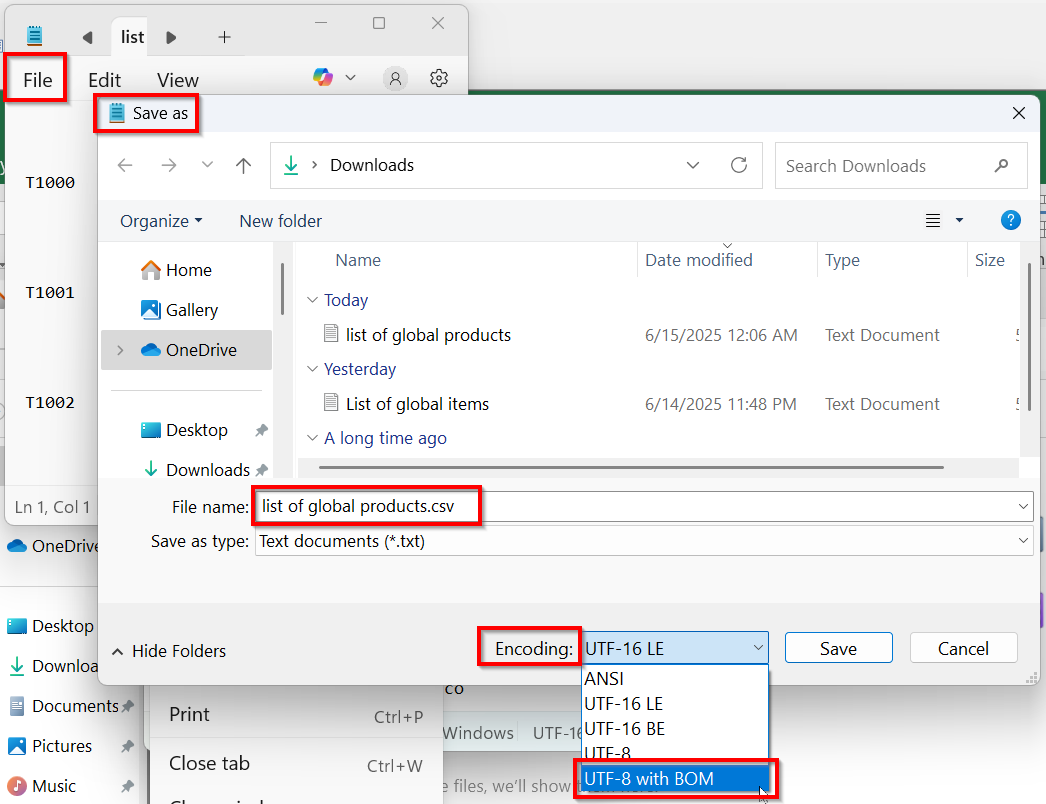
➤ Click File >> Save As
➤ Change the filename to end in .csv >> Set Encoding to UTF-8 with BOM.
➤ Save the file.
➤ Now you will have a UTF-8 encoded CSV file with comma delimiters.
Converting Multiple Excel Datasets to CSV Comma-Delimited
As already mentioned above, the “Save As” method converts only the active worksheet to CSV. If you have multiple sheets in one worksheet, converting multiple Excel sheets requires exporting each sheet separately. You can automate it using VBA code to save every sheet as an individual CSV file.
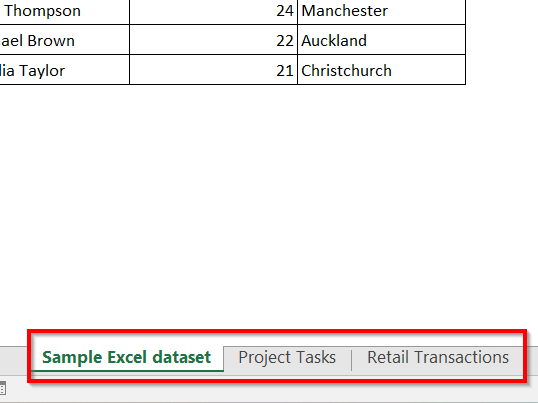
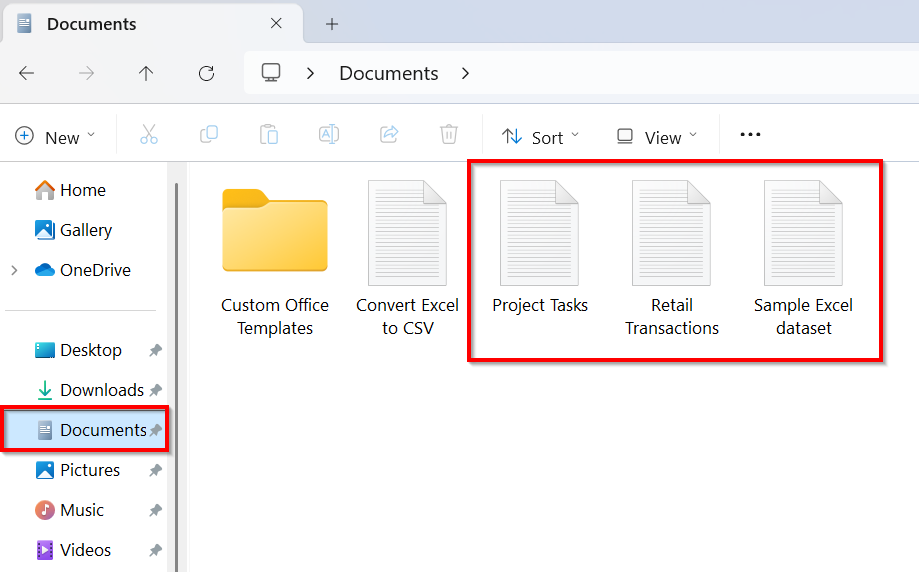
In the following Excel workbook, we have multiple sheets named Project tasks and Retail transactions. We’ll now convert these multiple Excel datasets to individual comma-delimited CSV files.
Steps:
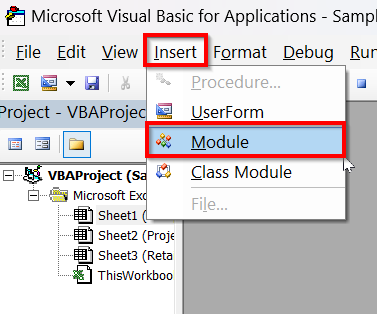
➤ Open VBA editor pressing Alt + F11 on your keyboard.
➤ Click Insert >> Module
➤ Insert the below VBA code. You can just copy the code and paste it into the Module.
Sub ExportWorksheetsToCSV()
    Dim ws As Worksheet
    Dim csvFilePath As String
    Dim saveFolder As String
    ' Set save folder to Documents
    saveFolder = Environ("USERPROFILE") & "\Documents\"
    MsgBox "Starting export of all worksheets to CSV files in your Documents folder."
    For Each ws In ThisWorkbook.Worksheets
        ws.Copy ' Copy the worksheet to a new workbook.
        ' Build full path for CSV file with worksheet name
        csvFilePath = saveFolder & ws.Name & ".csv"
        ' Save the copied worksheet as CSV.
        Application.ActiveWorkbook.SaveAs Filename:=csvFilePath, FileFormat:=xlCSV, CreateBackup:=False
        ' Close the new workbook without saving changes (already saved)
        Application.ActiveWorkbook.Close SaveChanges:=False
    Next ws
    MsgBox "Export complete. CSV files saved in: " & saveFolder
End Sub
➤ Press F5 to make it run.
➤ You will find separate CSV files for each worksheet, named after each sheet in your Documents folder.
Converting Excel Dataset to CSV Comma-Delimited Using Google Spreadsheets
You can also convert your Excel dataset to CSV comma comma-delimited, using Google Spreadsheets. The method is useful for the quick conversion of browser-based files without Excel.
Steps:
➤ Open Google Drive >> New >> File Upload. Choose your Excel file you want to convert.
➤ Once uploaded, right-click the file >> Open with >> Google Sheets.
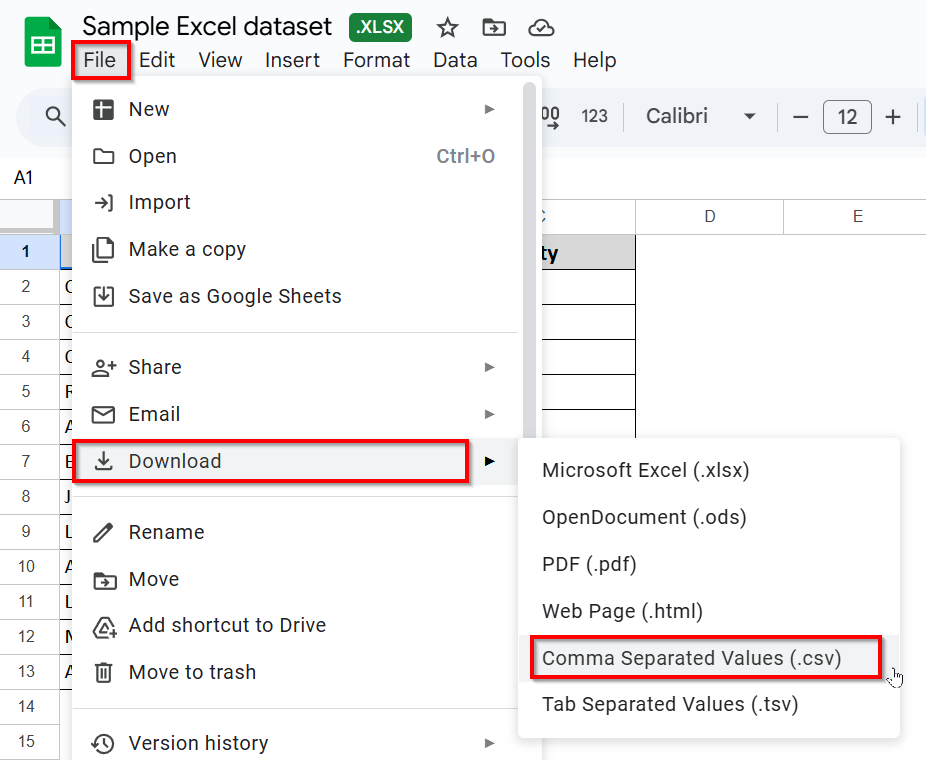
➤ Go File menu >> Download >> Comma-separated values (.csv)
➤ Your file will be converted to CSV and downloaded to your computer.
➤ Open the file in the text editor to check that all data is converted to comma-delimited right.
Converting Excel Dataset to CSV Comma-Delimited Using Third-Party Tools
You can also convert your Excel data to CSV comma-delimited using third-party tools. They offer a quick and accessible solution in this regard. You can use any of the following third-party tools for quick conversion.
- OpenOffice Calc: It allows you to open Excel files and export them as CSV.
- Zamzar: It is a web-based converter.
- Convertio: It supports various formats, including CSV.
- CSVed: It is a Windows-based CSV converter.
Frequently Asked Questions
How to change the delimiter in Excel for CSV?
You can adjust the settings to change the delimiter in Excel, following the steps below:
➤ Go to File >> Options >> Advanced.
➤ Uncheck Use system separators under Editing options.
➤ Change the Decimal separator and Thousands separator based on your needs
➜ Set Decimal separator to comma (,) and Thousands separator to period (.) for semicolon-delimited CSV.
➜ Set Decimal separator to period (.) and Thousands separator to comma (,) for comma-delimited CSV.
How to format a CSV file in Excel?
You can open a CSV file in Excel and format it. However, you should keep in mind that CSV files don’t save formatting. So, when you save or reopen the file as a CSV, all the formatting changes you have made will be lost. That’s why you will need to save the file as an Excel Workbook (.xlsx) if you want to keep all the formatting.
How do I remove the comma delimiter in Excel?
You can easily remove the comma delimiter in Excel manually. To do so, follow the steps below:
➤ Select the cells.
➤ Press Ctrl + H to open Find and Replace
➤ Enter a comma in “Find what.”
➤ Leave “Replace with” blank
➤ Click Replace All.
Wrapping Up
In today’s quick tutorial, we’ve shown you how to convert an Excel worksheet to a CSV comma-delimited file very easily and accurately. Through this, you can share plain text across various systems without worrying about compatibility issues. You can also check out our sample files to better understand the conversion process.