When managing tasks or tracking changes in Google Sheets, automatically recording the date when a specific cell is edited is often useful. This saves time and keeps logs accurate, especially when monitoring updates like task status, checkboxes, or comments.
While Google Sheets doesn’t have a built-in setting for this, there are multiple ways to achieve it, depending on your use case. In this article, we’ll walk you through three practical methods for autofilling a date when a cell is updated.
Steps to autofill a date based on another cell’s update:
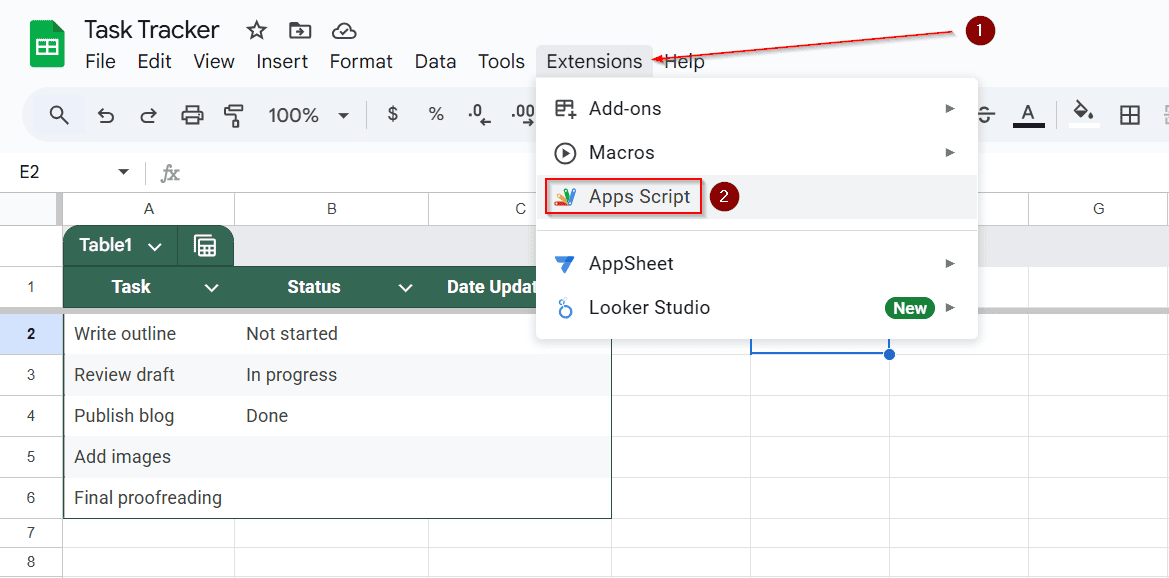
➤ Open your Google Sheet and go to Extensions >> Apps Script from the top menu. This opens the script editor in a new tab.
➤ Delete any placeholder code you see. You’ll be entering your custom script.
➤ Paste the following code:
function onEdit(e) {
const sheet = e.source.getActiveSheet();
if (sheet.getName() !== "Task Tracker") return;
const editedColumn = e.range.getColumn();
const editedRow = e.range.getRow();
if (editedColumn === 2 && editedRow > 1) {
const dateCell = sheet.getRange(editedRow, 3);
dateCell.setValue(new Date());
}
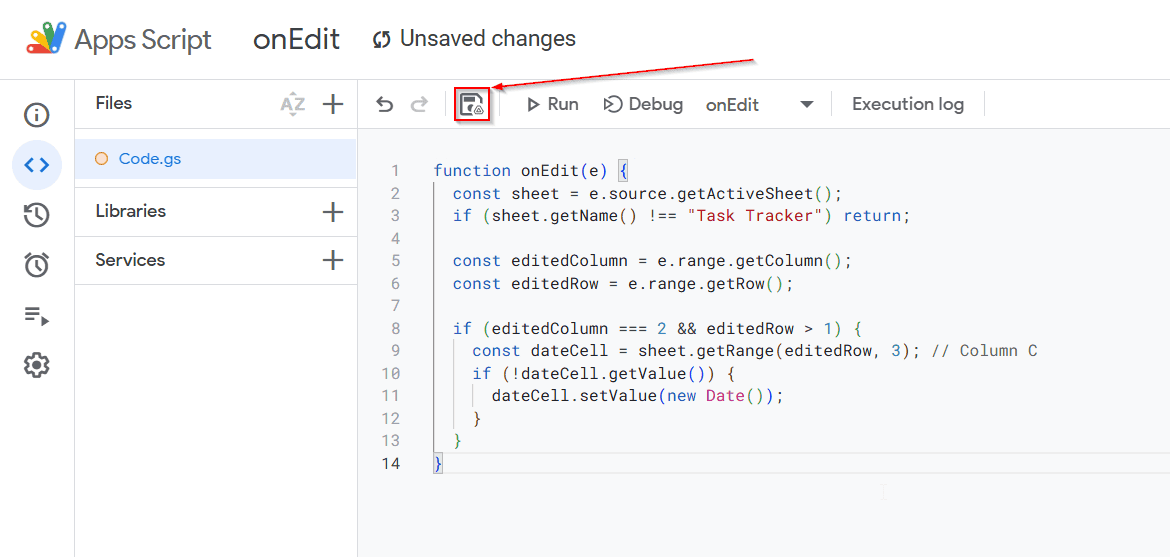
}➤ Click the Save icon or go to File >> Save and name your project. This saves the script to your sheet.
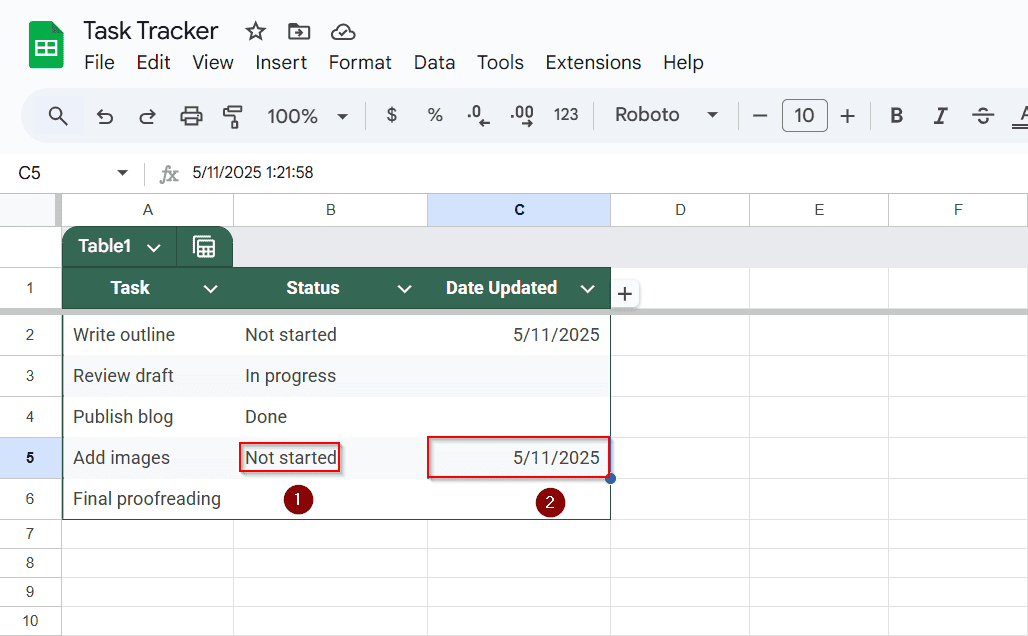
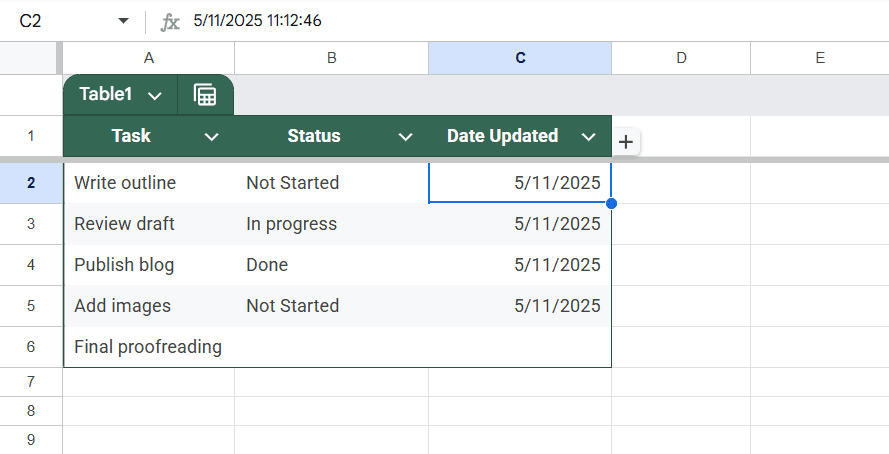
➤ Return to your sheet. Try editing a value in Column B (Status).
➤ The current date will automatically appear in Column C (Date Updated) on the same row.
Use Apps Script to Autofill Date on Any Edit in a Specific Column
This is a simple and effective way to insert today’s date when a specific column, like Status, is updated. It’s ideal for trackers, logs, or task lists where update timing matters. We’ll use Google Apps Script, a built-in tool in Google Sheets that lets you automate actions with small bits of JavaScript-based code.
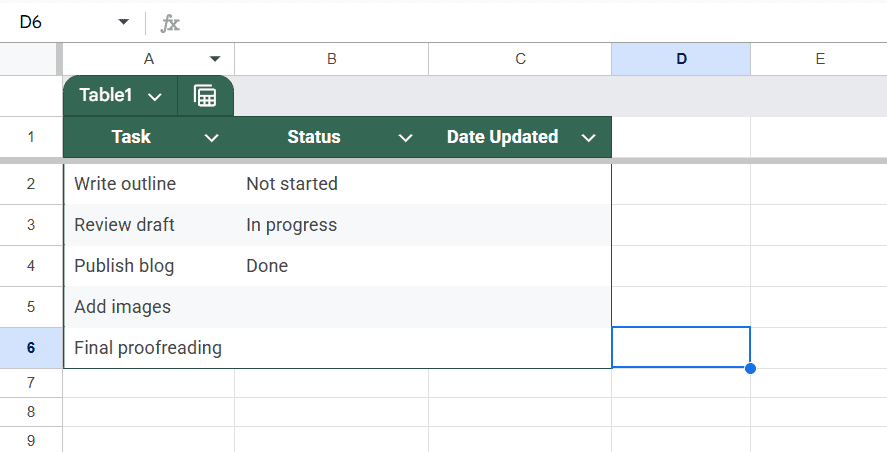
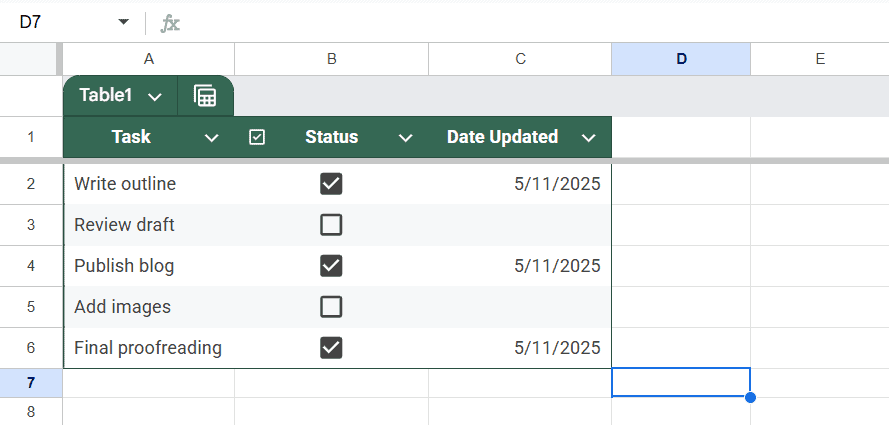
In this method, the script watches for edits in Column B and automatically fills Column C with the current date whenever a status changes. We’ll be using the following dataset on a sheet named Task Tracker.
Once the script is set up, any update you make to Column B will instantly trigger the timestamp in Column C, and no formulas or manual typing is needed.
Steps:
➤ Open your Google Sheet and go to the top menu: Extensions >> Apps Script.

➤ A new tab will open with the script editor. If there’s any default code, delete it.
➤ Paste the following code into the editor:
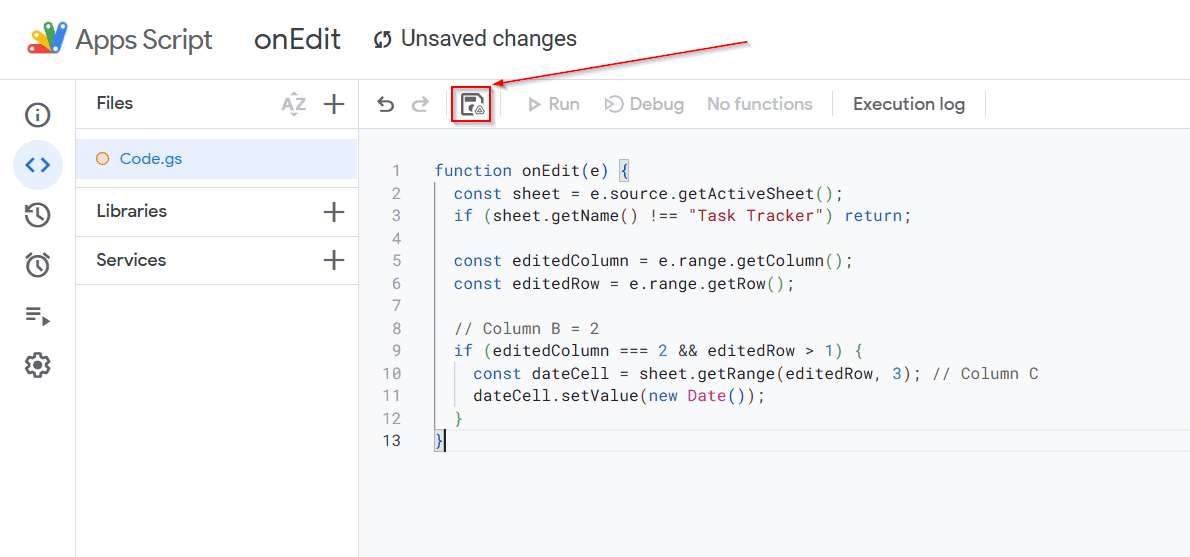
function onEdit(e) {
const sheet = e.source.getActiveSheet();
if (sheet.getName() !== "Task Tracker") return;
const editedColumn = e.range.getColumn();
const editedRow = e.range.getRow();
// Column B = 2
if (editedColumn === 2 && editedRow > 1) {
const dateCell = sheet.getRange(editedRow, 3); // Column C
dateCell.setValue(new Date());
}
}
➤ Click the disk icon or go to File >> Save to save the project. You can name the script whatever you like.
➤ Return to your sheet. Now, edit any cell in Column B (Status).
➤ The current date will automatically appear in the corresponding cell in Column C.
Only Autofill the Date Once with this Apps Script
Sometimes, you may want to record the first time a change is made, and then leave that date fixed, even if the cell is updated again later. This is useful for keeping a permanent log of when a task was started or marked for review.
This is another Apps Script that checks whether the Date Updated cell is already filled in this method. If it’s empty, it writes the current date. It does nothing if it already has a value, ensuring the original timestamp stays untouched.
Steps:
➤ Open the Apps Script editor by going to Extensions >> Apps Script .
➤ Replace any code with the script below:
function onEdit(e) {
const sheet = e.source.getActiveSheet();
if (sheet.getName() !== "Task Tracker") return;
const editedColumn = e.range.getColumn();
const editedRow = e.range.getRow();
if (editedColumn === 2 && editedRow > 1) {
const dateCell = sheet.getRange(editedRow, 3); // Column C
if (!dateCell.getValue()) {
dateCell.setValue(new Date());
}
}
}
➤ Save the script and return to your sheet.
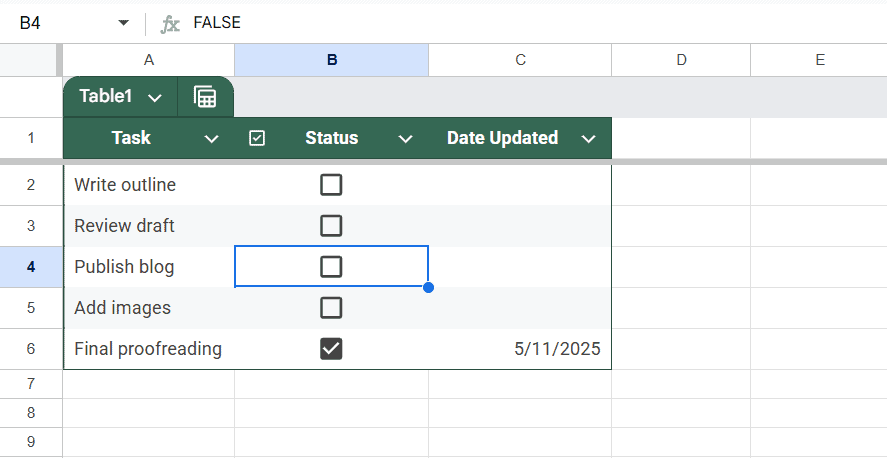
➤ Change the status in Column B for any row. The date will fill in Column C.
➤ Try editing the status again. Column C‘s date will remain unchanged.
This version helps lock the date as a one-time log.
Autofill Date on the Sheet When a Checkbox Is Ticked
Checkboxes are a clean and visual way to mark tasks as complete. This method autofills the date only when the box is checked, and optionally clears the date when it’s unchecked.
Steps:
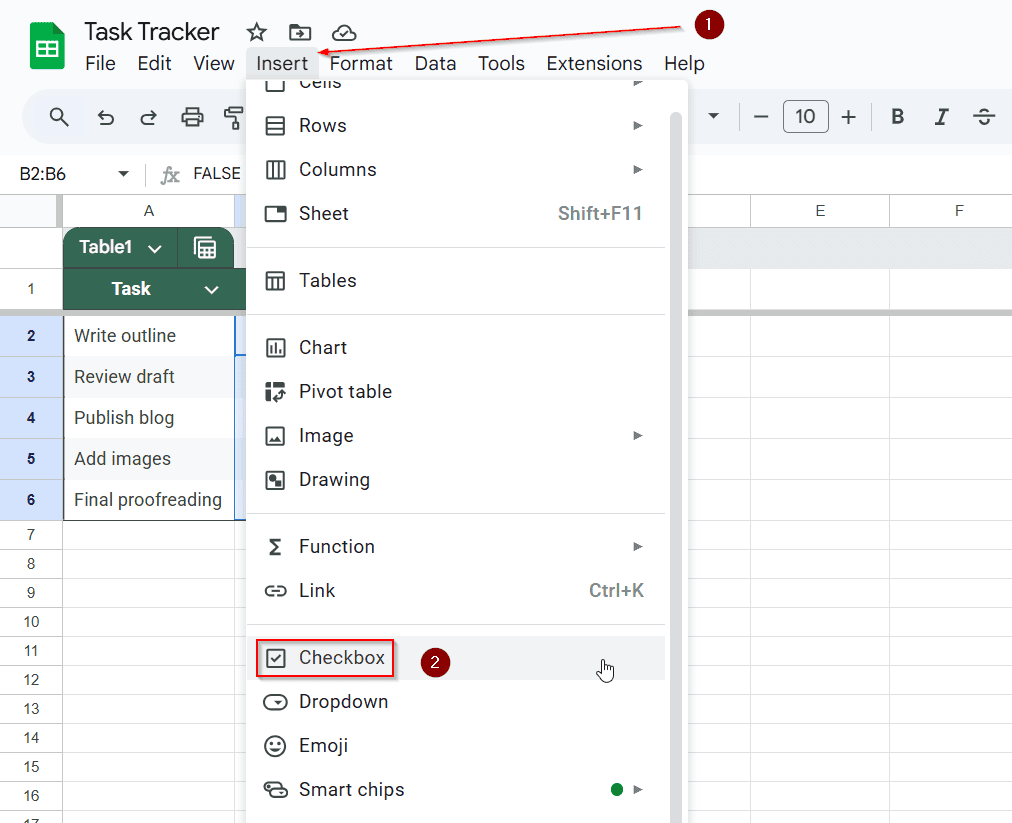
➤ First, turn Column B into checkboxes. Select cells in Column B (e.g., B2 to B10).
➤ Go to Insert >> Checkbox,
➤ Then, go to Extensions >> Apps Script and paste this code:
function onEdit(e) {
const sheet = e.source.getActiveSheet();
if (sheet.getName() !== "Task Tracker") return;
const col = e.range.getColumn();
const row = e.range.getRow();
if (col === 2 && row > 1) {
const checkValue = e.range.getValue();
const dateCell = sheet.getRange(row, 3); // Column C
if (checkValue === true && !dateCell.getValue()) {
dateCell.setValue(new Date());
} else if (checkValue === false) {
dateCell.clearContent(); // Optional: clears date when box is unchecked
}
}
}
➤ Save the script and return to your sheet.
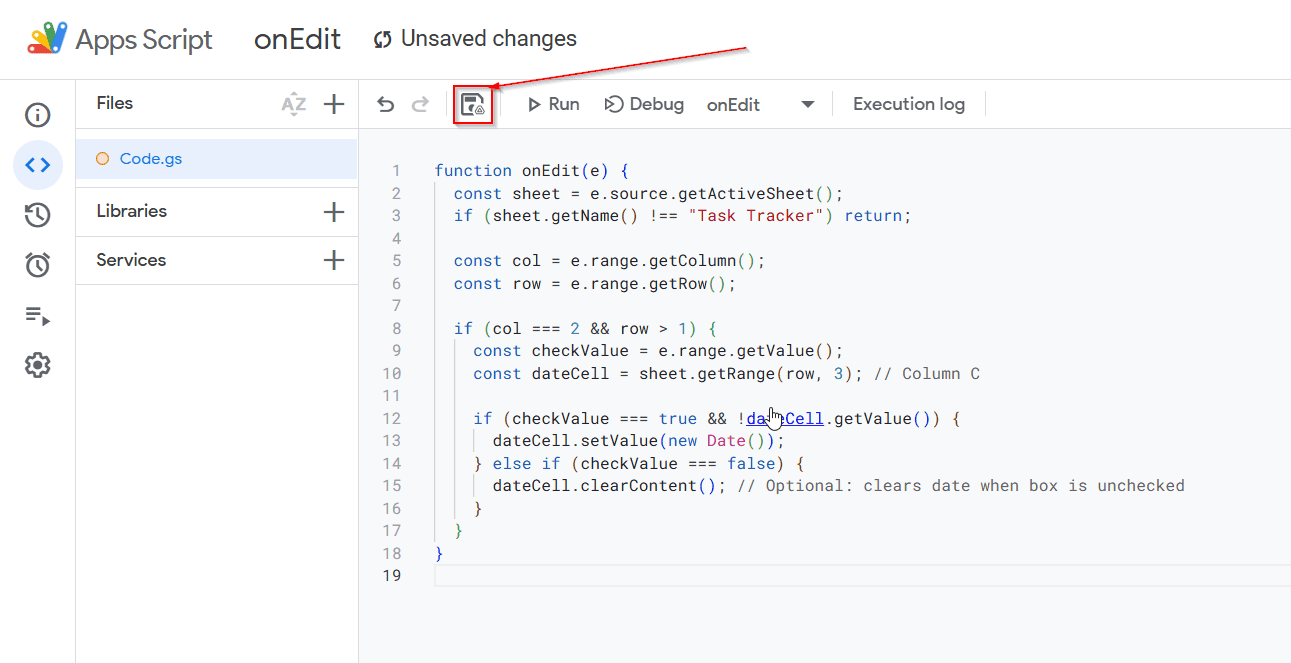
➤ Check a box in Column B. You will notice the date will autofill in Column C.
➤ Uncheck the box, and the date will disappear.
This is great for to-do lists and task tracking templates.
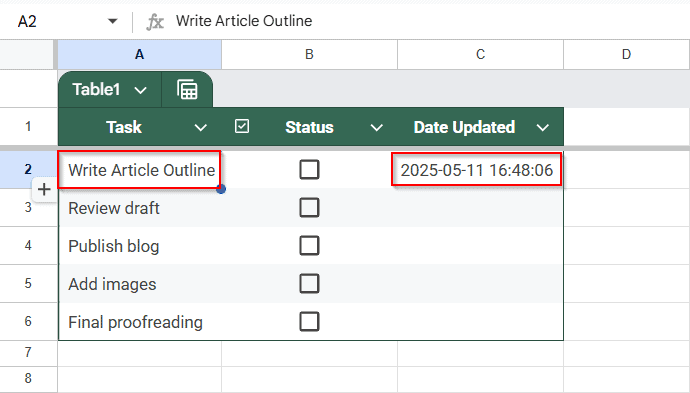
Automatically Timestamp Any Edit Made in the Sheet
If you’re managing a collaborative spreadsheet or need to keep track of all changes made across different cells, it’s helpful to log when any edit happens automatically. Instead of focusing on a specific column, this method timestamps edits no matter where they occur in the sheet. It’s handy for audit logs, version tracking, or monitoring updates in shared workbooks.
With a simple Apps Script, you can insert the current date and time into a designated column every time a user edits a row.
Steps:
➤ Open the script editor again (Extensions >> Apps Script).
➤ Paste the following code:
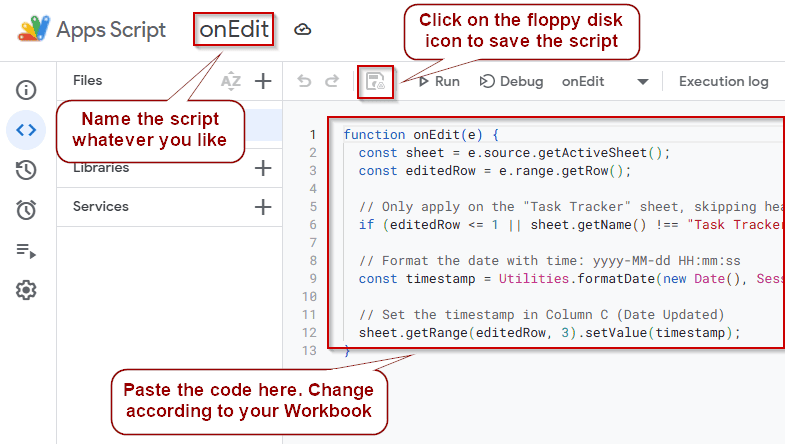
function onEdit(e) {
const sheet = e.source.getActiveSheet();
const editedRow = e.range.getRow();
// Only apply on the "Task Tracker" sheet, skipping header row
if (editedRow <= 1 || sheet.getName() !== "Task Tracker") return;
// Format the date with time: yyyy-MM-dd HH:mm:ss
const timestamp = Utilities.formatDate(new Date(), Session.getScriptTimeZone(), "yyyy-MM-dd HH:mm:ss");
// Set the timestamp in Column C (Date Updated)
sheet.getRange(editedRow, 3).setValue(timestamp);
}
➤ Save using the floppy disk icon and return to the sheet.
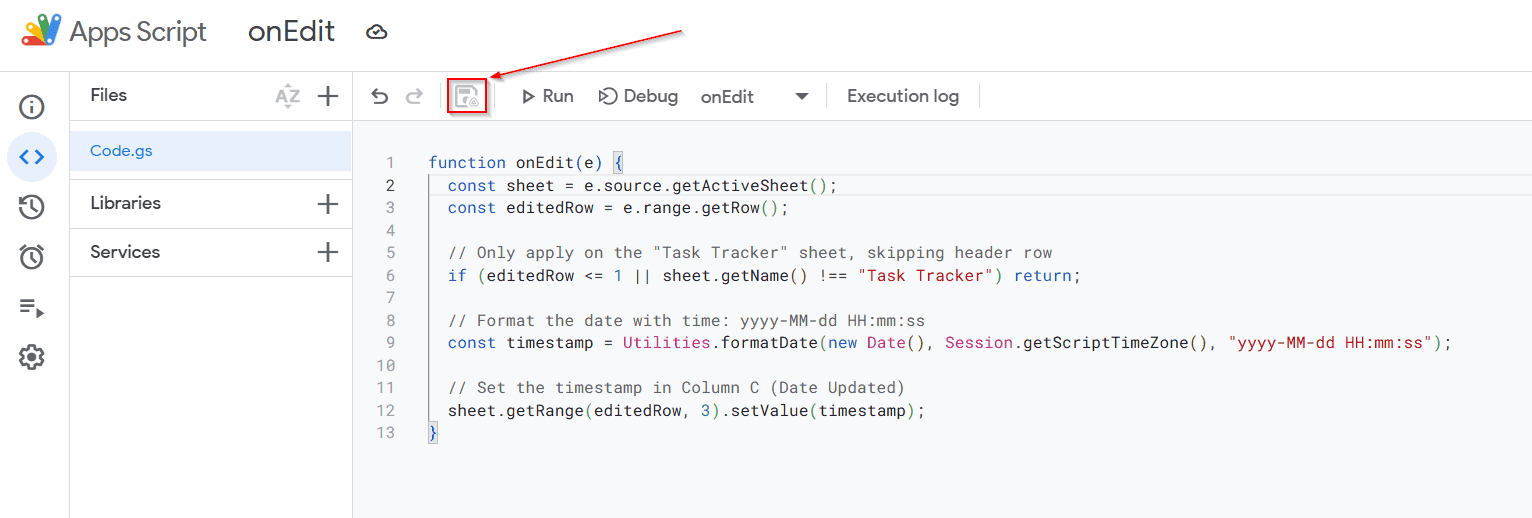
➤ Edit any cell in the sheet, and the script will place the current date and time in the Data Updated Column.
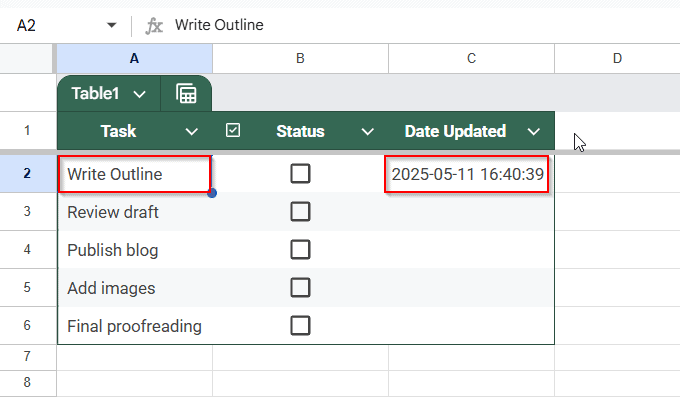
➤ Edit the same cell again, and you can see that the timestamp updates to the current time in the Date Updated column.
Frequently Asked Questions
How can I autofill the date when a specific column is updated in Google Sheets?
You can use Google Apps Script to insert the current date when a user edits a cell in a specific column, like a status column.
Steps:
➤ Open your sheet and go to Extensions >> Apps Script
➤ Delete any default code and paste the script below:
function onEdit(e) {
const sheet = e.source.getActiveSheet();
if (sheet.getName() !== "Task Tracker") return;
const editedColumn = e.range.getColumn();
const editedRow = e.range.getRow();
if (editedColumn === 2 && editedRow > 1) {
const dateCell = sheet.getRange(editedRow, 3); // Column C
dateCell.setValue(new Date());
}
}
➤ Click File >> Save and return to the sheet
➤ Edit any value in Column B, and today’s date will appear in Column C.
Can I insert the date only once and prevent it from updating again?
Yes. You can modify the script to check if the date cell is filled. If it is, the script will skip updating it.
function onEdit(e) {
const sheet = e.source.getActiveSheet();
if (sheet.getName() !== "Task Tracker") return;
const editedColumn = e.range.getColumn();
const editedRow = e.range.getRow();
if (editedColumn === 2 && editedRow > 1) {
const dateCell = sheet.getRange(editedRow, 3);
if (!dateCell.getValue()) {
dateCell.setValue(new Date());
}
}
}
This is perfect for logging the original change date without overwriting it on future edits.
Will the script work if I paste values into multiple cells at once?
No. The onEdit(e) trigger only works for single-cell edits. It does not respond to multi-cell paste actions. You would need the onChange function trigger and more complex logic to handle those.
How can I format the date to exclude time?
Use Utilities.formatDate function in the script to customize the date. For example:
Utilities.formatDate(new Date(), Session.getScriptTimeZone(), “yyyy-MM-dd”)
Will the script work on mobile devices too?
Yes. The script will run as long as the sheet is manually edited by a user with edit access. This includes edits made from the Google Sheets mobile app.
Wrapping Up
If your Google Sheet needs to track when changes are made, automatically inserting a date can make your workflow smoother and more accurate. There are a few different ways to handle updating task statuses, checking off items, or simply logging edits.
Using Google Apps Script gives you complete control. You can fill in the date every time a cell is updated, once only, or even when a checkbox is ticked. With just a few lines of code, your sheet can do more automatically.