
Named ranges are an effective way to simplify Excel formulas, navigate large workbooks, and make data easier to understand. Instead of referencing cell addresses like A2:A11, you can assign a name such as SalesData or EmployeeList and use that name directly in your formulas.
In this article, you’ll learn multiple easy ways to locate a named range in Excel using keyboard shortcuts, the Name Box, or the Name Manager. Let’s get started.
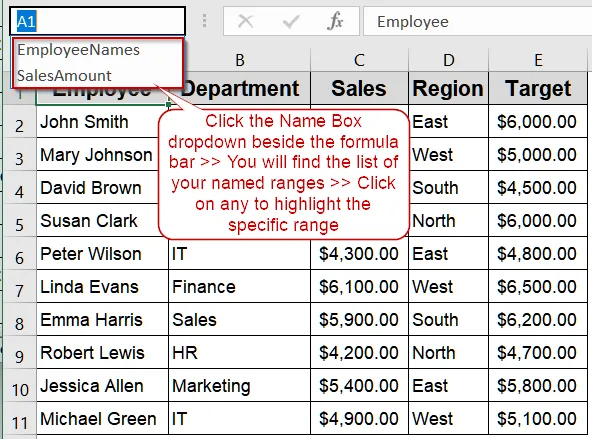
➤ Look for the Name Box, located to the left of the formula bar.
➤ Click the small dropdown arrow beside it.
➤ A list of all named ranges in the workbook will appear.
➤ Click on the desired name (for example, SalesAmount).
➤ Once clicked, Excel highlights and selects the named range automatically.
What Is a Named Range in Excel?
A named range in Excel is a custom name assigned to a specific cell or group of cells. Instead of using standard references like A1:B10, you can name the range “SalesData” or “BonusRate” and use that name in formulas, making them easier to read. For instance,
=SUM(SalesData) is much clearer than =SUM(A2:A11). Named ranges also make navigation faster and reduce formula errors in complex spreadsheets.
Jump to Named Ranges Using the Name Box Dropdown
The Name Box (located next to the formula bar) is one of the simplest tools for accessing named ranges. It lets you jump instantly to any defined name with just one click. This method is best for quick navigation without using any dialog boxes or menus. We’ll use the following dataset with several named ranges:
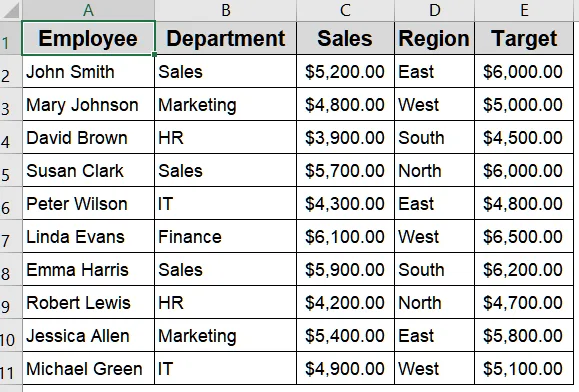
➤ Look for the Name Box, located to the left of the formula bar.
➤ Click the small dropdown arrow beside it.
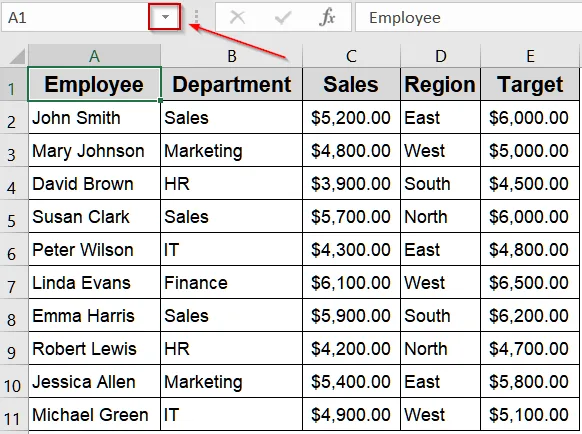
➤ A list of all named ranges in the workbook will appear.
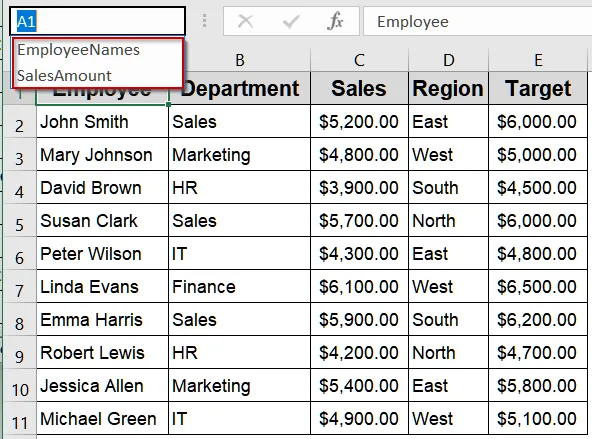
➤ Click on the desired name (for example, SalesAmount).
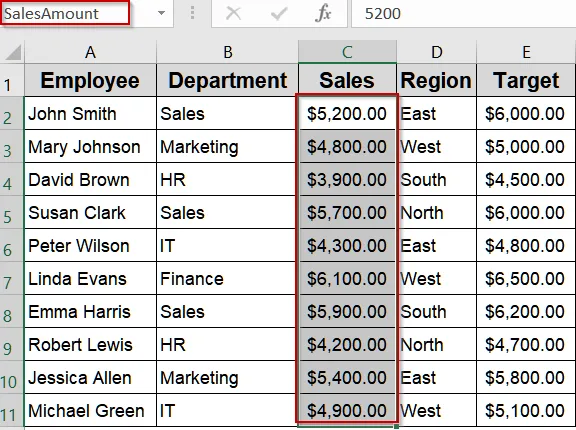
Once clicked, Excel highlights and selects the named range automatically.
Locate Named Ranges Using the Go To Dialog
The Go To dialog is a fast way to jump directly to any named range in your workbook. It lists all defined names so you can quickly navigate to a specific one without scrolling through the sheet. This method is perfect for users who prefer keyboard shortcuts or need to move quickly between multiple named ranges in a large workbook.
➤ Press Ctrl + G or F5 on your keyboard.
➤ In the Go To dialog box, you’ll see a list of all named ranges under “Go to:”.
➤ Select the name you want, such as SalesAmount or EmployeeNames.
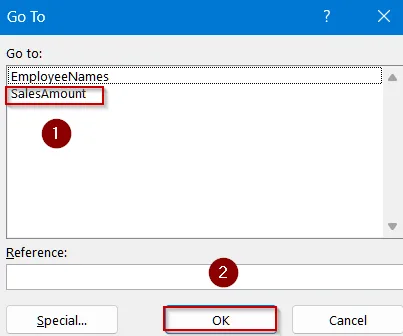
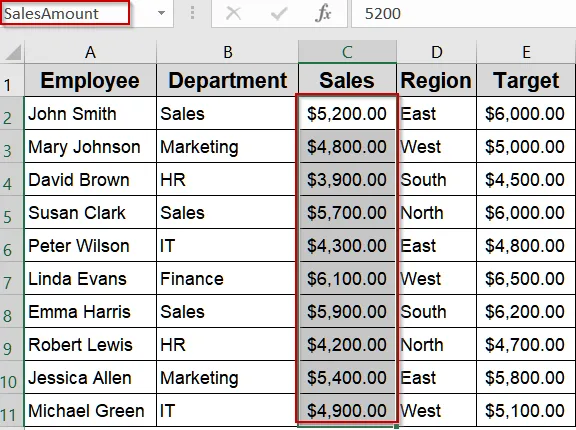
➤ Click OK, and Excel will immediately jump to that named range in the worksheet.
Manage and View All Named Ranges Using the Name Manager
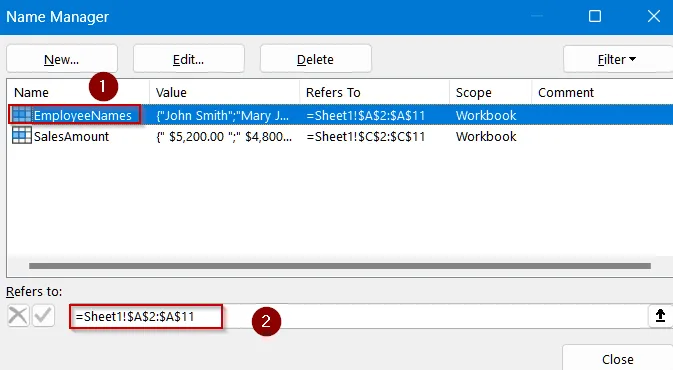
The Name Manager provides a full overview of all named ranges, including their cell references, formulas, and scopes. It’s the most comprehensive tool for managing named data in Excel. This method gives you full control over your named ranges so that you can view, edit, delete, or even create new ones directly from the same dialog box.
➤ Go to the Formulas tab on the Excel ribbon.
➤ In the Defined Names group, click Name Manager.
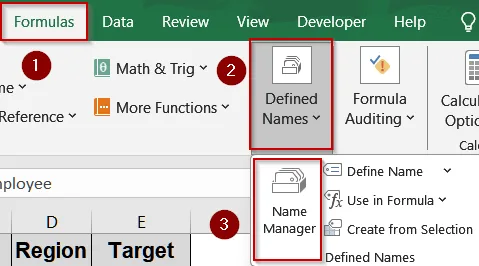
➤ The Name Manager dialog box will open, showing all named ranges in your workbook.
➤ You can see each name’s Value, Refers to address, and Scope (Workbook or Worksheet).
➤ To view its location, select a name and click inside the “Refers to” field and Excel will display the referenced range.
Downloadable Resources
Get our practice workbook or necessary files that we have worked with to prepare this article.
Frequently Asked Questions
What is the best way to find a named range in Excel?
The most efficient method is pressing Ctrl + G or F5 to open the Go To dialog, where all named ranges are listed. Selecting one instantly navigates you to that exact range location in Excel.
How does the Name Box help locate named ranges easily?
The Name Box, located beside the formula bar, contains a dropdown list of all named ranges. Clicking a name from the list immediately highlights that specific cell range, making navigation effortless within large datasets.
What details can I view in the Name Manager?
The Name Manager displays all named ranges with information such as their names, scope, values, and cell references. It allows editing or deleting named ranges, helping users maintain organized and accurate Excel workbooks efficiently.
Why can’t I find a specific named range in my workbook?
You might not see it if the named range is scoped to a particular worksheet. Switch to that specific sheet, or open Name Manager to confirm its defined scope and reference details accurately.
Can I modify or delete a named range after creating it?
Yes. Open the Name Manager from the Formulas tab, choose the named range, and adjust the name or “Refers to” section. You can also delete outdated ranges to maintain workbook consistency.
Wrapping Up
In this tutorial, you learned how to find a named range in Excel using three simple methods including the Go To dialog, the Name Box dropdown, and the Name Manager feature. Mastering these techniques will make it much easier to move through complex workbooks and maintain clean, well-organized formulas. Feel free to download the practice file and share your feedback.