If you’re handling sensitive or confidential data in Excel, it’s not enough to just lock cells or disable editing. Sometimes, you need to completely prevent others from even viewing the contents of a sheet. Excel provides several layers of protection from hiding sheets and setting passwords to restricting permissions and using macros for advanced control.
In this article, we’ll learn all the best ways to password protect Excel sheets from viewing, including both built-in and advanced techniques. Whether you’re sharing a file across a team or simply want to keep prying eyes away, these methods will help you secure your data effectively.
Steps to password protect Excel sheet from viewing:
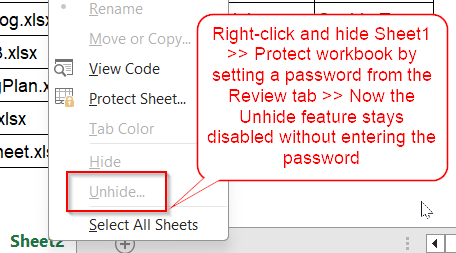
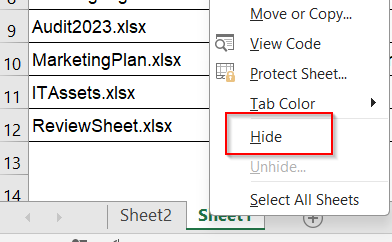
➤ Right-click the sheet tab you want to protect such as Sheet1 and select Hide.
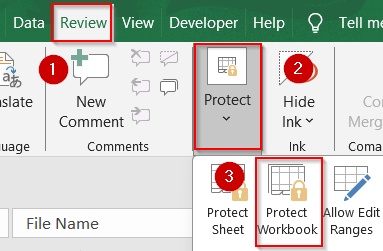
➤ Go to the Review tab and click Protect Workbook.
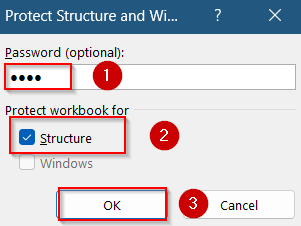
➤ In the dialog box, check the box for Structure.
➤ Enter a password and confirm it.
➤ Click OK.
Hide the Sheet and Protect Workbook Structure
If you only need to prevent users from viewing a specific sheet, hiding it and then protecting the workbook structure is a simple and effective solution. This ensures that even if users know how to unhide sheets, they won’t be able to access them without a password.
Steps:
➤ Right-click the sheet tab you want to protect such as Sheet1 and select Hide.
➤ Go to the Review tab and click Protect Workbook.
➤ In the dialog box, check the box for Structure.
➤ Enter a password and confirm it.
➤ Click OK.
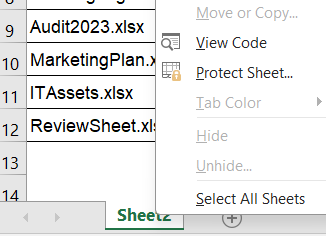
Now, even if someone tries to unhide the sheet, they’ll find the Unhide option disabled unless they unprotect the workbook which requires the password you set.
Encrypt the Entire Workbook with a Password
If your goal is to block access to the entire Excel file including all sheets, encryption is the most secure route. This method password-protects the file itself, ensuring only authorized users can even open the workbook.
Steps:
➤ Go to File tab >> Select Info.
➤ Click Protect Workbook, then choose Encrypt with Password.
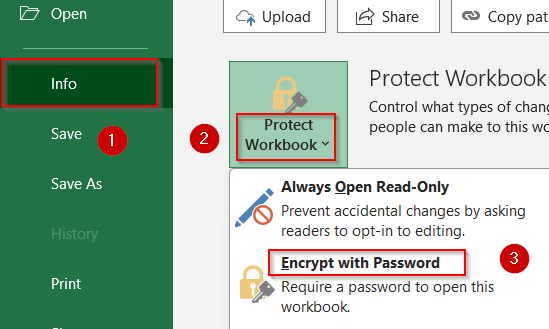
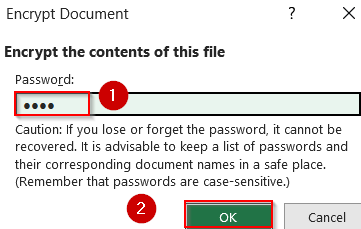
➤ Type a password in the box and click OK.
➤ Re-enter the password to confirm, then click OK again.
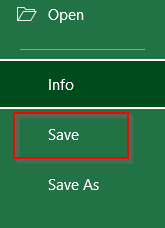
➤ Save the file from the same tab.
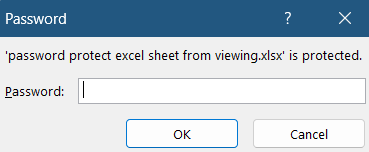
This will prevent anyone from opening the workbook without entering the correct password.
Restrict Access with Information Rights Management (IRM)
For organizations using Microsoft Office 365, IRM lets you control exactly who can view or edit a workbook, even after it’s shared. This feature is ideal for teams handling confidential information and needing to restrict access at the user level.
Steps:
➤ Open your workbook.
➤ Go to File tab >> Click Info >> Choose Protect Workbook.
➤ Choose Restrict Access, then select Restricted Access.
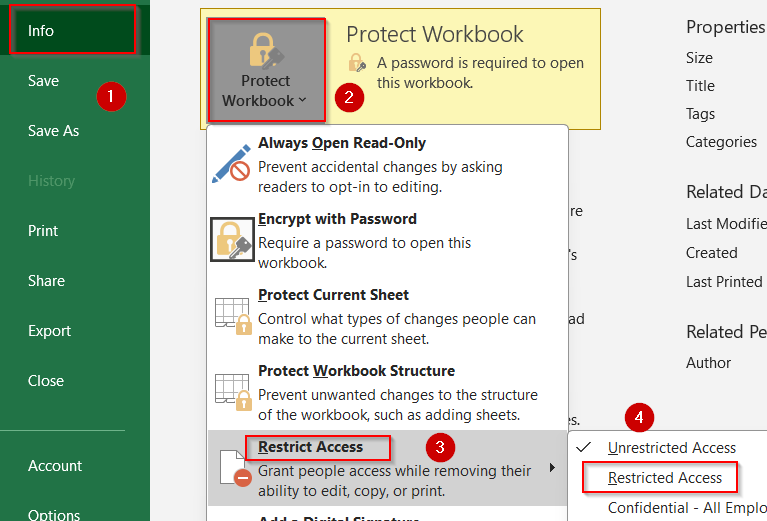
➤ Assign permissions by entering email addresses and specifying if they can read or edit.
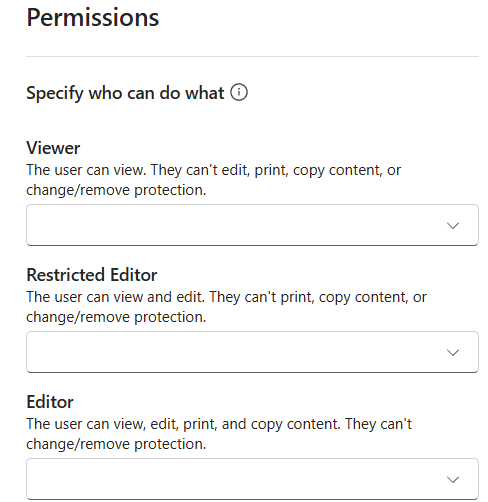
This is a great method for managing visibility and edit rights on a per-user basis.
Save the File as Read-Only From Save As Tab
If you want others to view your workbook without accidentally changing its contents, setting the file to open in read-only mode is a useful option. It helps protect your data while still allowing visibility.
Steps:
➤ Go to File >> Save As and choose your file location.
➤ In the Save dialog, click Tools >> General Options (bottom-right).
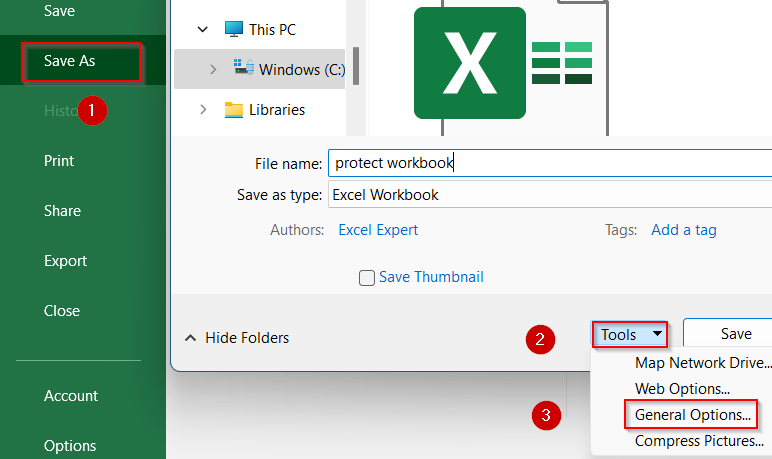
➤ Check Read-only recommended or enter a password to modify.
➤ Click OK, confirm any password, then click Save.
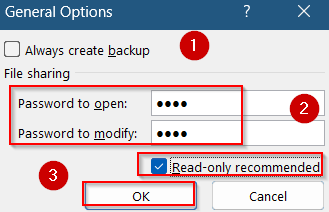
Anyone opening the workbook will see a prompt recommending read-only access or requesting a password to enable editing.

Use VBA Macros to Make Sheets Very Hidden
If you want to hide a sheet in a way that prevents even savvy Excel users from easily finding it, using a VBA macro is a powerful solution. It allows you to make the sheet “very hidden,” meaning it won’t even appear in the Unhide menu. This is especially useful for concealing sensitive data while keeping it in the same workbook.
Steps:
➤ Press Alt + F11 to open the VBA editor.
➤ In the left pane, double-click ThisWorkbook.
➤ Paste the code and replace “Sheet1” with your actual sheet name:
Private Sub Workbook_Open()
    Sheets("Sheet1").Visible = xlSheetVeryHidden
End Sub
➤ Run the macro by pressing F5 key.
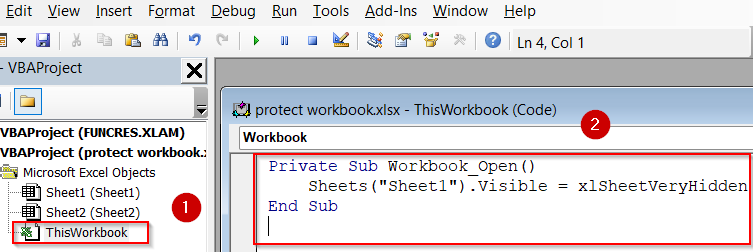
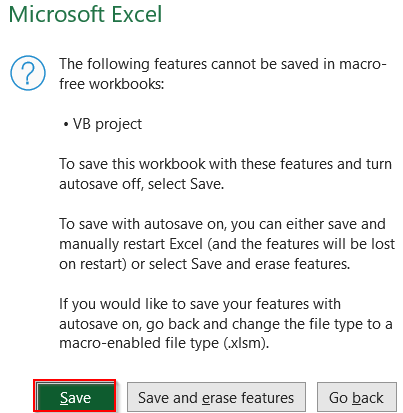
➤ Save the file as a macro-enabled workbook (.xlsm).
Now, each time the file opens, the specified Sheet1 will remain completely hidden.

Note:
Users can disable macros, so this method isn’t fully protected from changes.
Frequently Asked Questions
Can I password-protect a single sheet from being viewed?
Not directly. Excel doesn’t support sheet-level view passwords. However, you can hide the sheet and lock the workbook structure with a password so it can’t be unhidden without permission.
What is the most secure way to hide a sheet from others?
Using a macro to set the sheet to xlSheetVeryHidden is one of the best methods. Combined with workbook protection, this makes the sheet invisible and unhidable without going into the VBA editor.
Is hiding a sheet enough to stop someone from viewing it?
No. Anyone can right-click and unhide sheets. You need to protect the workbook structure with a password or use a macro to make the sheet very hidden for better protection.
Can I prevent someone from opening the Excel file entirely?
Yes. Use File tab >> Select Info and click Protect Workbook to Encrypt with Password. Then set a password and re-enter to confirm it so that it must be entered before anyone can open the file.
Will the sheet still be hidden if someone disables macros?
No. If macros are disabled, the Workbook Open event won’t run, and the sheet might become visible. This is why macros are not foolproof and should be used alongside workbook structure protection.
Wrapping Up
In this tutorial, we learned five effective methods to password protect Excel sheets from being viewed, including workbook encryption, user-level permissions, VBA tricks, and hiding sheets with structure locks. Whether you’re trying to secure a financial report or prevent coworkers from snooping through sensitive tabs, these strategies give you flexible protection options based on your needs. Feel free to download the practice file and share your feedback.