When working with Excel, you may need to deal with large datasets that contain duplicate entries. Obviously, these duplicates can affect your data accuracy and analysis. So, sometimes you may need to remove repeated values but keep at least one instance to preserve essential information.
Excel has easy features and tools to help you quickly remove duplicates. In this article, we will show you six methods to do so. It includes, Remove Duplicates feature, VBA macros, Power Query, the UNIQUE formula, and the Advanced Filter.
➤ Select the data range including headers from which you want to delete duplicates.
➤ Go to the Data tab >> Remove Duplicates >> check ‘My data has headers’.
➤ Select the column you want to check for duplicates >> and click OK.
➤ Excel will remove all the duplicates and will keep one instance.
What Does It Mean By Delete Duplicates in Excel, But Keep One?
In simple words, deleting duplicates but keeping one means you want Excel to remove all the repeated entries from your data. However, it needs to keep just the first instance, so the unique values appear only once. It helps you to keep your data clean, even without losing important records.
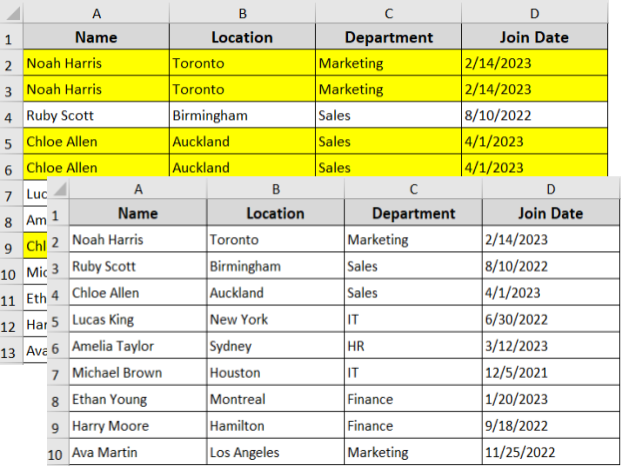
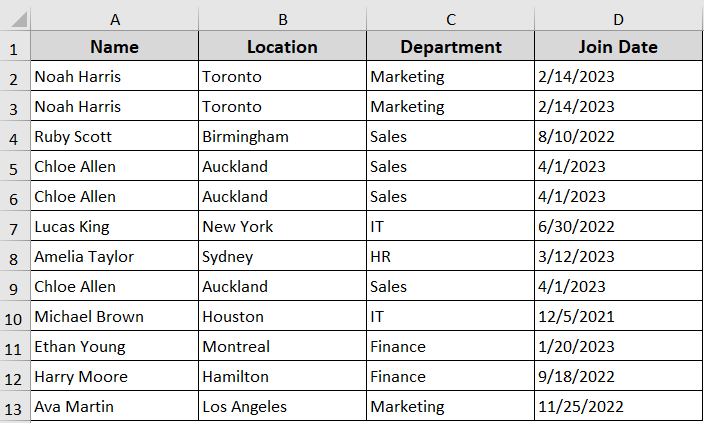
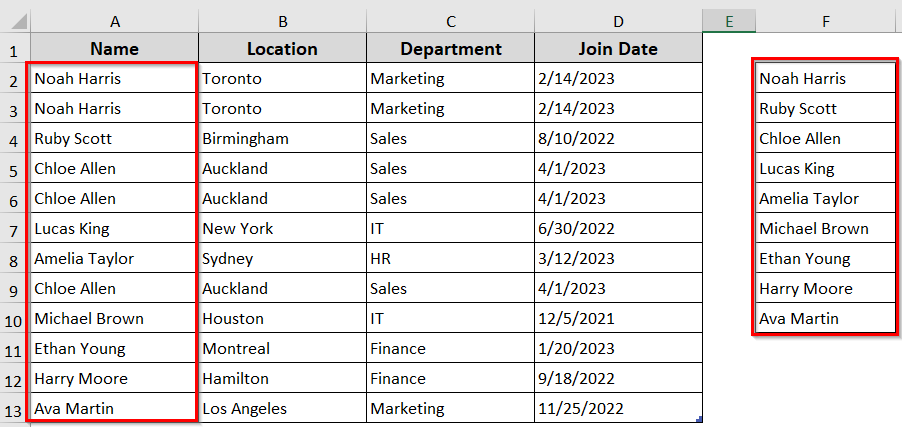
Below we have an employee dataset on Excel, having some duplicate values [Noah Harris (2 rows) and Chloe Allen (3 rows)]. We will now remove all the duplicates from this Excel dataset, keeping one using six different methods.
Using the Remove Duplicates Feature to Delete Duplicates in Excel
The Remove Duplicate feature of Excel is the quickest way to clean your data and make it free from duplicates. It automatically deletes duplicate rows and keeps the first instance only.
Steps:
➤ Select the data range from which you want to delete duplicates, including headers.
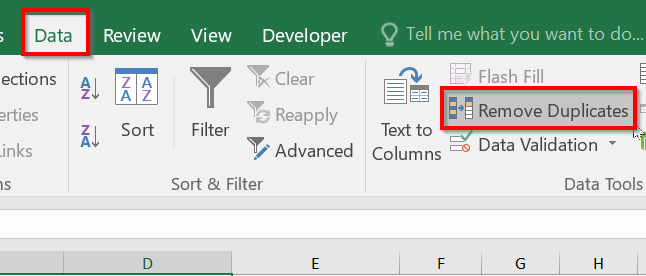
➤ Go to the Data tab >> Remove Duplicates under the Data Tools group.
➤ In the dialog box, make sure ‘My data has headers’ is checked.
➤ Select the column to check for duplicates. Click OK.

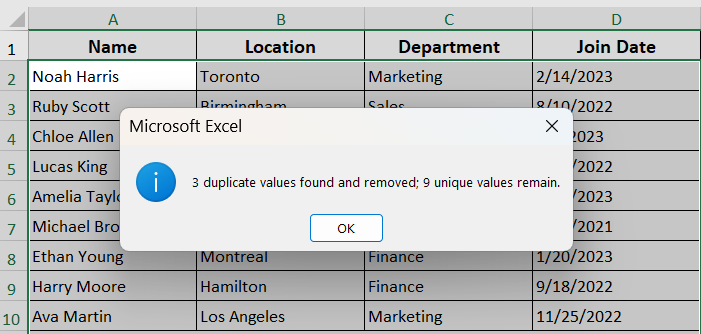
➤ Excel will remove all the duplicates, keeping one, showing the message like below.
Application of Power Query to Delete Duplicates
If you have to check for duplicates from a large dataset, you should use Power Query. It will remove all the duplicates and display the clean data in a new table. So, your original data remains untouched.
Steps:
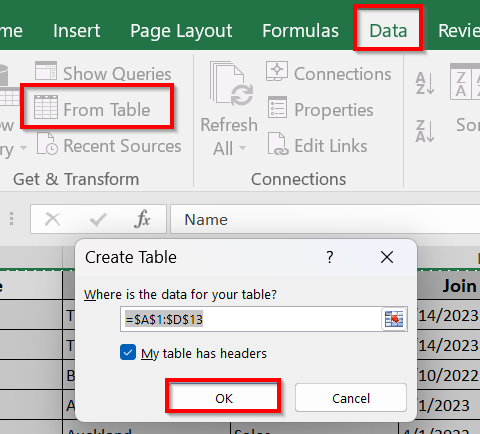
➤ Select your data range, including headers.
➤ Go to the Data tab >> From Table. Make sure “My table has headers” is checked and click OK.
➤ Your data is loaded inside Power Query Editor.
➤ Use Ctrl + A to select all columns, or hold down the Ctrl key and click each row number you want to select.
➤ Go to the Home tab inside Power Query >> Remove Duplicates under Reduce Rows.
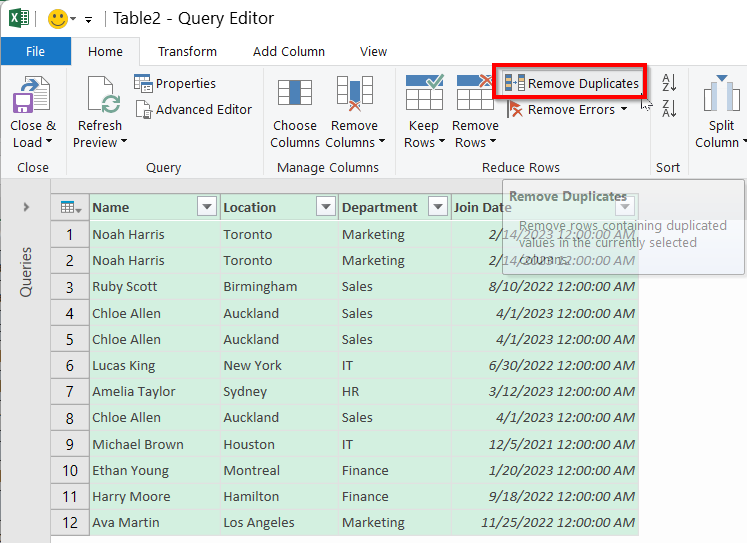
➤ It will instantly keep only the first instance.
➤ Click Close & Load.
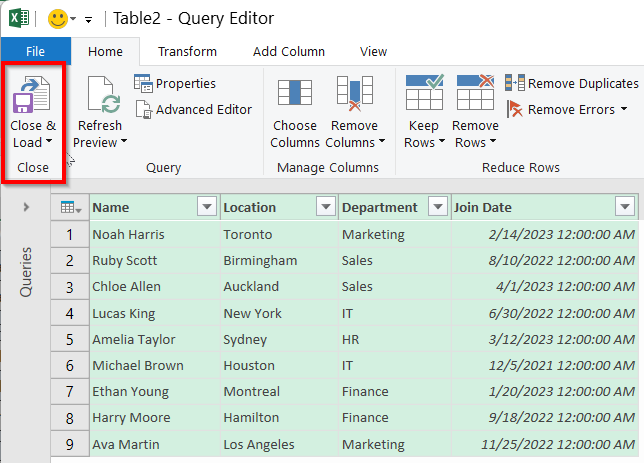
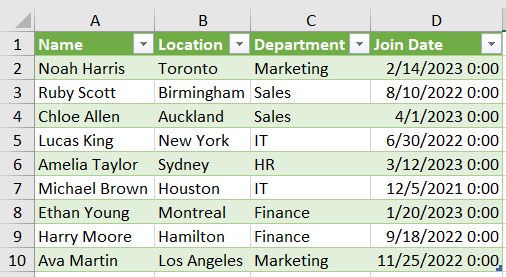
➤ The deduplicated data will be inserted into your Excel worksheet.
Inserting VBA Code to Remove Duplicates While Keeping One
You can also use the VBA script to delete the duplicates and keep the first instances. That’s especially when you want to have more control over the process. The VBA script will help you to remove duplicates across large datasets.
Steps:
➤ Press Alt + F11 to open the VBA Editor.
➤ In the left panel, right click on your workbook name >> Insert >> Module.
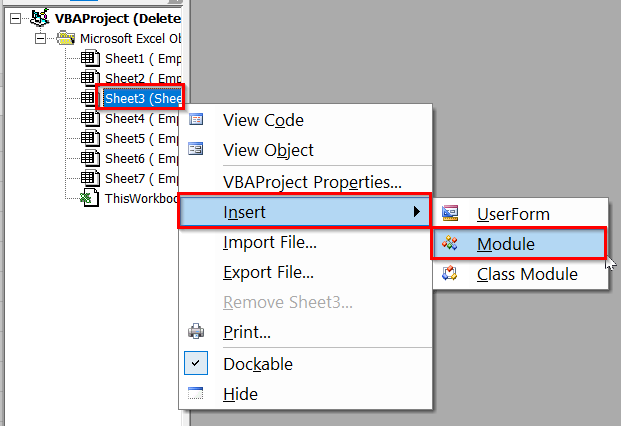
➤ Insert the below VBA script in the VBA editor.
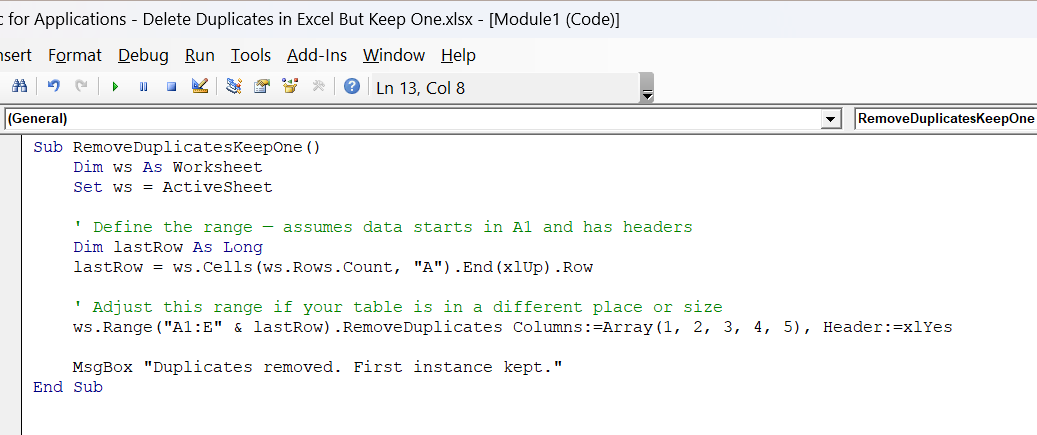
Sub RemoveDuplicatesKeepOne()
    Dim ws As Worksheet
    Set ws = ActiveSheet
    ' Define the range — assumes data starts in A1 and has headers
    Dim lastRow As Long
    lastRow = ws.Cells(ws.Rows.Count, "A").End(xlUp).Row
    ' Adjust this range if your table is in a different place or size
    ws.Range("A1:E" & lastRow).RemoveDuplicates Columns:=Array(1, 2, 3, 4, 5), Header:=xlYes
    MsgBox "Duplicates removed. First instance kept."
End SubNote:
➧ If your dataset is wider or narrower, change this part: Range(“A1:E” & lastRow). For example, if your data ends in column D, use “A1:D”.
➧ Change the number of this part Columns:=Array(1, 2, 3, 4, 5) based on the number of columns you want to check. For instance, for one column check, use Columns:=Array(1).
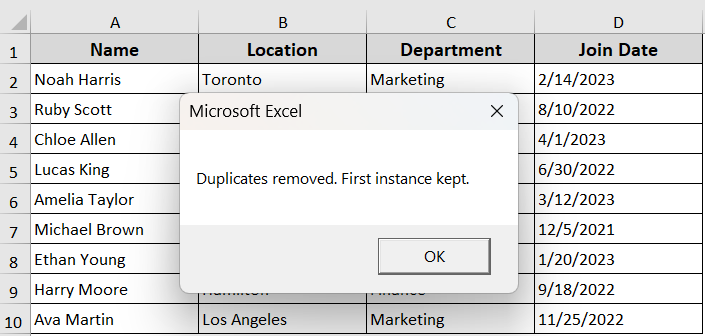
➤ Press F5 or click Run.
➤ It will remove the duplicate data, only keeping the first instance.
Delete Duplicates in Excel & Keep One Using the UNIQUE Function
If you’re using Excel 365 or Excel 2021, the UNIQUE function is one of the simplest ways to remove duplicates. It will instantly create a new list of clean data with unique values. Your original data will remain untouched.
Steps:
➤ Select an empty area in your sheet next to the set of your data.
➤ Enter the formula below in the F2 cell to delete the duplicates from column A
=UNIQUE(A2:A13).
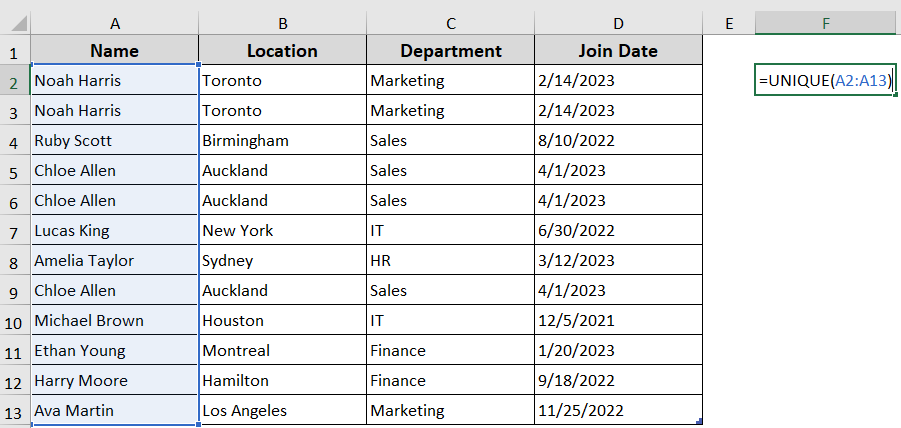
➤ This returns the unique value as a new list from the cell where you typed the formula. Your original data will stay unchanged.
Sorting Data to Remove Duplicates But Keep One Record
Sorting groups the duplicates together visually. So, you can quickly spot the duplicate entries and delete the extra ones. If you want to review duplicates before deleting them, especially in a small dataset, you can use this method.
Steps:
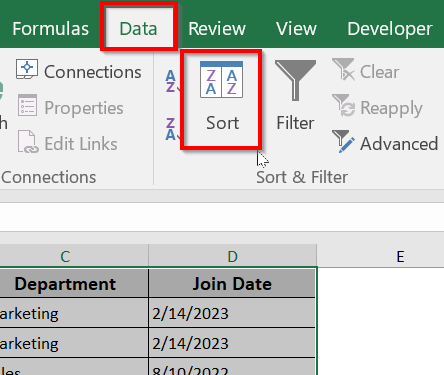
➤ Select your data range you want to check for duplicates.
➤ Go to the Data >> Sort.
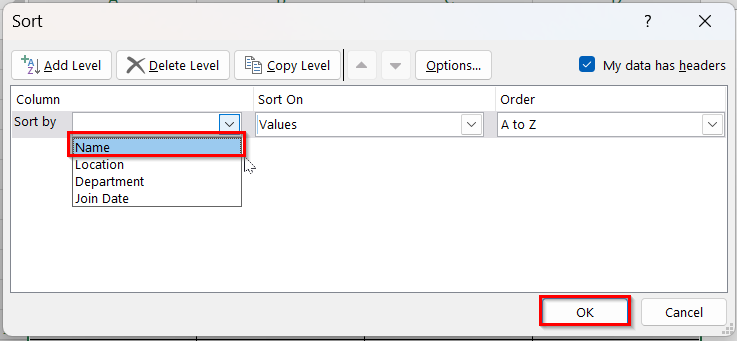
➤ Choose the columns to sort by >> Click OK.
➤ It will group the duplicate data.
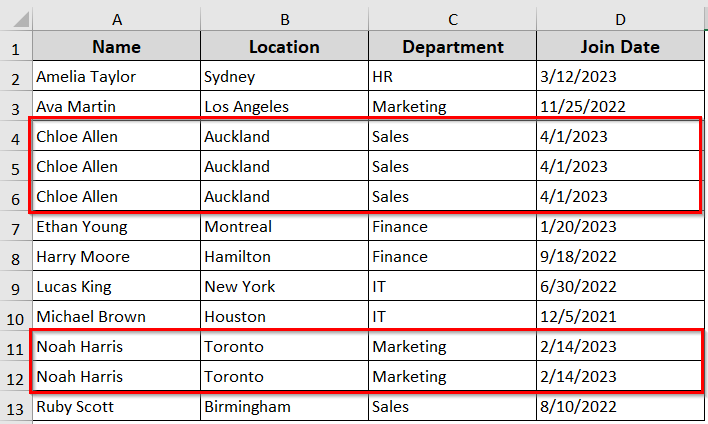
Now you can manually delete duplicates or use the Remove Duplicates remove to delete duplicates automatically.
Using the Advanced Filter Option
The Advanced Filter option in Excel is used to extract new values. The feature filters out the duplicates and keeps the original data showing unique entries.
Steps:
➤ Select the range of your data.
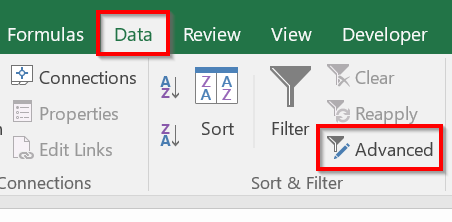
➤ Go to the Data tab >> Advanced under Sort & Filter group.
➤ In the pop-up window, select Copy to another location.
➤ Click in the ‘Copy to’ box and select a blank area like F1 in our case.
➤ Check the box for “Unique records only,” and click OK.
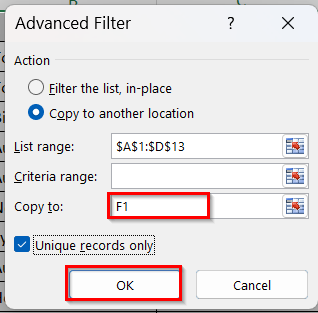
➤ Excel will copy a duplicate-free version of your data starting from the F column to the I column.

Frequently Asked Questions
How do I extract only certain Data in Excel?
You can use four different formulas to extract only certain data in Excel. The functions have the following syntax:
➤ RIGHT function: =RIGHT(Cell name, number of characters)
➤ LEFT function: =LEFT(Cell name, number of characters)
➤ MID function: =MID(Cell name, starting number, number of characters)
➤ FIND function: =FIND(Search term, cell name, [starting number])
How do I make Excel not show duplicates?
You can use the ‘Filter the list, in-place’ option of the Advanced Filter under the Data tab. It will hide the duplicate values in the Excel dataset. As a result, unique data will be displayed.
How to use trim in Excel?
Follow the steps below:
➤ Select the cells where you want to trim spaces.
➤ Click Trim Spaces >> Trim leading and trailing spaces
➤ Click Trim.
Wrapping Up
In today’s guide, we have covered different automatic and manual effective methods to delete duplicates in Excel, but keep one. You can choose from the above-described methods based on what works best for your data. Feel free to try these methods on our sample dataset and find out which method fits your needs the best.