If your Excel workbook contains several sheets and you need to save each one as its own file, there’s no need to copy-paste them manually. Excel offers multiple ways to split a single workbook into multiple files using built-in tools, VBA scripts, or Power Query.
In this article, you’ll learn how to split Excel sheets into separate files using step-by-step methods. Whether you prefer a visual method or a script-driven approach, each technique ensures your data is split cleanly. These techniques work across Excel 2016, 2019, 2021, and Microsoft Office 365.
Steps for splitting Excel workbook using VBA Editor:
➤ Press Alt + F11 to open the VBA editor.
➤ Click Insert >> Module >> Paste the following code:
Sub SplitSheetsIntoFiles()
    Dim ws As Worksheet
    Dim wb As Workbook
    Dim folderPath As String
    folderPath = Application.ThisWorkbook.Path & "\SplitFiles\"
    MkDir folderPath
    For Each ws In ThisWorkbook.Sheets
        ws.Copy
        Set wb = ActiveWorkbook
        wb.SaveAs folderPath & ws.Name & ".xlsx"
        wb.Close False
    Next ws
End Sub
➤ Press F5 to run the program.
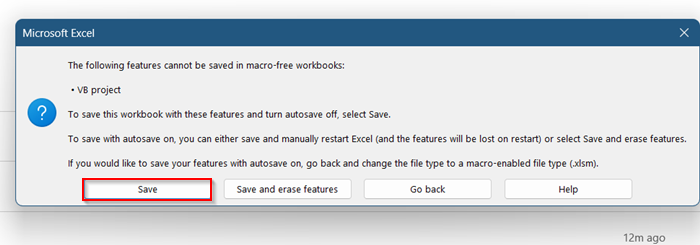
➤ Go to File >> Save.

Quick Video Tutorial: Split Excel Sheets into Multiple Files
What Does "Splitting Excel Sheets into Multiple Files" Mean?
Splitting Excel sheets into multiple files means taking each worksheet within a workbook and saving it as a separate Excel file. This is especially useful when you need to send individual reports, separate department data, or archive sheets independently. The resulting files retain formatting, formulas, and layout just like the original.
This process automates what would otherwise be a time-consuming task, especially with workbooks containing dozens of sheets. Depending on your preferred method, you can get this done using Excel’s built-in tools or VBA, without needing external plugins or downloads.
Use VBA to Split Each Worksheet into a New File
If you’re comfortable using Excel’s Developer tools, this method is one of the fastest and most customizable. It allows you to split each worksheet into its own file using just a simple VBA script. This method is best for users who want a built-in Excel solution without using external tools.
Steps:
➤ Press Alt + F11 to open the Visual Basic for Applications (VBA) editor.
➤ Click Insert >> Module to create a new module.
➤ Paste the following VBA code:
Sub SplitSheetsIntoFiles()
    Dim ws As Worksheet
    Dim wb As Workbook
    Dim folderPath As String
    folderPath = Application.ThisWorkbook.Path & "\SplitFiles\"
    MkDir folderPath
    For Each ws In ThisWorkbook.Sheets
        ws.Copy
        Set wb = ActiveWorkbook
        wb.SaveAs folderPath & ws.Name & ".xlsx"
        wb.Close False
    Next ws
End Sub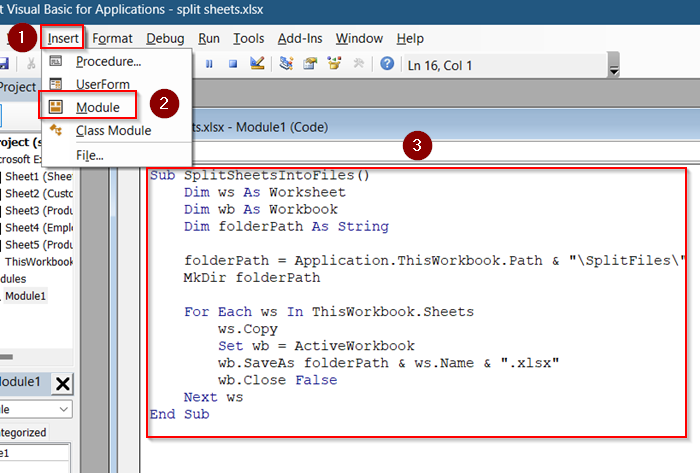
➤ Press F5 to run the macro.
➤ Go to File >> Save.
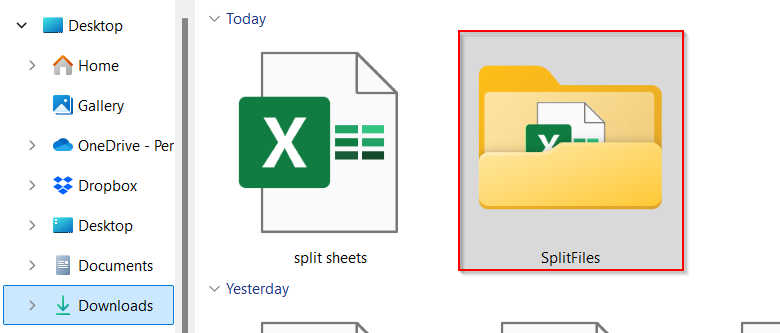
Excel will create a new folder named SplitFiles in the workbook directory and save each sheet there as a separate .xlsx file.
Use Power Query to Export Filtered Sheets Manually
If you’re working with a large dataset and need to organize information by groups such as by customer, location, or department, Power Query is a powerful tool that can help. It lets you filter and group your data without writing any code, and then split those groups into separate worksheets within the same file.
Once the data is separated, you can manually save each worksheet as a new Excel file. This approach is perfect if you want to review or adjust each sheet before exporting. It gives you more control and is especially helpful for those who prefer a step-by-step, visual method instead of using macros or VBA.
Steps:
➤ Select your data and go to Data >> Get & Transform >> From Table/Range.
➤ Load the data into Power Query. Ensure headers are checked.
➤ Go to the Group By option in Power Query.
➤ Under Advanced tab, Group by the column you want to split (e.g., Location).
➤ Use “All Rows” as the operation and click OK.

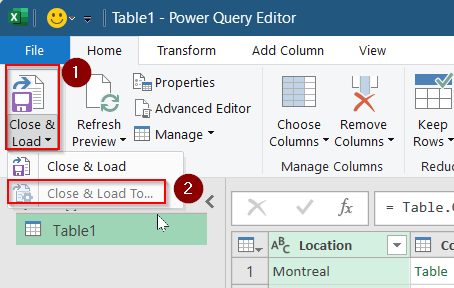
➤ Expand each group and click “Close & Load To” >> “Only Create Connection”.
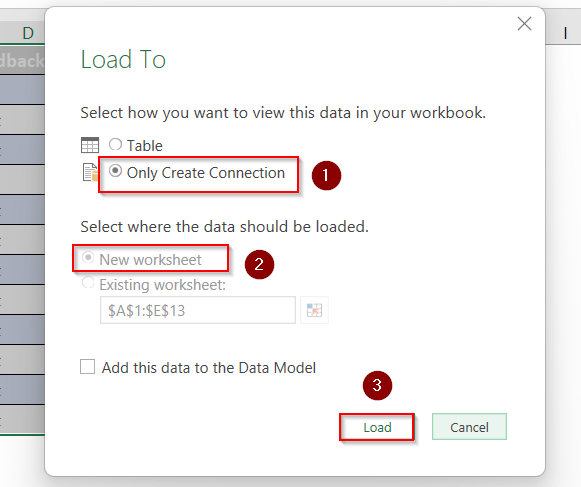
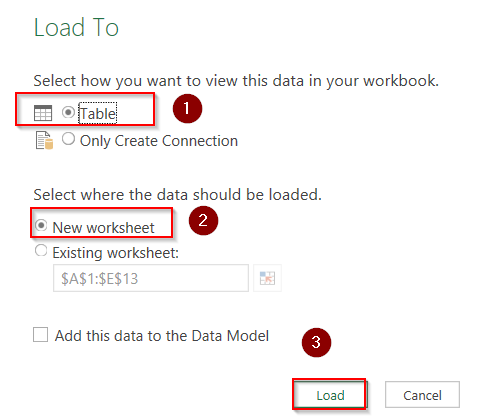
➤ Choose Only Create Connection in the New Worksheet and Load.
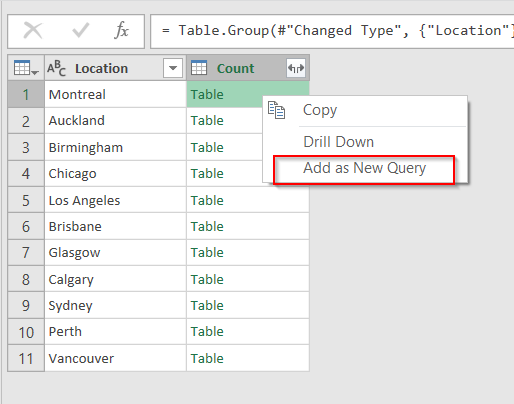
➤ For each group, right-click and select Add as New Query.
➤ Click on Load To >> Table >> New Worksheet >> Load.
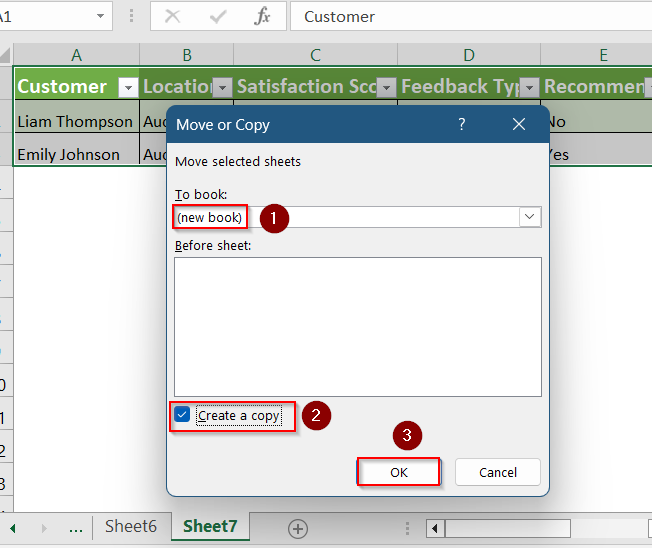
➤ Right-click on the desired sheet and choose Move or Copy.
➤ Under To Book, select New Book and check Create a copy and click OK.
➤ Save each sheet manually as a separate Excel file from File >> Save.
Use Filter and Save As (Manual Process)
If you’re working with a small dataset and only need to split it a few times, the manual filter and save method is a simple and effective approach. This method doesn’t require any advanced Excel skills, VBA, or add-ins. It’s perfect for users who are comfortable navigating basic Excel features and prefer full control over the output.
By using the built-in Filter option in Excel, you can isolate specific groups of data such as entries for a single customer or location and then save each filtered group as a separate file. While this method can be time-consuming if your dataset contains many unique values, it works well when speed and automation aren’t your main priorities.
Steps:
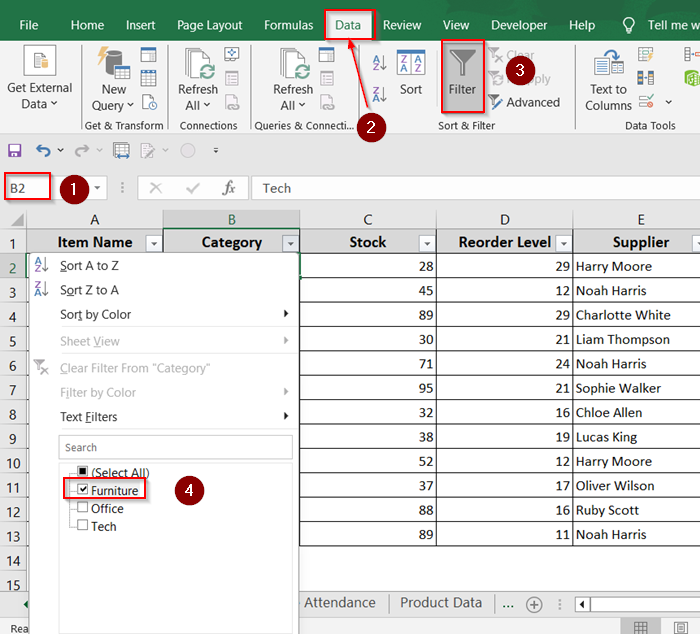
➤ Click on a cell from your desired column (e.g.,Category).
➤ Go to Data >> Filter.
➤ Click on the dropdown beside the column Category.
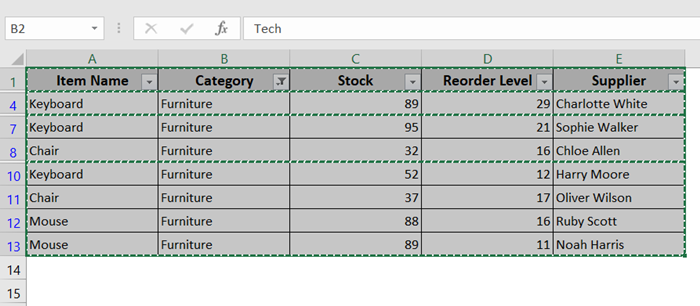
➤ Uncheck Select All and check the filter you want (e.g.,Furniture).
➤ Use Ctrl + A to select all cells. Press Ctrl + C to Copy the filtered data.
➤ Go to File >> Blank Workbook >> Press Ctrl + V to paste your filtered data.
➤ Save as a new Excel file by clicking File >> Save As.
Repeat the same steps for other values in the filter if needed.
Frequently Asked Questions
Can I split a sheet based on multiple columns?
Yes, you can split a sheet based on more than one column, but Excel doesn’t support this directly. You’ll need to create a helper column by combining the criteria using a formula like =A2&B2. Once created, you can use that helper column for grouping, filtering, or splitting with Power Query or VBA.
Will the VBA method overwrite existing files?
Yes, if a file with the same name already exists in the target folder, the VBA macro will overwrite it without any warning. To avoid this, consider saving your files in a new folder or modifying the code to add timestamps or unique suffixes to filenames before running the macro.
What happens if there are blank rows in the data?
Blank rows are generally ignored by VBA and Power Query as long as the correct data range is selected. However, they can still affect filtering and formatting. It’s recommended to clean your data first using Excel’s “Go To Special >> Blanks” or Power Query’s “Remove Blank Rows” feature to ensure clean output.
Does this work with Excel for Mac?
Yes, Power Query and manual filtering work in Excel for Mac, especially in newer versions. VBA support is more limited and may require adjustments. Some macros won’t run as expected, so test carefully or consider alternatives like Power Query when possible.
Wrapping Up
In this tutorial, we learned multiple ways to split an Excel sheet into multiple files depending on your needs and comfort level. We explored how to automate the process using a VBA script, how to group and export data visually using Power Query, and how to manually Filter and save worksheets when working with smaller datasets. Feel free to download the practice file and share your thoughts and suggestions.