Protecting columns in Google Sheets is often necessary when you are working with associates and need to protect sensitive information, like formulas or reference values. It is also helpful for preventing accidental edits and deletions. Google Sheets allows users to lock and protect columns using various built-in tools.
Follow the steps shown below to properly lock columns in Google Sheets:
➤ Choose the columns that you want to protect.
➤ Right click on the columns and navigate to View more cell actions >> Protect Range.
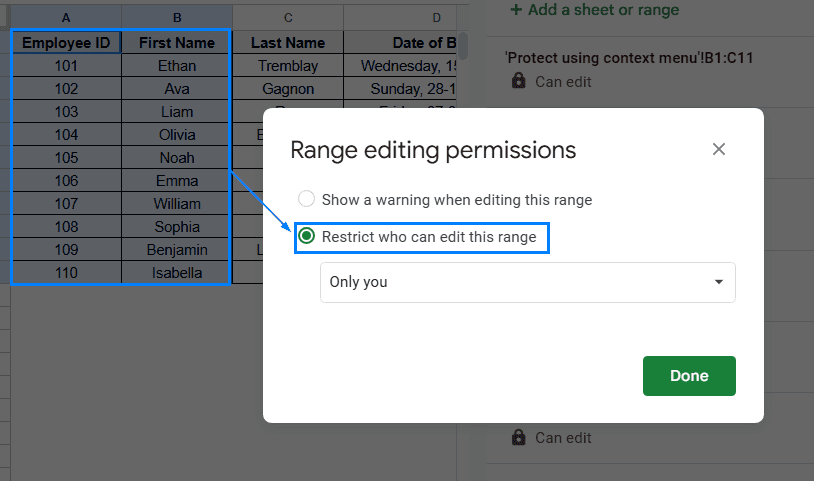
➤ Then, head to Set Permissions >> Restrict who can edit this range.
➤ Choose Only you or Custom to specify who can edit the selected columns.
➤ Click on Done to complete the operation.
In this article, we will cover 3 methods for easily protecting your data and locking columns in Google Sheets.
Protect Columns Using Data Protection Option
This is the simplest method for locking columns while allowing for changes to be made to the rest of the spreadsheet. This method will allow you to individually select one or multiple columns that you want to lock and prevent edits. We have taken a sample dataset that contains information about employee ID, names, date of birth and department details. We want to protect columns D and E, containing the date of birth and department of the employee.
Steps:
➤ Open your Google Sheets file.
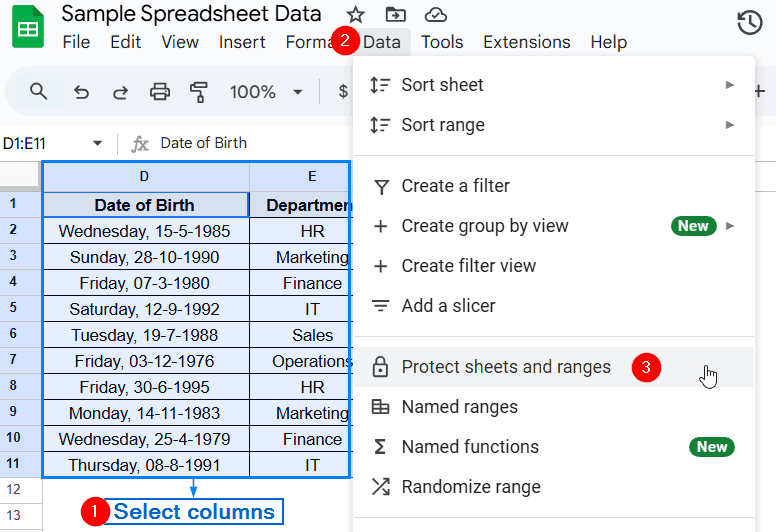
➤ Highlight the columns you want to protect. In our case, we selected column D and column E.
➤ From the main menu, click on Data >> Protected sheets and ranges.
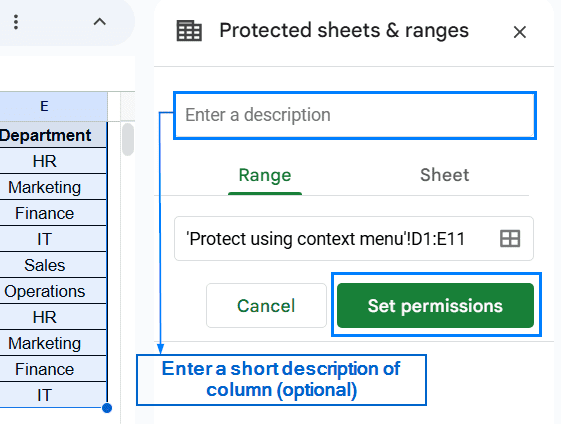
➤ Click on Set permissions from the Protected sheets & ranges menu.
Note:
You can also enter an optional custom description for the columns that are being protected.
➤ Then, check Restrict who can edit this range box and select Only you or Custom.
Note:
Selecting the Custom option will enable you to authorize users by email.
➤ Finally, click on Done to successfully protect the columns.
Protect Columns Using the Context Menu
Google Sheets also allows you to protect one or multiple columns using the right-click context menu. Although faster than the first method, this method achieves the same result. For this demonstration, we will protect columns B and C containing the first and last names of the employees. Follow the steps shown below.
Steps:
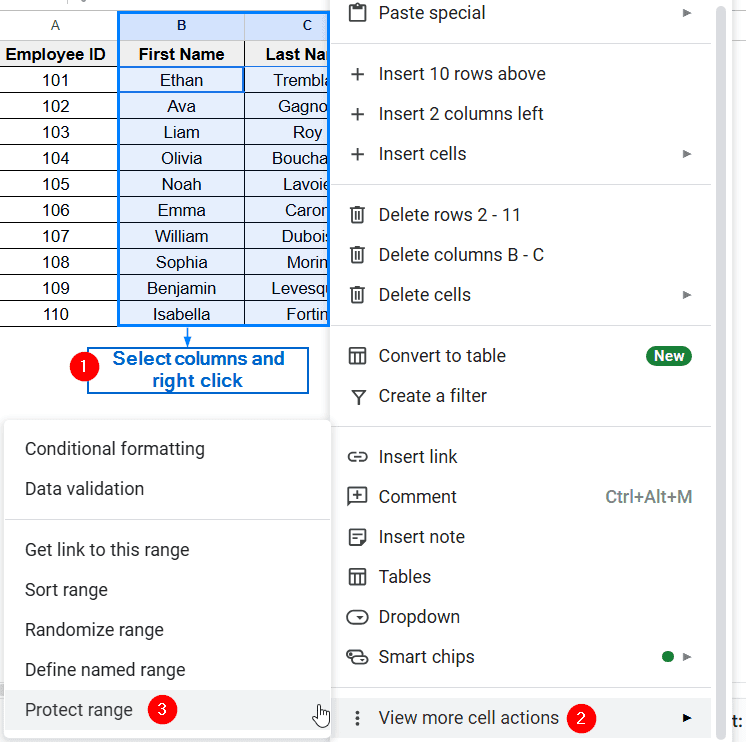
➤ Choose the columns that you want to protect. We selected column B and column C.
➤ Right click on the column and navigate to View more cell actions >> Protect Range.
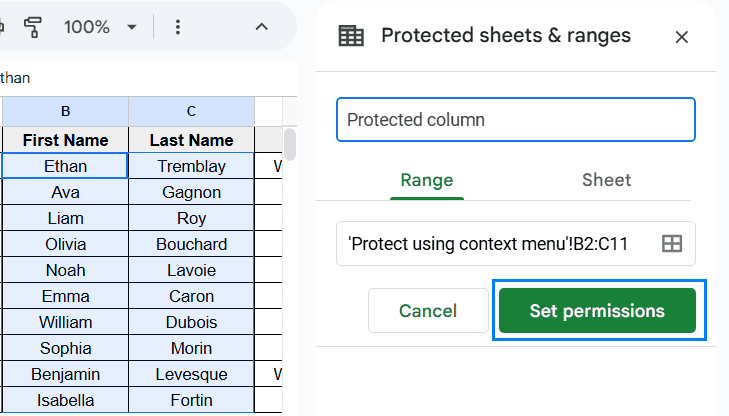
➤ Click on Set permissions.
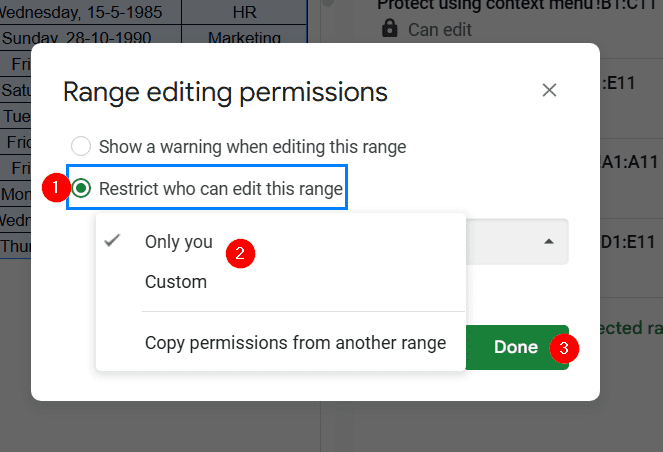
➤From the Range editing permissions menu, check the Restrict who can edit this range box.
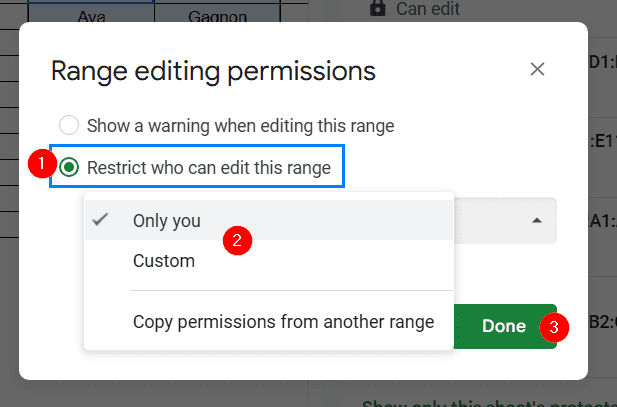
➤Select Only you or Custom option from the dropdown menu and click on Done.
Protect Columns by Showing a Warning
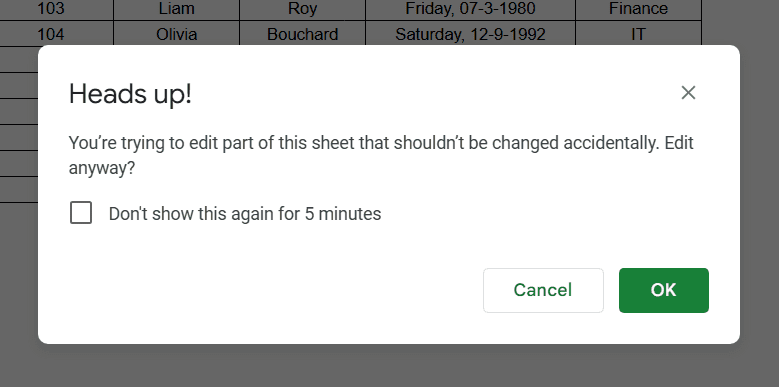
This feature is helpful when you want to prevent unintentional edits to sensitive data. If anyone tries to modify protected columns, a warning message will pop up to remind them that the column is restricted. Follow the steps below to properly use this feature.
Steps:
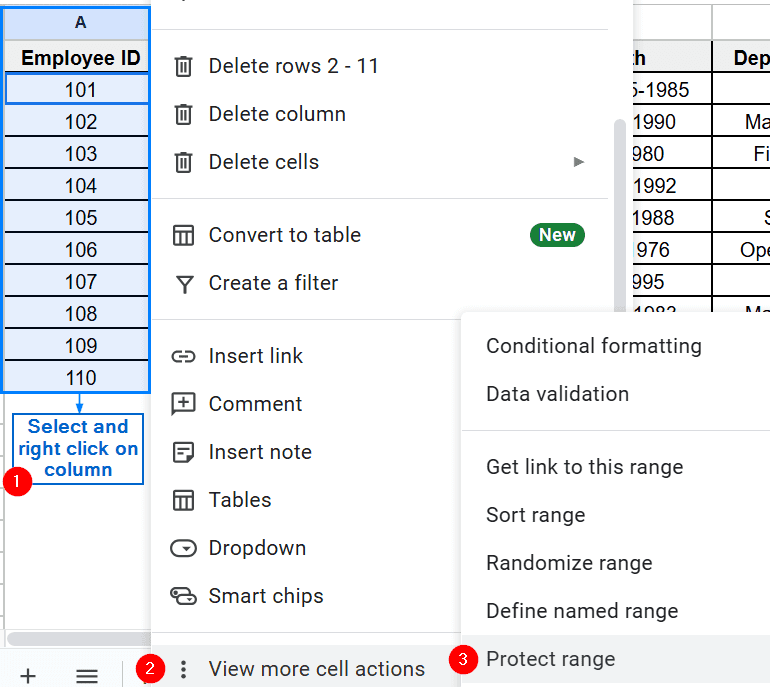
➤ Open your spreadsheet and highlight the column that you want to protect. In this example, we have selected column A.
➤ Right-click your mouse and go to View more cell actions >> Protect Range.
➤ Click on Set Permission.
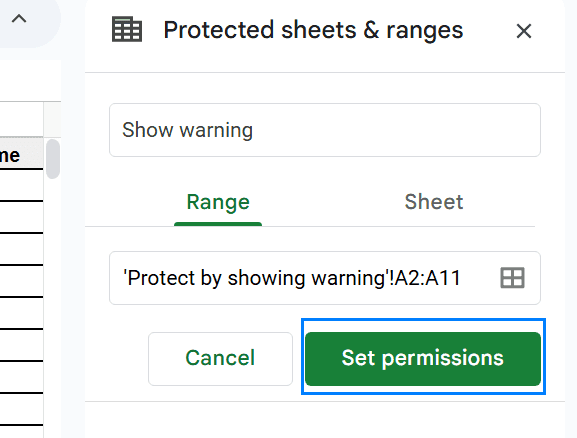
➤ From the Range editing permissions menu, check the Show a warning when editing this range box.
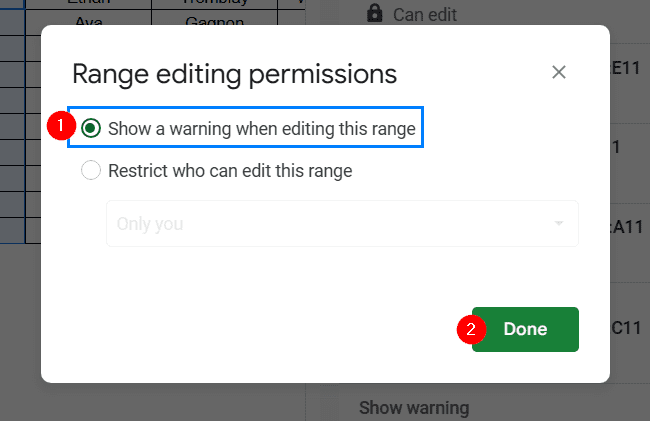
➤ Click on Done. Now, anyone trying to modify that particular column will get a warning before making any changes.
Frequently Asked Questions
Can Users View Locked Columns?
Locked columns can still be accessed or viewed by users. Protecting columns only restricts users from making changes to the selected columns.
How do I Unlock Protected Columns?
To unlock protected columns, go to Data >> Protected sheets and ranges. Select the column that you want unlocked and click on the trash icon to remove protection.
Concluding Words
Protecting important data is a must when you are collaborating with associates or dealing with highly sensitive information. Google Sheets lets you do that easily with its built-in tools. In this article, we have covered three easy and practical methods of protecting columns in Google Sheets, including protecting columns from the top toolbar, from the context menu and showing a warning when making changes. Feel free to try out each method and choose one that best suits your needs.