
An employee database in Excel is a structured table that stores essential information about employees, such as their names, job titles, departments, contact details, and joining dates. It helps HR teams, managers, and small business owners organize staff details in one place for easy access and management.
Creating an employee database is useful for tracking attendance, payroll, performance, and other HR activities. It also allows you to filter, sort, and analyze employee information without needing expensive HR software.
In this article, you’ll learn how to create an employee database in Excel step by step using different methods.
Here’s how to create an employee database in Excel:
➤ Open a new Excel workbook and create column headers such as Employee ID, Name, Department, Job Title, Email, Phone, and Joining Date.
➤ Enter employee information row by row under each column.
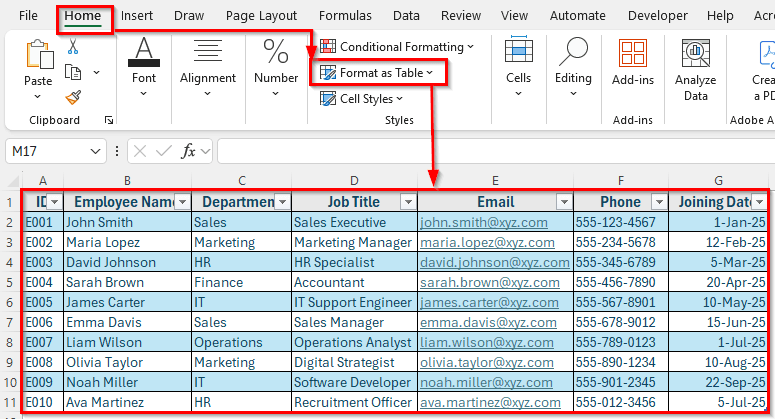
➤ Highlight your data range and go to the Home tab.
➤ Click Format as Table and choose a style.
➤ In the pop-up window, check the option My table has headers and click OK.
➤ Now your data is structured as a proper table, which makes it easier to filter, sort, and manage.
Steps to Create an Employee Database in Excel
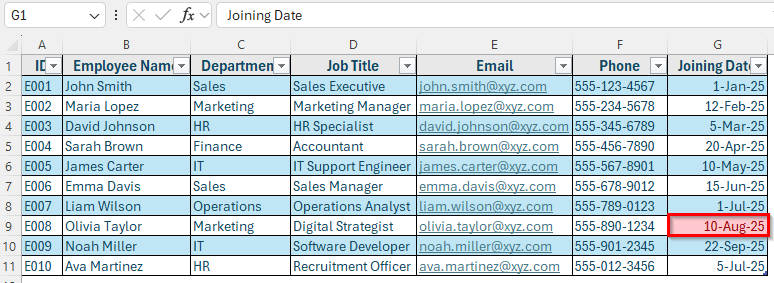
In the following dataset, we’ll create a simple employee database. Column A contains the Employee ID, Column B lists Employee Names, Column C shows Department, Column D contains Job Titles, Column E has Email Addresses, Column F records Phone Numbers, and Column G includes Joining Dates.

We’ll use this dataset to demonstrate how to build and manage an employee database in Excel.
Step 1: Create a Structured Table for Employee Data
The first step in building an employee database is to organize your data into a structured table. A well-structured table makes it easier to enter, manage, and analyze employee information.
It also allows you to use Excel’s powerful features like sorting, filtering, and formatting more effectively.
Here’s how to do it:
➤ Open your Employee dataset in Excel.
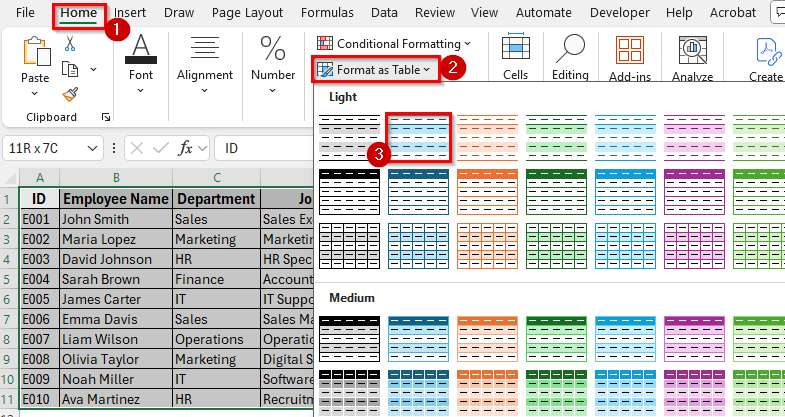
➤ Highlight your data range and go to the Home tab.
➤ Click Format as Table and choose a style.
➤ In the pop-up window, check the option My table has headers and click OK.
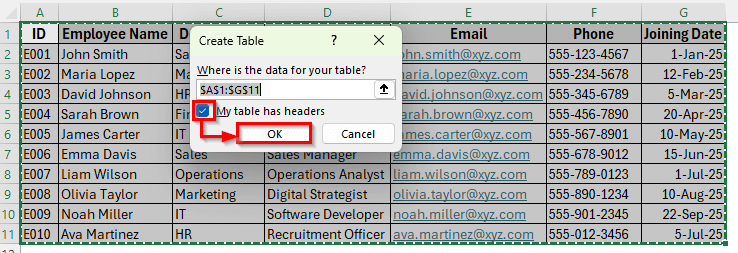
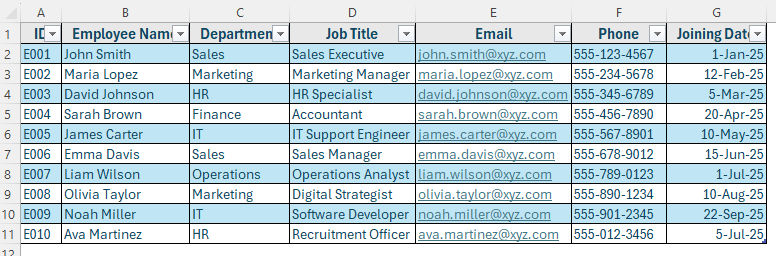
➤ Now your data is structured as a proper table, which makes it easier to filter, sort, and manage.
Step 2: Apply Data Validation for Consistency
To prevent errors and maintain consistent data entry, you can apply Data Validation to certain columns like Department or Job Title.
Here’s how to do it:
➤ Select the cells under the Department column.
➤ Go to the Data tab and click Data Validation from the Data Tools group.
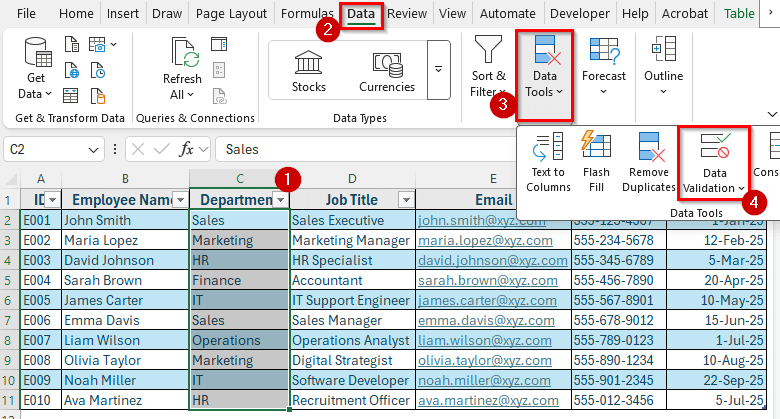
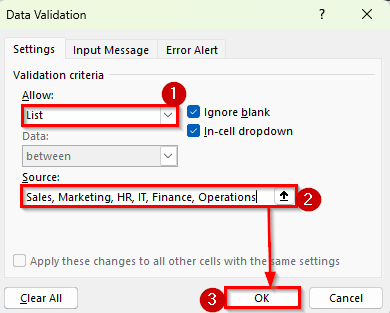
➤ In the Allow box, choose List.
➤ Click on Source icon and enter department names separated by commas like Sales, Marketing, HR, IT, Finance, Operations.
➤ Click OK.
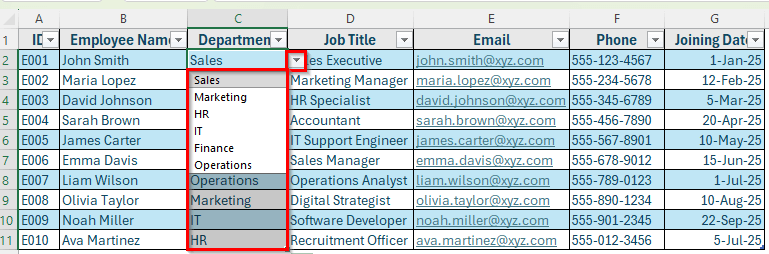
➤ Now, you’ll have a dropdown list to choose from, reducing typing errors and ensuring uniform data.
Step 3: Add Conditional Formatting to Highlight Important Info
Conditional Formatting helps you quickly identify specific records, such as employees who joined recently or belong to a certain department.
Here’s how to do it:
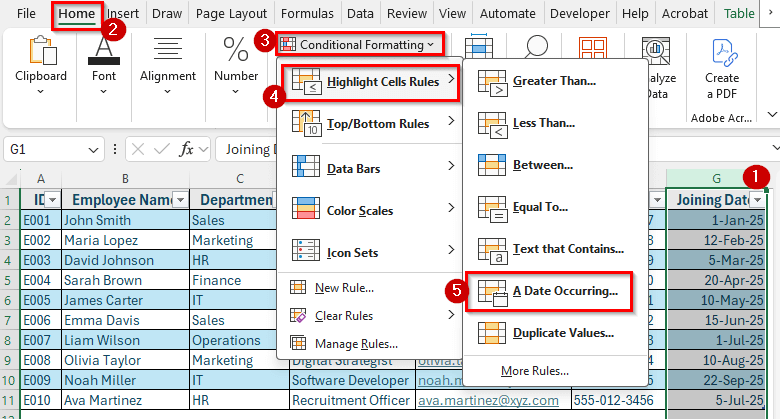
➤ Select the Joining Date column.
➤ Go to Home >> Conditional Formatting >> Highlight Cells Rules >> A Date Occurring.
➤ Choose Last months and click OK.
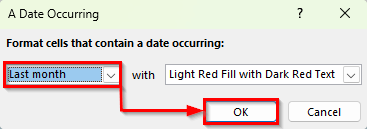
➤ Excel will highlight employees who joined last month, making them easy to spot.
Step 4: Freeze Panes to Keep Headers Visible
When dealing with long employee lists, Freeze Panes is useful to keep your column headers visible while scrolling.
Here’s how:
➤ Click on the row just below your headers. For example, click on Row 2.
➤ Go to View >> Freeze Panes >> Freeze Top Row.
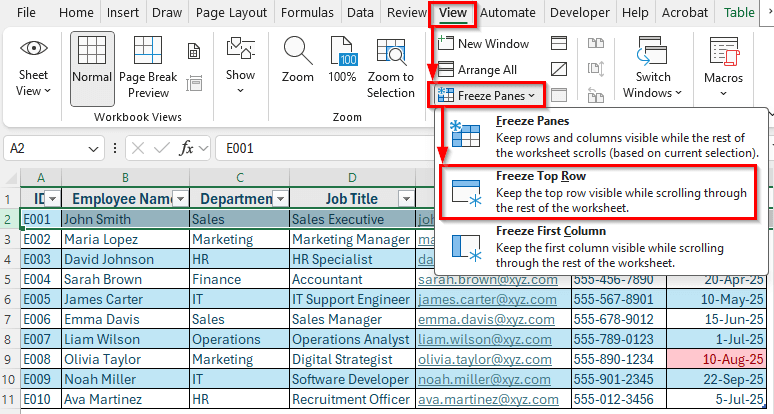
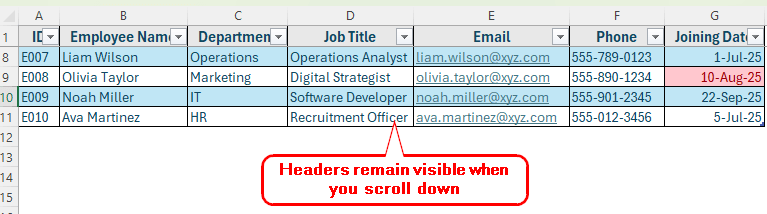
➤ Now your headers will remain visible even as you scroll through hundreds of employees.
Step 5: Use TODAY Function to Add Useful Insights
Once your employee database is ready, you can make it more valuable by using the TODAY function to calculate the total number of days an employee has worked since their joining date. This function allows you to calculate time-based information.
Here’s how to do it:
➤ Insert a new column in Column H and named it Days in Company. This column will display how many days each employee has worked so far.
➤ In cell H2, enter this formula:
=TODAY()-G2
➤ Press Enter. Excel will show the total days for all employees of the table. For example, if an employee joined on 01-Jan-2025, the result will show how many days have passed since that date, which is 272 days.

Step 6: Protect Your Employee Database
It’s important to secure your employee database so that sensitive information like contact details, job titles, and joining dates isn’t accidentally modified or deleted. Excel offers built-in protection features that allow you to lock your worksheet and control who can make changes.
Protecting your employee database ensures that only authorized users can edit the data, while others can still view it without altering anything.
Here’s how to do it:
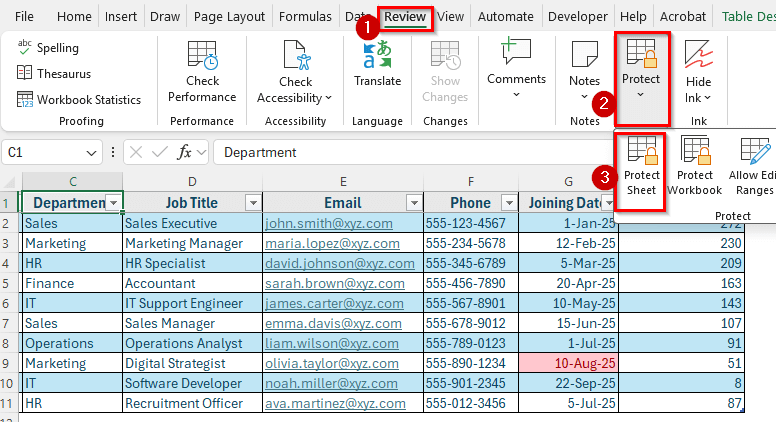
➤ Click on the sheet tab at the bottom of your workbook that contains the employee database.
➤ Go to the Review tab in the ribbon and select Protect Sheet.
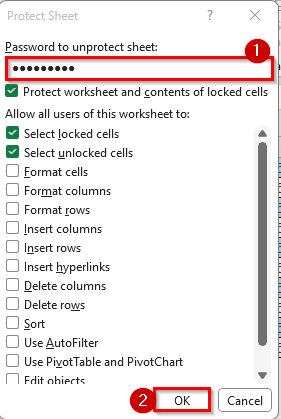
➤ In the Protect Sheet dialog box, enter a password and choose the actions you want to allow users to perform.
➤ Click OK.
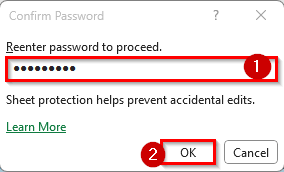
➤ If you added a password, Excel will ask you to confirm it before finalizing.
➤ Reenter the password and click Ok.
➤ Now, your employee database is protected. Users without the password will only be able to view the data but won’t be able to make any changes.
Frequently Asked Questions
How do I create an employee database in Excel?
Start by creating column headers such as Employee ID, Name, Department, Job Title, Email, Phone, and Joining Date. Enter employee details under each column and format the data as a table. You can then add validation, filters, formulas, and protection to make the database easier to manage and more secure.
Can I use Excel to manage employee records?
Yes, Excel is a great tool for storing and managing employee information. You can use it to track personal details, job roles, contact information, and joining dates. With features like filters, formulas, and conditional formatting, you can also analyze and organize data more effectively.
How do I create an employee database template in Excel?
Create a new worksheet and add essential columns such as Employee ID, Name, Department, Job Title, Email, Phone, and Joining Date. Format the range as a table and save the file as a template. This allows you to reuse the structure whenever you need to record new employee information.
How do I protect employee data in Excel?
Go to the Review tab and click Protect Sheet. Set a password to prevent others from editing the data without permission. You can also lock specific cells or columns that contain sensitive information to make sure only certain parts of the sheet are editable.
Wrapping Up
Creating an employee database in Excel is a simple and effective way to organize and manage staff information. By setting up a structured table, adding validation, applying filters, and using formulas, you can turn a basic sheet into a powerful HR tool.
It helps you keep track of employee details, calculate useful insights, and protect sensitive data in one place. Excel also makes it easy to update and search for information as your team grows.
With these steps, you can build a professional employee database that saves time and keeps all important records organized and ready to use.