When working with data, the CSV (Comma Separated Values) format is essential for transferring information between different software programs. However, Excel may save CSV files using a semicolon (;) instead of a comma (,) as the delimiter. This can cause errors when importing the data into other systems. In this article, we will guide you through three effective methods to ensure your Excel CSV files are saved with commas: changing Windows Regional Settings, using a simple VBA code, and using a quick Find and Replace tool.
To make Excel save CSV files with commas instead of semicolons, here is one simple solution by using the Windows Regional Settings feature.
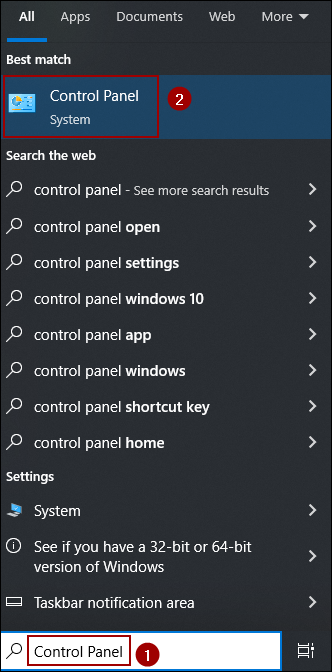
➤ Open the Windows search bar and type Control Panel.
➤ From the Control Panel, click Clock and Region > Region > Additional Settings.
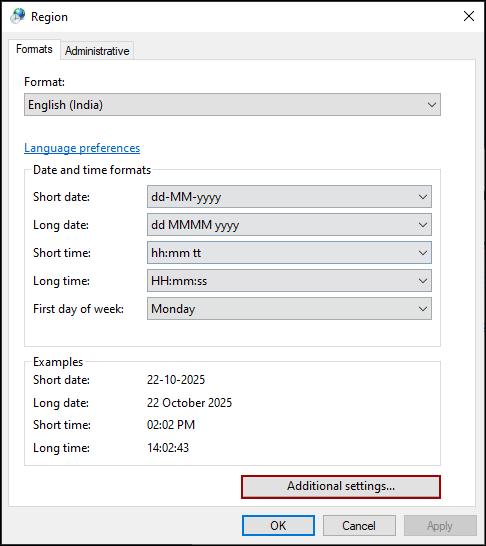
➤ Look for the List separator field and change the existing character to a comma (,).
➤ Click Apply and then OK to save the changes, and now if we save the file as CSV, Excel will save the file with commas.

Changing Windows Regional Settings to Save CSV Files with Commas
The permanent solution is to change the List separator setting in the Windows Regional Settings. This setting directly dictates the delimiter Excel uses when saving a CSV file.
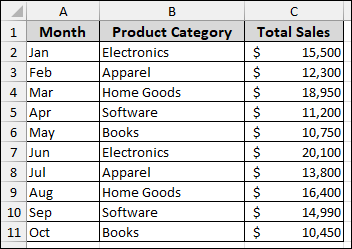
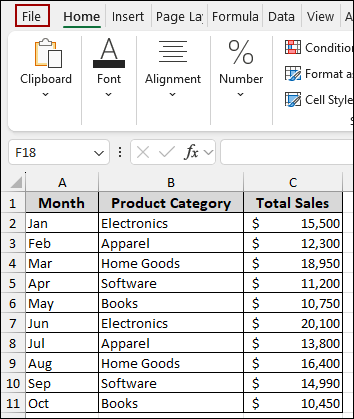
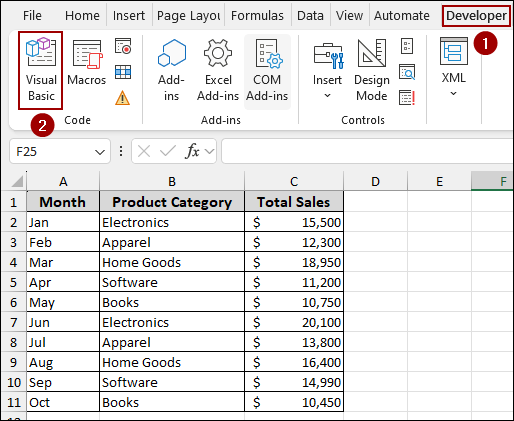
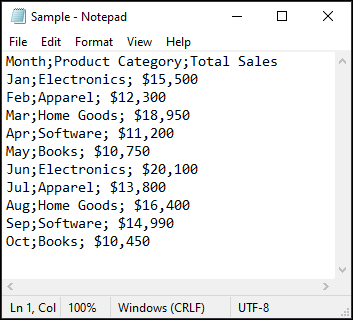
Suppose we have a sample sales data of some different categories of products, month-wise. Now, we will use the Windows Regional Settings feature to make Excel save CSV files with commas instead of semicolons.
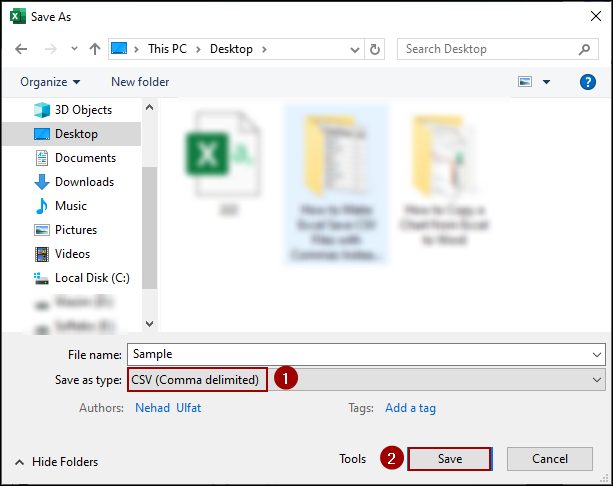
First, let’s examine the default behavior. For this, we will save the Excel sheet as a CSV (Comma delimited) file.
➤ Press Ctrl + S , name the file and select CSV (Comma delimited) as the file type, and click Save.
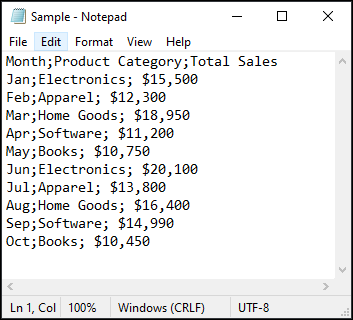
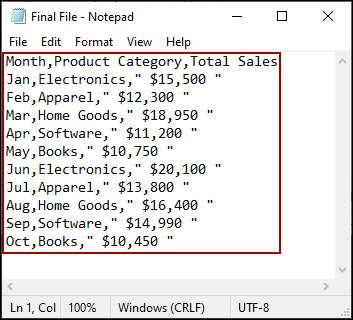
If your regional settings use a semicolon as the list separator, opening the saved CSV file in a text editor like Notepad will show that the data is separated by semicolons, not commas.
To save a CSV file with a comma instead of a semicolon.
➤ Open the Windows search bar and type Control Panel.
➤ Click on the Control Panel search result.
➤ In the Control Panel, click on Clock and Region.
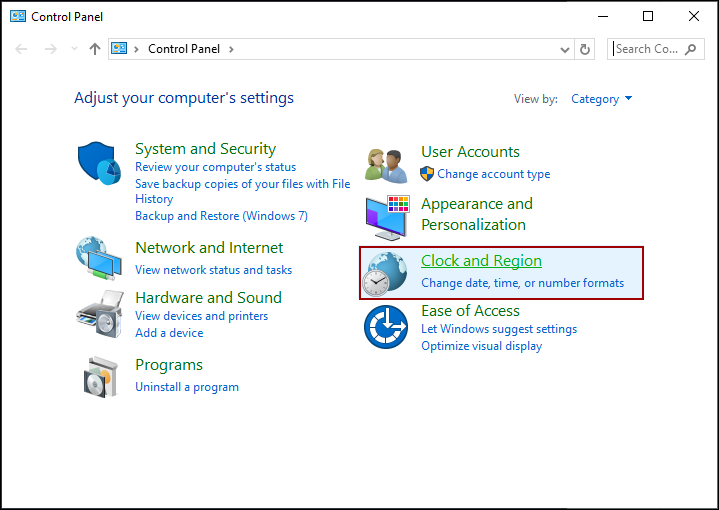
➤ Next, click on Region to open the Region dialog box.
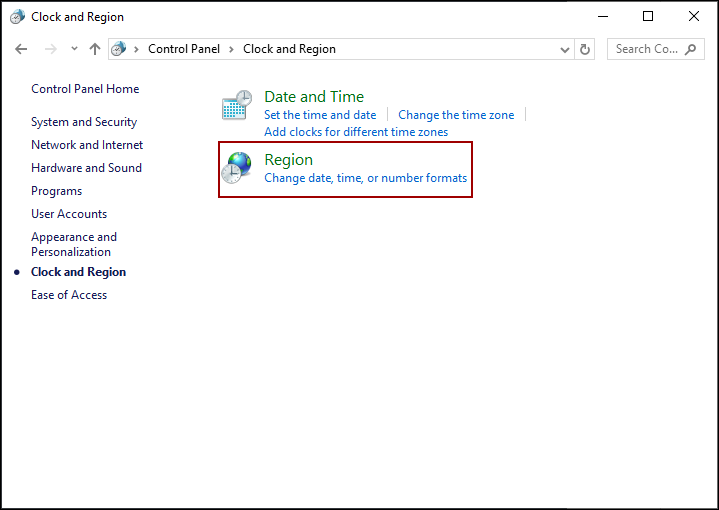
➤ In the Region dialog box, make sure you are on the Formats tab, and then click Additional settings.
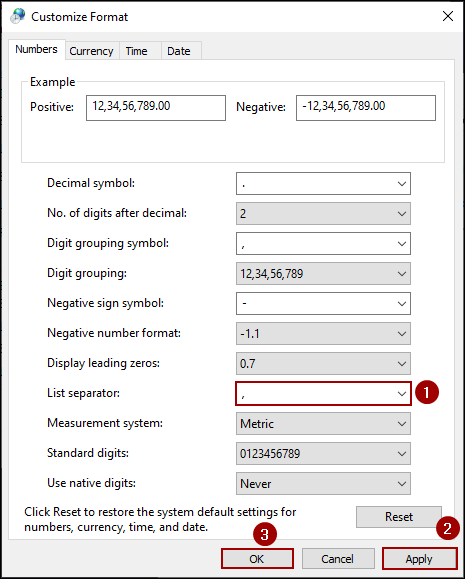
This opens the Customize Format dialog box.
➤ Look for the List separator field and change the existing character (which is often a semicolon) to a comma (,).
➤ Click Apply and then OK to save the changes.
Now, coming back to the Excel file, let’s save it again as a CSV (Comma delimited) file.
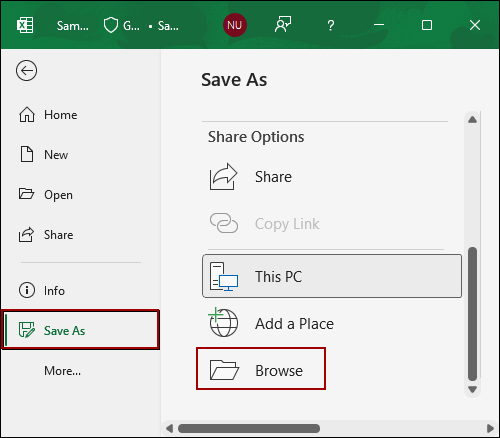
➤ Go to the File tab.
➤ Select Save As and click Browse.
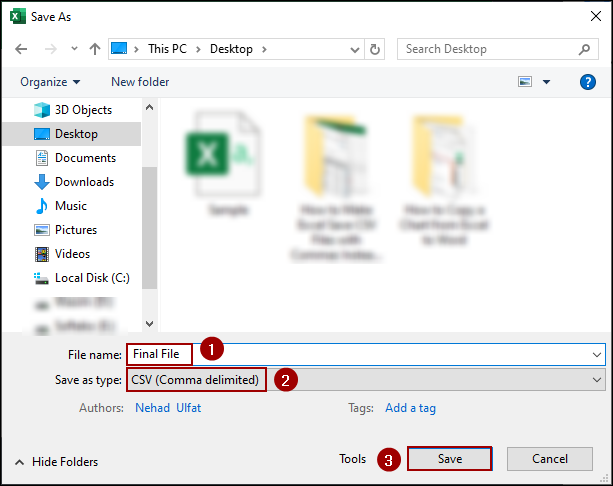
➤ Write down the file name, select CSV (Comma delimited) as the file type, and click Save.
Finally, after opening the file in Notepad, you will see that the data is correctly delimited by commas.
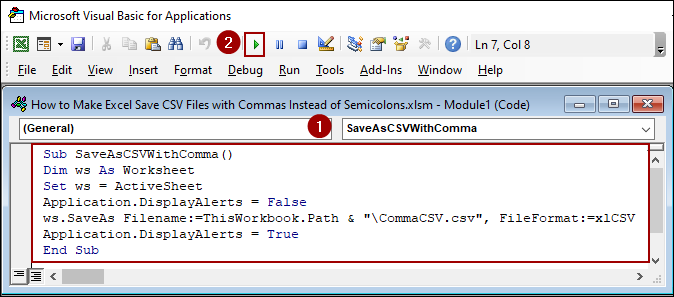
Applying VBA Code to Make Excel Save CSV Files with Commas Instead of Semicolons
If you can’t change the Windows settings or only need a comma delimiter for specific files, you can use a small VBA macro. This code overrides the regional settings and saves the active worksheet using the xlCSV file format, which forces a comma delimiter.
➤ Go to the Developer tab and click on Visual Basic.
➤ Open a new module, insert the following code, and hit Run.
Sub SaveAsCSVWithComma()
Dim ws As Worksheet
Set ws = ActiveSheet
Application.DisplayAlerts = False
ws.SaveAs Filename:=ThisWorkbook.Path & "\CommaCSV.csv", FileFormat:=xlCSV
Application.DisplayAlerts = True
End Sub
The macro will save the active sheet as a CSV file named CommaCSV.csv in the same folder as your Excel workbook.
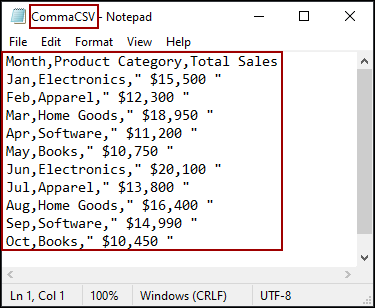
Finally, opening the file in Notepad, you will see the data correctly delimited by commas.
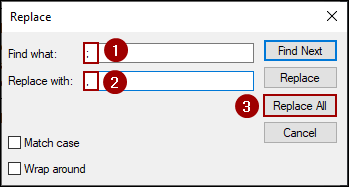
Using Find and Replace Feature to Replace Semiclons with Commas
A simple, manual solution that requires no settings changes is to simply use the Find and Replace feature in Notepad after saving the file with the default semicolon delimiter.
Suppose we have a CSV file with a semicolon delimiter. Now, we will use the Find and Replace feature to change the delimiter to a comma.
➤ Click the Edit menu on the Notepad ribbon.
➤ Select Replace.

From the Replace dialog box:
➤ In the Find what box, enter a semicolon (;).
➤ In the Replace with box, enter a comma (,).
➤ Click Replace All.
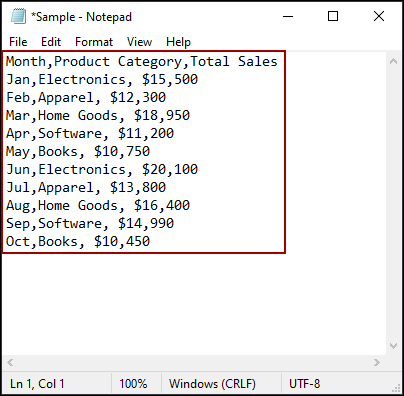
The semicolons will instantly be replaced by commas. The data now appears with the correct comma delimiter. Save the Notepad file to finalize the change.
Frequently Asked Questions
I changed the setting, but Excel still uses semicolons. Why?
Make sure you have closed and reopened Excel. You can also save the file as CSV (Comma delimited) or CSV UTF-8. Sometimes Excel caches the old separator until you restart it.
Why does my CSV look correct in Notepad but open wrong in Excel?
Excel parses the file again using your system separator. That’s why it may split columns incorrectly even though the raw CSV is correct.
Why does Excel switch back to semicolons after I reboot my PC?
If your region format automatically resets (e.g., corporate device or IT-managed PC), Windows may reapply default regional settings at startup. You need administrative permission to keep the change permanently.
Concluding Words
Above, we have explored several ways to make Excel save CSV file with commas instead of semicolons. Changing the Windows Regional Settings offers a permanent fix, while the VBA code provides a quick solution for overriding local settings. The Find and Replace method also provides a simple solution even after saving the file. If you have any questions, please don’t hesitate to share them in the comments section below.