
Ensuring data accuracy in Excel is crucial when working with large datasets or reports. Sometimes, a single validation rule isn’t enough and you might want to check for multiple conditions at once, such as restricting text length, allowing only specific words, or limiting dates within a certain range. That’s where combining multiple data validation rules in one cell becomes highly useful.
In this article, you’ll learn several effective ways to apply multiple data validation rules in a single Excel cell starting from custom formulas with the AND and OR functions to setting automated criterias using VBA. Let’s get started.
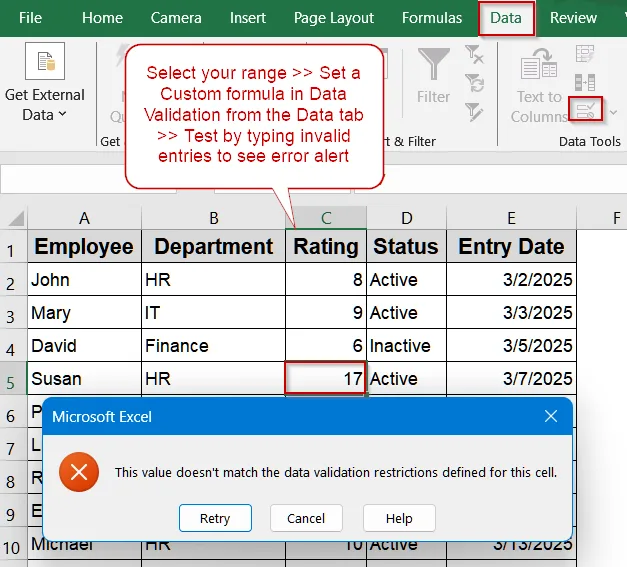
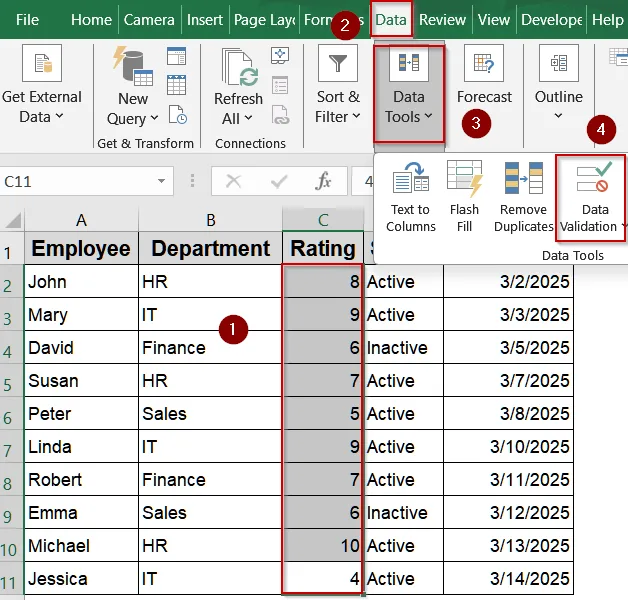
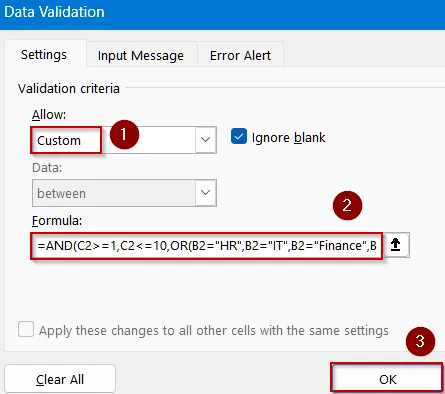
➤ Go to Data >> Data Validation >> Set “Allow” to Custom.
➤ In the formula box, enter:
=AND(C2>=1,C2<=10,OR(B2=”HR”,B2=”IT”,B2=”Finance”,B2=”Sales”))
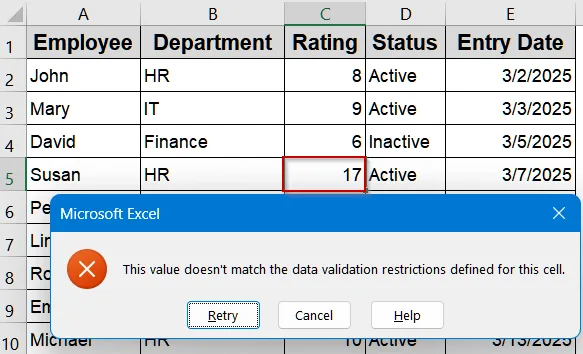
This ensures the rating (column C) is between 1 and 10 and the department name in column B is valid.
➤ Click OK, then test by typing values outside the range or incorrect department names to see the error alert.
Combine Multiple Validation Rules Using AND and OR Functions
In many Excel sheets, data accuracy requires enforcing more than one rule at a time. For instance, you might need a numeric rating to stay within a specific range while ensuring the department name entered is valid. You can easily combine rules using a custom formula with AND and OR functions.
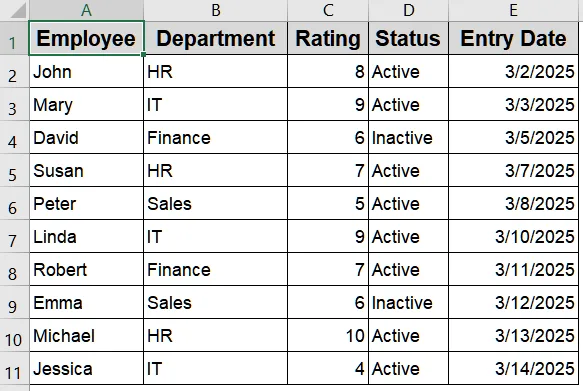
We’ll use the following dataset for demonstration:
=AND(C2>=1,C2<=10,OR(B2="HR",B2="IT",B2="Finance",B2="Sales"))This ensures the rating (column C) is between 1 and 10 and the department name in column B is valid.
Allow Text or Date Range with a Custom Formula
There are cases when you need to allow both text and date entries in the same cell, for instance, when tracking employee approvals or scheduling review dates. This method lets users enter either a specific word (like “Approved”) or a valid date within a certain month.
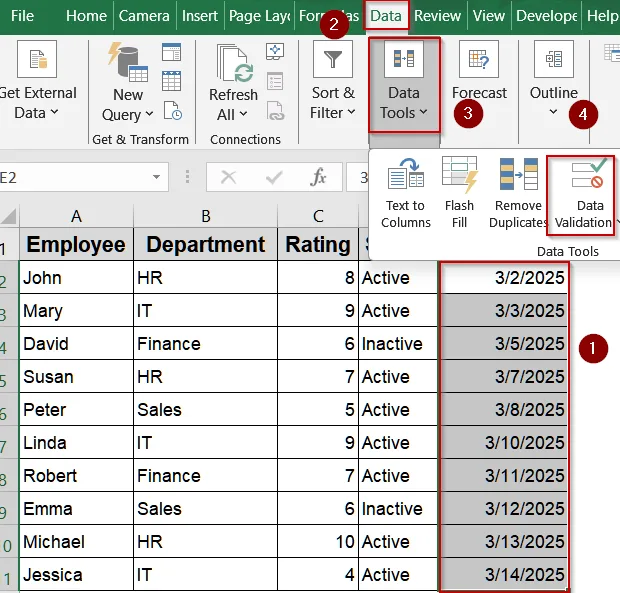
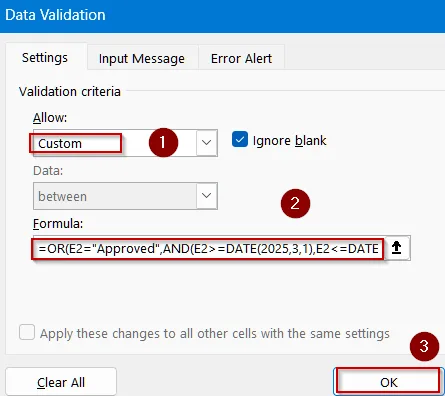
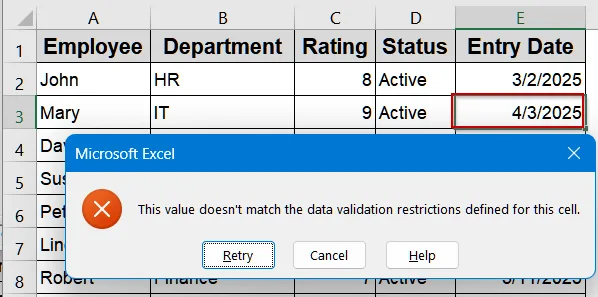
=OR(E2="Approved",AND(E2>=DATE(2025,3,1),E2<=DATE(2025,3,31)))This allows the cell to contain the word “Approved” or a date between March 1 and March 31, 2025.
Restrict Entry Based on Starting Characters and Length
If you need all codes or identifiers to start with a fixed prefix and have a defined length, this method ensures standard formatting. You can use the LEFT and LEN functions to enforce both conditions simultaneously.
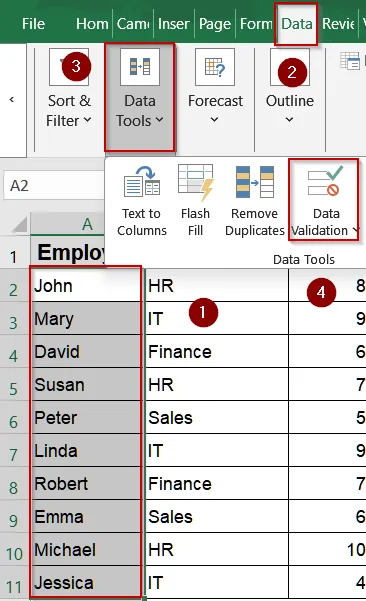
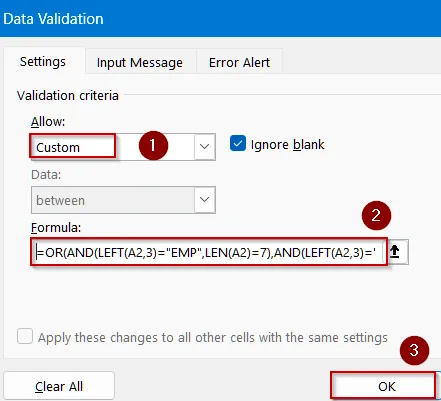
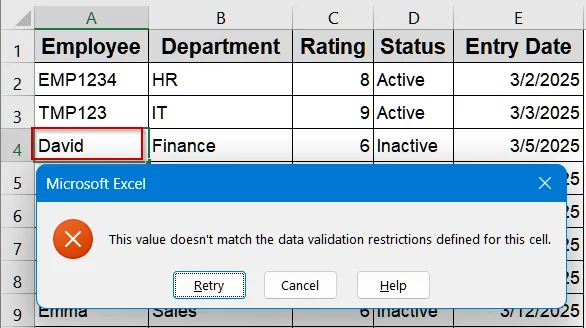
=OR(AND(LEFT(A2,3)="EMP",LEN(A2)=7),AND(LEFT(A2,3)="TMP",LEN(A2)=6))This allows entries that start with “EMP” followed by 4 digits or “TMP” followed by 3 digits.
Automate Combined Validation Using VBA Code
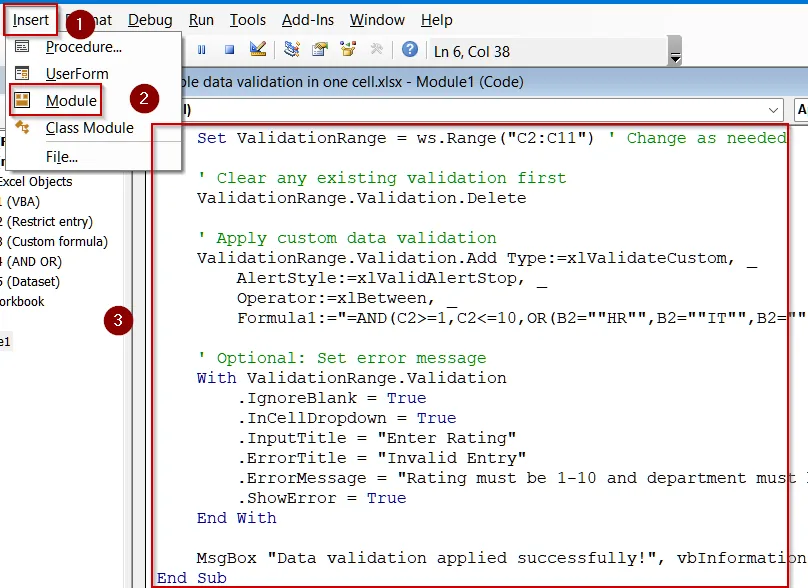
In Excel, it’s often necessary to enforce multiple conditions at once, such as ensuring a numeric rating is within a specific range while the corresponding department name is valid. Using VBA, you can apply these combined rules automatically across a range, saving time, preventing errors, and maintaining consistent data entry without manual formula setup.
Sub ApplyRatingAndDepartmentValidation()
    Dim ws As Worksheet
    Dim ValidationRange As Range
    ' Set your worksheet and the range to apply validation
    Set ws = ThisWorkbook.Sheets("Sheet1")  ' Change to your sheet name
    Set ValidationRange = ws.Range("C2:C11") ' Change as needed
    ' Clear any existing validation first
    ValidationRange.Validation.Delete
    ' Apply custom data validation
    ValidationRange.Validation.Add Type:=xlValidateCustom, _
        AlertStyle:=xlValidAlertStop, _
        Operator:=xlBetween, _
        Formula1:="=AND(C2>=1,C2<=10,OR(B2=""HR"",B2=""IT"",B2=""Finance"",B2=""Sales""))"
    ' Optional: Set error message
    With ValidationRange.Validation
        .IgnoreBlank = True
        .InCellDropdown = True
        .InputTitle = "Enter Rating"
        .ErrorTitle = "Invalid Entry"
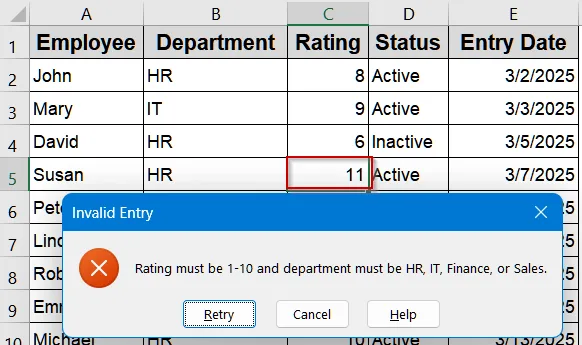
        .ErrorMessage = "Rating must be 1-10 and department must be HR, IT, Finance, or Sales."
        .ShowError = True
    End With
    MsgBox "Data validation applied successfully!", vbInformation
End Sub
This ensures the rating (column C) is between 1 and 10 and the department name in column B is valid.
Downloadable Resources
Get our practice workbook or necessary files that we have worked with to prepare this article.
Multiple Data Validation in One Cell.xlsx
Practice Workbook · Excel (.xlsx)
Frequently Asked Questions
What is the purpose of applying multiple data validation rules in one cell?
Applying multiple data validation rules helps control data entry by enforcing several restrictions at once, such as limiting text length, restricting numeric ranges, and allowing only specific text or date formats to ensure consistent and accurate information.
How can I combine two or more rules in Excel Data Validation?
You can combine rules using a Custom formula with logical functions like AND or OR. For example, =AND(A2>0,LEN(A2)<10) ensures the value is positive and under ten characters, maintaining proper accuracy and input control.
Can I create a drop-down list that allows more than one selection?
Yes, but Excel doesn’t support that by default. You can achieve this through VBA by adding a short macro that lets users select multiple items from one drop-down list, separated by commas automatically.
Why is my Data Validation formula not working correctly?
Your validation formula might fail if it references incorrect cells or doesn’t return TRUE/FALSE. Also, ensure the active cell is properly referenced, and that the correct range is selected when setting up the validation rule.
Will my Data Validation still work if I protect the Excel worksheet?
Yes, but you must adjust the protection settings. When protecting the worksheet, enable “Edit objects” and “Edit scenarios” so users can still interact with or change cells containing Data Validation or drop-down lists.
Wrapping Up
In this tutorial, you learned how to apply multiple data validation rules in one Excel cell using custom formulas and VBA. These methods let you enforce complex input conditions, ensure data accuracy, and even create flexible multi-select lists for advanced use cases. Feel free to download the practice file and share your feedback.