If you work with large Excel datasets, it can be overwhelming to manage everything on a single sheet. A common thing we do in this situation is to split the Excel sheet into multiple smaller sheets based on the number of rows. This technique helps in organizing data better because on a smaller data sheet it’s easier to work on.
To split excel sheet into multiple sheets based on rows, follow these steps:
➤ Define how many rows or which criteria you want to split by (e.g., every 100 rows, by region, etc.).
➤ Use Excel formulas, macros to generate separate sheets.
This article will walk you through different methods like VBA Macro (row count-based) and Manual copy-paste to split excel sheets into multiple sheets based on rows.
Implementing VBA Macro to Split Excel Sheet into Multiple Sheets Based On Rows
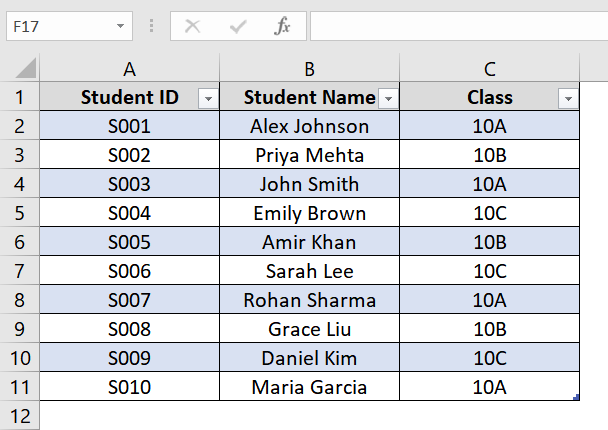
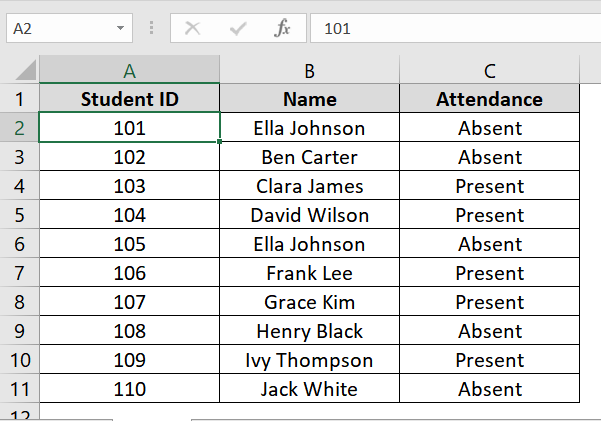
This method will use a VBA macro to automatically divide a large dataset into smaller worksheets. Here the splitted worksheet will contain a fixed number of rows. It is good if you are handling large data sets (e.g., over 100 rows) and want to segment them for reporting or printing purposes. This method won’t need to sort or group data. Here we have a situation where we have 11 rows. We want to divide these dataset into multiple worksheets based on row count so that we can easily work with them in future.
Steps:
➤ Open your Excel workbook. If your dataset isn’t in table format you can add table by pressing the shortcut Ctrl + T
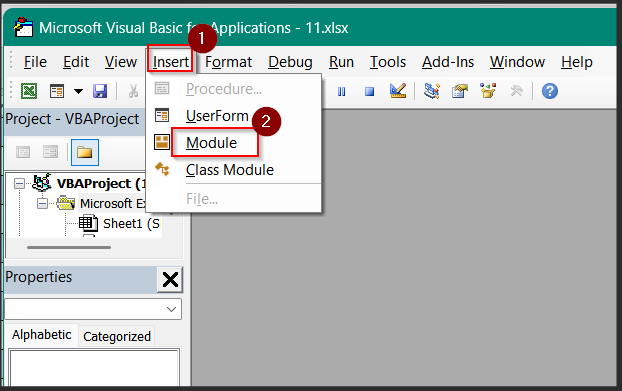
➤ Press ALT + F11 to open the VBA Editor (Microsoft Visual Basic for Applications).
➤ In the VBA editor, click Insert > Module to add a new code module.
➤ Paste the following VBA code into the module:
Sub SplitSheetByRows()
Dim SourceSheet As Worksheet
Dim TargetSheet As Worksheet
Dim RowCount As Integer
Dim LastRow As Long
Dim RowsPerSheet As Integer
Dim i As Long
Dim SheetIndex As Integer
' Settings
Set SourceSheet = ActiveSheet
RowsPerSheet = 3 ' Change this value as needed
LastRow = SourceSheet.Cells(SourceSheet.Rows.Count, "A").End(xlUp).Row
SheetIndex = 1
For i = 2 To LastRow Step RowsPerSheet
Set TargetSheet = Worksheets.Add(After:=Worksheets(Worksheets.Count))
TargetSheet.Name = "Split_" & SheetIndex
SourceSheet.Rows(1).Copy Destination:=TargetSheet.Rows(1)
SourceSheet.Rows(i & ":" & Application.Min(i + RowsPerSheet - 1, LastRow)).Copy Destination:=TargetSheet.Rows(2)
SheetIndex = SheetIndex + 1
Next i
End Sub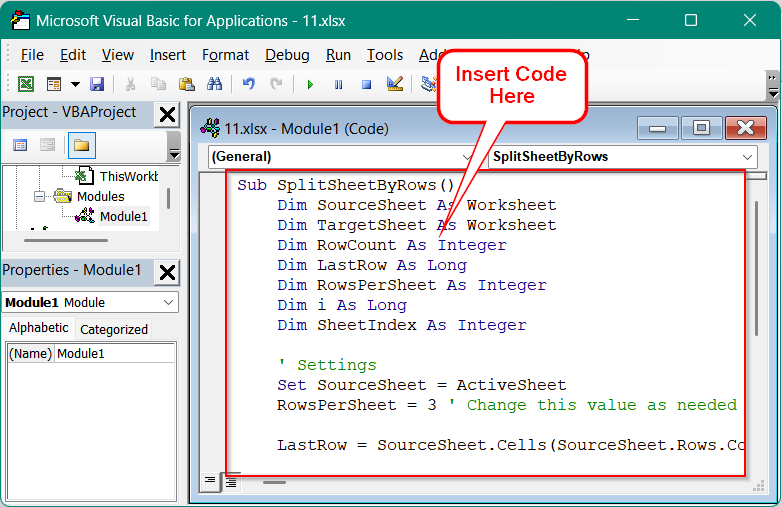
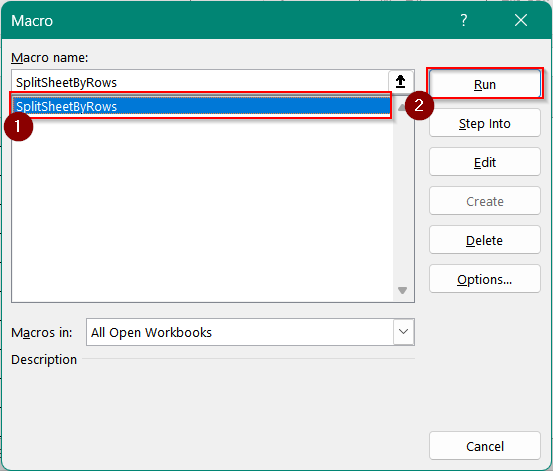
➤ Close the VBA editor, return to Excel, then press ALT + F8 , select SplitSheetByRows, and click Run.
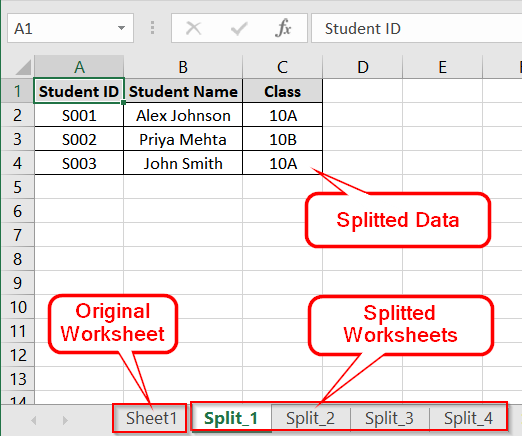
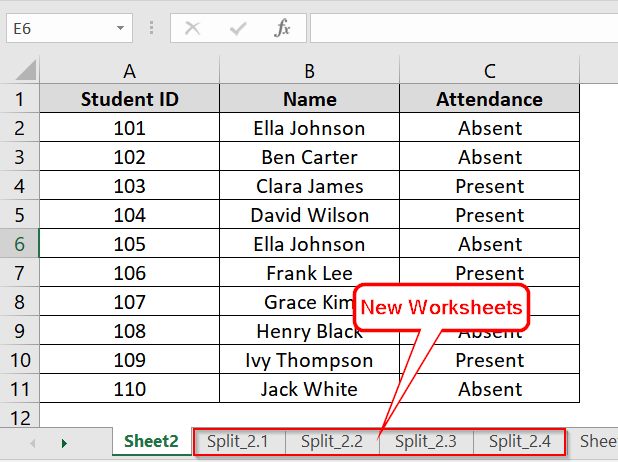
➤ Your workbook will now have new sheets named Split_1, Split_2, etc., each containing 3 rows of data from the original sheet plus the header row.

Note:
➧ You can change RowsPerSheet = 3 in the code to any number you want (e.g., 100 for large datasets).
➧ The code assumes the header is in row 1 and data starts from row 2.
➧ This macro creates new sheets within the same workbook.
Using Manual Copy and Paste to Split Excel Sheet by Rows
This method is the simplest way to divide a worksheet into multiple sheets by row count for small datasets. It is useful and handy when we are dealing with fewer than 50–100 rows and you want control over the organization. No formulas or coding required.
Steps:
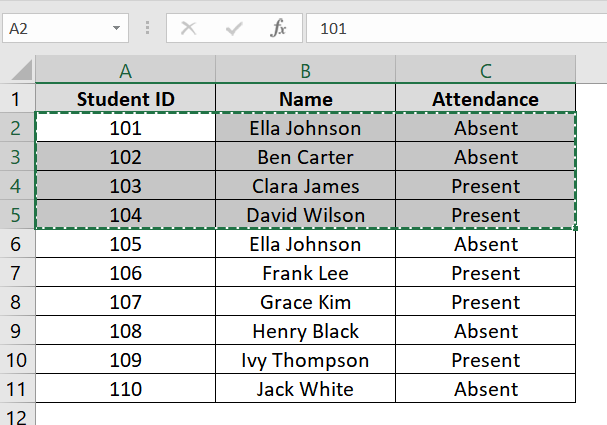
➤ Open your Excel workbook containing your data. For this example, assume the data starts from cell A1 with headers in Row 1 and goes down to Row 11 across Columns A to C.
➤ Create a new sheet by pressing Shift + F11 . Rename it (e.g., Split_2.1). Also create a few more worksheets to speed up your work process. I have created 4 new worksheets for this.
➤ Determine how many rows you want per sheet. For this example, we’ll use 4 rows per new sheet.
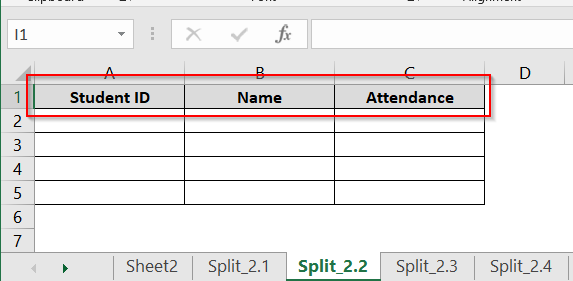
➤ In the 4 new sheets, paste the headers first by copying A1:C1 from the original sheet and pasting it into A1 of the new sheet.
➤ Select the rows for the first sheet (e.g., A2:C5), right-click, and choose Copy (Ctrl+C)
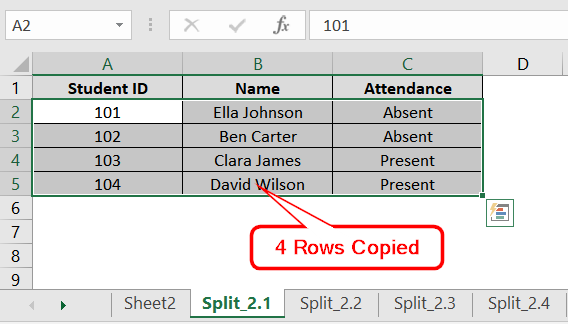
➤ Paste (Ctrl+V) the copied rows into the new sheet starting at cell A2.
➤ Repeat this process for the next group of rows (e.g., A6:C9, then A10:C11).
Note:
➧ You must copy the header row (Row 1) into each new sheet for clarity.
➧ This method is not recommended for very large datasets due to manual labor and risk of error.
Applying Pivot Table with “Show Report Filter Pages”
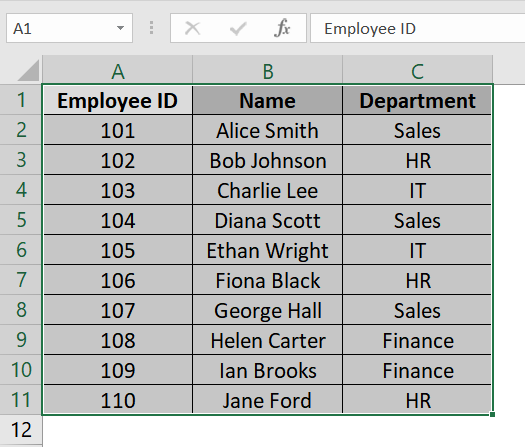
This method uses Excel’s Pivot Table feature along with “Show Report Filter Pages” to split a dataset into separate sheets. It does so based on a category (like department, region, product, etc.). It’s useful when you have grouped data and want to automatically create one sheet per group. In this example, we’ll use a table of employee data and split it by the Department column.
Steps:
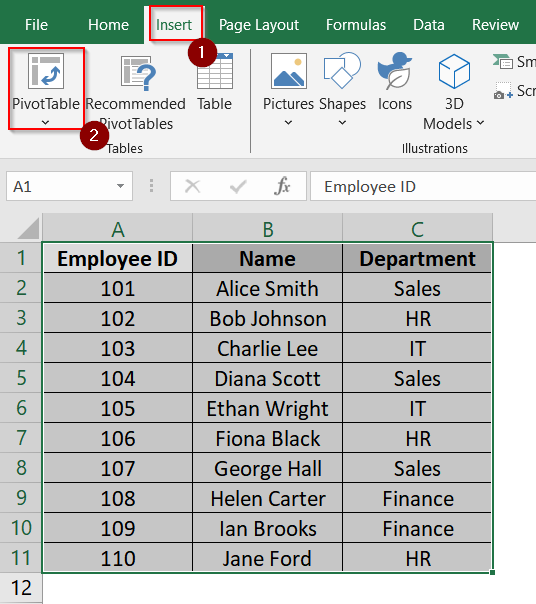
➤ Select the full data range (e.g., A1:C11 in your sheet). Make sure the first row contains headers.
➤ Go to the Insert tab on the ribbon and click PivotTable.
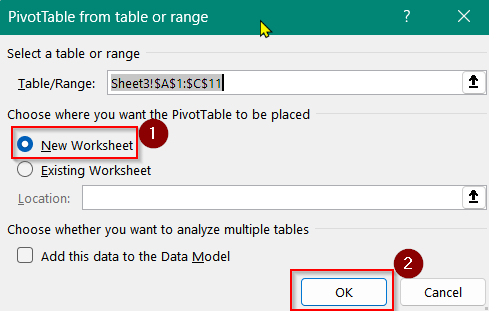
➤ In the dialog box that appears, choose to place the Pivot Table on a New Worksheet and click OK.
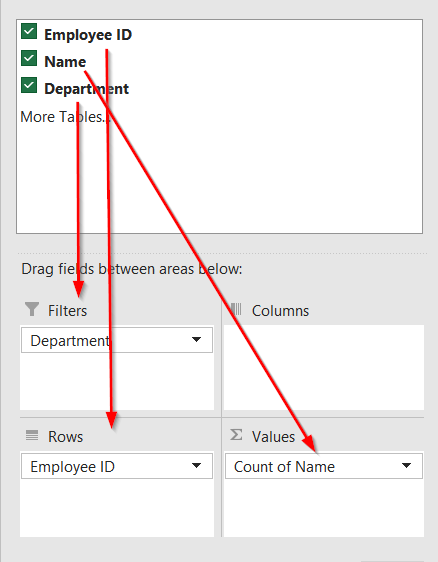
➤ In the PivotTable Fields pane, drag “Department” to the Filter area.
➤ Then drag “Employee ID” to the Rows area and
➤ “Name” to the Values area (it will default to “Count of Name“; remove it if not needed or leave as is for employee count).
➤ Click anywhere inside the Pivot Table. Then go to the PivotTable Analyze tab on the ribbon, and choose PivotTable> Options > Show Report Filter Pages.
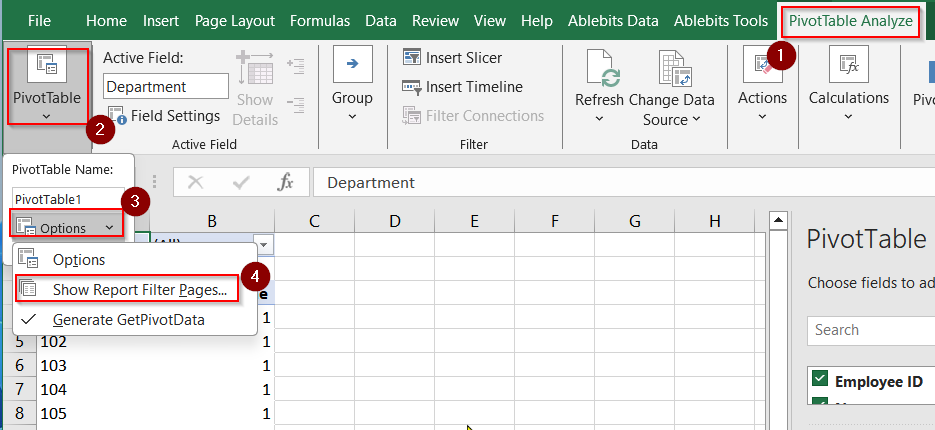
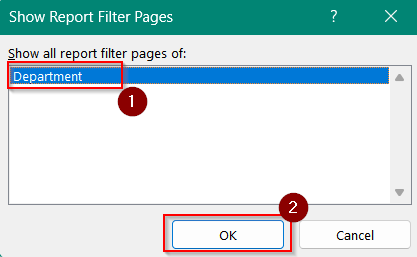
➤ In the popup window, select the field you used in the Filter area. In this case, “Department”
➤ Click OK.
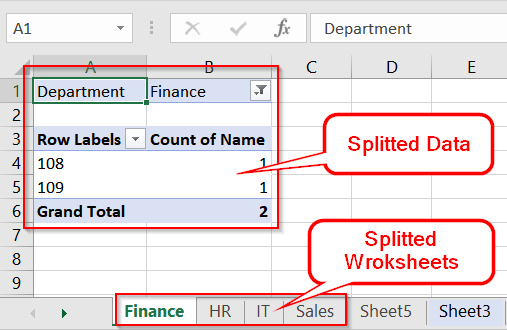
➤ Excel will now automatically create separate worksheets for each unique value in the “Department” column, each containing its own filtered Pivot Table.
Note:
➧ Make sure your dataset has no blank rows or missing headers before creating the Pivot Table.
➧ Ideal for datasets with 10–1000+ rows where group-wise reports are needed.
Frequently Asked Questions (FAQs)
How do you split Excel rows into multiple sheets?
Use VBA or manually Copy Paste to break rows into separate sheets based on row number or conditions.
How to split Excel files into multiple files based on the number of rows?
Use a VBA macro that loops through the data, copies batches of rows, and saves each as a new workbook.
How do I break an Excel sheet into multiple pages?
Use the Page Break Preview under the View tab and drag page breaks manually or set them via Page Layout.
How to create multiple sheets in Excel automatically?
Run a VBA macro. It supports dynamic sheet creation.
Concluding Words
As you might already know, splitting Excel sheets into multiple sheets based on rows is a time saving trick. It is particularly very necessary for large datasets. I have described two methods. One is a VBA macro and the other is manually copy-paste. Both of these methods are native to Excel and don’t require any third party tools. Although there are many third party tools that can also perform this, I would prefer an Excel native tool for better security.