Radio buttons, also known as option buttons, are a powerful tool in Excel for creating interactive forms and data input systems. They allow users to select only one option from a set, making them ideal for surveys, status selectors, and decision-making interfaces.
In this article, you will learn how to add radio buttons in Excel step by step using both Form Controls and ActiveX Controls. We will also cover how to insert multiple buttons and group them correctly.
Steps to insert a radio button and link it to a cell in Excel:
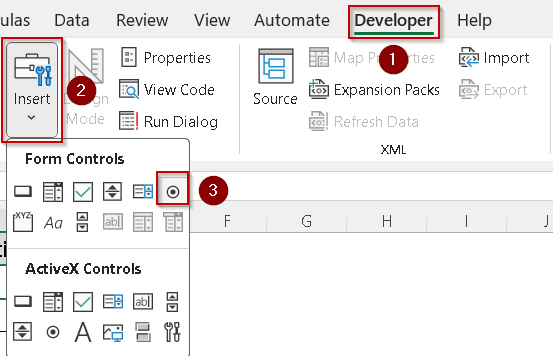
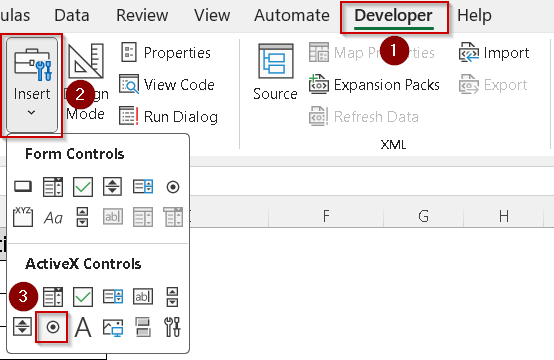
➤ Go to your worksheet, open the Developer tab, click Insert, then under Form Controls, choose Option Button.
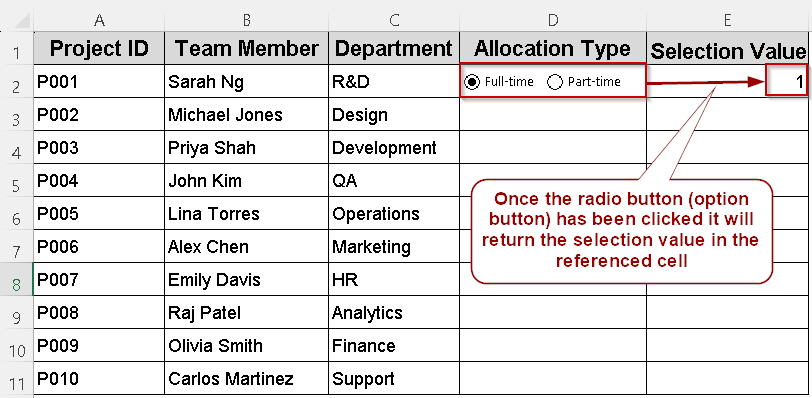
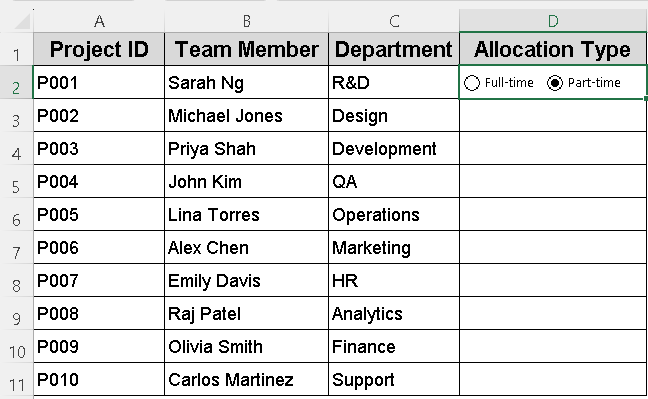
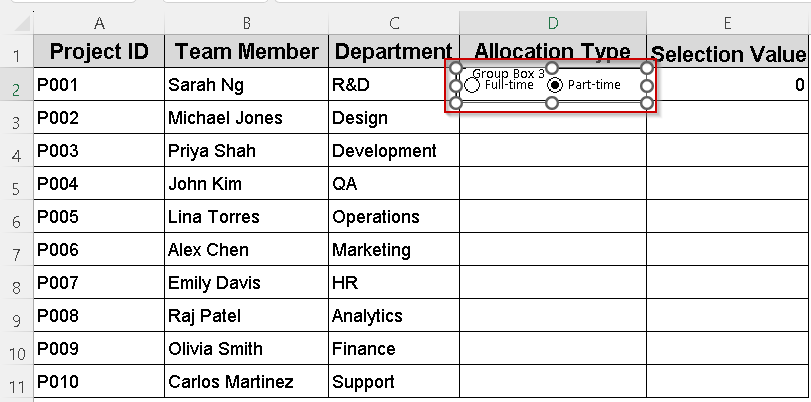
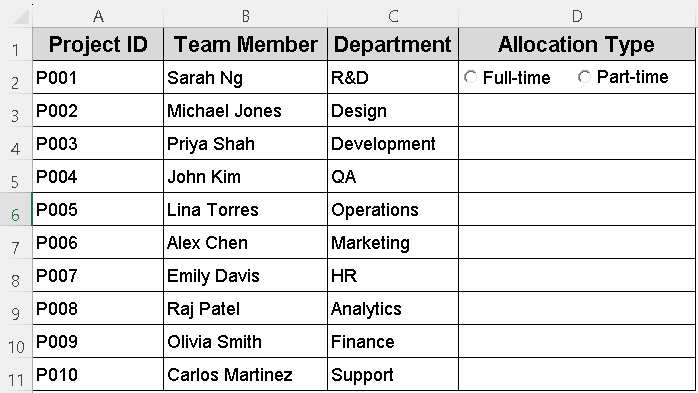
➤ Click to place the first radio button in the worksheet (e.g., in cell D2 next to Project ID P001).
➤ Right-click the radio button, select Edit Text, and change the caption to Full-Time.
➤ Repeat the process to add a second button nearby. Change its caption to Part-Time.
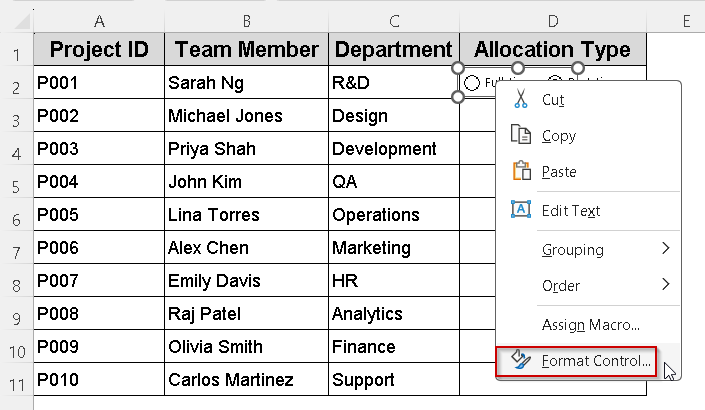
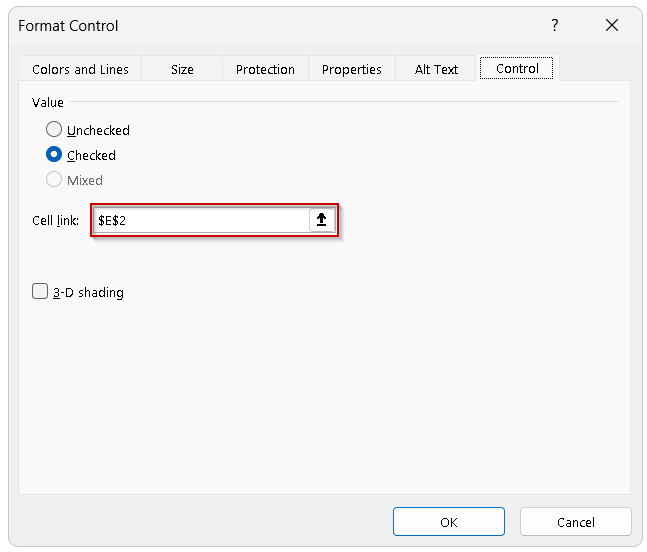
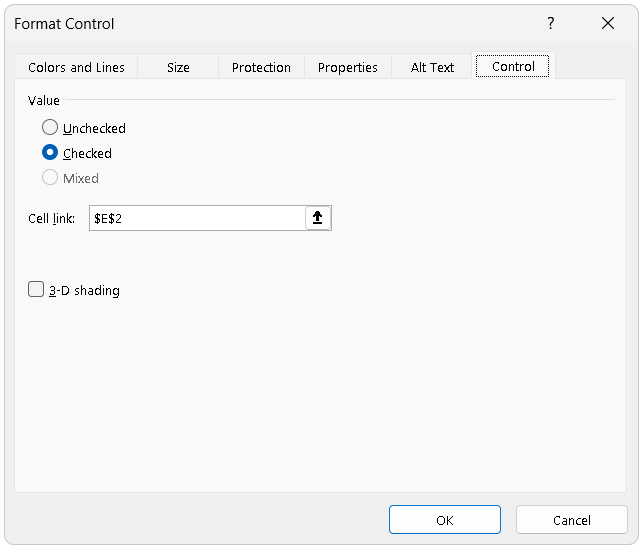
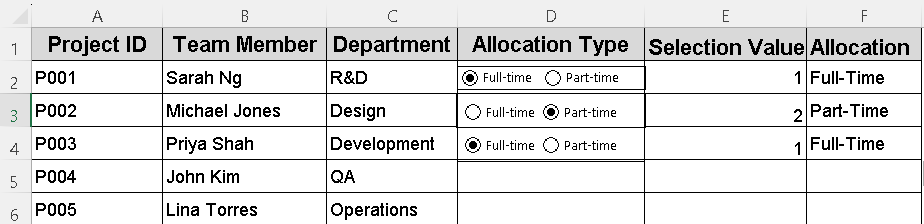
➤ Right-click the first button, choose Format Control, go to the Control tab, and set the Cell link to a helper cell (e.g., E2). Click OK.
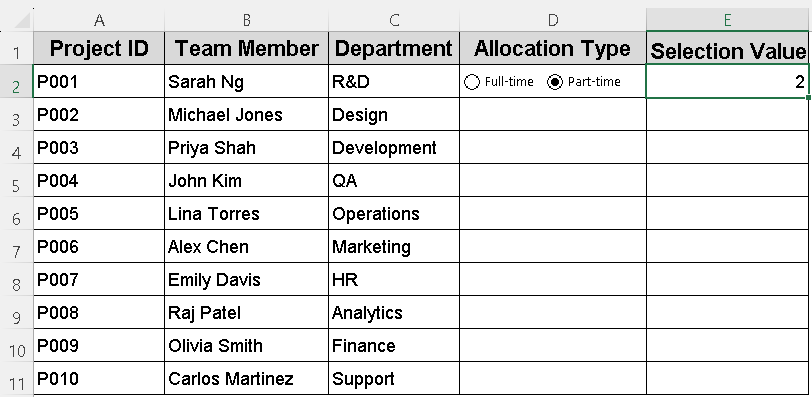
➤ Repeat for the second button, linking it to the same cell (E2). Selecting one stores a value (1 or 2) in E2.
Insert a Radio Button in Excel
A radio button, also called an option button, lets users select one option from a set. This control is commonly used in Excel for creating interactive forms where only one choice can be selected at a time.
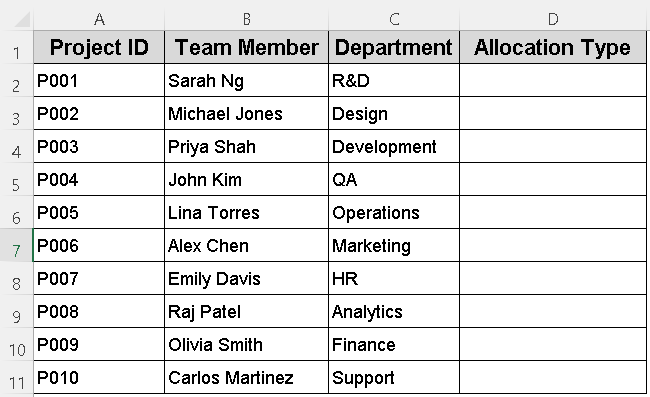
For this demonstration, we’ll insert a single radio button next to Project ID P001 in the Allocation Type column. The button will be labeled “Full-Time” and linked to a helper cell so Excel can record the user’s selection.
When the radio button is clicked, the linked cell updates to indicate the selection, preparing the sheet for adding more options or grouping controls in later steps.
Steps:
➤ Go to your Excel worksheet where you want to add the radio buttons.
➤ On the Developer tab, click Insert, then under Form Controls, select Option Button (Radio Button).
➤ Click on the worksheet where you want to place the first radio button (for example, in cell D2).
➤ Right-click the radio button, select Edit Text, and change the caption to Full-Time.
➤ Repeat the process to add a second radio button next to the first one and set its caption to Part-Time.
➤ Right-click the first radio button and select Format Control.
➤ In the Control tab, set the Cell link to a helper cell (e.g., E2) where the selection value will be stored. Click OK.
➤ Repeat for the second radio button, linking it to the same helper cell (E2).
➤ Now, selecting either radio button will store a value (1 for the first button, 2 for the second) in the linked cell (E2), which you can use in formulas or VBA.
➤ To reset the selection, clear the linked cell or add additional VBA to control the buttons.
Grouping Multiple Radio Buttons in Excel
When inserting multiple radio buttons, it’s important to control how they behave, especially if you’re working with repeated options across multiple rows. By default, all Form Control radio buttons on a worksheet are part of the same group, which means selecting one will deselect all others, even those meant for different rows.
To allow each row to have its own independent set of radio buttons, you need to group them using Group Boxes.
Steps:
➤ Go to the Developer tab >> Insert >> under Form Controls, select Group Box.

➤ Draw the Group Box around the two radio buttons for the first row (e.g., Full-Time and Part-Time for Project P001 in D2).
➤ The Group Box ensures that these two radio buttons work independently from those in other rows.
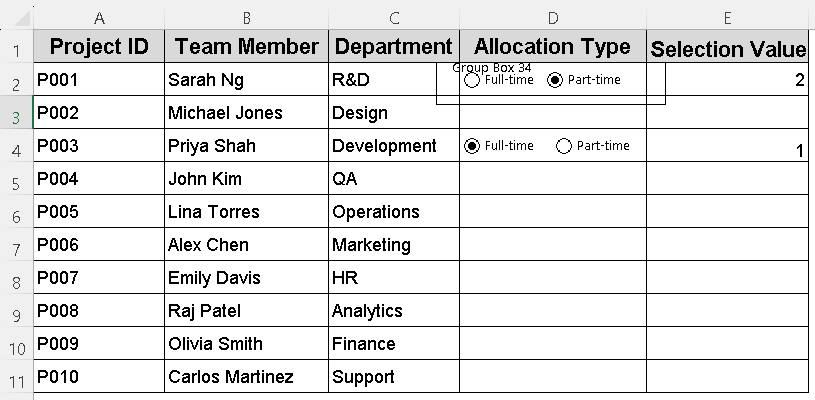
By grouping each set of radio buttons, your worksheet maintains consistent, row-level selection logic, allowing you to gather accurate input across multiple entries.
Linking Radio Buttons to Formulas and Automating Responses
Radio buttons in Excel can be linked to cells, allowing you to capture user selections as numeric values. This makes it easy to automate responses and calculations based on those choices. In this method, we’ll link Full-Time and Part-Time radio buttons to a cell and use formulas to display or process the selection automatically.
Steps:
➤ Right-click the first radio button (Full-Time) and choose Format Control.
➤ In the Control tab, set the Cell Link to a specific cell (e.g., E2). Click OK.
➤ Repeat this for the corresponding Part-Time radio button in the same group, linking it to the same cell (E2).
➤ When you select Full-Time or Part-Time, the linked cell will display a number representing the selected option (typically 1 for the first button, 2 for the second, etc.).
➤ Use an IF formula in a nearby cell to convert the numeric value into text. For example, in cell F2 enter:
=IF(E2=1, “Full-Time”, IF(E2=2, “Part-Time”, “No Selection”))
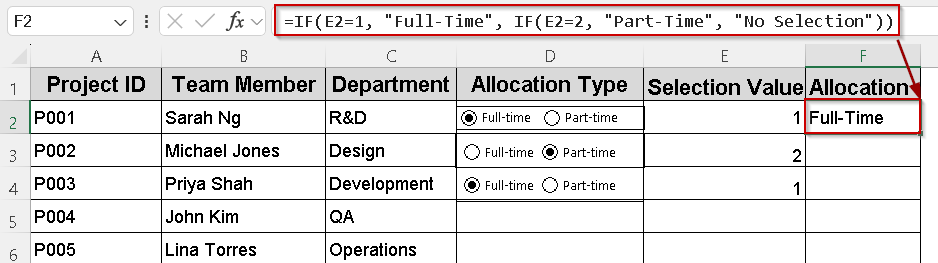
➤ Copy the linked cell and formula setup for other rows by updating the references accordingly (E3/F3, E4/F4, etc.).
By linking radio buttons to cells and formulas, you simplify data input and empower your workbook to respond intelligently to user selections.
Combining Radio Button with ActiveX Controls
ActiveX radio buttons provide more flexibility and event handling compared to Form Controls. They can be programmed to respond dynamically when selected, making them ideal for interactive UserForms or worksheets.
In this method, we’ll insert ActiveX radio buttons (OptionButtons) and write VBA code to capture user selections and display the chosen allocation type.
Steps:
➤ Press Alt + F11 to open the VBA Editor.
➤ In the Excel worksheet, go to the Developer tab >> Insert >> ActiveX Controls >> Option Button.
➤ Draw two Option Buttons near each other (for example, label one “Full-Time” and the other “Part-Time”).
➤ Right-click each Option Button, choose Properties, and set the Caption to “Full-Time” and “Part-Time” respectively. Close the Properties window.
➤ Exit Design Mode by clicking the Design Mode button on the Developer tab.
➤ Double-click one of the Option Buttons to open its code window and paste this VBA code:
Private Sub OptionButton1_Click()
If OptionButton1.Value = True Then
MsgBox "You selected Full-Time."
End If
End Sub
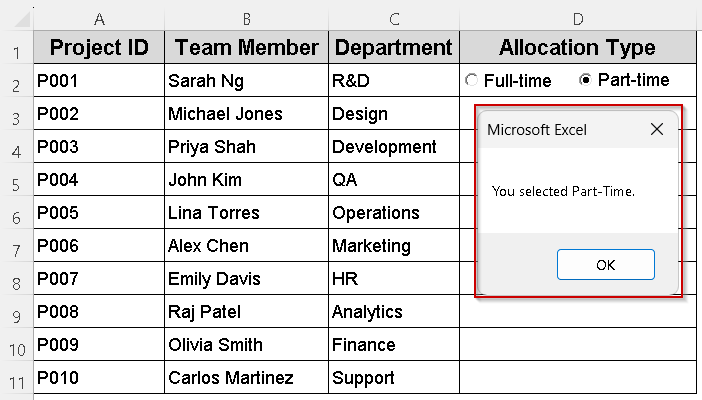
Private Sub OptionButton2_Click()
If OptionButton2.Value = True Then
MsgBox "You selected Part-Time."
End If
End Sub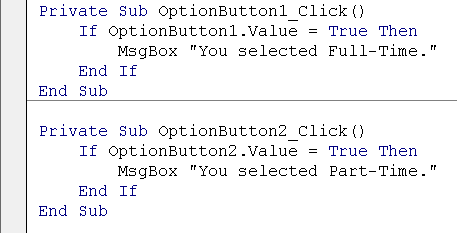
➧ Similarly, the Private Sub OptionButton2_Click() procedure runs when the "Part-Time" radio button is clicked, also checking if it’s selected before showing a confirmation message.
➧ This event-driven approach allows the form to respond immediately to user input without extra buttons or actions.
➧ You can customize the code inside each click event to perform other tasks, such as writing the choice to a worksheet cell or triggering other macros.
➧ Toggling off Design Mode enables these events to fire properly when interacting with the ActiveX controls.
➤ Close the VBA Editor and return to Excel.
➤ Click the Option Buttons to test their functionality. A message box will appear showing which option was selected.
Using ActiveX radio buttons allows advanced interactivity and customization beyond what Form Controls offers.
Frequently Asked Questions
What is a radio button in Excel?
A radio button (Option Button) allows users to select one choice from a set of mutually exclusive options. Only one button in a group can be selected at a time.
How do I insert radio buttons in Excel?
Enable the Developer tab, click Insert >> Form Controls >> Option Button, then draw the button on the sheet. Repeat for multiple buttons.
Why aren’t my radio buttons grouped correctly?
If buttons are not inside distinct Group Boxes or share the same cell link, they’ll interfere. Use proper Group Boxes and unique linked cells per row.
Can radio buttons be used to change chart titles?
Yes. Link radio buttons to a cell and reference that cell in your chart title using formulas; the title updates dynamically based on the selected option.
Wrapping Up
Radio buttons in Excel offer a simple yet powerful way to guide user choices and enhance interactivity in forms and dashboards. Whether you’re using Form Controls for quick selections, Group Boxes for row-level independence, or ActiveX for advanced automation, each method helps simplify data entry and analysis.