Extracting the month and day from a full date in Excel is a practical need when organizing, sorting, or analyzing time-based data. Whether you’re preparing reports, dashboards, or labels, Excel provides several user-friendly methods to isolate and display the month and day from any date entry.
In this article, you’ll learn multiple effective ways to isolate and extract month and day values from full dates in Excel.
Steps to extract month and day from date in Excel:
➤ Suppose your date is in cell A2.
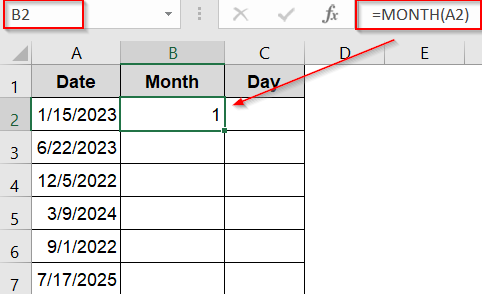
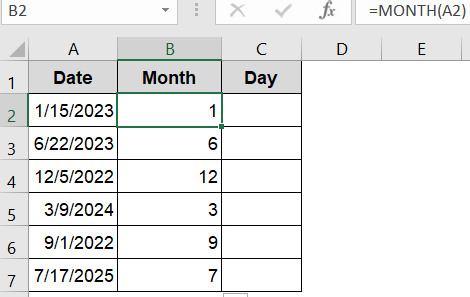
➤ To extract the month number, select cell B2 and enter: =MONTH(A2)
➤ Press Enter. The cell will show the month number (e.g., 1 for January).
➤ Use the AutoFill handle to drag down the rest of the cells.
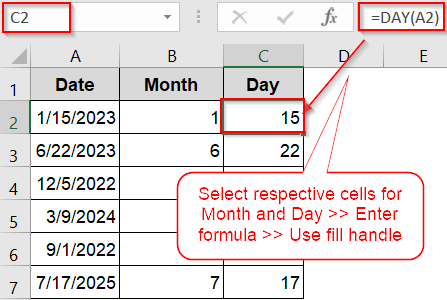
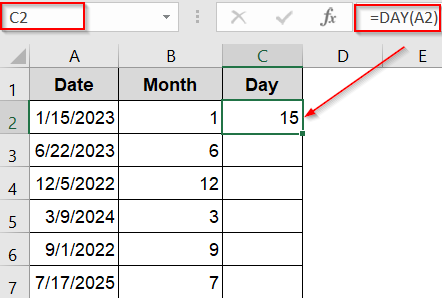
➤ To extract the day number, select cell C2 and enter: =DAY(A2)
➤ Press Enter. The cell will show the day number (e.g., 15 for the 15th day).
Use the MONTH and DAY Functions
The simplest way to extract the month or day from a date is to use the dedicated MONTH and DAY functions. These functions return the numeric month (1–12) or day (1–31) from a date stored in a cell.
Steps:
➤ Suppose your date is in cell A2.
➤ To extract the month number, select cell B2 and enter:
=MONTH(A2)
➤ Press Enter. The cell will show the month number (e.g., 1 for January).
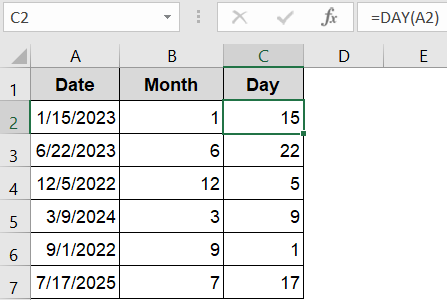
➤ Use the AutoFill handle to drag down the rest of the cells.
➤ To extract the day number, select cell C2 and enter:
=DAY(A2)
➤ Press Enter. The cell will show the day number (e.g., 15 for the 15th day).
You can drag these formulas down if you have a list of dates. This method provides numeric results, which you can use in further calculations or formatting.
Extract Month and Day as Text Using the TEXT Function
If you want to extract the month or day as text instead of a number, the TEXT function lets you convert dates into formatted strings. This is useful if you want abbreviated month names or day names.
Steps:
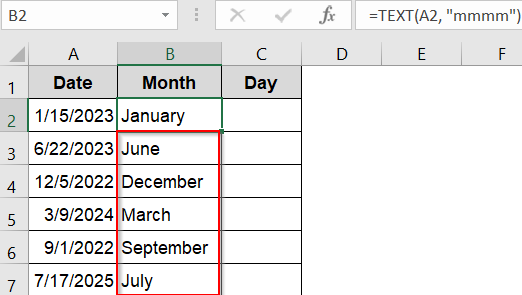
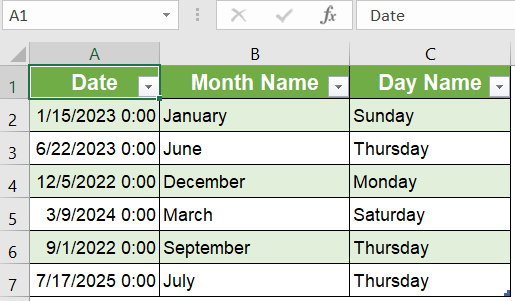
➤ With your date in A2, to extract the month name, select B2 and enter:
=TEXT(A2, “mmmm”)
➤ Press Enter. The cell will display the full month name (e.g., January).

➤ Use the AutoFill handle to drag down the rest of the cells.
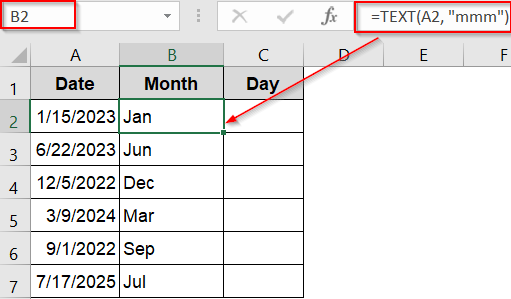
➤ To get the abbreviated month name (e.g., Jun), use:
=TEXT(A2, “mmm”)
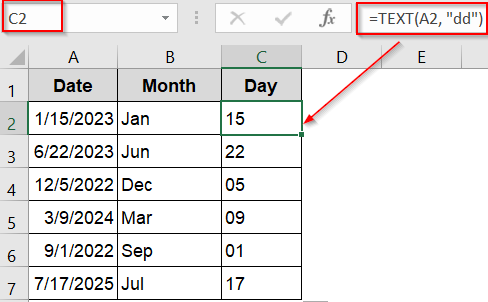
➤ For the day as a number with leading zero (e.g., 05), enter in C2:
=TEXT(A2, “dd”)
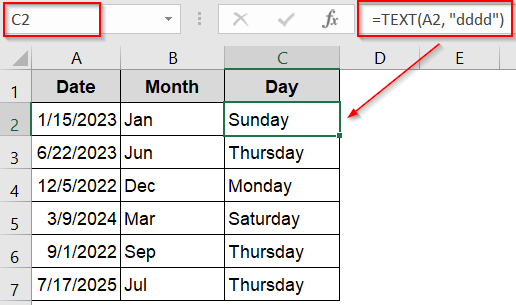
➤ To extract the weekday name, use:
=TEXT(A2, “dddd”)
The TEXT function returns text values that look exactly as you want for reports or labels.
Apply Custom Cell Formatting to Display Month and Day
If you want the original date cell to show only the month or day visually but keep the underlying date intact, custom cell formatting is the best choice. This method does not extract data into separate cells but formats the existing date display.
Steps:
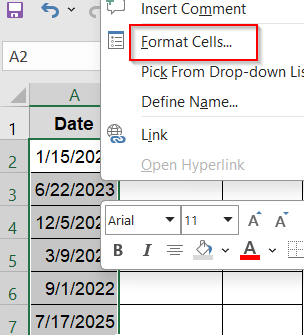
➤ Select the cell or range with your dates (e.g., A2:A7).
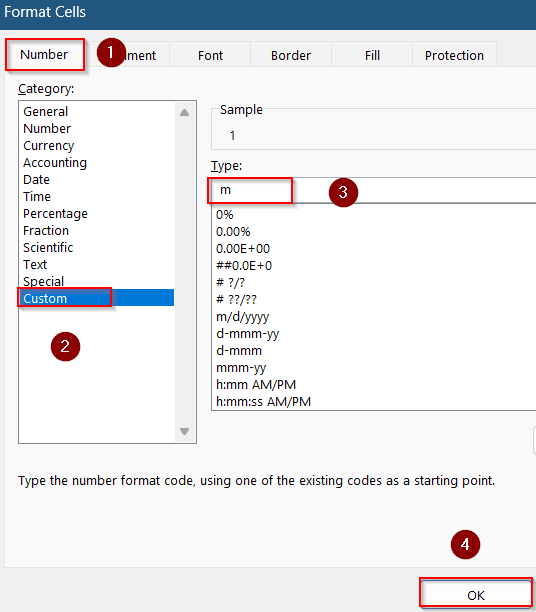
➤ Right-click and choose Format Cells.
➤ Go to the Number tab >> select Custom.
➤ To display only the month number, type: m
➤ Click OK.
➤ Repeat the same steps for respective ranges to extract other variations.
➤ To display the full month name, type: mmmm
➤ To display only the day number, type: d
➤ To display day with leading zero, type: dd
➤ To display name of your weekday, type: dddd
➤ Click OK.
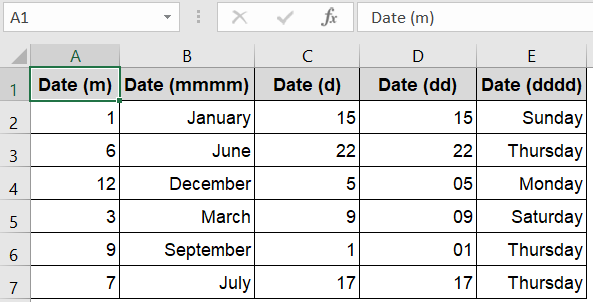
Each column now demonstrates the output for each custom text input in Format Cells. Use the ones you require in your dataset.
Convert Dates with CHOOSE and SWITCH Functions
The CHOOSE and SWITCH functions allow you to convert numeric month or weekday values into custom text labels. Unlike the TEXT function, these methods give you full control over the output format, letting you define your own abbreviations or language variations. They’re especially useful when you need fixed, non-localized results for reporting or logic-based tasks.
Steps:
For CHOOSE Function
➤ In cell B2, enter:
=CHOOSE(MONTH(A2),”Jan”,”Feb”,”Mar”,”Apr”,”May”,”Jun”,”Jul”,”Aug”,”Sep”,”Oct”,”Nov”,”Dec”)
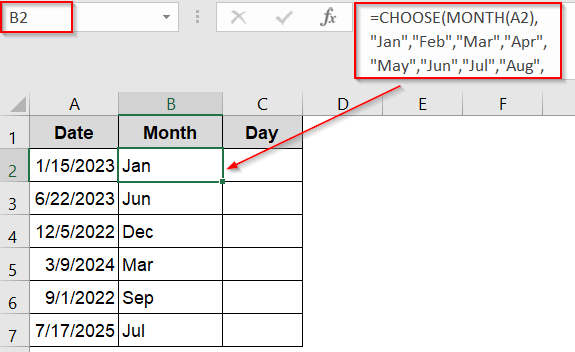
➤ Use the AutoFill handle to drag down the rest of the cells.
➤ In cell C2, enter:
=CHOOSE(WEEKDAY(A2),”Sun”,”Mon”,”Tue”,”Wed”,”Thu”,”Fri”,”Sat”)
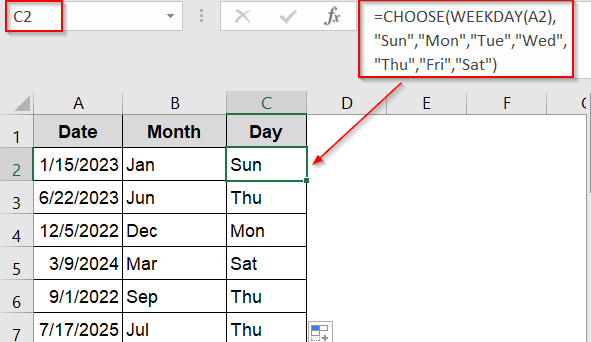
Now abbreviations for Month and Day will be displayed in your dataset.
For SWITCH Function
➤ In cell B2, use formula:
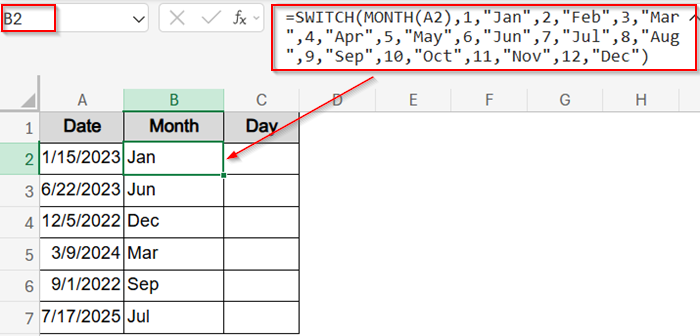
➤ In cell C2, use formula:
=SWITCH(WEEKDAY(A2),1,”Sun”,2,”Mon”,3,”Tue”,4,”Wed”,5,”Thu”,6,”Fri”,7,”Sat”)
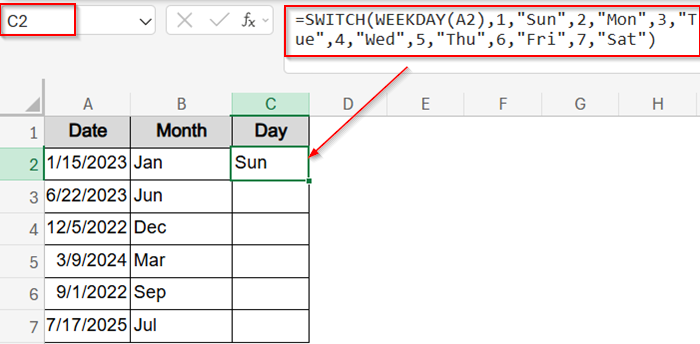
➤ Drag the formulas down.
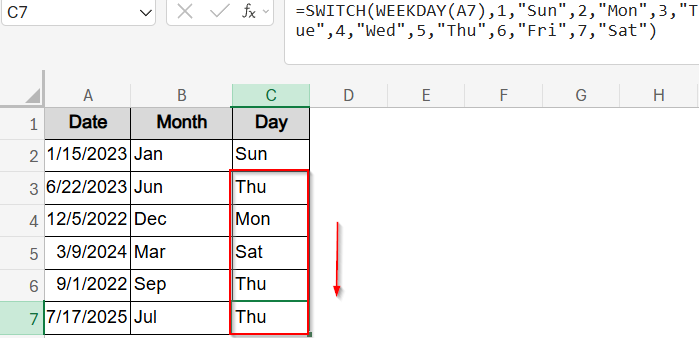
This method gives full control over localization and abbreviation.
Extract Month and Day Using Power Query
Power Query is perfect when working with larger datasets or automating transformations. It gives you control to split, transform, and format date components as separate columns.
Steps:
➤ Select the full dataset (A1:A7).
➤ Go to the Data tab and click From Table/Range.
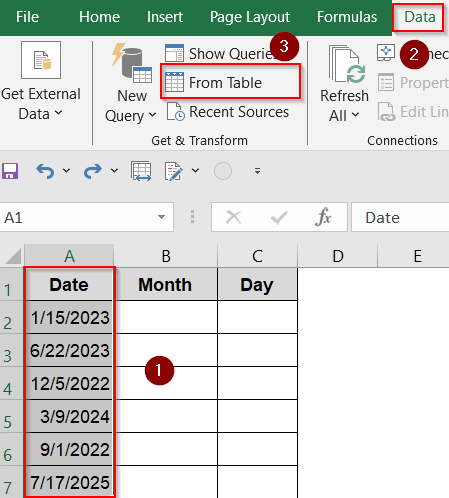
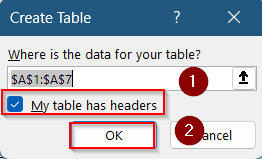
➤ In the Create Table dialog, confirm your data has headers and click OK.
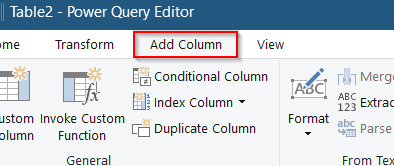
➤ In Power Query, go to the Add Column tab on the top ribbon.
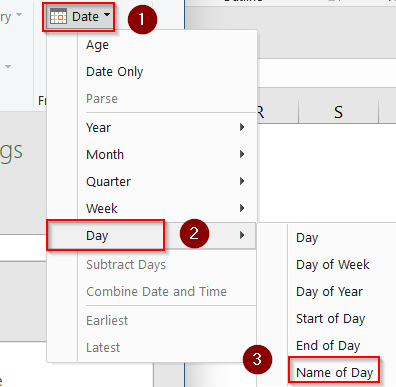
➤ Click Date at the top right corner >> Hover over Month >> Select Name of Month.

➤ Then click on Date again >> Hover over Day >> Select Name of Day.
➤ Go to the Home tab and click Close & Load.
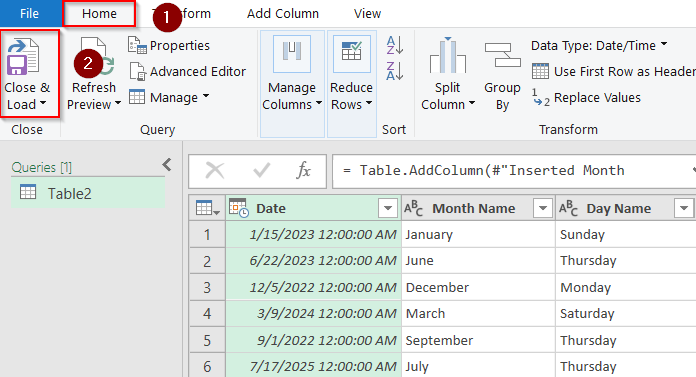
This will create two new columns with the full month name and weekday name extracted from each date. You can refresh the table whenever source data is updated by pressing Alt + F5 on your keyboard.
Frequently Asked Questions
Can I extract both month and day in one formula?
Yes, you can use =TEXT(A2,”mm-dd”) for a formatted result or =MONTH(A2)&”-“&DAY(A2) to combine numeric month and day values in a single cell.
How do I handle dates stored as text?
If your date is stored as a text string, apply =DATEVALUE(A2) first to convert it into a valid Excel date. Then use regular functions like MONTH or DAY on it.
Can I get the month name instead of the number?
Certainly. Use =TEXT(A2,”mmmm”) for the full month name like “September” or =TEXT(A2,”mmm”) for a shorter form like “Sep” in your Excel cell.
Will custom formatting change the date value?
No, applying custom formatting such as “mmmm” or “dd” only alters the display. The actual date value in the cell remains intact and can still be used in calculations.
Wrapping Up
In this tutorial, we learned several practical methods to extract the month and day from a date in Excel. From basic functions like MONTH and DAY to more flexible methods like TEXT, CHOOSE, SWITCH, and even Power Query, each approach serves different needs whether you want formatted text, numeric outputs, or fully automated transformations. Feel free to download the practice file and share your feedback.