Automatic page breaks in Excel help divide your worksheet for printing, but sometimes they appear in unwanted spots or override your layout preferences. Whether you’re seeing dotted lines across your sheet or struggling to control how data flows to paper, knowing how to remove or control these automatic breaks can make your workflow easier.
In this article, we’ll learn all the best ways to deal with automatic page breaks whether you want to remove them entirely, adjust their placement, or just hide them from view. Let’s get started.
Steps to remove automatic page break in excel:
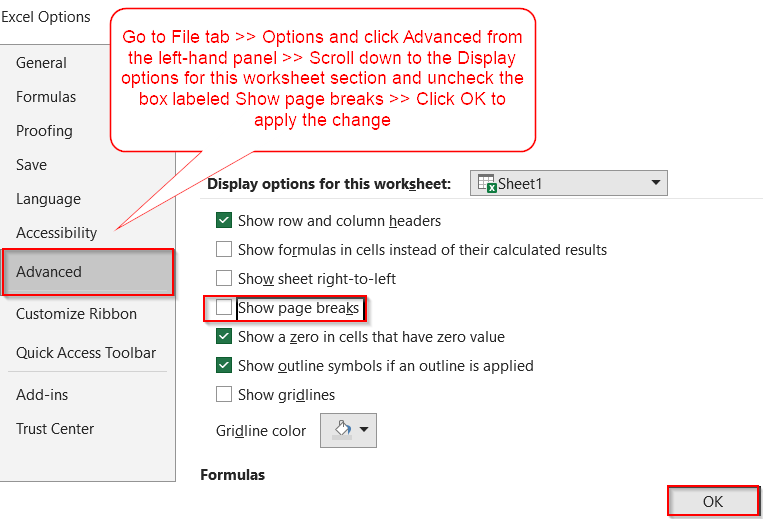
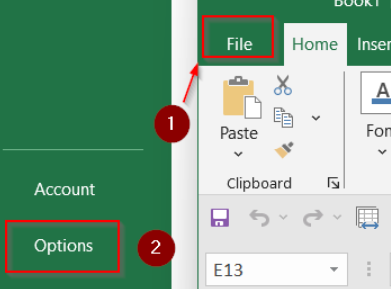
➤ Go to File tab >> Options.
➤ Click Advanced from the left-hand panel.
➤ Scroll down to the Display options for this worksheet section.
➤ Uncheck the box labeled Show page breaks.
➤ Click OK to apply the change.
Hide Automatic Page Breaks from View Without Changing Layout
If the dotted lines from automatic page breaks are distracting but you don’t want to modify the actual layout or print output, then you can simply hide them. This is useful for creating a cleaner and less cluttered working environment.
Steps:
➤ Go to File tab >> Options.
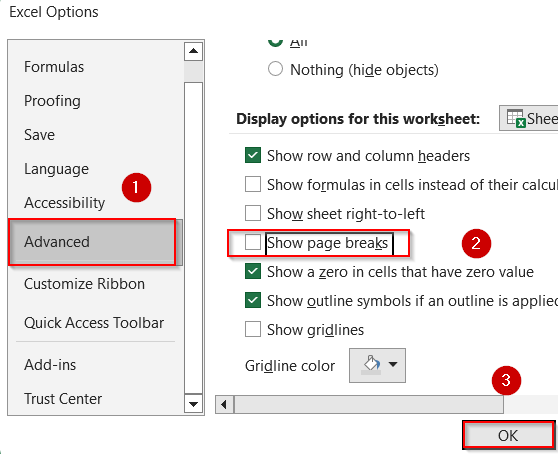
➤ Click Advanced from the left-hand panel.
➤ Scroll down to the Display options for this worksheet section.
➤ Uncheck the box labeled Show page breaks.
➤ Click OK to apply the change.
This setting hides the visual indicators but doesn’t remove or affect how the worksheet is printed.

Adjust Page Setup to Control Automatic Page Breaks
Instead of manually removing automatic page breaks, you can control where Excel places them by adjusting scaling and margin settings. This method gives you indirect but efficient control over your printed page layout.
Steps:
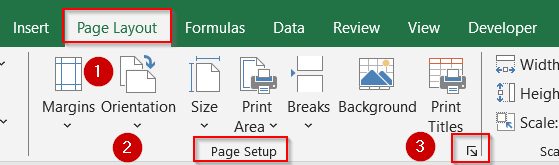
➤ Go to the Page Layout tab.
➤ Click the Page Setup launcher (small arrow in the bottom-right corner of the group).
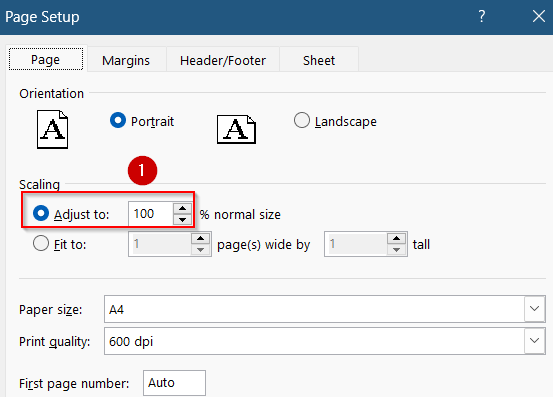
➤ In the Page tab, choose Adjust to and set a custom scale like 100%. Avoid “Fit to X pages” as it overrides manual breaks.
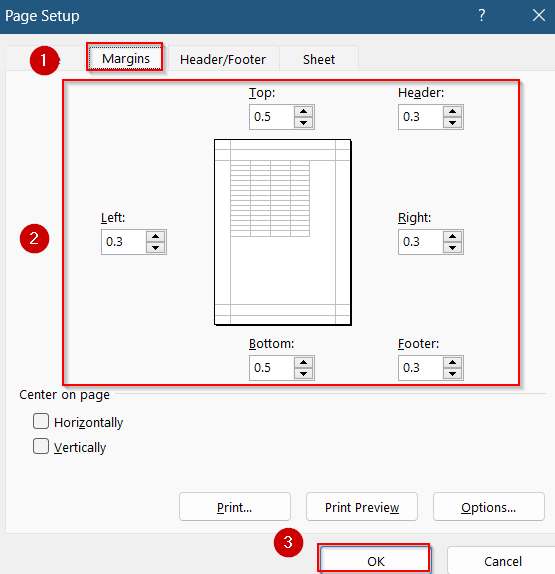
➤ Switch to the Margins tab and reduce Top/Bottom or Left/Right margins if needed.
➤ Click OK to apply changes.
This helps Excel recalculate break positions by giving more room to display data on each printed page.
Override or Reset Automatic Page Breaks Using Manual Breaks
Automatic page breaks can’t be deleted outright, but you can control their placement by inserting manual page breaks or resetting them entirely. This method helps you push automatic breaks to more suitable positions or clear manual breaks if needed.
Steps:
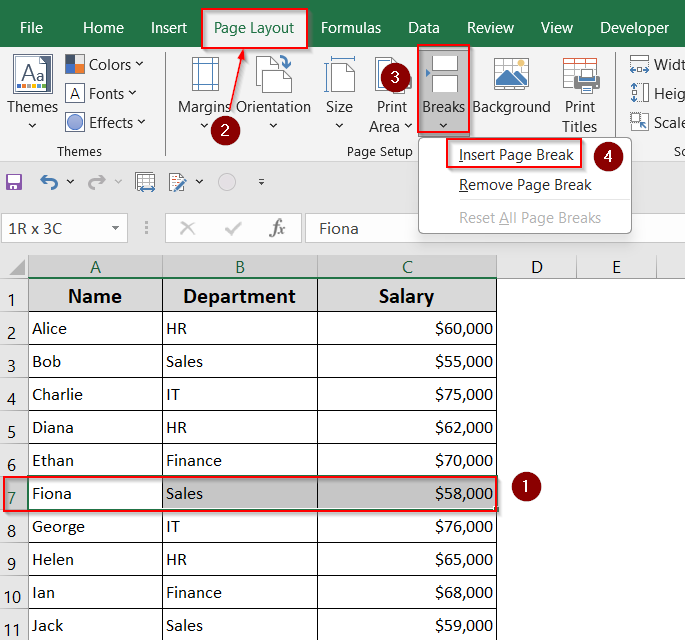
➤ Click the row below or column to the right of where you want a break.
➤ Go to Page Layout >> Breaks >> Insert Page Break to add a manual break.
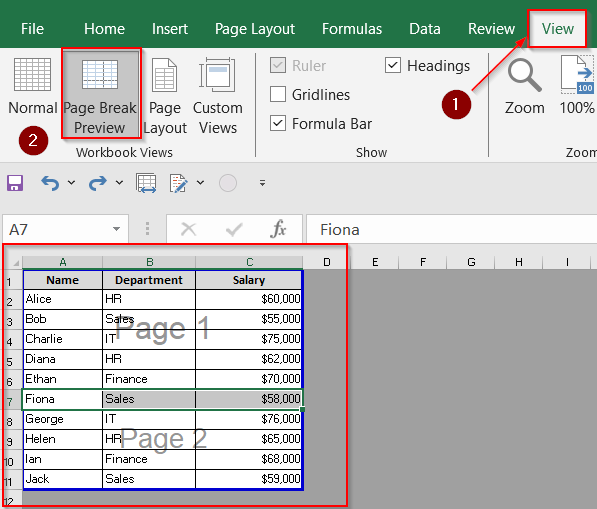
➤ Go to View >> Page Break Preview to check output.
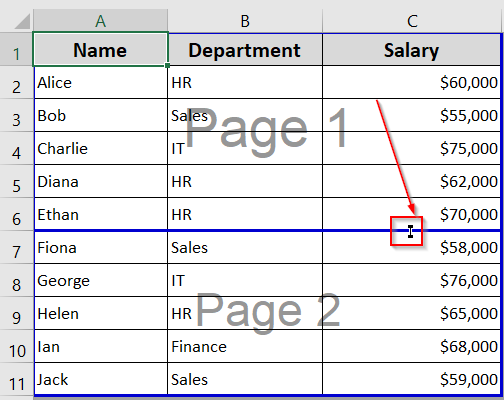
➤ You can move the position of the break by using the small arrow that appears on the blue line as you move your cursor closer. Drag it around as you like.
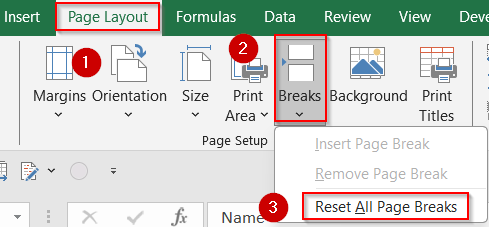
➤ To clear all manual breaks and return to Excel’s default layout, go to Page Layout tab >> Breaks >> Reset All Page Breaks.
This gives you flexible control by either overriding unwanted breaks with your own breaks or resetting everything altogether.
Use VBA to Quickly Hide or Show Automatic Page Breaks
If you often find yourself toggling the visibility of automatic page breaks, using a VBA macro can simplify the process. Instead of manually navigating through Excel’s options, a quick macro lets you automate the hide/show toggle in seconds which is ideal for repetitive tasks or shared files.
Steps:
➤ Press Alt + F11 to open the VBA editor.
➤ In the editor, click Insert >> Module to add a new module.
➤ To hide automatic page breaks, paste this code:
Sub remove_automatic_pagebreak()
    ActiveSheet.DisplayPageBreaks = False
End Sub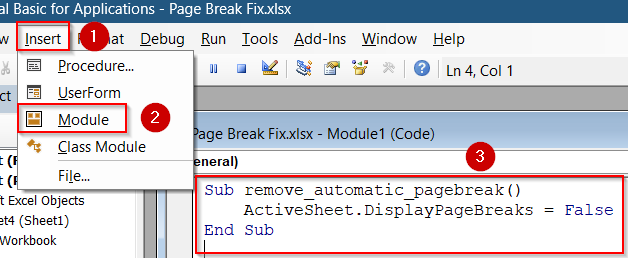
➤ Press F5 key while inside either macro to run it.
This method doesn’t delete or affect your actual page layout, it simply toggles the visibility of the break lines on screen.
Frequently Asked Questions
Can I delete automatic page breaks in Excel?
No, Excel does not let you delete automatic page breaks directly. However, you can override them by inserting manual page breaks in strategic spots, which pushes automatic ones farther down or out of the print area.
What’s the difference between automatic and manual page breaks?
Automatic page breaks are created by Excel based on paper size, margins, and scaling. Manual page breaks are user-inserted to control exactly where a new page starts when printing. Solid blue lines show manual breaks; dotted lines show automatic ones.
Why are my manual page breaks not showing or working properly?
If manual page breaks aren’t working, check for conflicting settings like Fit to Page scaling, merged cells, or a defined print area. These can block or override manual breaks, making them ineffective or invisible.
How can I remove all page breaks and go back to Excel’s default layout?
Go to the Page Layout tab, click Breaks, and select Reset All Page Breaks. This will remove all manually added breaks and allow Excel to automatically manage the layout based on the current content and settings.
Is there a way to hide page breaks without removing them entirely?
Yes, you can hide the dotted and solid lines by going to File >> Options >> Advanced and unchecking Show page breaks under “Display options for this worksheet.” This affects only visibility, not the actual print layout.
Wrapping Up
In this tutorial, we explored all the effective methods to deal with automatic page breaks in Excel. From using Page Break Preview to inserting manual breaks, resetting layout, or hiding break lines using both built-in settings and VBA, each fix serves a unique purpose depending on your layout goals. Whether you want more visual control, cleaner workspace visuals, or to return to Excel’s default behavior, these solutions will help you regain full command over page breaks in your spreadsheet.