
When we prepare professional or academic reports in Excel, we often need to add extra details like page numbers, file names, or dates to make the document more informative. To do so, we need to edit footers and include important reference information on our printed pages.
For example, you’re creating a monthly sales report to be shared with stakeholders. If you add a detailed footer with the report title, date, or page number, it will make your report more presentable and also help your audience easily follow the document. In fact, without proper footers, important context may be lost, or the document might look unpolished.
In this article, we will explain three different methods to edit the footer in Excel, including the Page Layout View, the Page Setup dialog box, and advanced methods like VBA.
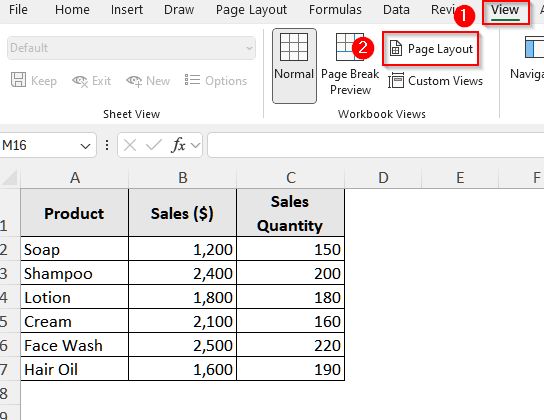
➤ First, go to the View tab from the upper menu bar.
➤ Then, select the Page Layout tab from the tabs under the View tab.
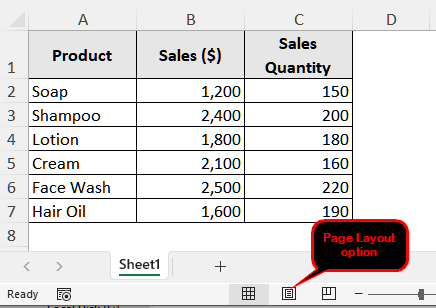
➤ You can also choose the Page Layout directly from the bottom ribbon in your dataset.
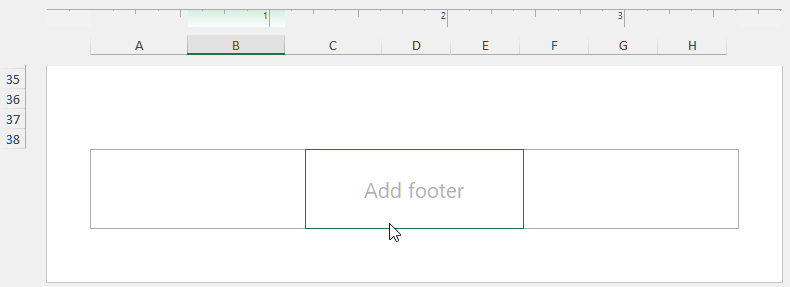
➤ Now, scroll down a bit and you will find an area that says Add footer.
➤ Hover the cursor of your mouse over it, and you will see three different parts appear. They are called left, center, and right.
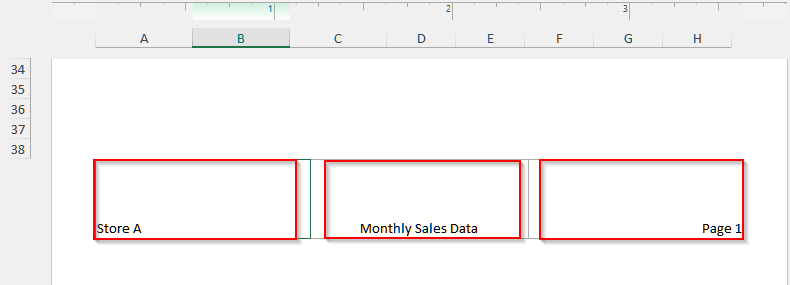
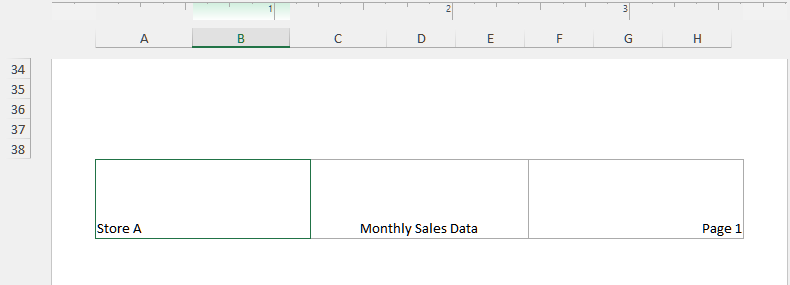
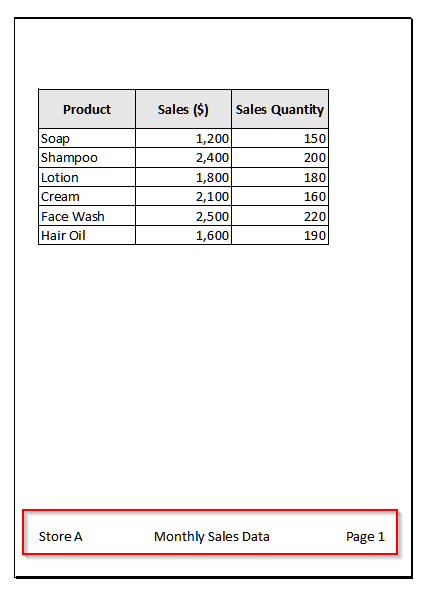
➤ Now, type what you think is appropriate to represent your dataset into the three parts. In our case, we wrote Monthly Sales Data in the middle part, Page 1 in the right part, and Store A in the left part.
➤ After editing, click anywhere outside the footer area to apply the changes. Now, your footer will appear on the printed page.
Use the Page Layout Tab to Edit Footers in Excel
In Excel, the Page Layout View lets us see exactly how our sheet will look when printed, including the footer area. Thus, we can easily click and edit the footer directly on the page, just like typing in a document.
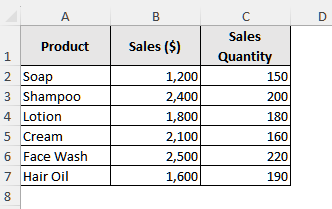
We will use the dataset below to explain how the Page Layout View can help us edit the footer in an Excel dataset.
Steps:
➤ First, go to the View tab from the upper menu bar.
➤ Then, select the Page Layout tab from the tabs under the View tab.
➤ You can also choose the Page Layout directly from the bottom ribbon in your dataset.
➤ Now, scroll down a bit and you will find an area that says Add footer.
➤ Hover the cursor of your mouse over it, and you will see three different parts appear. They are called left, center, and right.
➤ Now, type what you think is appropriate to represent your dataset into the three parts. In our case, we wrote Monthly Sales Data in the middle part, Page 1 in the right part, and Store A in the left part.
➤ After editing, click anywhere outside the footer area to apply the changes. Now, your footer will appear on the printed page.
Edit Footer in Excel with Page Setup Setting
Excel’s Page Setup option provides a clean and simple way to insert or customize footers, without even needing to click on the worksheet itself.
Steps:
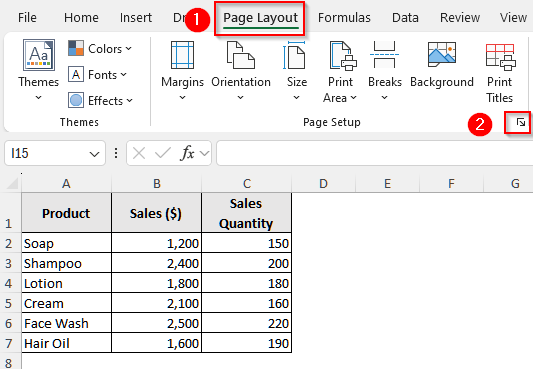
➤ First, go to the Page Layout tab from the Excel ribbon.
➤ Then, click on the small arrow at the bottom-right corner of the Page Setup group. This will open the Page Setup dialog box.
➤ Now, you will see a new window. Go to the Header/Footer tab.
➤ Then, select Custom Footer.
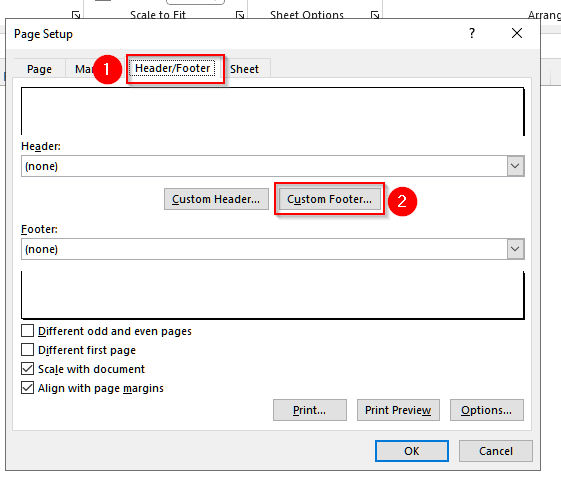
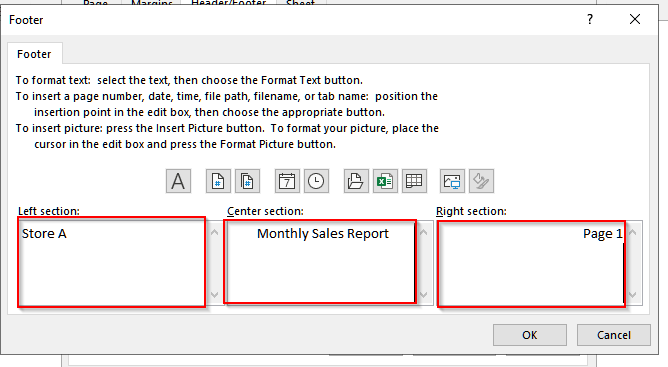
➤ Now, you will see a new window open. Enter the footer contents in the boxes for the Left, Center, and Right sections.
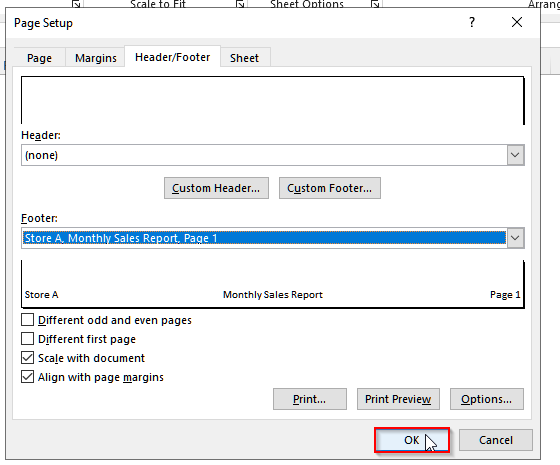
➤ After you have done editing, select OK. You will be back in the Page Setup window.
➤ Finally, click OK again to close the Page Setup window.
Use VBA Code to Edit Footer in Excel Dataset
If you want to apply the same footer across multiple sheets or automate footer formatting, then VBA code is the right choice for you.
Steps:
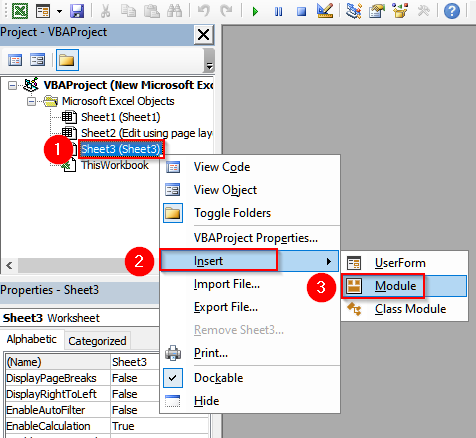
➤ First, press Alt + F11 and it will open the Visual Basic for Applications (VBA) editor.
➤ Then, right-click on your working sheet and a list of options will appear.
➤ Now, go to the Insert menu and another list will appear with some options. Choose Module to open a blank coding window among the options.
➤ Then, copy and paste the following code into the module:
Sub AddCustomFooter()
    With ActiveSheet.PageSetup
        .LeftFooter = "Store A"
        .CenterFooter = "Monthly Sales Report"
        .RightFooter = "Page &P"
    End With
End Sub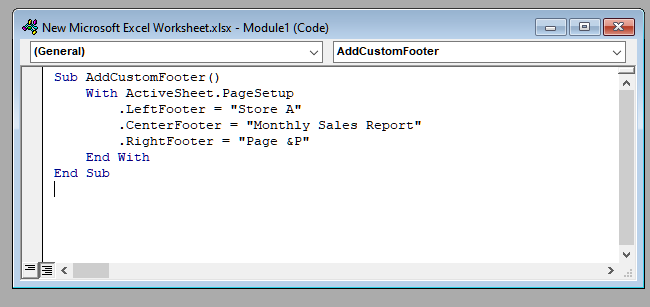
➤ Finally, press F5 to execute the code and save the worksheet as a macro-enabled form (.xlsm form).
Frequently Asked Questions
Can I Delete the Footer in Excel Completely?
Yes, you can easily delete the footer in Excel permanently. First, select the Page Layout from the upper menu ribbon. Then, in the bottom right corner of the Page Setup dialog box, you will see a small arrow. Click on the arrow to open the Page Setup window. Now, go to the Header/Footer tab, and under the Footer option, select (none). Select Ok to close the window, and the footer will be removed completely.
Can I Insert the Page Number Automatically in the footer in Excel?
Absolutely, you can. To insert the page numbers automatically in the footer, first select the Page Layout View. Then, click inside the footer area (choose any of the three parts, left, middle, or right). Now, go to the Header & Footer tab from the top menu bar. Finally, click the Page Number button, and it will insert a code (&[Page]) that updates page numbers automatically when you print or preview your sheet.
Can I Edit the Footer in the Excel Online Version?
Unfortunately, you cannot. The online version of Excel still has not added the feature to add or edit, or customize the footer of your dataset.
Wrapping Up
In this article, we have explained three methods to edit the footer in Excel. With any of these three methods, the Page Layout View, the Page Setup dialog box, or a simple VBA code, you can easily edit or customize the footers of your dataset. Hope you will try these methods to manage footers in your Excel dataset when needed. Also, let us know if you have any inquiries or need help with any Excel issues.