
Sometimes, you need to present Excel data inside a PowerPoint slide without switching between applications. For example, during a business presentation, you might want to show a table of monthly sales or a chart that’s directly linked to your Excel file. That’s where embedding comes in handy.
PowerPoint allows you to embed an Excel file directly into a slide. This means you can view and even edit the data within PowerPoint without opening Excel separately. Embedding also keeps your spreadsheet data organized and avoids copy-paste errors.
In this article, you’ll learn different ways to embed an Excel file in PowerPoint. We’ll use a sample dataset and show step-by-step methods, including linking a live Excel file or inserting it as an object.
Here’s how to embed an Excel file in PowerPoint using the Object Insert method:
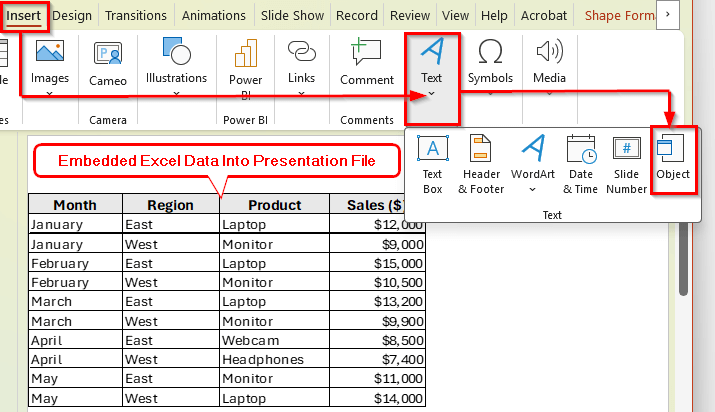
➤ Open your PowerPoint presentation and go to the slide where you want to embed the Excel file.
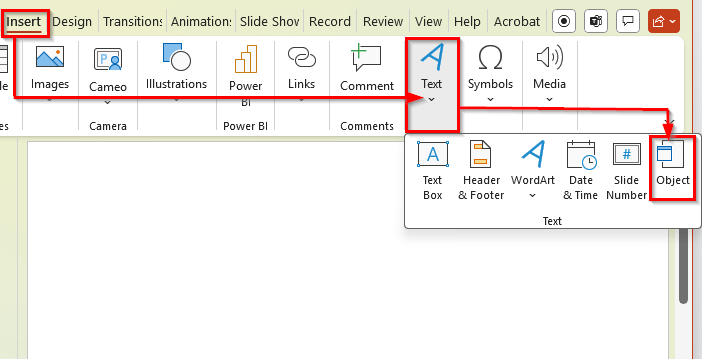
➤ Click on the Insert tab in the PowerPoint ribbon.
➤ In the Text group, select Object.
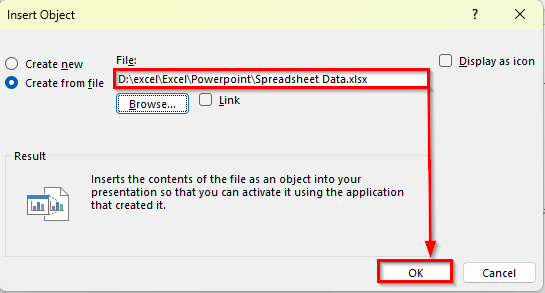
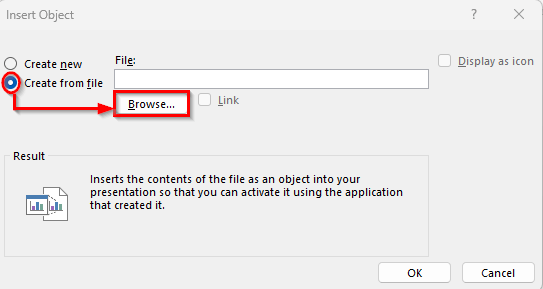
➤ In the dialog box, choose Create from file.
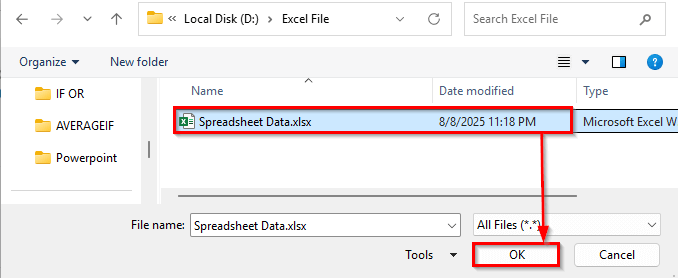
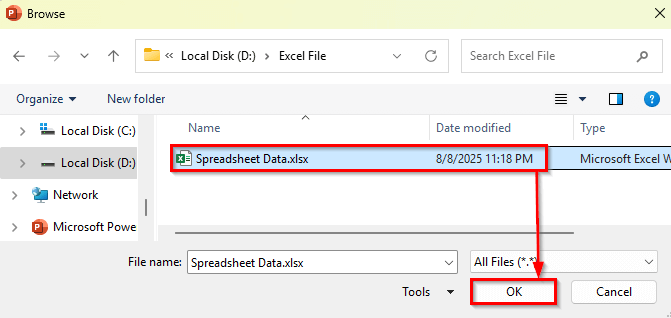
➤ Click Browse and locate your Excel workbook. For example, we saved it as Spreadsheet Data on our computer.
➤ Select the file and click OK to insert it.
➤ Once the file appears in the box, click OK.
➤ The Excel file will now appear on your slide as a preview window or icon.
➤ Resize or move the object as needed to fit your slide layout.
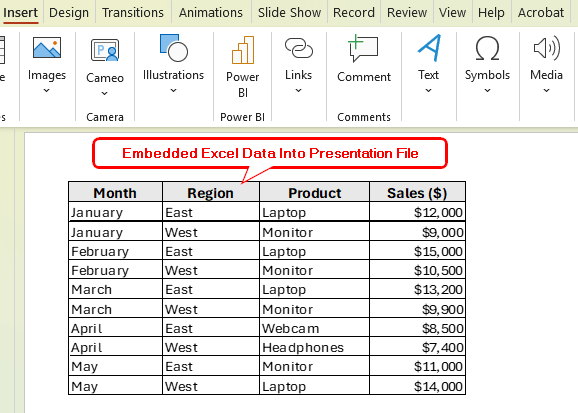
Embed Excel File as an Object in PowerPoint
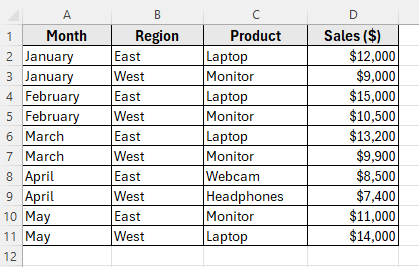
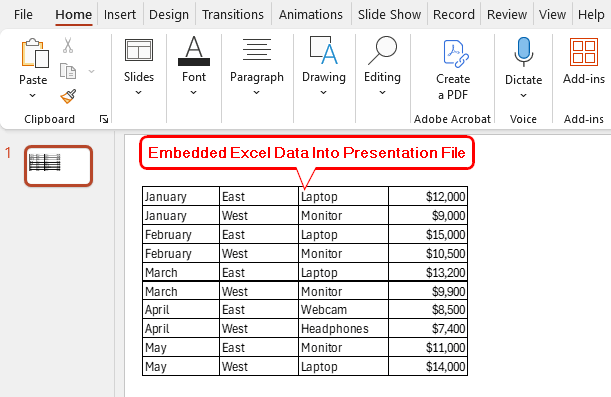
In the following dataset, we have a simple monthly sales report that tracks product sales across regions. Column A lists the Month, Column B shows the Sales Region, Column C contains the Product Names, and Column D holds the Sales Amounts in dollars.
We will demonstrate several ways to embed this Excel file or specific parts of it into a PowerPoint slide. You can embed the data as an editable object, insert a static table, or create a live link to keep your data updated.
The most direct way to embed an Excel file into a PowerPoint slide is by inserting it as an object. This allows you to include the entire workbook in your presentation. You can double-click the object to view or edit the spreadsheet without leaving PowerPoint.
This method is ideal when you want to keep the full Excel file accessible inside your presentation for reference or quick updates during meetings.
Here’s how to do it:
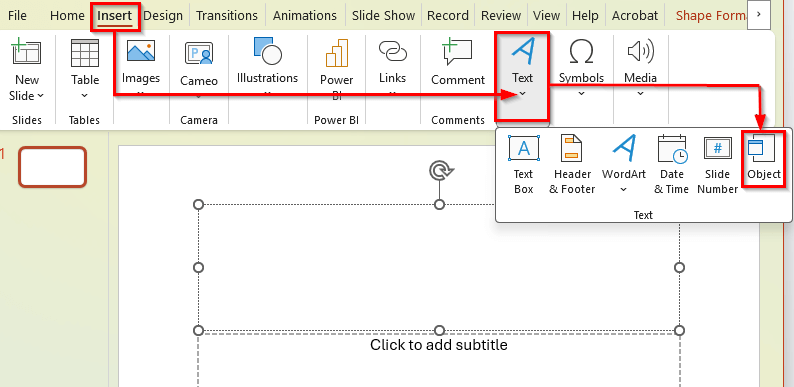
➤ Open your PowerPoint presentation and go to the slide where you want to embed the Excel file.
➤ Click on the Insert tab in the PowerPoint ribbon.
➤ In the Text group, select Object.
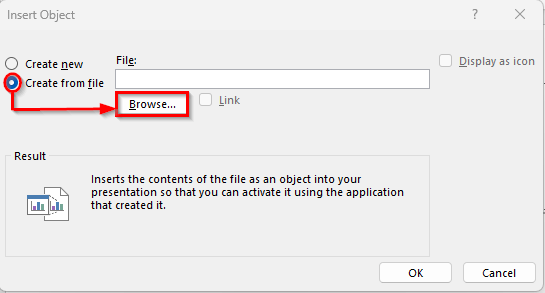
➤ In the dialog box, choose Create from file.
➤ Click Browse and locate your Excel workbook.
➤ Select the file and click OK to insert it. For example, we saved it as Spreadsheet Data on our computer.
➤ Once the file appears in the box, click OK.
➤ The Excel file will now appear on your slide as a preview window or icon.
➤ Resize or move the object as needed to fit your slide layout.
Copy Excel Table and Paste as an Embedded Object
If you only need to display part of your Excel file such as a specific table or chart, you can copy that range and paste it into PowerPoint as an embedded Excel object. This keeps the data editable while limiting what appears on the slide.
This method is helpful when you want to focus the presentation on a specific portion of your dataset without inserting the entire file.
Here’s how to do it:
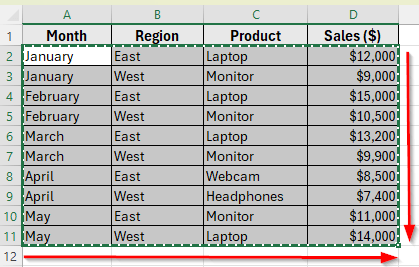
➤ Open your Excel file and select the range you want to embed. For example, highlight cells A1 to D11 in your dataset.
➤ Press Ctrl + C to copy the selection.
➤ Go to PowerPoint and select the slide where you want to paste the data.
➤ Click on the Home tab in PowerPoint.
➤ Click the small arrow under the Paste button and choose Paste Special.
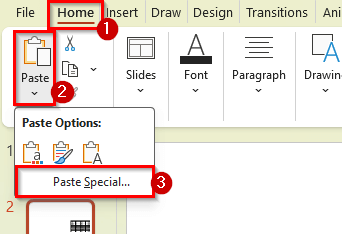
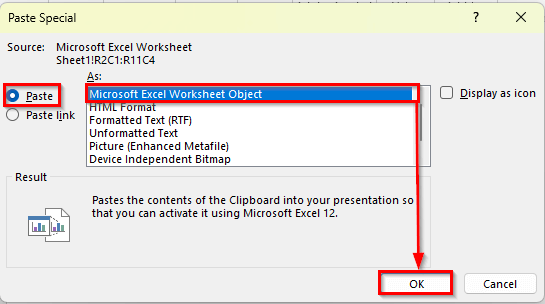
➤ In the dialog box, choose Microsoft Excel Worksheet Object, then click OK.
➤ The copied Excel range will now appear as an embedded object on your slide. You can resize or move it just like any other shape or image.
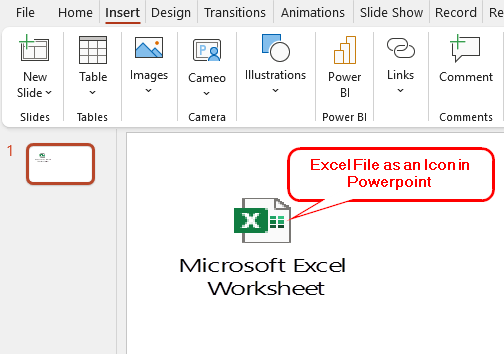
Insert Excel File as an Icon in PowerPoint
If you want to attach a full Excel file to your slide without showing its contents directly, you can insert it as an icon. Clicking the icon during a presentation will open the Excel file in a separate window. This method keeps your slide clean while still giving access to the full dataset when needed.
It is useful when you want to share detailed data with your audience but keep the slide simple and uncluttered.
Here’s how to do it:
➤ Open your PowerPoint presentation and go to the slide where you want to attach the Excel file.
➤ Click the Insert tab on the ribbon.
➤ In the Text group, select Object.
➤ Choose Create from file in the dialog box.
➤ Click Browse and select your Excel file.
➤ Select the file and click OK to insert it. For example, we saved it as Spreadsheet Data on our computer.
➤ Once the file appears in the box, check the box labeled Display as icon. Click OK.
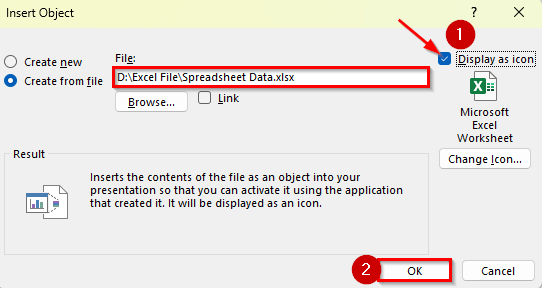
➤ An icon representing the Excel file will appear on your slide. Double-click the icon to open the file. You can move or resize it as needed.
Frequently Asked Questions
How do I embed an Excel file into a PowerPoint slide?
You can embed an Excel file by inserting it as an object. Go to the Insert tab in PowerPoint, click Object, choose Create from file, and select your Excel workbook. This places the file directly into your slide.
Can I edit the embedded Excel file inside PowerPoint?
Yes. If you insert the file as an object or paste a selected range as an Excel worksheet object, you can double-click it to open and edit the data within PowerPoint. Any changes are saved in the embedded version of the file.
What happens if I move the Excel file after linking it to PowerPoint?
The link will break if the Excel file is moved or renamed. PowerPoint will no longer be able to find the source file, and the data will not update. To avoid this, keep the Excel file in the same location or update the link manually.
Wrapping Up
There are different ways to embed an Excel file into PowerPoint. You can insert the whole file, paste just a table, link to the original file, or add it as an icon.
If you want to edit the data inside PowerPoint, use the object or paste method. If your Excel file changes often, linking it is the best option. And if you just want to attach the file without showing the data, inserting it as an icon works well.
Pick the method that suits your needs. These steps will help you share Excel data easily in any PowerPoint presentation.