When working in Excel, there may be times when you need to display multiple items inside a single cell instead of spreading them across rows or columns. This is especially useful for organizing grouped information, such as listing multiple products, tasks, or notes in one cell without losing structure. Excel offers several ways to achieve this starting from manual entry using line breaks to automated drop-down lists and copy-pasting data from other applications.
In this article, we’ll explore several practical methods to create lists inside a single cell, along with a sample dataset to help you follow along. Let’s get started.
Steps to make a list within a cell in Excel:
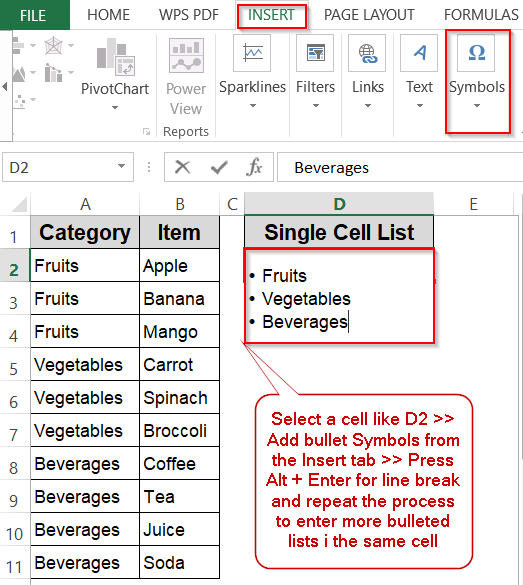
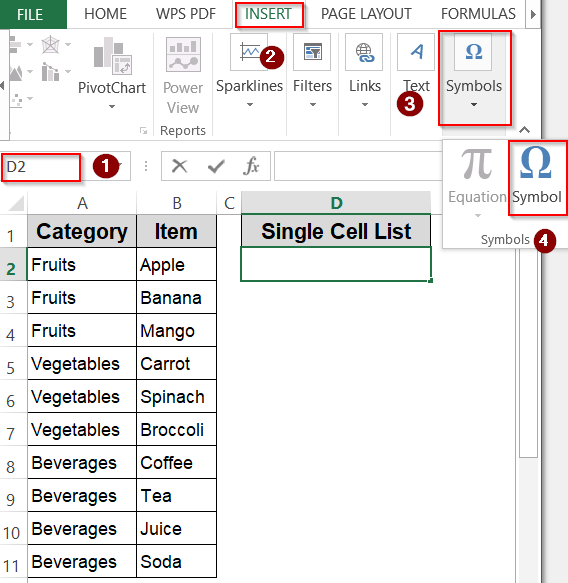
➤ Select the cell where the bullet will be inserted.
➤ Go to the Insert tab, then click Symbol in the Symbols group.
➤ In the Symbol window, choose a font like Segoe UI Symbol or Wingdings.
➤ Scroll to find your preferred bullet style and click Insert.
➤ Press Space after the bullet and type your text. Press Alt + Enter for line break inside the cell and repeat the process.
Pasting a Multi-Line List from Another Source
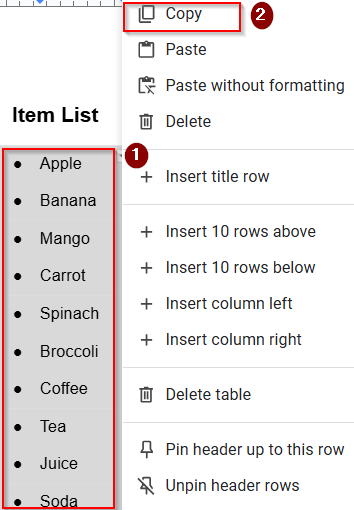
If your list is already created in another app (like Word, Notepad, or an email), you can paste it directly into a single Excel cell. This is especially useful for large lists that would take too long to type manually.
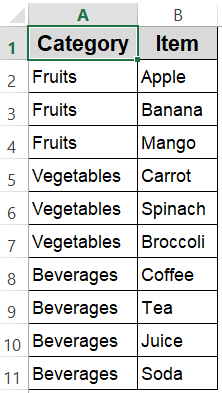
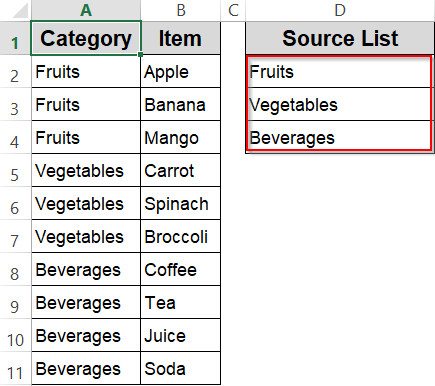
This is the dataset we will be using:
Steps:
➤ Copy your list from the original source.
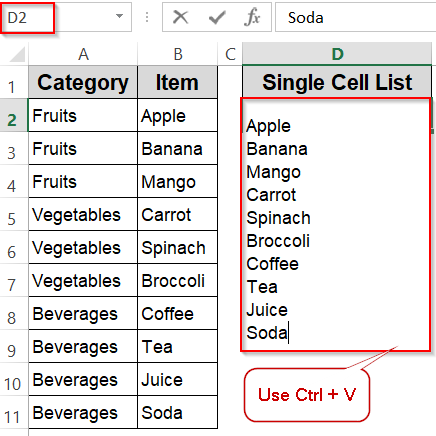
➤ In Excel, double-click the target cell to edit it such as D2.
➤ Paste the list (Ctrl + V on Windows, Command + V on Mac).
➤ Excel will automatically insert line breaks between items.
This saves time and ensures the formatting is preserved without having to type everything again.
Add Decorative Bullets Using the Symbol Feature
If you want more bullet style options, Excel’s Symbol dialog box gives access to hundreds of characters, including various bullet shapes. This is a straightforward way to create decorative or non-standard bullet lists without memorizing codes. We’ll use it to create a bulleted Category list in a single cell.
Steps:
➤ Select the cell where the bullet will be inserted.
➤ Go to the Insert tab, then click Symbol in the Symbols group.
➤ In the Symbol window, choose a font like Segoe UI Symbol or Wingdings.
➤ Scroll to find your preferred bullet style and click Insert.
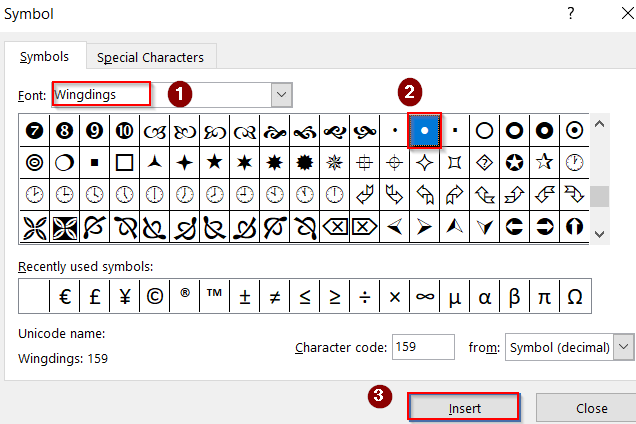
➤ Press Space after the bullet and type your text. Press Alt + Enter for line break inside the cell and repeat the process.
➤ Alternatively, hold the Alt key and type 0149 on the numeric keypad to insert a bullet (●).
This method is great for users who want a variety of bullet styles while keeping the process simple and menu-based.
Insert Bullets Quickly with Keyboard Shortcuts
For quick bullet creation, nothing beats keyboard shortcuts. This approach lets you instantly insert bullets without navigating menus, making it perfect for frequent bullet users. While Excel doesn’t have a native bullet shortcut like Word, you can use Alt codes to type them directly. We’ll use it to create a bulleted Category list in a single cell.
Steps:
➤ Select the cell where you want to insert the bullet.
➤ Double-click inside the cell or press F2 to enter edit mode.
➤ Hold the Alt key and type 0149 on the numeric keypad to insert a bullet (●).
➤ Press Space and then type your text.
➤ For multiple bullets in one cell, press Alt + Enter to add a new line, then repeat the shortcut.
This method is ideal for power users who prefer speed and minimal mouse interaction when working in Excel.
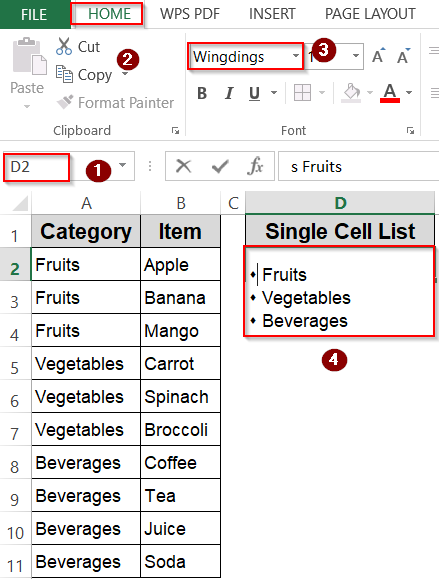
Using Special Symbol Fonts for Bulleted Lists
Excel supports symbol-based fonts such as Wingdings and Webdings, which are packed with characters perfect for creating stylish bullets. By changing a cell’s font to one of these, you can type characters that instantly appear as bullet points, giving your list a unique and visually appealing style without inserting symbols manually. This method is great for users who want to create a consistent bullet style across many cells quickly.
Steps:
➤ Select the cell or range where you want to add bullets.
➤ Go to the Home tab and locate the Font drop-down.
➤ Change the font to Wingdings or Webdings.
➤ Type a character such as the lowercase “S” or “L” to produce a bullet shape (different keys give different symbols).
➤ Press Alt + Enter after each bullet item to add multiple bullets in the same cell.
This method is perfect for stylized bullet lists where you want a consistent, professional look without using insert menus repeatedly.
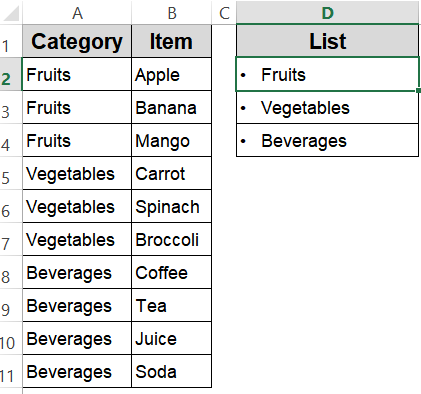
Creating a Bulleted List Using the CHAR Function in Excel
Sometimes, you want your Excel lists to look neat and professional with actual bullet points. The CHAR function allows you to insert special characters, including bullets, directly into a cell. By combining CHAR with text, you can create clean, visually appealing bulleted lists without using symbols manually.
Steps:
➤ In a new column, enter the formula to add a bullet before each item. For example, in D2, type:
=CHAR(149)&" "&A2
Here, CHAR(149) inserts a bullet, and ” “&A2 adds the item text from column A.
➤ Press Enter. You will see a bullet followed by the item name (e.g., • Fruits).
➤ Drag down the formula and change cell references accordingly.
➤ Adjust the column width if necessary to ensure all bullets and text are fully visible.
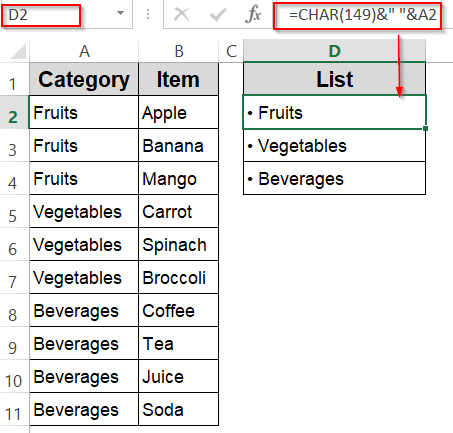
Now, your Excel sheet displays a clean, bulleted list for easy reading and presentation.
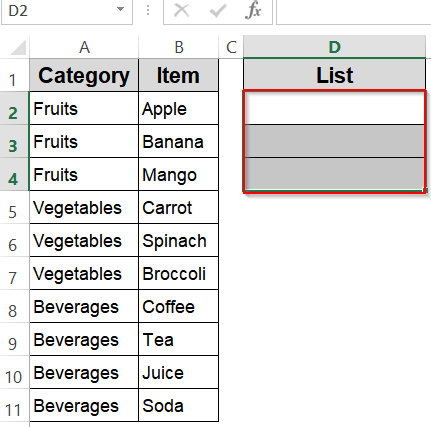
Creating Bulleted Lists with Custom Number Formatting
If you want your bullets to be purely visual and avoid altering your cell’s actual content, Custom Number Formatting is an excellent choice. This approach lets you display bullet points before text without typing special characters, keeping the underlying data clean for calculations or sorting.
Steps:
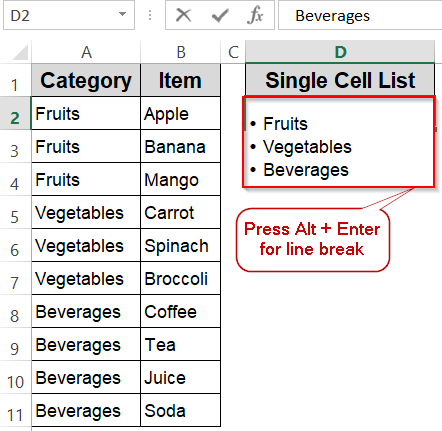
➤ Select the cell or range where your text list will be placed such as D2:D4.
➤ Press Ctrl + 1 to open the Format Cells tab.
➤ Go to the Number tab and select Custom.
➤ In the Type field, enter “• @” (use the Alt + 7 bullet or copy-paste one).
➤ Click OK and then type your text normally. Excel will automatically display bullets before each entry.
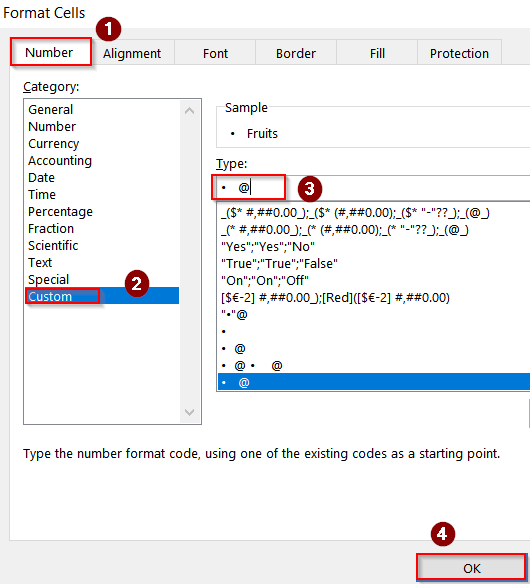
This method ensures your list remains both visually appealing and data-friendly, ideal for when you want style without interfering with data processing.
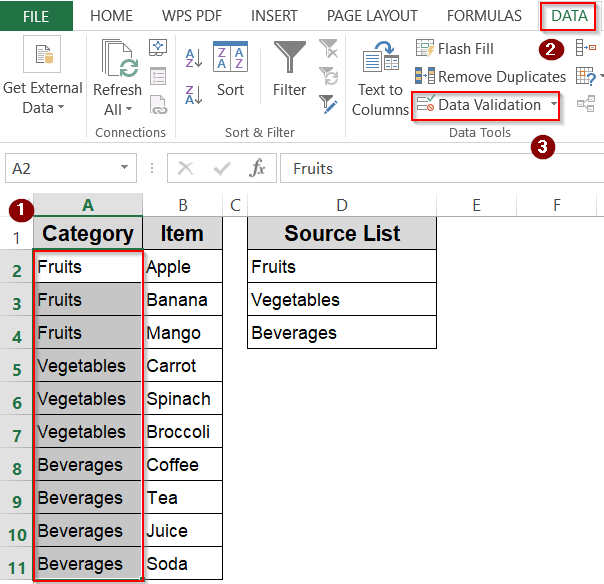
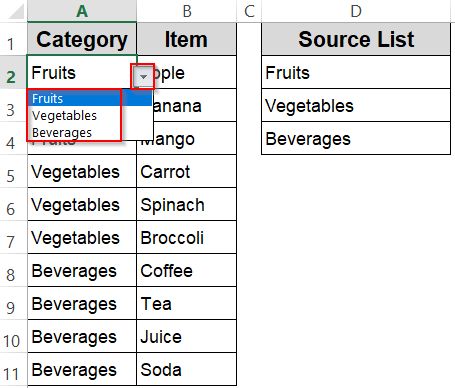
Using Data Validation to Create a Drop-Down List Inside a Cell
Manually entering data in Excel can lead to mistakes, inconsistencies, and slow data entry, especially when dealing with repeated categories or items. Drop-down lists solve this problem by allowing you to select from predefined options directly within a cell. This not only speeds up your workflow but also ensures accuracy and consistency across your spreadsheet. Using Data Validation, you can easily create flexible and professional drop-down lists tailored to your dataset.
Steps:
➤ Create a list of options in a separate column (e.g., D2:D4 for categories such as Fruits, Vegetables, Beverages).
➤ Select the cell(s) where you want the drop-down list (e.g., A2:A11).
➤ Go to Data >> Data Validation.
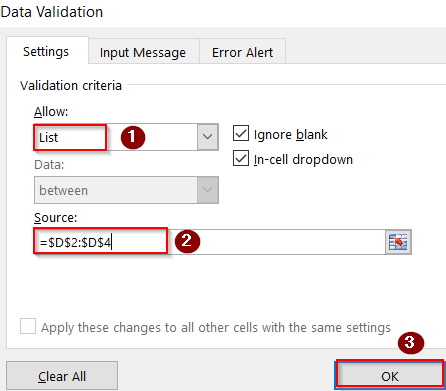
➤ In the Allow box, choose List.
➤ In the Source box, select your list range (D2:D4).
➤ Click OK.
Now, each cell will display a drop-down arrow, letting you pick items from the list.
Frequently Asked Questions
Can I make a bullet list in Excel without using the Symbol menu?
Yes. Use Alt + 7 on Windows or CHAR(149) formula for bullets. These methods let you quickly add bullets without navigating menus, perfect for dynamic lists that frequently change.
How do I add multiple lines in one Excel cell without breaking the layout?
Press Alt + Enter (Windows) or Control + Option + Enter (Mac) between items. Ensure Wrap Text is enabled so all lines display properly, keeping your multi-line list neat and contained within a single cell.
Will my text formatting affect the look and readability of an in-cell list?
Yes. Font size, alignment, and row height directly affect appearance. Left alignment improves readability, while proper spacing ensures no items are cut off, keeping your in-cell bullet or numbered lists clean and easy to scan.
Can I copy a bullet or numbered list from Word or another application into Excel?
Yes. Double-click the cell before pasting to keep everything together. Replace paragraph breaks with Alt + Enter to maintain separation. Adjust font and spacing afterward to match Excel’s formatting style.
Wrapping Up
In this tutorial, we explored multiple ways to create a list within a single cell in Excel, from inserting bullet symbols to copying formatted lists and making drop-downs. By applying these methods, you can keep related information neatly organized without spreading across multiple rows or columns. Whether for quick notes, product details, or data collection forms, in-cell lists make your spreadsheet cleaner and more user-friendly. Feel free to download the practice file and share your feedback.