When you download transaction data from your bank’s website, it will probably be downloaded as a CSV file. The data in the CSV file is not properly formatted or organized, making it harder to understand. Fortunately, it is easy to import that data into Excel and make it readable. In this article, we will learn how to organize bank statements in Excel. We will learn how to import the data, format it, and calculate the balance.
➤ Import the data from Data > Get Data > From File.
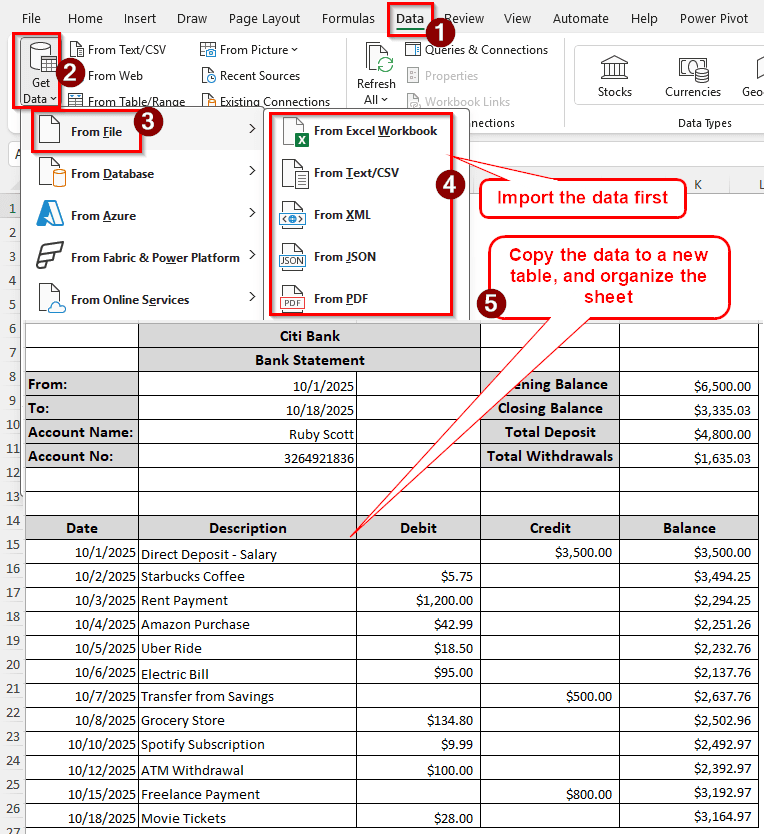
➤ Prepare a format for the bank statement in another sheet.
➤ Copy the data from the imported sheet, and assign appropriate values.
The organization of bank statements varies among different individuals. There is no one single way to do this, and you might not like the way we show. Whatever method you follow will be okay, as the bank statement organization does not follow a strict principle. Study the tutorial below to learn our method of organizing bank statements.
Steps to Organize Bank Statements in Excel
We have a sample file that is almost the same as the one you will get when you download one from your bank. We will use that file to import the transactions and build an organized bank statement.
Step 1: Import Data to Excel
First, we need to import the data downloaded from the bank’s website in Excel. Follow the steps below:
➤ Open Microsoft Excel, and go to the Data tab of the ribbon.
➤ From Get & Transform Data, go to Get Data > From File.
➤ Now, if you have downloaded a CSV file, choose From Text/CSV. If you downloaded a PDF file, select From PDF.
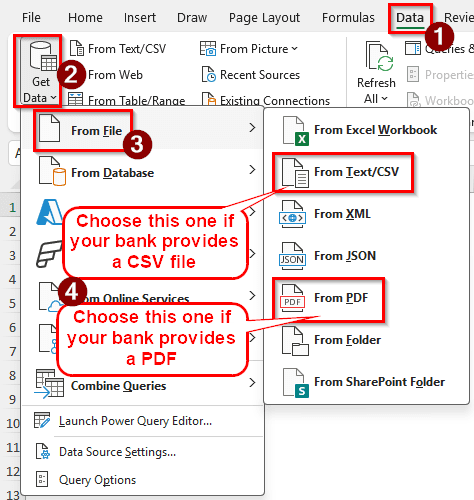
➤ We are selecting the csv file here. Browse for the file and hit Import.
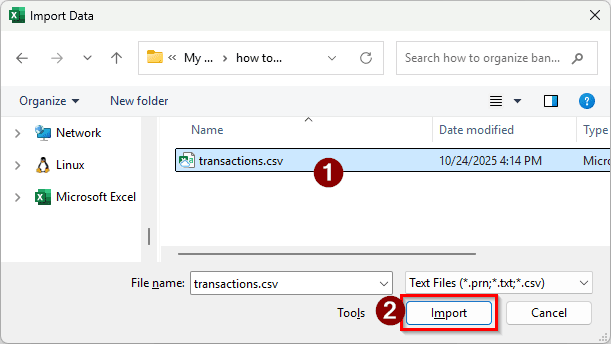
➤ In the new window, select Load.
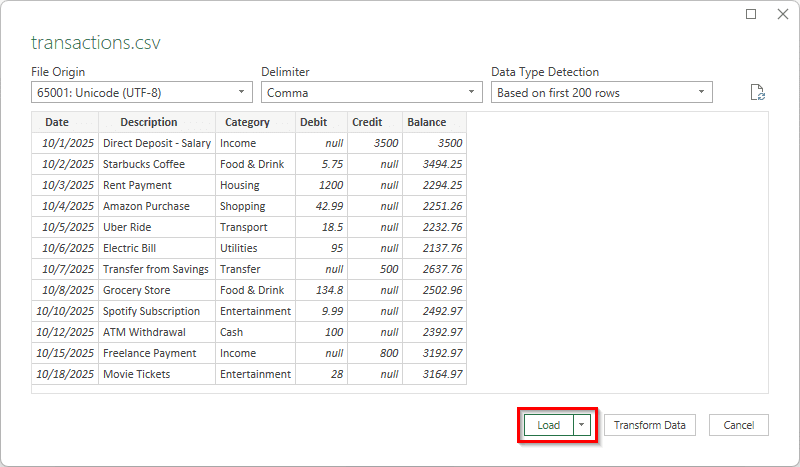
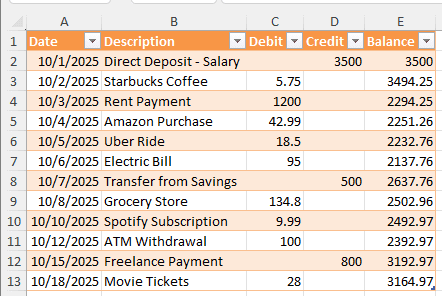
➤ Excel will create a table for you automatically.
Step 2: Organize the Bank Statement
Now that the data is imported from the downloaded file, we can move on to organizing the statement.
➤ Create a new sheet for the organized bank statement by pressing the plus (+) icon on the right of the sheet name at the bottom of Excel.
![]()
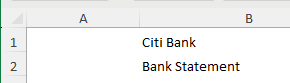
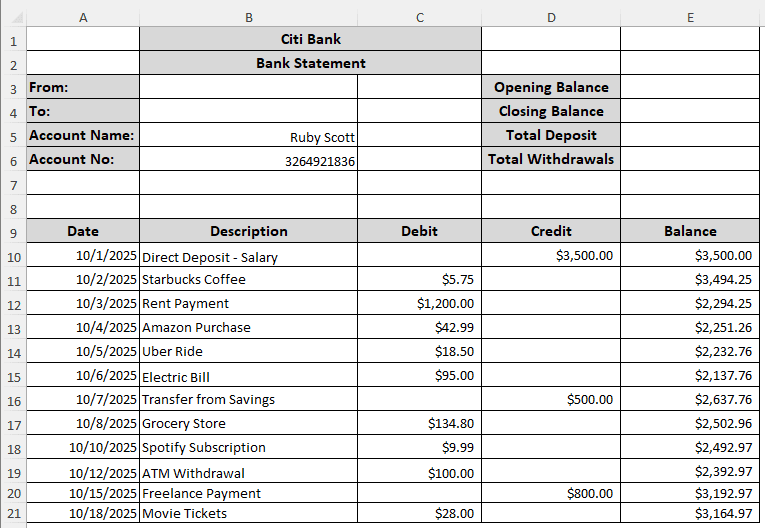
➤ In the new sheet, write the bank name on B1, and the title “Bank Statement” on B2:
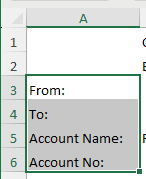
➤ Next, from A3 to A6, write the following:
From:
To:
Account Name:
Account No:
➤ Fill the Account Name and Account No, then go to the transactions table and copy it.
➤ Go to the A9 cell, and from the Clipboard group of the Home tab, select Paste> Paste Values.

➤ Now, put some decorations on the sheet, be creative but professional. Here’s what we chose:
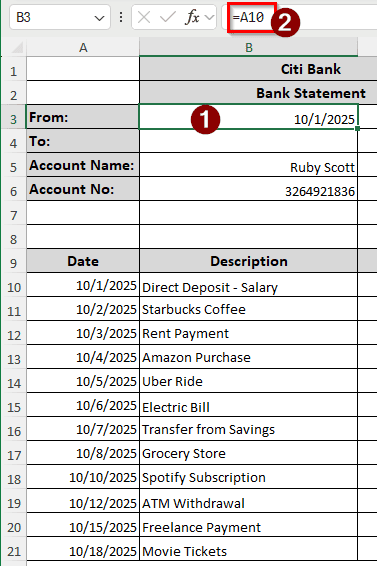
➤ In the B3 cell, refer to the first date of the transactions:
=A10
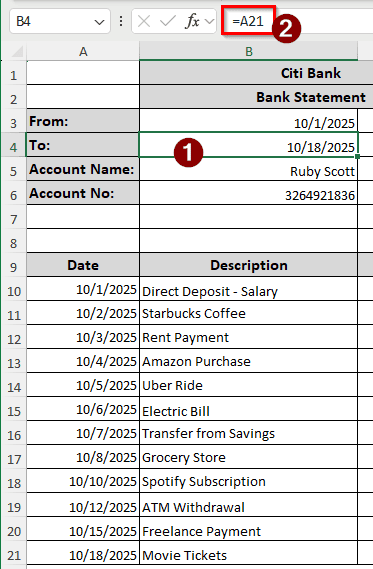
➤ In the B4 cell, insert the ending date:
=A21
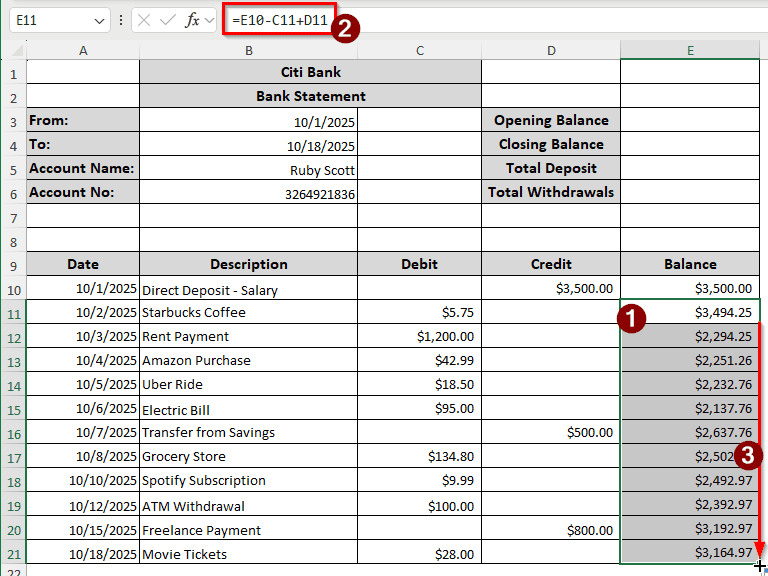
➤ Calculate the running balance again by inserting the following formula in the E11 cell, and autofilling till E21:
=E10-C11+D11
➤ Write the opening balance from the closing balance of the last month.
➤ In the E4 cell, write the following formula:
=E3-E21

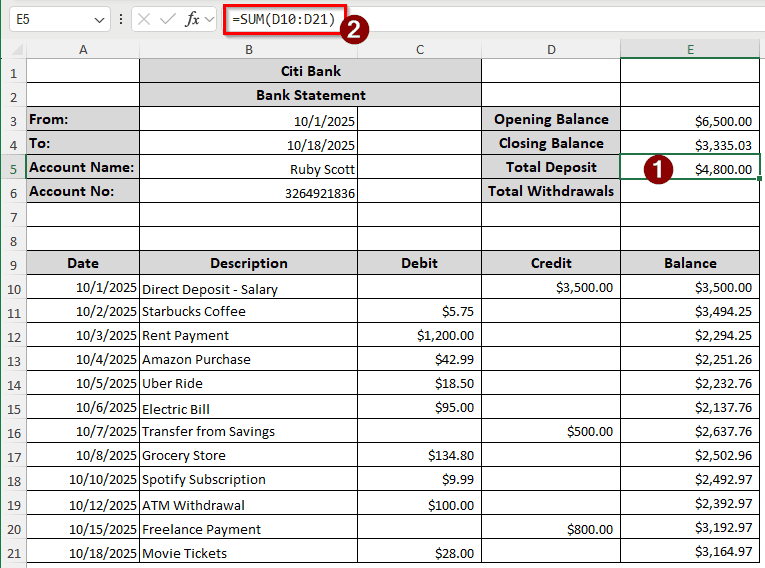
➤ Calculate the total deposit in the E5 cell using the following formula:
=SUM(D10:D21)
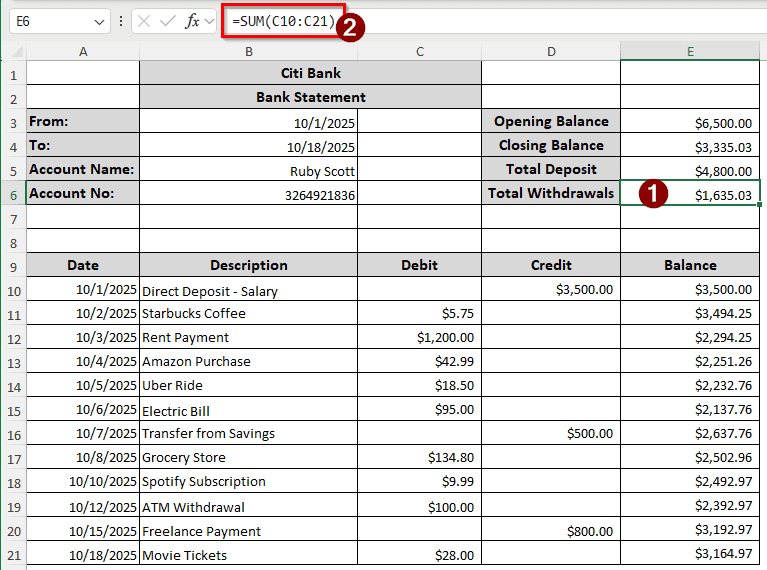
➤ Finally, calculate the total withdrawals using the following formula:
=SUM(C10:C21)
Frequently Asked Questions
Is there an app to edit bank statements?
Excel can be used both on your mobile device and your PC to edit bank statements. Your bank might also have a dedicated app that will let you edit data and submit it for reconciliation. Other than that, you can use any office app to edit bank statements.
Can I hide things on my bank statement?
You can hide sensitive information on your bank statement, but don’t try to hide something that you are supposed to share legally. A lot of government or investment-related tasks require bank statements, and if you hide suspicious transactions, you might face a lawsuit.
Is a bank statement confidential?
Yes, a bank statement is a very private document. It shows a lot of information about you, and companies might use it to track your patterns. Don’t share your bank statement with someone you don’t completely trust, like corporations.
Can AI analyse my bank statements?
Yes, but you should not upload your bank statement to an AI that uses your data to train the model. Bank statements are private information and should be treated as such. Use a local LLM or an AI that respects your privacy.
How to check if a bank statement is edited?
If the bank statement is edited by an expert, it would be hard to check, but in most cases, it isn’t. Therefore, you can look for inconsistencies and weird things in the statement to find signs of editing. Check the fonts, word size, logos, etc., to know whether it is edited or not.
Wrapping Up
In this article, we have learned how to organize bank statements in Excel. Make sure to follow the steps mentioned in the article carefully to properly organize your data. We have included the organized transactions with this article for you to download. Leave a comment below about what article you want to see next. We will see you in another tutorial.