When you automate reports or data organization in Excel, adding new worksheets programmatically is one of the most common tasks. With VBA, you can easily create new sheets and assign them meaningful names instead of leaving them as “Sheet1,” “Sheet2,” and so on.
In this guide, we’ll look at different ways to add a sheet with a specific name in Excel VBA, including how to name it immediately after creation, insert it in a specific position, create multiple sheets with dynamic names, and ensure you don’t accidentally create duplicates. Each method will help you control how and where new sheets are added in your workbook efficiently.
Steps to add a new sheet and assign a name
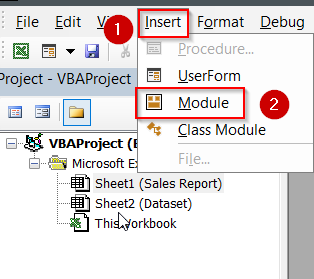
➤ Press Alt + F11 to open the VBA Editor.
➤ Go to Insert >> Module to add a new module.
➤ Paste this code into the module:
Sub AddNamedSheet()
' Add a new worksheet
Sheets.Add
' Rename the active sheet
ActiveSheet.Name = "Sales_Report"
' Confirm creation
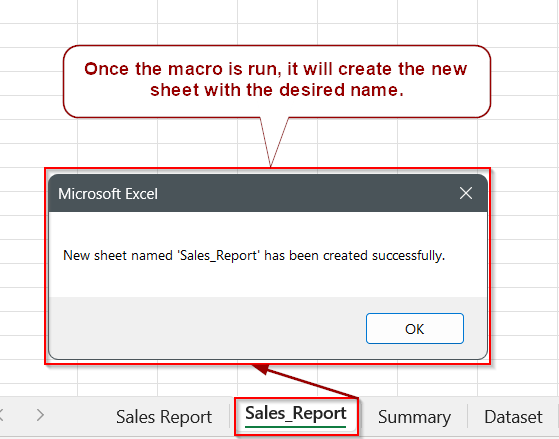
MsgBox "New sheet named 'Sales_Report' has been created successfully."
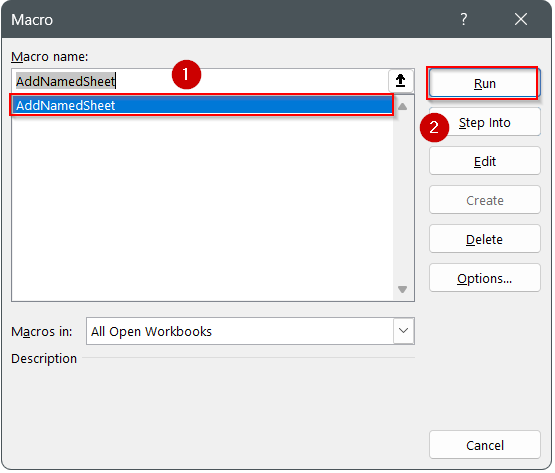
End Sub➤ Press F5 or go back to Excel, open the Macro window (Alt + F8), select AddNamedSheet, and click Run.
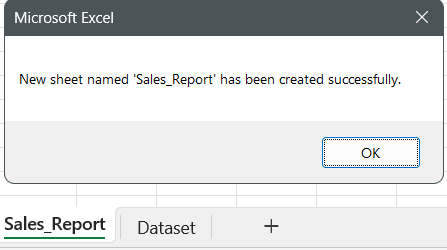
➤ A new sheet named Sales_Report will be created in your workbook.
Add a New Sheet and Assign a Name in Excel VBA
In Excel VBA, adding a new worksheet and assigning it a meaningful name is a common task when organizing data programmatically. This method shows how to create a new sheet in your workbook and set its name immediately after adding it, ensuring clarity and easy identification.
This is the dataset that we will be using to demonstrate the methods:
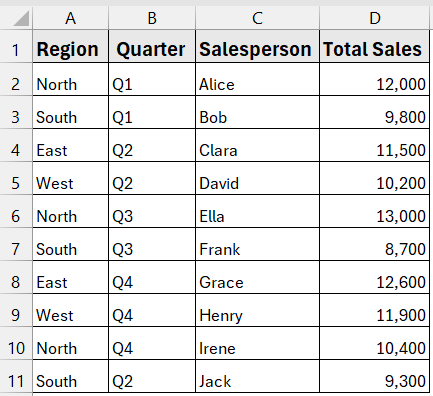
Using our dataset, we’ll create a new worksheet named “Sales_Report” to store overall sales summaries.
Steps:
➤ Press Alt + F11 to open the VBA Editor.
➤ Go to Insert >> Module to add a new module.
➤ Paste the following code:
Sub AddNamedSheet()
    ' Add a new worksheet
    Sheets.Add
    ' Rename the active sheet
    ActiveSheet.Name = "Sales_Report"
    ' Confirm creation
    MsgBox "New sheet named 'Sales_Report' has been created successfully."
End Sub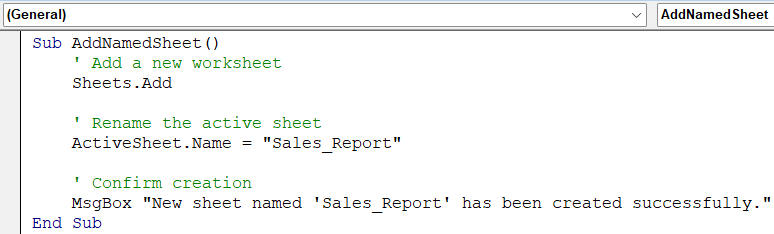
➤ Press F5 or go back to Excel, open the Macro window (Alt + F8), select AddNamedSheet, and click Run.
➤ You will see a new sheet named Sales_Report added to your workbook.
➧ ActiveSheet.Name = "Sales_Report" renames the newly added worksheet.
➧ You can change "Sales_Report" to any name you want, such as "Summary" or "Quarterly_Data".
➧ A message box confirms successful sheet creation.
Add and Name the Sheet in a Single Line in Excel VBA
Sometimes you want to streamline your code by creating and naming a worksheet in one step. This method combines the addition of a new sheet and its naming into a single line, reducing extra commands and making the code cleaner.
For demonstration, we will create a worksheet named “Summary” to store aggregated data.
Steps:
➤ Press Alt + F11 to open the VBA Editor.
➤ Go to Insert >> Module to add a new module.
➤ Paste the following code:
Sub AddSheetSingleLine()
    ' Add a new worksheet and assign a name in one line
    Sheets.Add.Name = "Summary"
    ' Confirm creation
    MsgBox "New sheet named 'Summary' has been created."
End Sub 
➤ Press F5 while in the VBA editor or return to Excel, open the Macro window (Alt + F8), select AddSheetSingleLine, and click Run.
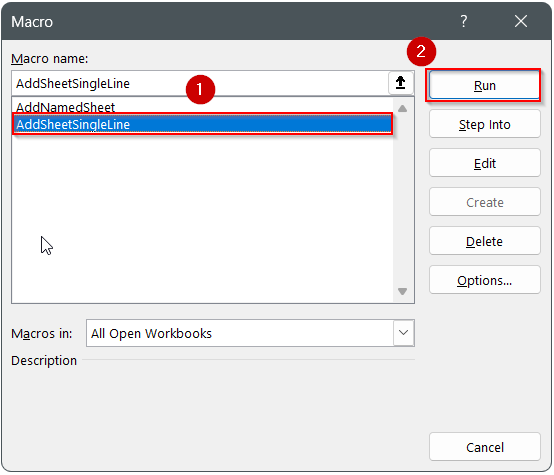
➤ A new sheet named Summary will appear in your workbook.

➧ This approach is efficient when you want to quickly add a sheet without using multiple lines of code.
➧ It is useful for automating reports or dashboards where new sheets are frequently added with predefined names.
Add a Sheet at a Specific Location in Excel VBA
In many cases, you may want to control where the new worksheet appears within your workbook. This method allows you to add a sheet before or after a specific existing sheet, then assign it a name. This helps keep your workbook organized, especially when working with multiple sheets.
For demonstration, we will add a sheet named “Data” at the end of the workbook.
Steps:
➤ Press Alt + F11 to open the VBA Editor.
➤ Go to Insert >> Module to add a new module.
➤ Paste the following code:
Sub AddSheetAtSpecificLocation()
    ' Add a new worksheet after the last sheet
    Sheets.Add After:=Sheets(Sheets.Count)
    ' Assign a name to the newly added sheet
    ActiveSheet.Name = "Data"
    ' Confirm creation
    MsgBox "New sheet named 'Data' has been created at the end."
End Sub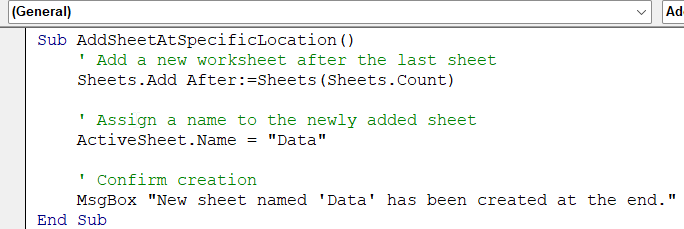
➤ Press F5 in the VBA editor or return to Excel, open the Macro window (Alt + F8), select AddSheetAtSpecificLocation, and click Run.
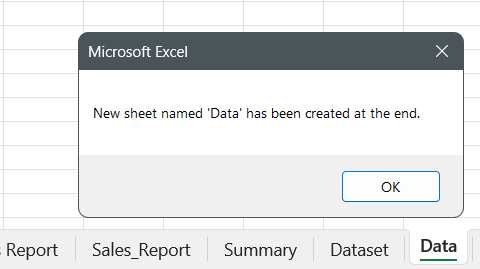
➤ A new sheet named Data will be added at the end of your workbook.
➧ ActiveSheet.Name = "Data" assigns the desired name to the new sheet.
➧ This method is helpful when you want to control sheet placement rather than relying on Excel’s default behavior of inserting sheets at the beginning.
Frequently Asked Questions (FAQs)
Can I use this method to add sheets to a specific workbook?
Yes. Prefix Sheets.Add with the workbook reference, for example:
ThisWorkbook.Sheets.Add.Name = “Report”
What happens if a sheet with the same name already exists?
VBA will throw a runtime error. To avoid this, use the “Add Only If It Doesn’t Already Exist” method.
Can I add multiple sheets in a specific order?
Yes. You can specify Before or After when adding sheets inside a loop to control the placement.
Can dynamic sheet names be generated from cell values?
Absolutely. You can replace the array with a range from your worksheet and loop through each cell’s value.
Wrapping Up
Adding and naming sheets with VBA makes workbook management faster and more reliable, especially for repetitive tasks. You can choose a simple method to add a single sheet or use loops and arrays for multiple sheets. Always consider checking for existing sheet names to avoid errors. By mastering these techniques, you can automate the organization of data and reporting in Excel efficiently.