When you embed an Excel sheet into a PowerPoint presentation, you might encounter an issue where only a portion of your data is visible. This problem can lead to errors, especially when preparing a presentation that needs to display complete information. In this article, we will cover the most common reasons why the embedded Excel data isn’t fully showing up and provide step-by-step solutions for each scenario.
The two main reasons an embedded Excel object may not show all data are if the Excel object was inserted as a picture instead of an embedded workbook. If there are hidden rows in the Excel sheet before embedding, you might not get the full data displayed.
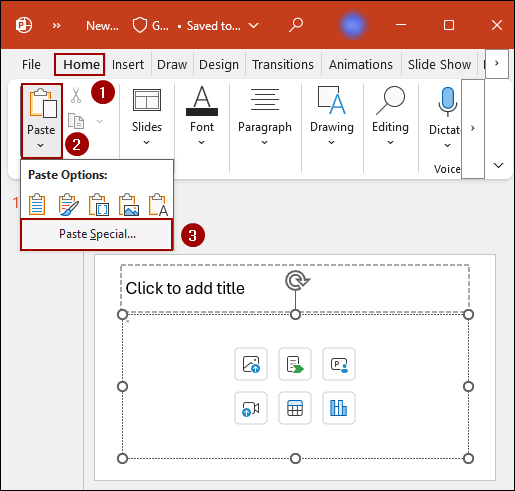
To solve the embedded Excel in PowerPoint not showing all data, here is one simple solution by using the Paste Special tool.
➤ Select the entire range from the Excel sheet and press Ctrl + C to copy.
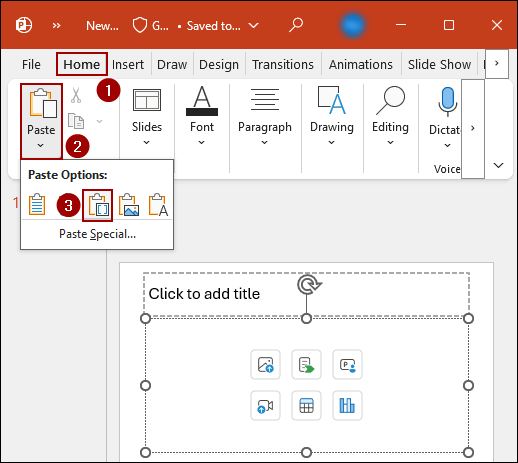
➤ Switch to PowerPoint, go to Home > Paste Special.
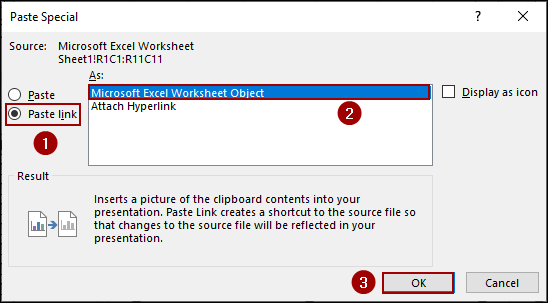
➤ In the Paste Special dialog box, select Paste link on the left.
➤ Choose Microsoft Excel Worksheet Object as the format.
➤ Click OK, and the embedded Excel will show all the data in PowerPoint.
Excel Workbook Inserted as a Picture Instead of an Embedded Workbook
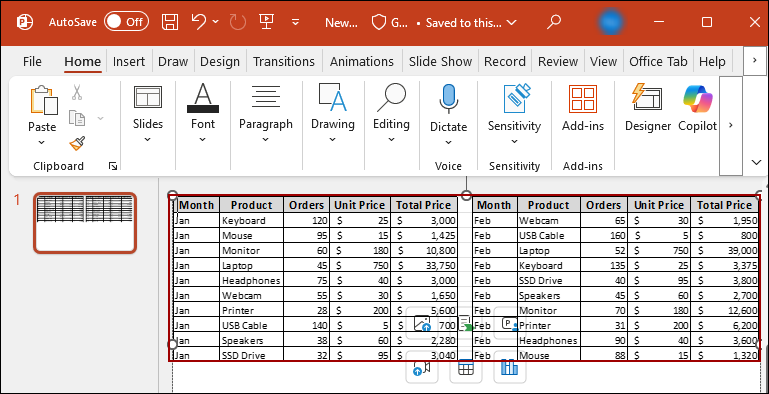
When you directly insert an Excel file into PowerPoint, it often defaults to pasting it as a picture or a table object, not a true embedded Excel workbook. Thus, it will not show all data from the Excel sheet. Here, we will insert the Excel workbook as a picture to show the problem and then solve this using the Paste Special tool.
Problem:
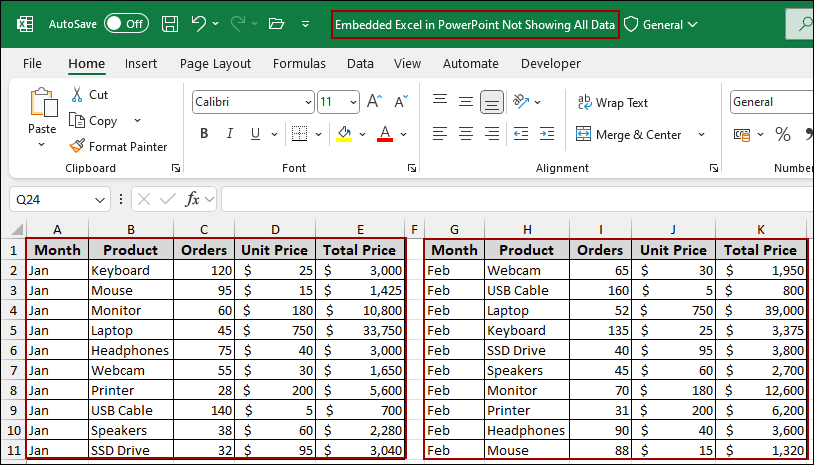
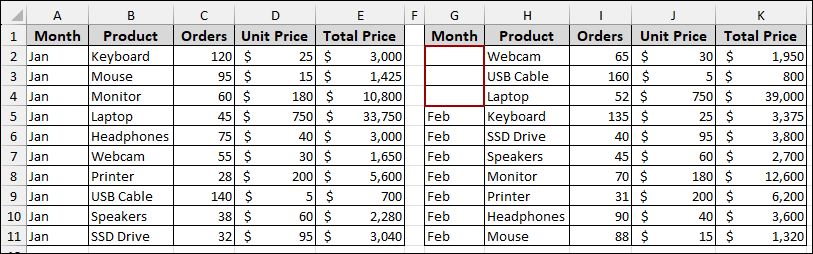
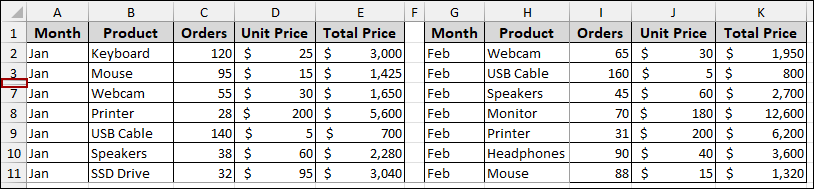
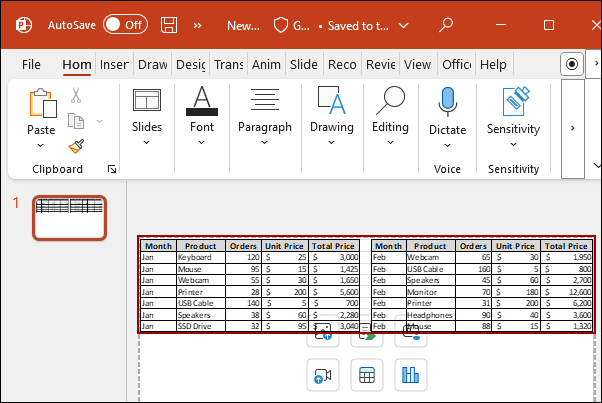
Suppose we have a complete sales data table for Jan and Feb from column A to column K. The workbook is saved as “Embedded Excel in PowerPoint Not Showing All Data”. Let’s insert the data from the Excel sheet into PowerPoint using the Insert Object method.
➤ In PowerPoint, go to the Insert tab.
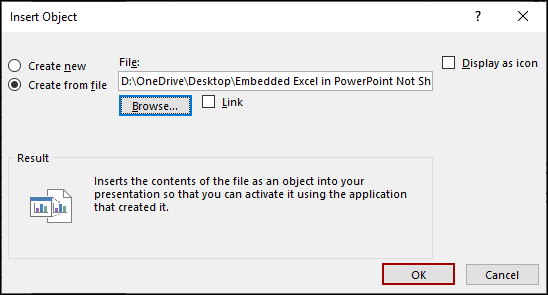
➤ In the Text group, click Object.
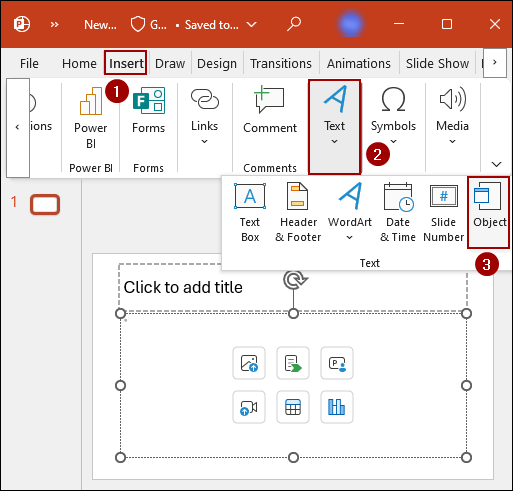
➤ In the Insert Object dialog box, select the Create from file option.
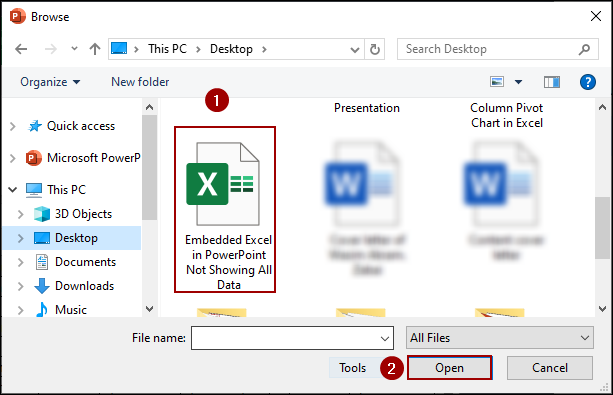
➤ Click Browse to locate your Excel file.
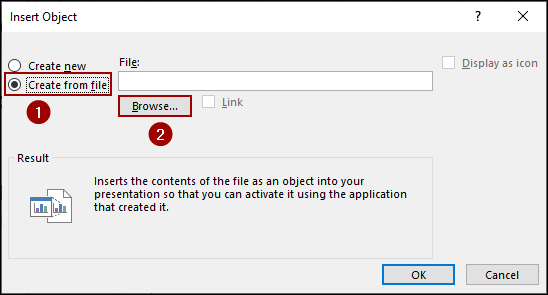
➤ Select the file and click Open.
➤ Back in the Insert Object dialog box, click OK.
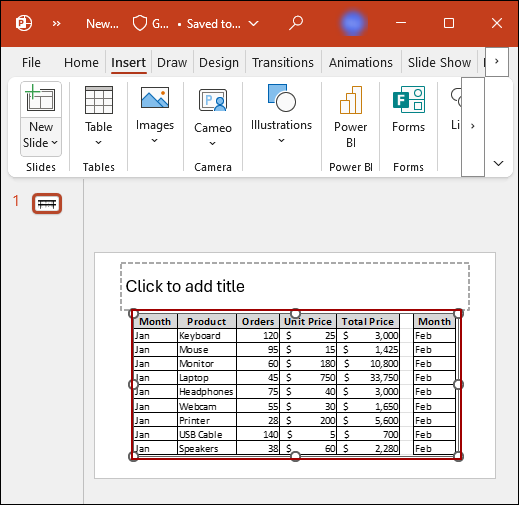
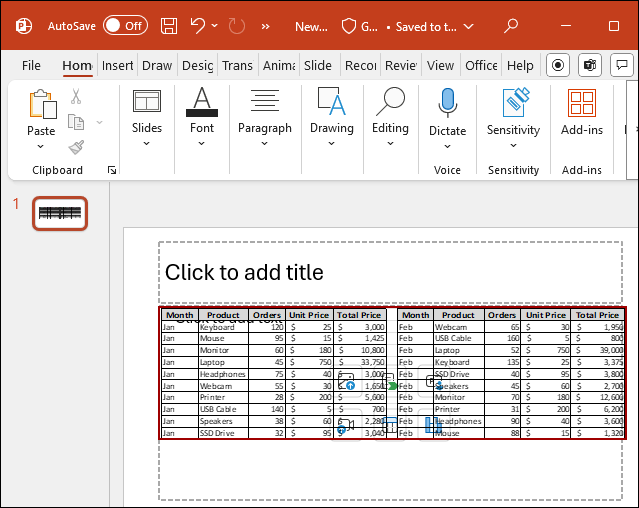
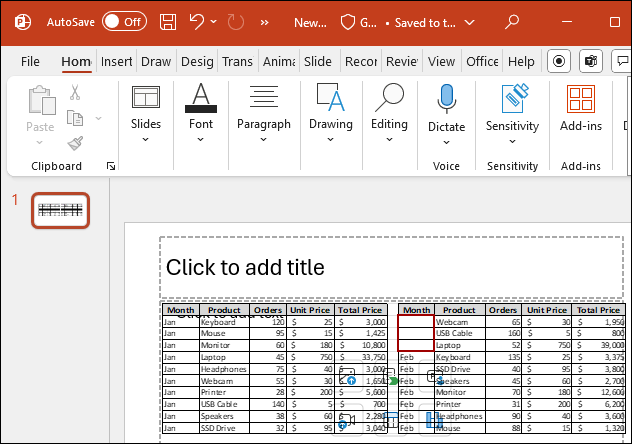
As a result, you will see that the embedded Excel in PowerPoint does not show all the data.
Solution:
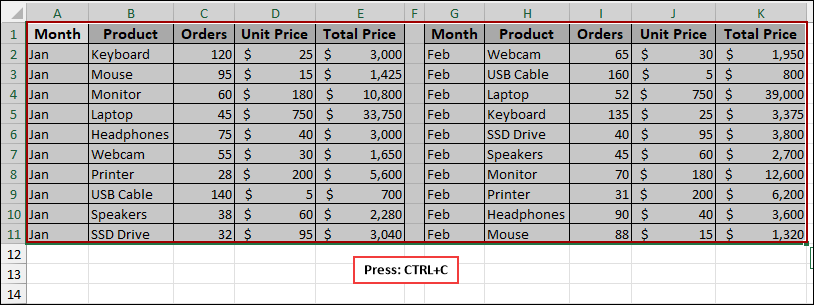
Let’s go back to our full Excel data table and select the entire range (A1:K11).
➤ Press Ctrl + C to copy it.
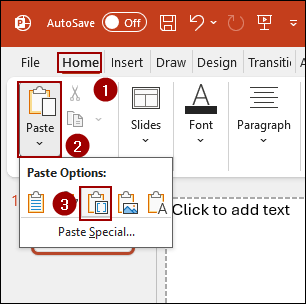
➤ Switch to PowerPoint, go to the Home tab, click the drop-down arrow under Paste, and select Paste Special.
➤ In the Paste Special dialog box, select Paste link on the left.
➤ On the right, select Microsoft Excel Worksheet Object as the format, and then click OK.
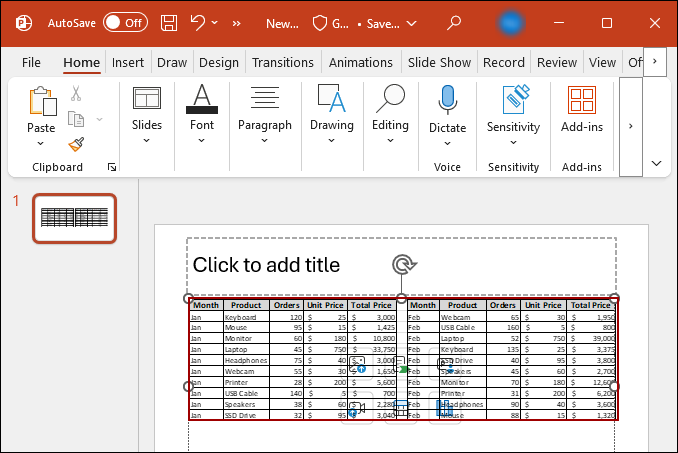
This method ensures the full data is pasted as an embedded object, correctly displaying all columns from A to K. By utilizing this method, you will get dynamic data in PowerPoint. Whenever you change any data from the Excel sheet, it will be updated in the PowerPoint too.
To check, let’s switch to the Excel sheet and delete some data from Column G.
Returning to the PowerPoint, we will see that the file has been updated with the change.
In some cases, you might not need to update your PowerPoint file with the changes made in Excel. In that case, you can paste the Excel data as a picture.
➤ Copy data from the Excel sheet.
➤ In PowerPoint, go to Home > Paste > Embed.
As a result, you will get the full data displayed in PowerPoint as a static image.
Hidden Rows in the Excel Sheet Before Embedding
A common reason for missing data is that some rows were hidden in the original Excel sheet before the range was copied and pasted into PowerPoint. PowerPoint will only paste the visible cells.
Problem:
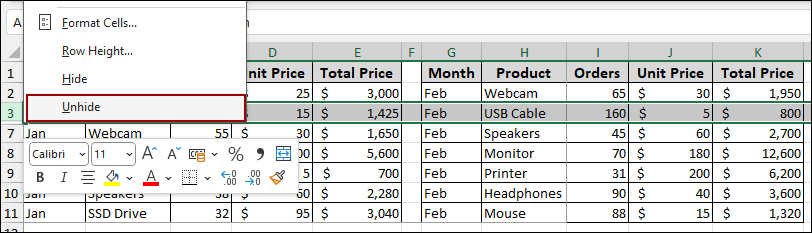
Suppose we have the Excel data, but this time, rows 4, 5, and 6 are hidden.
If we copy this visible range and paste it into PowerPoint, only the visible rows will appear.
Solution:
To fix this, you must unhide the rows in Excel before copying the data.
➤ Select the rows above and below the hidden range.
➤ Right-click on the selected row headers and click Unhide.
Now all the data, from row 1 to row 11, is visible again in the Excel sheet.
➤ Select the full range and press Ctrl + C .

➤ Switching to PowerPoint, click Home > Paste > Embed.
The new embedded object now correctly shows all data, as the source Excel sheet had no hidden rows when copied.

Frequently Asked Questions
Why does PowerPoint only show a single sheet from my Excel file?
PowerPoint embeds only the active sheet before insertion. The other sheets do not appear inside the object. You must activate the correct sheet before embedding.
I updated the Excel file, but PowerPoint is not reflecting the changes. What’s wrong?
You probably linked the file instead of embedding it, or inserted a static image. Linked files sometimes fail to refresh if the source path changes.
Does PowerPoint support scrolling inside an embedded Excel sheet?
Yes, but only when the worksheet is fully embedded, not when pasted as a picture or partial preview. You must enter edit mode (double-click) to scroll.
Concluding Words
Above, we have successfully solved the common issues that prevent an embedded Excel object from displaying all its data in PowerPoint. While copying data from Excel, you need to use the Paste Special tool to paste data as a Microsoft Excel Worksheet Object to show all data. Furthermore, before you copy any data, you must ensure that there are no hidden rows in your source Excel sheet, as PowerPoint will only paste visible cells. If you have any questions, please don’t hesitate to share them in the comments section below.