
Importing a Text File to Excel VBA means using Visual Basic for Applications (VBA) code to bring external text data into Excel worksheets automatically. Instead of using manual import wizards, VBA allows users to automate the process, define delimiters, and handle repetitive imports efficiently. We use VBA because it helps to save time, reduce manual effort, and ensure data consistency, particularly when we need to handle multiple text files and structured reports.
To import a text file to Excel using VBA, follow these steps:
➤ Open a new or existing Excel workbook.
➤ Alt + F11 to open the VBA editor.
➤ Insert a new module (Insert → Module) and paste your VBA code for importing the text file.
➤ Press F5 to run the script, select your text file from the file dialog, and the data will be imported automatically into the active worksheet.
In this article, we will describe how to import a text file into Excel VBA from a specific file location, using a file selection dialog, and importing data with multiple delimiters.
Import Text File to Excel Using VBA from a Specific File Location
VBA (Visual Basic for Applications) can import a text file directly into Excel by defining its file path. We use this approach when our text file’s location doesn’t change, such as when importing monthly or weekly reports from a fixed folder.
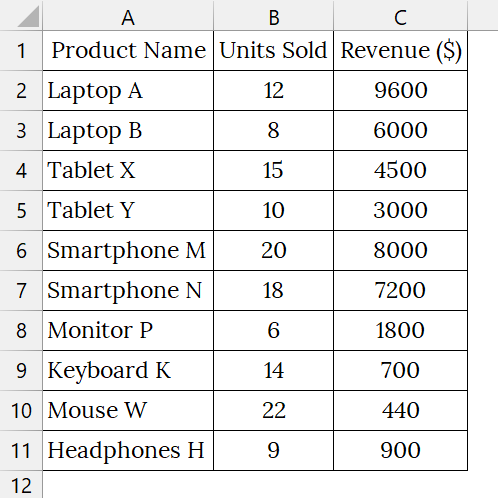
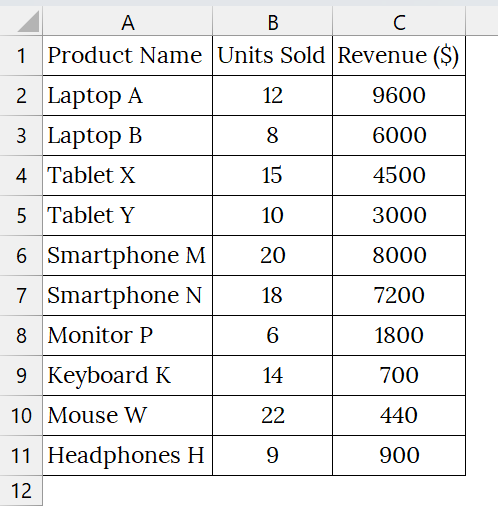
We have a text file that represents the sales report of an electronics shop, saved as a comma-separated text file. We will import this data into Excel by specifying the exact location of the text file using VBA.
Steps:
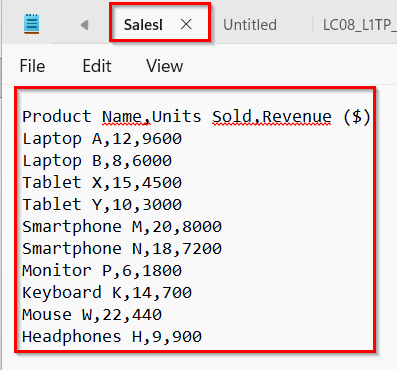
➤ We have taken a text file named SalesData.txt that contains comma-separated data like Product Name, Units sold, and Revenue.
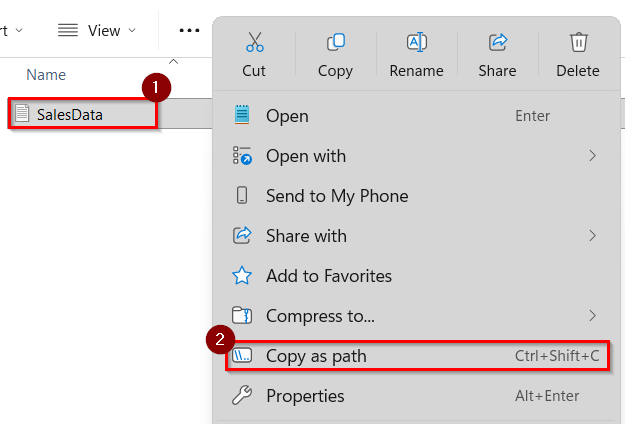
➤ Go to the folder where your text file is saved: StoreSalesData.txt.
➤ Hold down the Shift key, right–click on the file, and select Copy as path. This will copy the full directory of your text file, which we will later use in our VBA code.
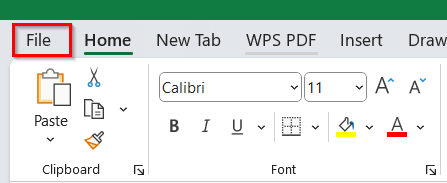
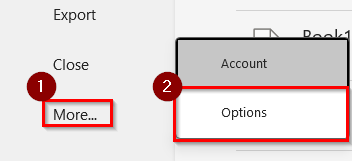
➤ If the Developer tab is not visible, click File.
➤ Choose more → Options.
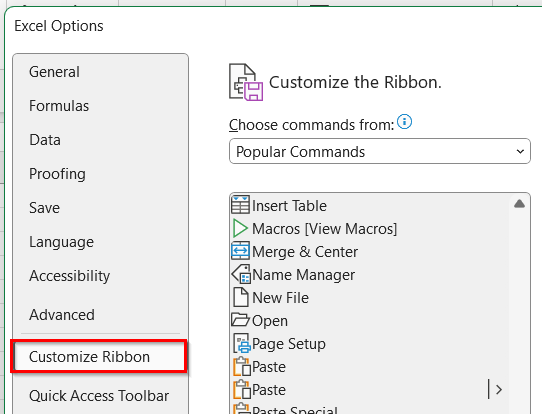
➤ Click on the Customize Ribbon.
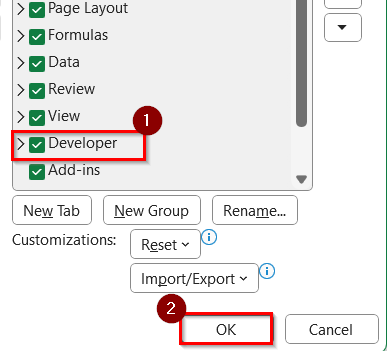
➤ Check Developer, and click OK.
➤ Now, open a blank worksheet.
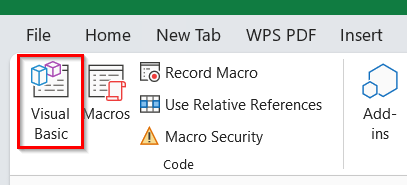
➤ Go to the Developer tab.

➤ Then select Visual Basic to open the VBA editor.

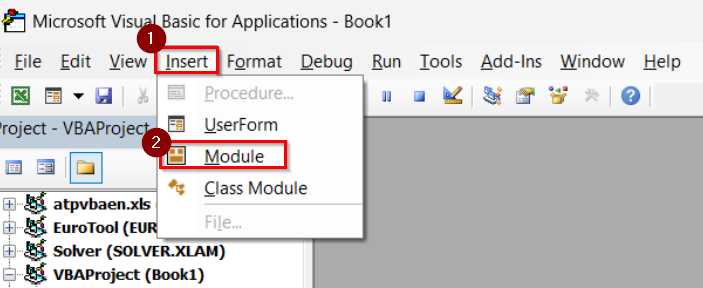
➤ Inside the VBA editor, click Insert → Module.
➤ A new code window will open where you will paste your VBA script.
➤ Copy and paste the following VBA code into the module window:
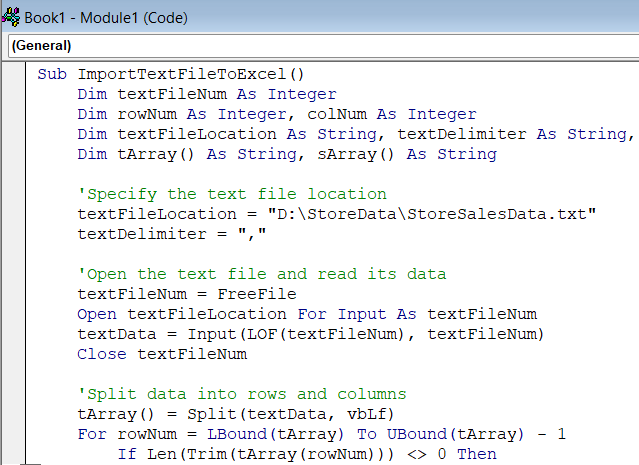
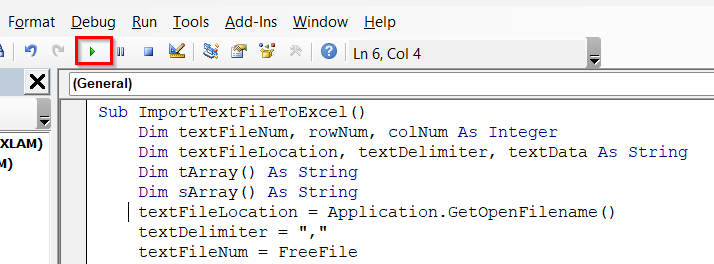
Sub ImportTextFileToExcel()
Dim textFileNum As Integer
Dim rowNum As Integer, colNum As Integer
Dim textFileLocation As String, textDelimiter As String, textData As String
Dim tArray() As String, sArray() As String
Specify the text file location
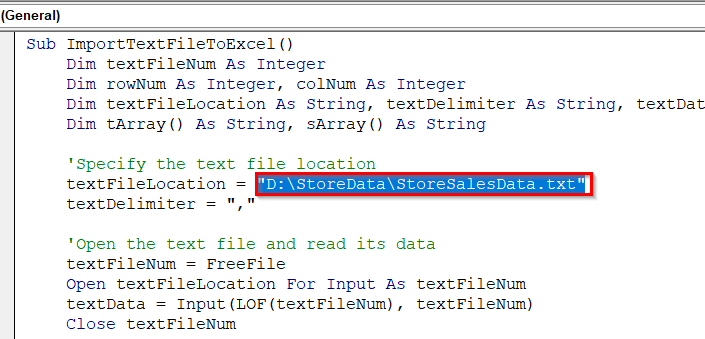
textFileLocation = "D:\StoreData\StoreSalesData.txt"
textDelimiter = ","
'Open the text file and read its data
textFileNum = FreeFile
Open textFileLocation For Input As textFileNum
textData = Input(LOF(textFileNum), textFileNum)
Close textFileNum
'Split data into rows and columns
tArray() = Split(textData, vbLf)
For rowNum = LBound(tArray) To UBound(tArray) - 1
If Len(Trim(tArray(rowNum))) <> 0 Then
sArray = Split(tArray(rowNum), textDelimiter)
For colNum = LBound(sArray) To UBound(sArray)
ActiveSheet.Cells(rowNum + 1, colNum + 1) = sArray(colNum)
Next colNum
End If
Next rowNum
MsgBox "Data Imported Successfully", vbInformation
End Sub➥ textDelimiter = "," tells VBA that the file is comma-separated.
➥The loop structure reads each line, splits it into parts using commas, and places the data into Excel cells.
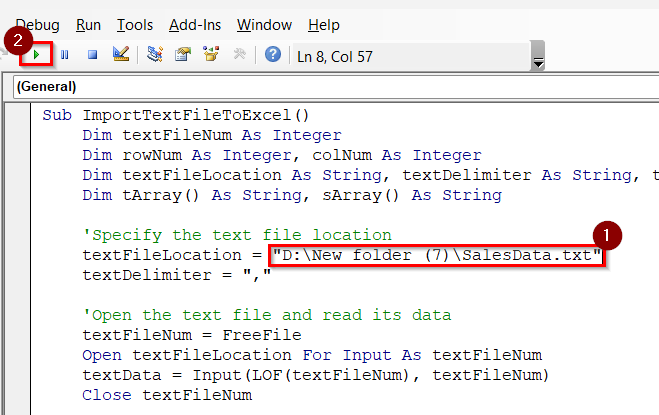
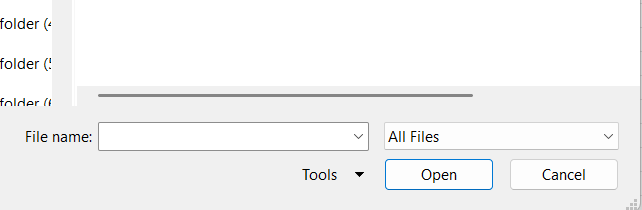
➤ Select the file path in the code.
➤ Replace the file path in the code with your own (that you have copied earlier). For example: “D:\New folder (7)\SalesData.txt”. Make sure the path includes the .txt file extension.
➤ Press F5 on your keyboard or click Run.
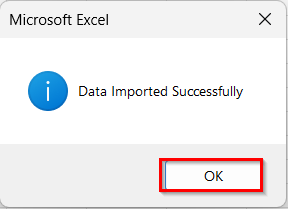
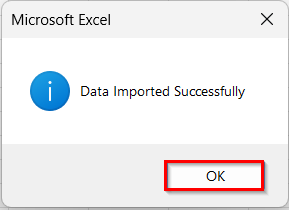
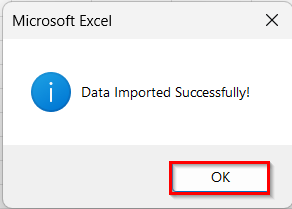
➤ After the script executes, Excel will display a message box saying “Data Imported Successfully”. Click Ok.
➤ The data will appear in your active sheet.
Import a Text File to Excel Using a File Selection Option
Data can be imported from any text file that is located anywhere into Excel by simply selecting the file through a file dialog box. This approach is suitable when the file path changes or when importing multiple files.
We have a text file that contains a shop’s sales record. The text file represents a small shop’s daily sales data containing product names, units sold, and revenue. We will import the data directly into Excel using the VBA method, without needing to manually open and copy the text file content or to paste the file location URL.
Steps:
➤ Open a new blank worksheet. Go to the Developer tab.

➤ Then select Visual Basic to open the VBA editor.

➤ In the VBA window, navigate to the menu and click Insert → Module.

➤ A new code window will open where you will paste our VBA script.

➤ Copy and paste the following VBA script inside the newly created module, which will open a file explorer window where you can select the text file to import:
Sub ImportTextFileToExcel()
Dim textFileNum, rowNum, colNum As Integer
Dim textFileLocation, textDelimiter, textData As String
Dim tArray() As String
Dim sArray() As String
textFileLocation = Application.GetOpenFilename()
textDelimiter = ","
textFileNum = FreeFile
Open textFileLocation For Input As textFileNum
textData = Input(LOF(textFileNum), textFileNum)
Close textFileNum
tArray() = Split(textData, vbLf)
For rowNum = LBound(tArray) To UBound(tArray) - 1
If Len(Trim(tArray(rowNum))) <> 0 Then
sArray = Split(tArray(rowNum), textDelimiter)
For colNum = LBound(sArray) To UBound(sArray)
ActiveSheet.Cells(rowNum + 1, colNum + 1) = sArray(colNum)
Next colNum
End If
Next rowNum
MsgBox "Data Imported Successfully", vbInformation
End Sub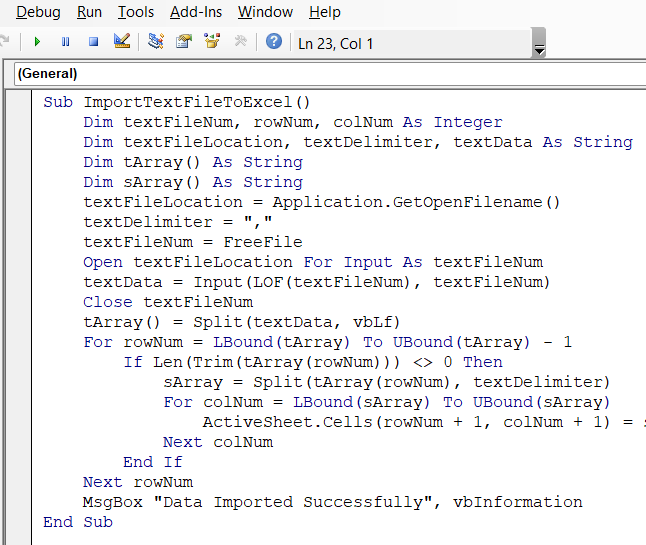
➤ Press F5 or click the Run button in the VBA toolbar.
➤ A file explorer window will appear.

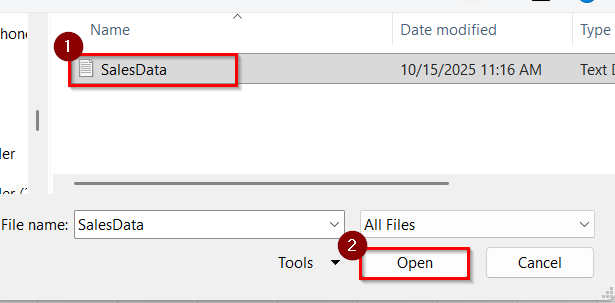
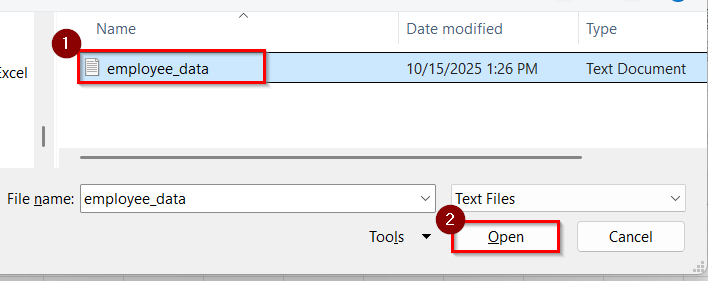
➤ Browse to your folder, select your text file. Example, SalesData.txt, and click Open.
➤ A message box saying “Data Imported Successfully” will appear.
➤ Click OK.
➤ Now, the text data will be displayed in an Excel sheet.
Import Text File with Multiple Delimiters into an Excel Worksheet
We can import a text file that contains data separated by multiple delimiters (like commas, semicolons, or tabs) into Excel using VBA. This is efficient when our text file isn’t consistently formatted, for example, some values are separated by commas, others by semicolons.
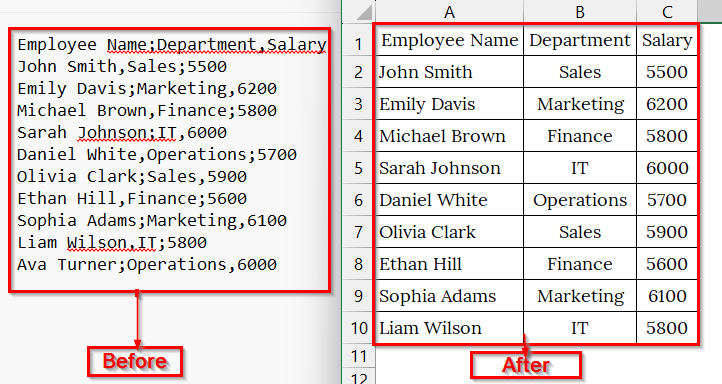
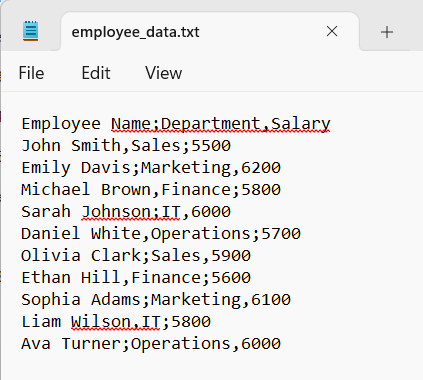
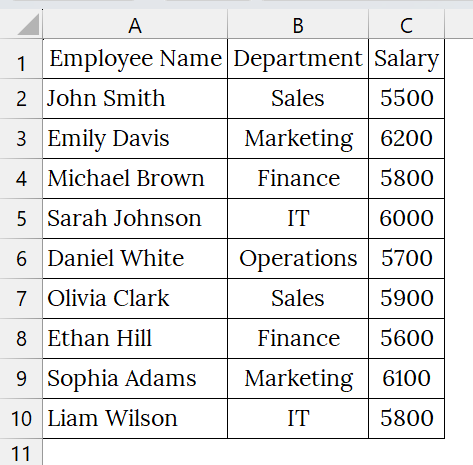
We have a text file that represents employee details, where the text file has mixed delimiters (commas and semicolons). We will use a VBA code to successfully unify them and import the data neatly into Excel columns.
Steps:
➤ We have taken a text file named employee_data.txt that contains comma- and semicolon-separated data like Employee Name, Department, and Salary.
➤ Open a blank worksheet. Go to the Developer tab.
➤ Then select Visual Basic to open the VBA editor.
➤ Inside the VBA editor, click Insert → Module.

➤ A new code window will open where you will paste your VBA script.

➤ Copy and paste the following code into the module window:
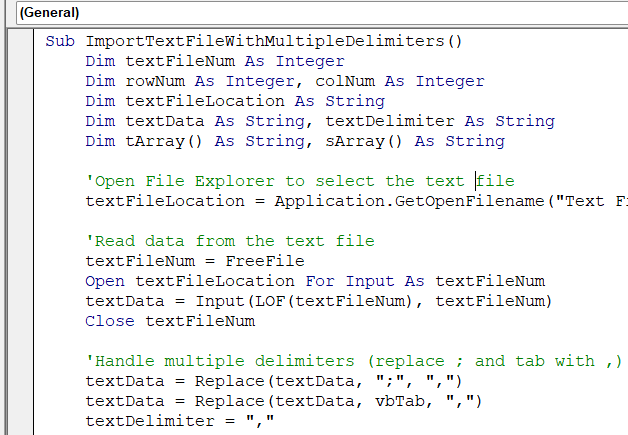
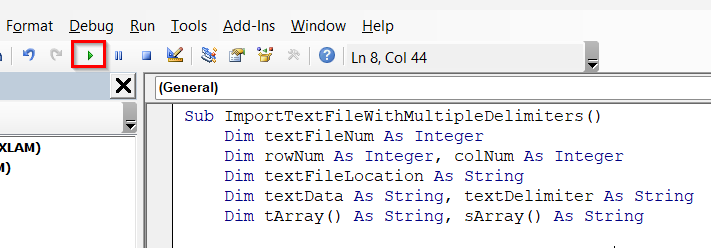
Sub ImportTextFileWithMultipleDelimiters()
Dim textFileNum As Integer
Dim rowNum As Integer, colNum As Integer
Dim textFileLocation As String
Dim textData As String, textDelimiter As String
Dim tArray() As String, sArray() As String
'Open File Explorer to select the text file
textFileLocation = Application.GetOpenFilename("Text Files (*.txt), *.txt", , "Select Text File to Import")
'Read data from the text file
textFileNum = FreeFile
Open textFileLocation For Input As textFileNum
textData = Input(LOF(textFileNum), textFileNum)
Close textFileNum
'Handle multiple delimiters (replace; and tab with,)
textData = Replace(textData, ";", ",")
textData = Replace(textData, vbTab, ",")
textDelimiter = ","
'Split data into rows and columns
tArray = Split(textData, vbLf)
For rowNum = LBound(tArray) To UBound(tArray) - 1
If Len(Trim(tArray(rowNum))) <> 0 Then
sArray = Split(tArray(rowNum), textDelimiter)
For colNum = LBound(sArray) To UBound(sArray)
ActiveSheet.Cells(rowNum + 1, colNum + 1).Value = Trim(sArray(colNum))
Next colNum
End If
Next rowNum
MsgBox "Data Imported Successfully!", vbInformation
End Sub➥ It replaces semicolon (;) and tab with a comma (,) — converting all delimiters into one type.
➥ The data is then split into rows and columns and placed in your active Excel sheet.
➤ Press F5 or click the Run button in the VBA editor.
➤ A file explorer window will appear.
➤ Browse and select your .txt file containing multiple delimiters (e.g., commas, semicolons, tabs). Click Open.
➤ You will see a confirmation message: “Data Imported Successfully!”
➤ After selecting the file, the script will import and organize the text file data into Excel columns automatically.
Frequently Asked Questions
Can I import a tab-delimited text file using VBA?
Yes, you can specify Tab:=True or use Delimiter:=vbTab in your VBA code to handle tab-separated files.
Where should I store my text files before importing?
Keep all your text files in a dedicated folder and use the folder path in your VBA script to automate imports.
Can I import multiple text files at once?
Yes. You can loop through all files in a folder using VBA’s Dir function to import them one by one.
What if my text file has headers or blank rows?
You can modify the VBA code to skip the first line or clean up blank rows after importing.
Concluding Words
The VBA Import Method provides a fast and flexible way to bring text data into Excel automatically. Through using simple VBA commands, you will be able to import text files to Excel VBA from a specific file location, a file selection dialog, and import data with multiple delimiters. Also, you can download the text files and datasets we have used in this article to practice on your own.