Creating mailing labels directly from Excel data helps you quickly prepare address labels for envelopes or packages without manually typing each one. While Excel doesn’t have a dedicated label-making feature like Word, you can still design, format, and print mailing labels by combining Excel with other tools or using Excel alone.
In this article, you’ll learn how to transform a simple Excel contact sheet into ready-to-print mailing labels. From setting up and formatting your data to aligning and printing labels correctly, our step-by-step guide will help you simplify the process whether you’re sending business mail or personal invitations.
Steps to create mailing labels in Excel:
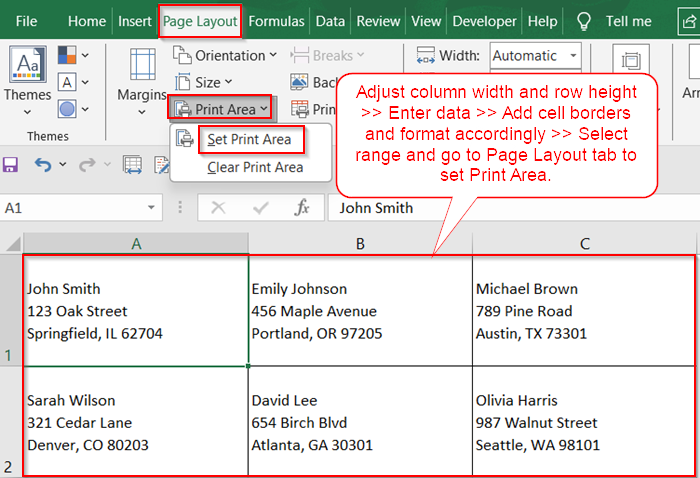
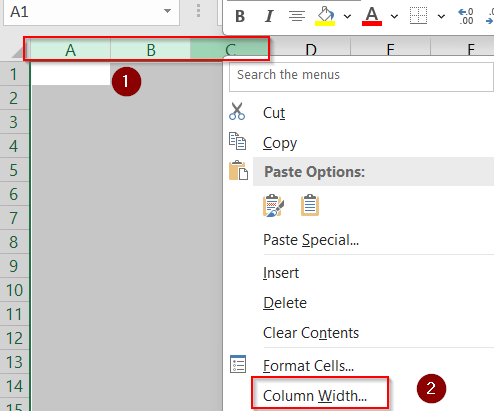
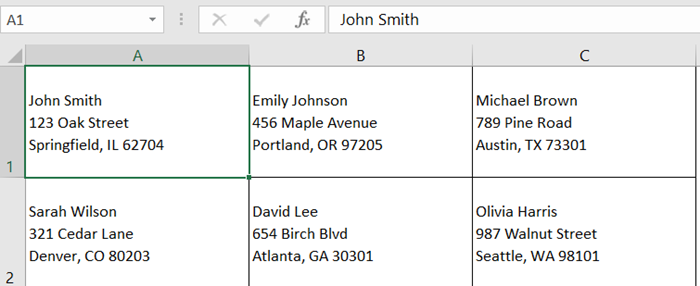
➤ Open a new worksheet and set the column width to match label width (e.g., 26 units ) by selecting required columns and right clicking on it.
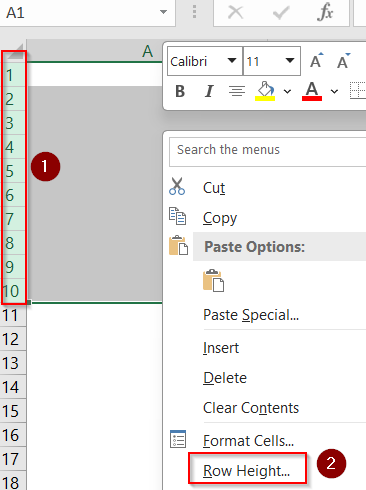
➤ Similarly, adjust row height to label height by right-clicking (e.g., 72 units).
➤ Create a grid by applying borders to cells covering the label area by going to the Home tab >> Borders icon >> All borders.
➤ Enter mailing data manually or by linking cells from your data table using formulas.
➤ Format text to fit the cell by using wrap text and alignment options.
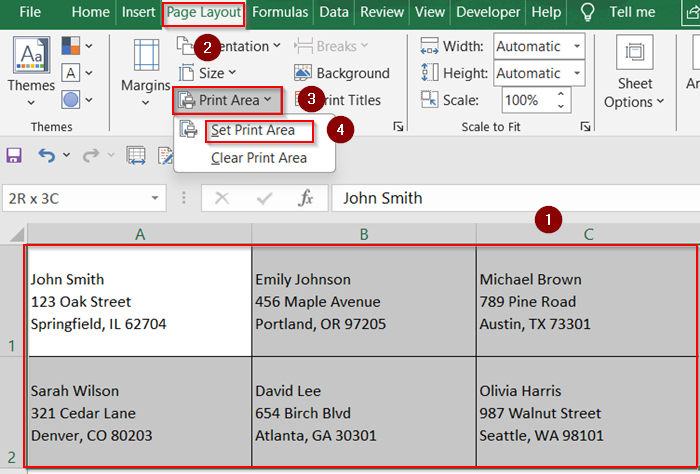
➤ Print the worksheet on label sheets after selecting your range A1:C2 and using Page Layout >> Print Area >> Set Print Area to select labels only.
Create Mailing Labels Using Excel and Word Mail Merge
The most common and effective way to create mailing labels from Excel is by using Word’s Mail Merge feature, which imports your Excel data and formats it into labels ready to print.
Steps:
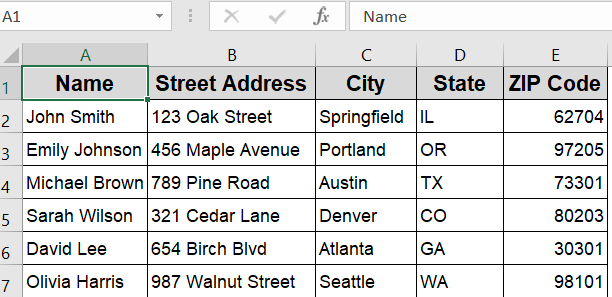
➤ Prepare your Excel sheet with columns like Name, Address, City, State, ZIP.
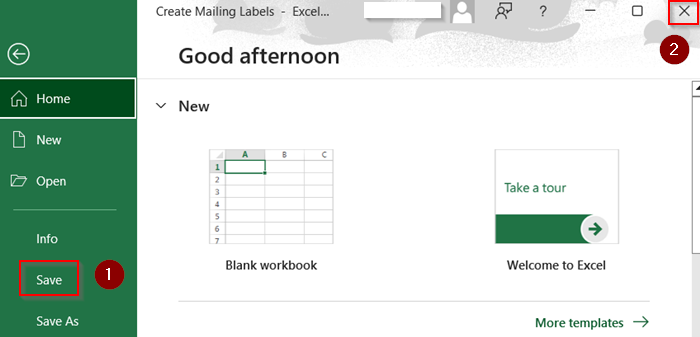
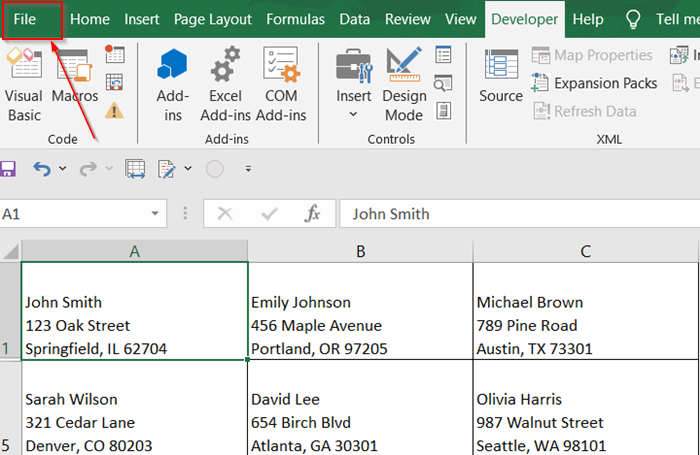
➤ Save and close the Excel workbook from the File tab.
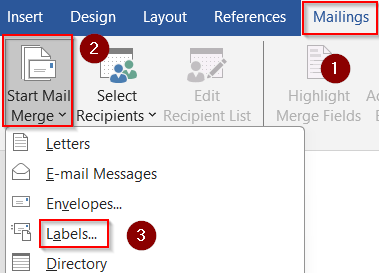
➤ Open Microsoft Word and go to Mailings >> Start Mail Merge >> Labels.
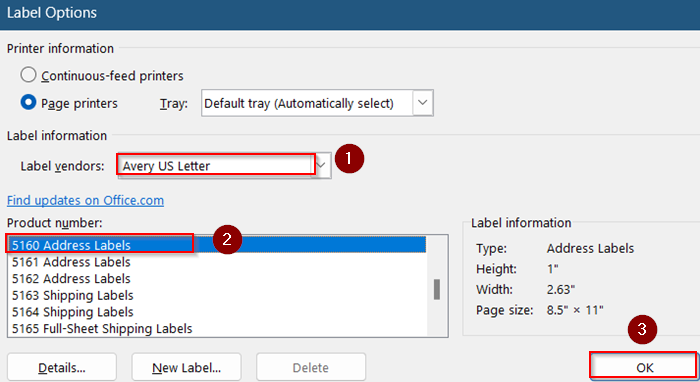
➤ Select Avery US Letter as your label vendor and 5160 Address Labels as product number. Then, click OK.
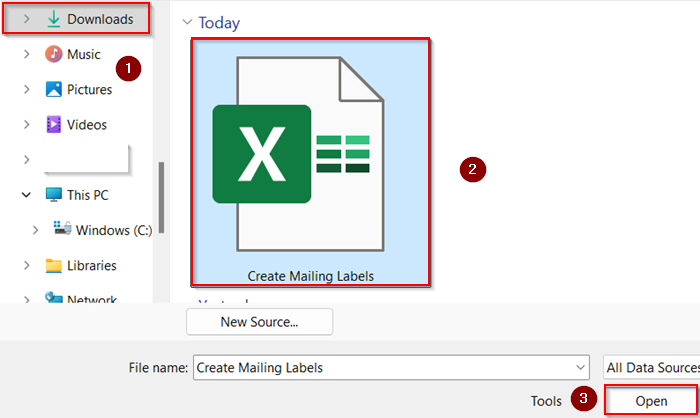
➤ Click Select Recipients >> Use an Existing List to browse to your Excel file..

➤ Go to your saved location such as Downloads >> Select your Excel file and click Open.
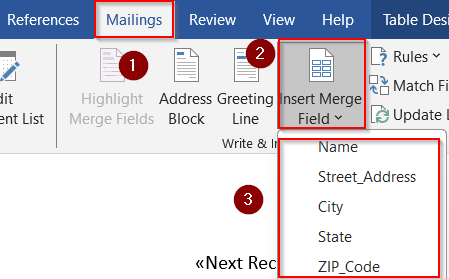
➤ Insert merge fields (Name, Address, etc.) into the first label layout from the Mailings tab.
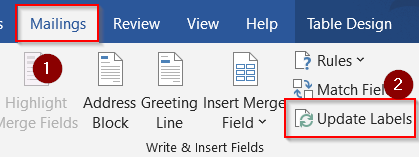
➤ Click Update Labels to apply the layout to all labels from the same tab.
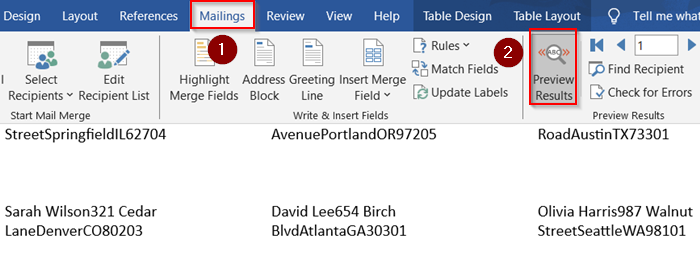
➤ Again, head to the Mailings tab and click on Preview Results.
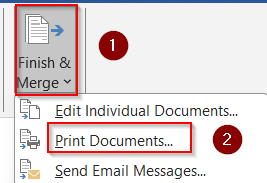
➤ Lastly, Click Finish & Merge >> Print Documents.
This method combines Excel’s data management with Word’s label templates for professional results.
Use Excel VBA to Automate Mailing Label Creation
For bulk label generation with minimal manual formatting, VBA macros can automate the process by populating labels in a grid format based on your address list.
Steps:
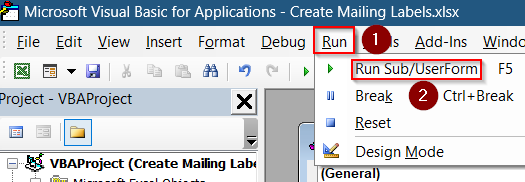
➤ Press Alt + F11 to open the VBA editor.
➤ Insert a new module and paste a VBA script that loops through your data and fills the label grid accordingly.
Sub CreateMailingLabels()
    Dim wsData As Worksheet, wsLabels As Worksheet
    Dim i As Long, r As Long, c As Long, labelPerRow As Long
    Dim startRow As Long, currentRow As Long, currentCol As Long
    Set wsData = ThisWorkbook.Sheets("Sheet1") 'Your data sheet
    Set wsLabels = ThisWorkbook.Sheets.Add(After:=wsData)
    wsLabels.Name = "Mailing Labels"
    labelPerRow = 3 'Number of labels per row
    startRow = 2 'Assumes headers in Row 1
    currentRow = 1
    currentCol = 1
    For i = startRow To wsData.Cells(wsData.Rows.Count, 1).End(xlUp).Row
        Dim name As String, address As String, city As String, state As String, zip As String
        name = wsData.Cells(i, 1).Value
        address = wsData.Cells(i, 2).Value
        city = wsData.Cells(i, 3).Value
        state = wsData.Cells(i, 4).Value
        zip = wsData.Cells(i, 5).Value
        With wsLabels.Cells(currentRow, currentCol)
            .Value = name & vbCrLf & address & vbCrLf & city & ", " & state & " " & zip
            .WrapText = True
            .RowHeight = 60
            .ColumnWidth = 25
            .Borders.Weight = xlThin
        End With
        currentCol = currentCol + 1
        If currentCol > labelPerRow Then
            currentCol = 1
            currentRow = currentRow + 4 'Spaced rows per label
        End If
    Next i
End Sub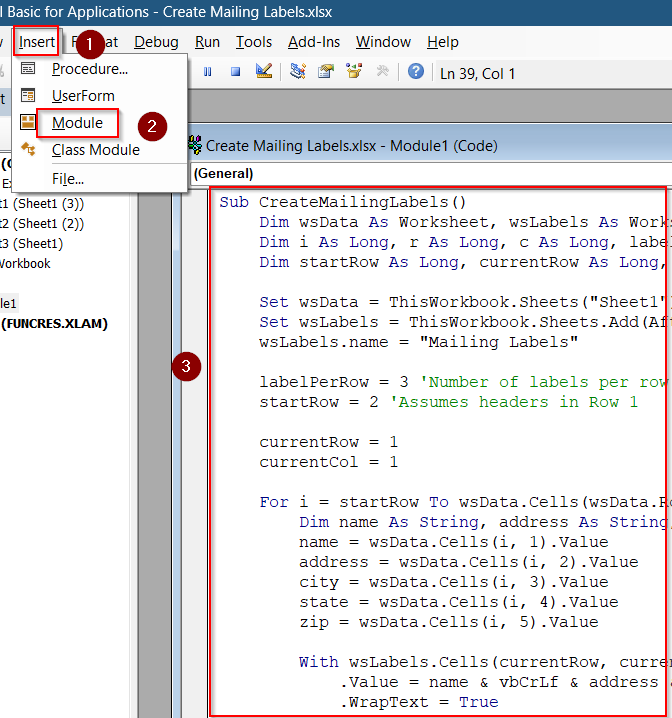
➤ Customize label size, starting cell, and number of labels per row in the script.
➤ Run the macro to auto-fill labels with addresses from your data table.
➤ Print directly from Excel when labels are ready by going to File >> Print.
VBA offers a scalable option if you frequently create labels.
Design Mailing Labels Directly in Excel Using Cell Formatting
If you prefer working solely in Excel, you can design mailing labels by adjusting column widths, row heights, and using cell borders to create a label grid.
Steps:
➤ Open a new worksheet and set the column width to match label width (e.g., 26 units ) by selecting required columns and right clicking on it.
➤ Similarly, adjust row height to label height by right-clicking (e.g., 72 units).
➤ Create a grid by applying borders to cells covering the label area by going to the Home tab >> Borders icon >> All borders.

➤ Enter mailing data manually or by linking cells from your data table using formulas.
➤ Format text to fit the cell by using wrap text and alignment options.
➤ Print the worksheet on label sheets after selecting your range A1:C2 and using Page Layout >> Print Area >> Set Print Area to select labels only.
While this requires manual setup, it offers full control over label appearance .
Frequently Asked Questions
Can I print mailing labels directly from Excel without Word?
Yes, by formatting cells to fit label sizes or using VBA macros, you can create printable mailing labels entirely within Excel.
How do I align addresses properly on label sheets in Excel?
Adjust column widths and row heights precisely to match label sheet dimensions, use cell alignment, and enable wrap text for clean formatting.
Are there free Excel add-ins for mailing label creation?
Some free add-ins exist but usually have limited features; paid add-ins offer better automation and label template support.
Can I save mailing label templates in Excel for repeated use?
Yes, once formatted, save your Excel workbook as a template file (.xltx) to reuse label layouts with updated address data.
Wrapping Up
In this tutorial, we learned how to turn a basic Excel spreadsheet into properly formatted mailing labels using the Word Mail Merge technique, a VBA-based automation script and direct label formatting inside Excel. From preparing your data to designing and printing the final output, Excel offers the flexibility to handle everything with precision and control. Feel free to try out each method and share your feedback.