Creating a mailing list in Excel is an effective way to organize contact data for newsletters, promotions, or even printed mail. Whether you’re planning to email customers or send holiday cards to clients, Excel gives you full control over how the list is structured, managed, and exported.
In this article, you’ll learn how to set up your mailing list structure, validate contact entries, sort and segment your data, and export your list for use in mail merge or email marketing tools.
Steps to create a mailing list in Excel:
➤ On a new workbook, enter your data and format it accordingly.
➤ Use features like Sort, Filter, Remove Duplicates to make your data look more clean.
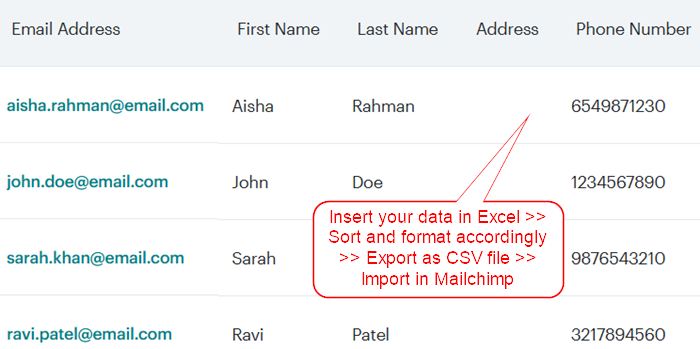
➤ Export as CSV (Comma delimited) format by going to File >> Save As.
➤ Go to any external mailing platform like Mailchimp and upload your CSV file to send out your mails.
Steps to Create a Mailing List in Excel
To turn your spreadsheet into a fully functional mailing list, you’ll need more than just names and emails. The following steps will show you how to structure, clean, and prepare your contact data in Excel so it’s ready for emails, labels, or bulk uploads from scratch.
Step 1: Set Up Your Mailing List Structure
Before entering any data, it’s important to define the structure of your mailing list. Consistent columns and clear headers help keep your information organized and easy to use.
Steps:
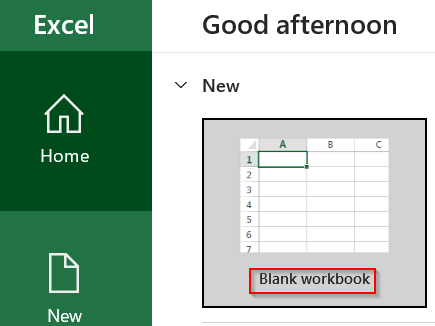
➤ Open a new Excel worksheet by clicking on Blank Workbook.
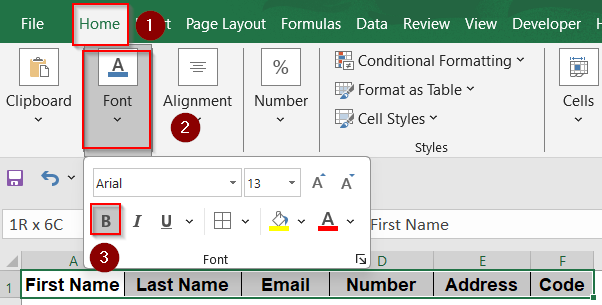
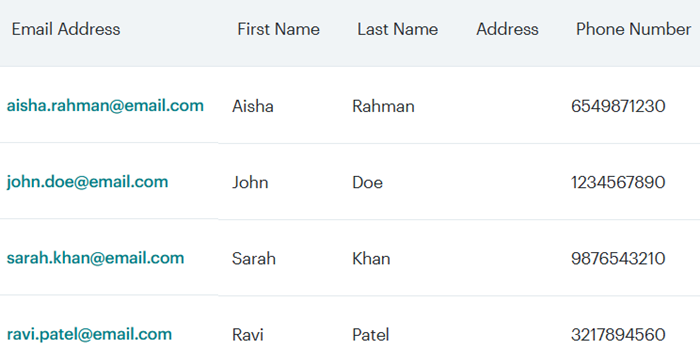
➤ In the first row, enter headers such as First Name, Last Name, Email Address, Phone Number, Street Address, City, State/Province, Zip/Postal Code, Country, etc.
➤ Format headers with bold text by going to the Home tab >> Under Font group, click on the B icon.
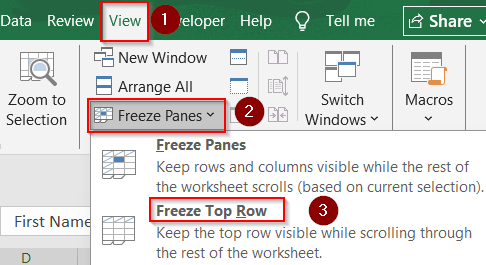
➤ Freeze Top Row for easy navigation by going to the View tab >> Freeze Panes.
➤ Optionally, format columns for specific data types (e.g., set email column format as text).
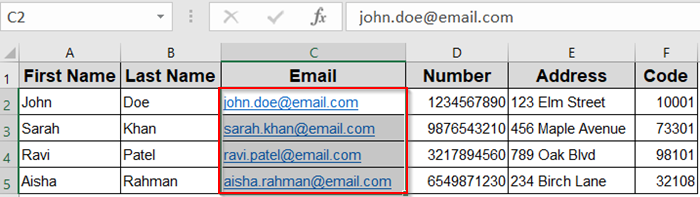
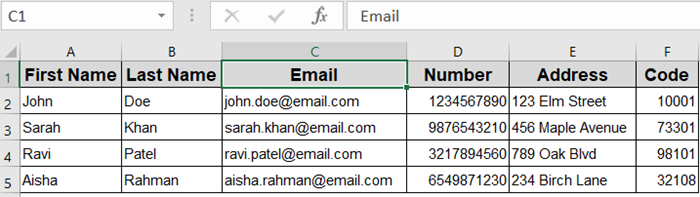
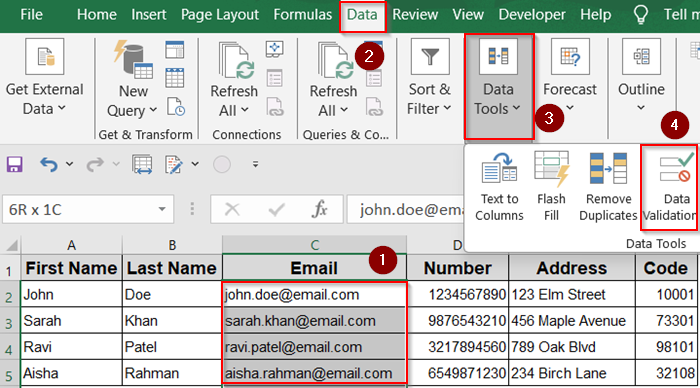
➤ Select your range C2:C5 that contains your email address.
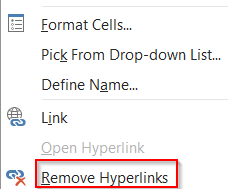
➤ Scroll down and click on Remove Hyperlinks by right-clicking to extract the text out of links.
This structure forms the foundation for your mailing list and ensures consistent data entry.
Step 2: Enter and Validate Your Contact Data
Accurate and validated data prevents errors and improves communication efficiency. Use Excel’s tools to reduce mistakes and maintain clean data.
Steps:
➤ Enter your contacts under each header row by row.

➤ Use Data Validation to restrict entries, for example select the email column >> Go to Data tab >> Data Validation under Data Tools.
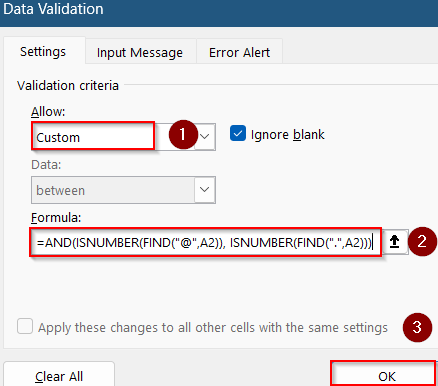
➤ Choose Custom under Allow, and use a formula to ensure proper email format:
=AND(ISNUMBER(FIND(“@”,A2)), ISNUMBER(FIND(“.”,A2)))
➤ Click OK.
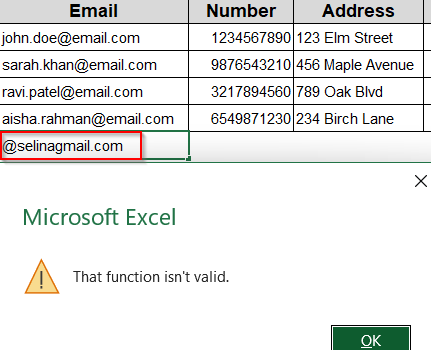
➤ Wrong format entries are blocked with an error pop-up.
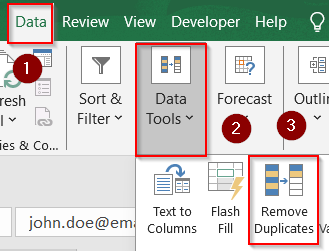
➤ Use Remove Duplicates from the Data tab under Data Tools to delete repeated contacts.
Validated data minimizes delivery issues and keeps your mailing list professional.
Step 3: Organize and Sort Your Mailing List
Sorting and filtering your list helps you segment contacts and target specific groups effectively.
Steps:
➤ Select your entire mailing list including headers.
➤ Go to Data >> Sort & Filter group >> Click Sort.
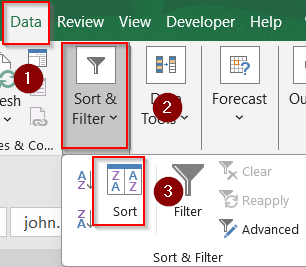
➤ Arrange your contacts alphabetically by First Name or any other relevant field and set A to Z as the alphabetical Order.
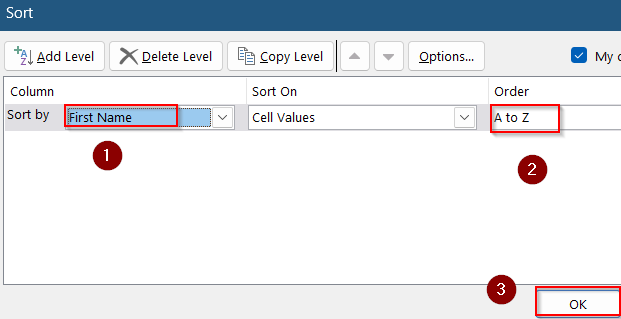
➤ Click OK.
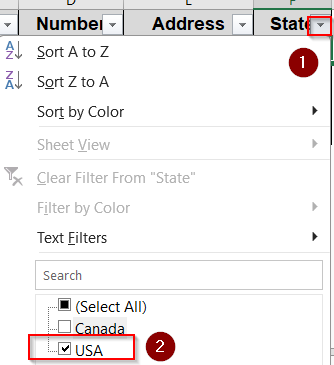
➤ Use Filters by clicking Data >>Sort & Filter group >> Filter to enable dropdown filters on each column.
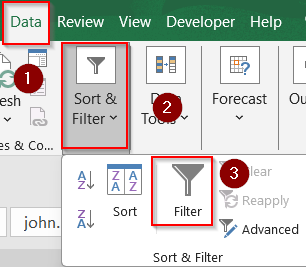
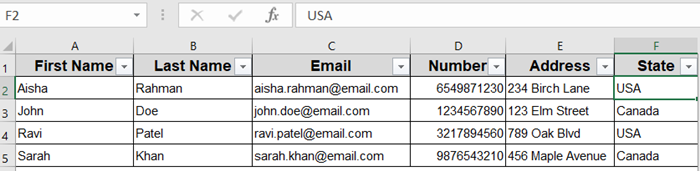
➤ Filter contacts based on criteria like location, subscription status, or any custom tag you added. For example, we filtered column State by checking USA only.
Organized lists enable better campaign targeting and easier management.

Step 4: Save and Export Your Mailing List
Once your mailing list is complete and organized, saving and exporting it correctly is crucial for use in email programs or print.
Steps:
➤ Save your workbook regularly as an Excel file (.xlsx) to keep all features intact.
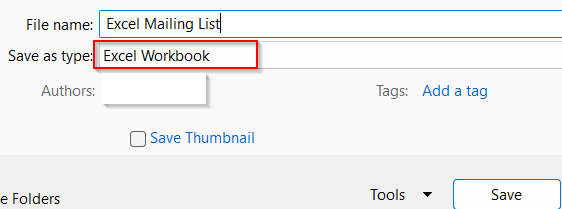
➤ To share or upload to mailing platforms, export your list as CSV.
➤ Go to File >> Save As.
➤ Choose CSV (Comma delimited) (*.csv) format.
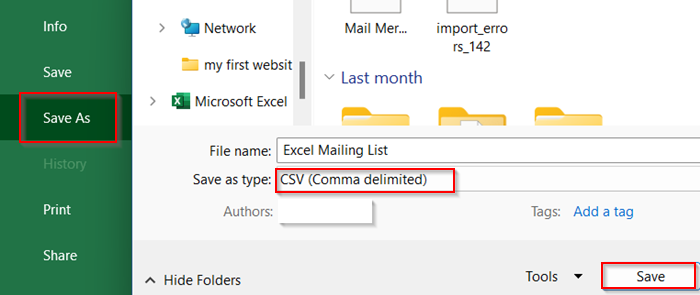
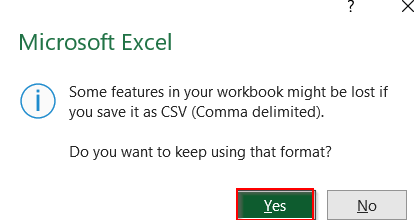
➤ Save the file and confirm any warnings about features not supported in CSV.
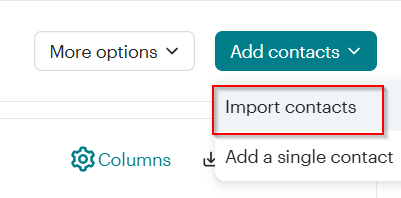
➤ You can now upload this CSV to tools like Mailchimp, Outlook Mail Merge, Mailmeteor, or even import it into Google Contacts.
➤ For example, log into your email marketing platform such as Mailchimp.

➤ Import the CSV file as your contact list.
➤ Create your email template using personalization tags corresponding to your CSV columns and launch the campaign.
Frequently Asked Questions
Can I import a mailing list from Outlook to Excel?
Yes, Outlook allows exporting contacts as CSV files, which Excel can open and edit. This simplifies migrating mailing lists from Outlook to Excel efficiently.
How do I prevent duplicate contacts in my Excel mailing list?
Use Excel’s Remove Duplicates feature under the Data tab. Select columns to check for duplicates and click OK to clean your list automatically.
Is it possible to add custom tags or categories to contacts?
Absolutely. Add a new column titled Tags or Category and input custom labels to organize or filter your mailing list by segments.
Can I send emails directly from Excel using my mailing list?
Direct email sending requires VBA macros or third-party add-ins. Excel alone doesn’t send emails but can prepare data for Outlook or other mailing tools.
Wrapping Up
In this tutorial, we learned how to create a mailing list in Excel from the ground up, starting with setting up a structured worksheet, validating entries like email addresses, organizing and sorting data, and finally exporting the list for external use. Whether you’re planning to send email newsletters, print address labels, or upload contact lists to a marketing tool, Excel provides the flexibility and control to manage it all. Feel free to download the practice file and share your feedback.