Working with spreadsheets often includes printing specific sections of a dataset. Over time, users may set print areas to control what gets printed. However, when the data changes or you want to print the entire sheet again, it is necessary to remove or reset those print areas. That is where knowing how to clear the print area in Excel becomes important.
To clear the print area in Excel, follow these steps:
➤ Open your Excel file.
➤ Go to the Page Layout tab on the ribbon.
➤ Click Clear Print Area in the Page Setup group.
In this article we will explain how to clear print area in Excel using the Page Layout Tab, Name Manager, Keyboard Shortcut, Page setup Dialogue Box method.
What Is a Print Area in Excel?
A print area in Excel is a specific range of cells defined by the user that Excel will print instead of the entire worksheet. This helps control what information appears on the printed page and is particularly useful when dealing with large spreadsheets. If not cleared, Excel will continue printing only that defined section.
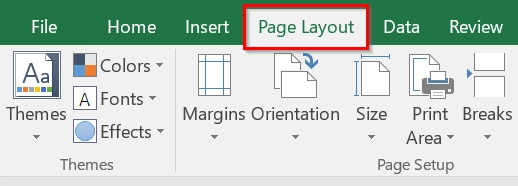
Use Page Layout Tab to Clear Print Area in Excel
We use Page Layout Tab when we want to print a selected area, or we want to reset it so the entire sheet prints. This is good in datasets like sales reports, attendance records, or inventories where the entire dataset needs to be visible in printouts.
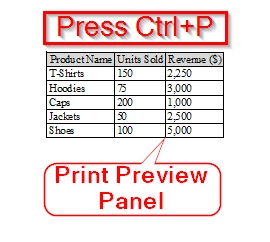
We have a table representing a typical monthly sales report for a small business. This sheet is frequently printed for meetings and presentations. Here, we will clear any previously printed area to print the entire worksheet of the report by using Page Layout Tab.
Steps:
➤ Open your Excel workbook that has a defined print area. In our example, it is the “Monthly Sales Report“.
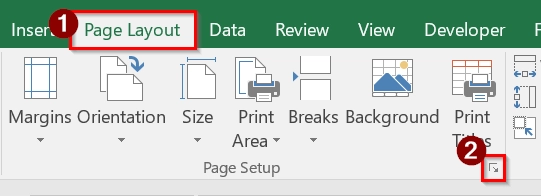
➤ Find the “Page Layout” tab near the top center of your Excel window and click on it. This tab includes all the page formatting options.
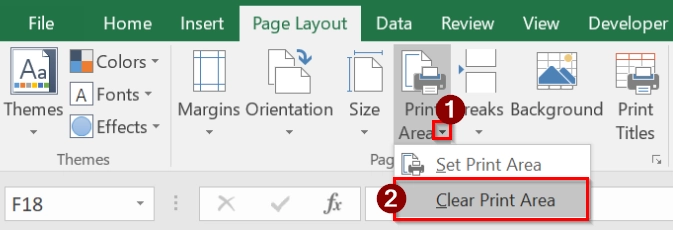
➤ Look for the “Print Area” button in the group labeled “Page Setup.” Click on the dropdown arrow next to it. Select “Clear Print Area”. Once clicked, Excel will clear print areas that were set previously and allow the entire worksheet to be printed.
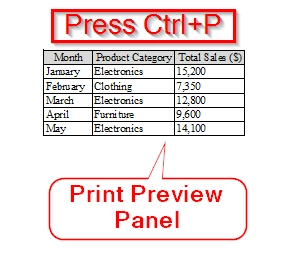
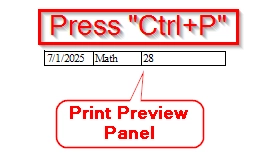
➤ Now press Ctrl + P to open the print preview and confirm that the entire worksheet is selected for printing.
Note:
➥ If the “Clear Print Area” option is grayed out, it means no print area is currently set.
➥ Clearing the print area does not affect your data, only the selected range is sent to the printer.
➥ You can reassign a new print area by selecting cells and clicking “Set Print Area”.
Using Name Manager to Delete Print Area in Excel
We use Name Manager when we previously set a specific print area and want to remove it, particularly when Excel continues to print only part of our worksheet.
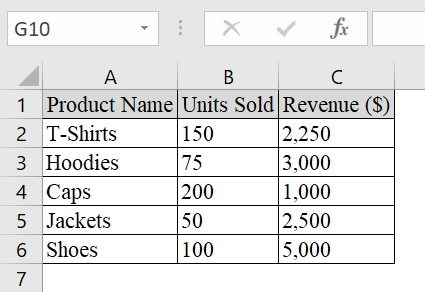
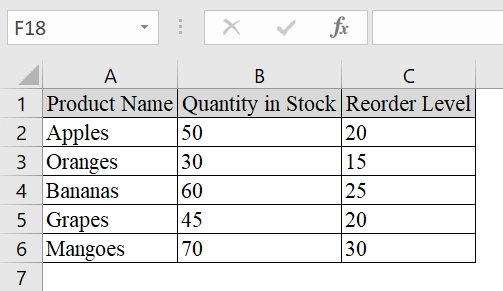
We have an Excel table that represents a product-wise monthly sales report. Initially, the print area only included the first 3 rows. After using the Name Manager to clear the print area, the entire dataset (all 6 rows) will be printable.
Steps:
➤ Open the Excel workbook where the print area is set.
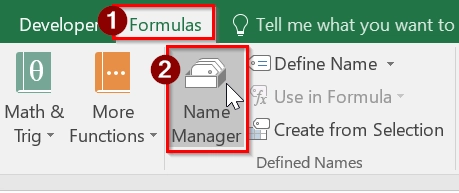
➤ Go to the “Formulas” tab on the Ribbon. Click on “Name Manager” in the Defined Names group.
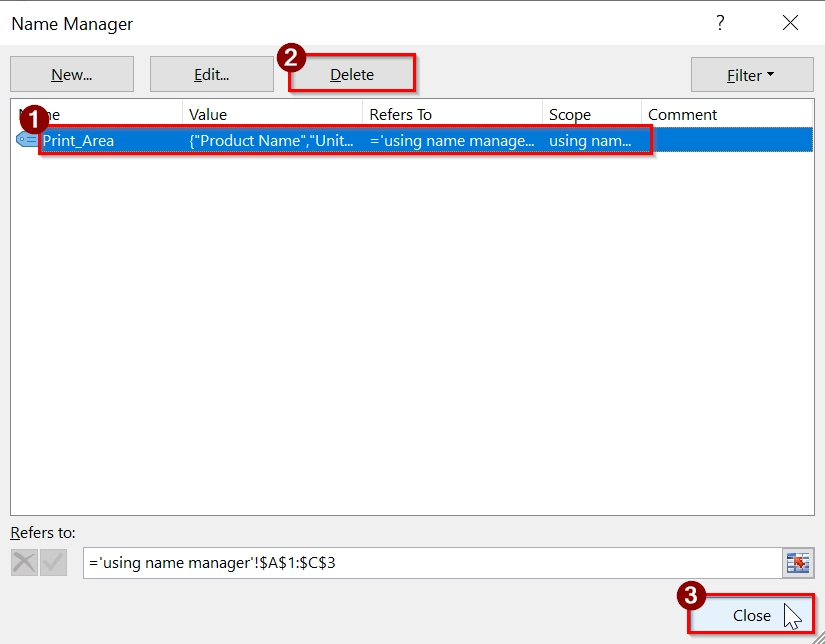
➤ In the Name Manager dialog box, select any previously defined print range (in our case it is”Print_Area“) and click “Delete“. Click “Close” to exit the Name Manager.
➤ Now, try printing again. Press Ctrl + P to preview the print area.
Note:
➥ If “Print_Area” is not listed, that means no print area has been set.
➥ This method is useful when the print area was defined with a dynamic or complex named range.
Combining Keyboard Shortcut with Ribbon Option to Clear Print Area In Excel
When we want to remove any existing print area settings from an Excel worksheet, we use Ctrl+A to clear the print area. We use it when our worksheet has a previously set print area, and now we want to print the entire sheet or set a new print area. This is good in inventory or data report sheets where the scope of data changes frequently.
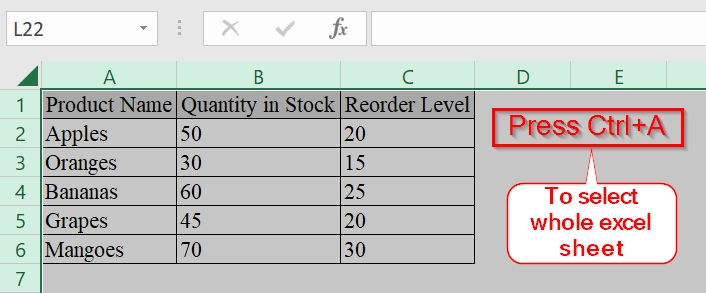
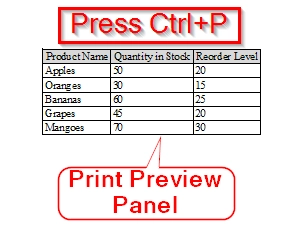
We have a worksheet that contains a fresh produce inventory list. Initially, only the first 2 rows were set as the print area. But, now we need to print the entire list for supplier reference. Clearing the print area ensures the entire table is printed.
Steps:
➤ Open the sheet in which you like to reset print settings.
➤ Press Ctrl + A to select the entire worksheet. Or you can select freely.
➤ At the top of your screen, click on the “Page Layout” tab to access print settings. Click on “Print Area” in the Page Setup group. From the dropdown menu, select “Clear Print Area.”

➤ This removes the existing print area and resets it so the full sheet can print. Press Ctrl + P to preview.
Note:
➥ Clearing the print area does not delete any data or formatting, it simply resets what Excel considers as the designated print zone.
➥ Use Print Preview (Ctrl + P) afterward to verify that the entire table or desired range is now included.
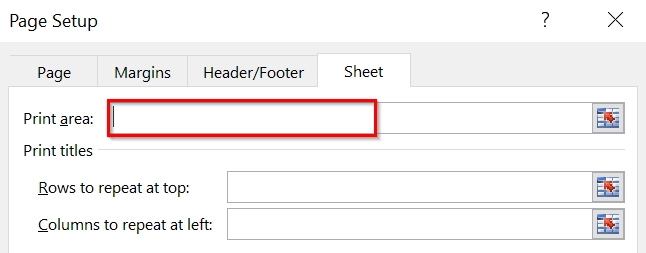
Clear Print Area via Page Setup Dialog Box
Page Setup Dialog Box is best when we have limited our print selection to specific cells or sections but now want to print the entire worksheet again. We use this when our dataset has expanded or includes additional columns/rows that need to be printed.
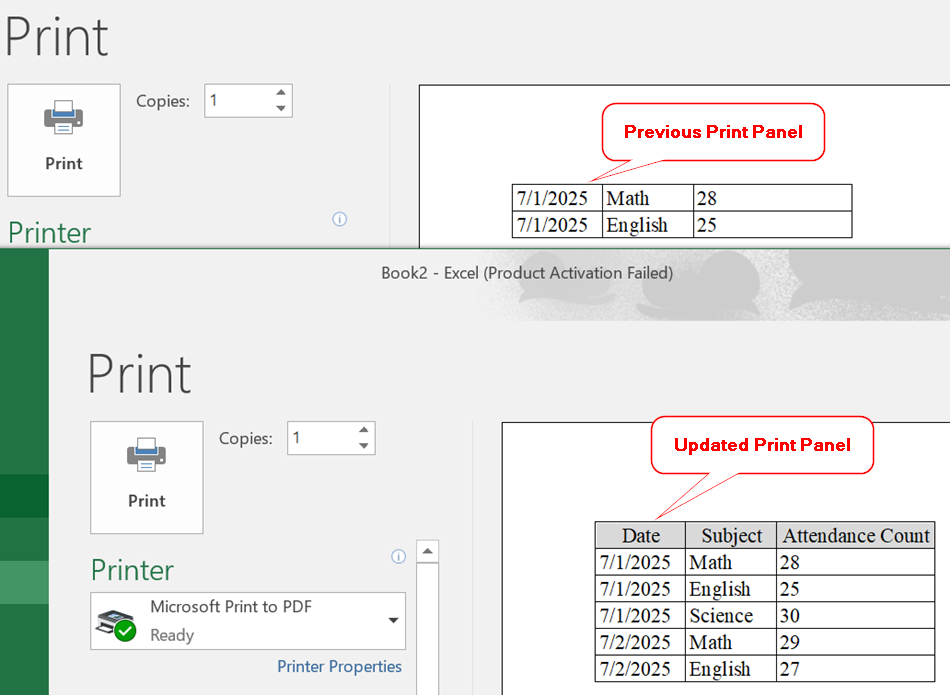
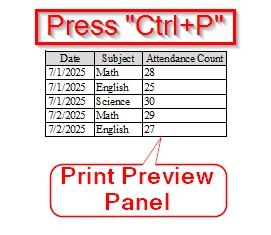
We have an Excel worksheet relating to the attendance of different subjects of a school where only a row with “Math” was set in the print area. After clearing the print area, the entire dataset becomes printable.
Steps:
➤ Open the worksheet with the print area already set.
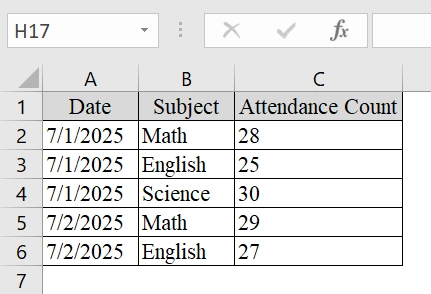
➤ Press Ctrl + P to see what portion is currently set as the print area.
➤ Go to the “Page Layout” tab on the Ribbon. Click on the small square launcher icon in the bottom-right corner of the “Page Setup” group.
➤ Once the dialog box opens, navigate to the “Sheet” tab where the Print area setting is located.
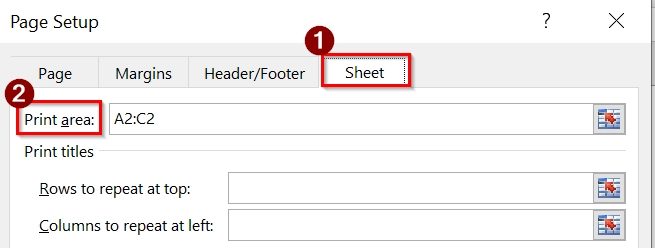
➤ In the “Print Area” box, delete any text that shows a defined cell range (e.g., A2:C2). Leave the field blank.
➤ Click “OK” to confirm and exit.

➤ To verify, press Ctrl + P to preview the print layout.
Note:
➥ Clearing the print area does not delete data, it only removes the print limitation.
➥ You can re-define a new print area later if needed by selecting the cells and using “Set Print Area.”
Applying VBA Macro to Clear Print Area in Excel
We use VBA macro (Visual Basic for Applications) to clear any set print area in an Excel worksheet. This is good when the print area is previously defined and now we want to remove it so a new one can be specified. This method is best in large datasets or automated report generation where manual removal is inefficient.
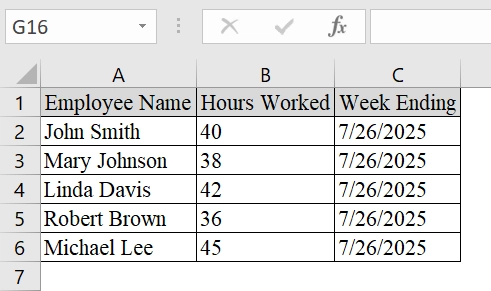
We have a dataset of employee timesheets. A previously set print area only included the first five rows. To ensure all employee hours are included,we need to clear the print area using a VBA macro and then reset it as needed.
Steps:
➤ Open the Excel Workbook with the Defined Print Area.
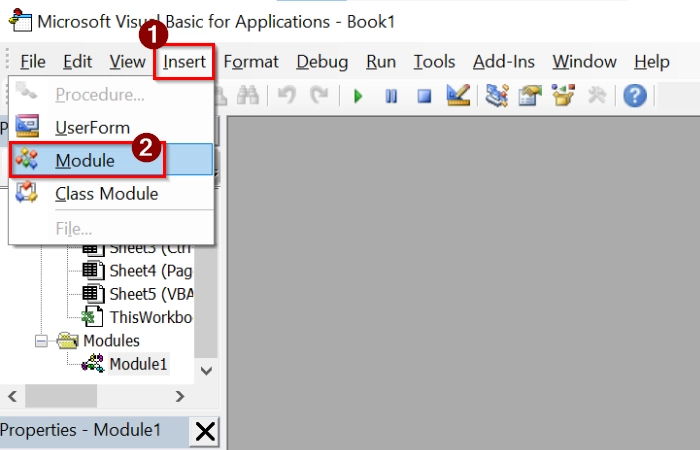
➤ Press Alt + F11 to Open the VBA Editor.
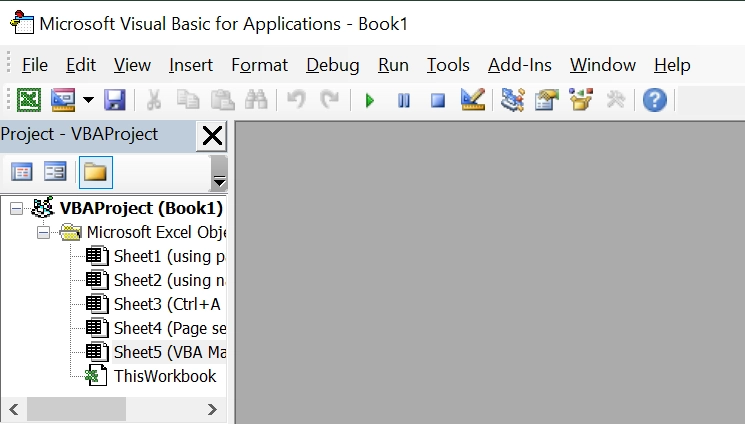
➤ In the VBA editor, click Insert → Module.
➤ A new blank module will appear. Paste the following code into the module:
Sub ClearPrintArea()
    ActiveSheet.PageSetup.PrintArea = ""
End Sub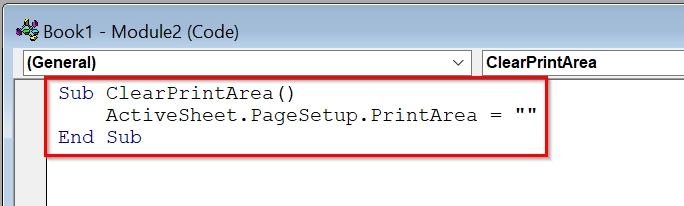
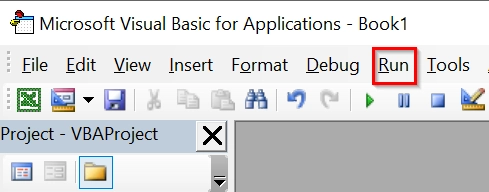
➤ Run the Macro and it will clear print area from your excel sheet.
Note:
➥ Macros must be enabled for the code to run. You may need to enable content when prompted.
➥ The script only affects the active sheet. Switch sheets if needed before running the macro.
➥ No data is altered by this macro,, only the print settings are reset.
Frequently Asked Questions
What happens if I don’t clear the print area?
Excel will continue printing only the previously defined range, which may exclude new or updated data.
Can I clear the print area for multiple sheets at once?
No, you need to clear the print area individually for each worksheet.
Is there a shortcut to clear the print area in Excel?
There is no direct shortcut, but using the ribbon method is quick and efficient.
Will clearing the print area affect my data?
No, clearing the print area does not change your data, just how it prints.
Concluding Words
Using the Page Layout method, clearing the print area in Excel is a fast and simple process. It ensures your entire worksheet is available for printing or allows you to redefine the print range as needed. You can also use other methods like Page Setup Dialogue Box, Name Manager, Combination of Keyboard Shortcut & Ribbon.

