Margins in Excel determine the amount of white space between your content and the edges of the printed page. Whether you’re preparing financial reports, dashboards, invoices, or large data tables, setting appropriate margins ensures that everything prints cleanly and professionally without cutting off important data or crowding the layout.
In this article, we’ll learn several methods to view, adjust, or remove margins in Excel. From using default presets and custom settings to quick print preview edits and multi-sheet margin control, you’ll find step-by-step instructions to handle margins with ease regardless of your Excel version.
Steps to change margins in excel:
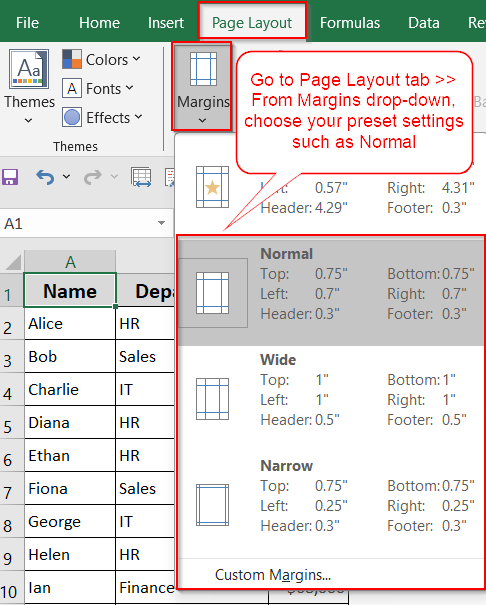
➤ Click the Page Layout tab in the Excel ribbon
➤ Click Margins in the Page Setup group.
➤ Select a preset option like Normal, Narrow, or Wide based on your needs.
Change Margins Using Preset and Custom Options from Page Layout Tab
The Page Layout tab offers the most direct and flexible way to adjust margins in Excel. Whether you want quick preset options for standard layouts or need to adjust margins for specific printing requirements, this method gives you full control over how your content fits on the page.
Steps:
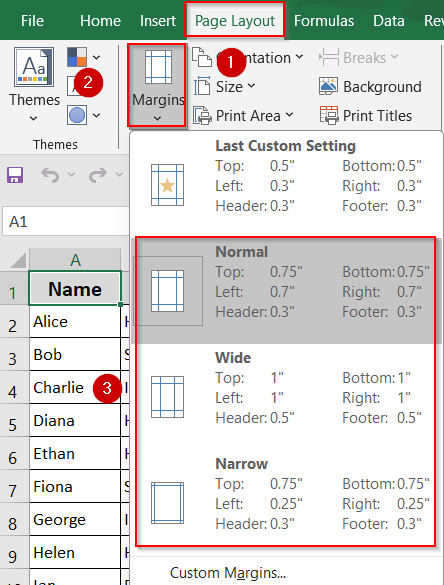
➤ Click the Page Layout tab in the Excel ribbon.
➤ Click Margins in the Page Setup group.
➤ Select a preset option like Normal, Narrow, or Wide based on your needs.
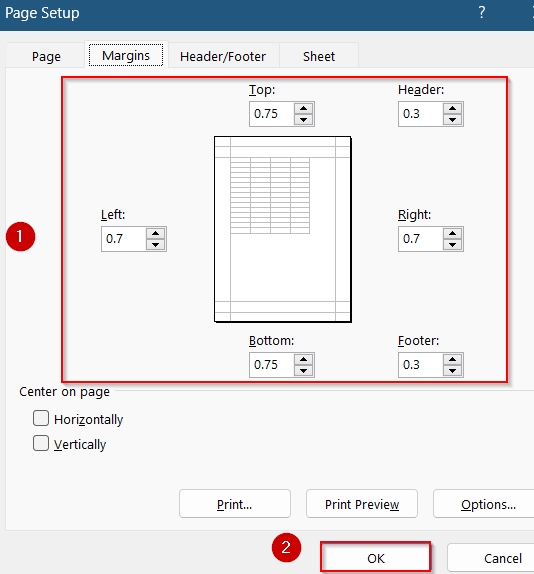
➤ For custom values, click Custom Margins at the bottom of the dropdown.
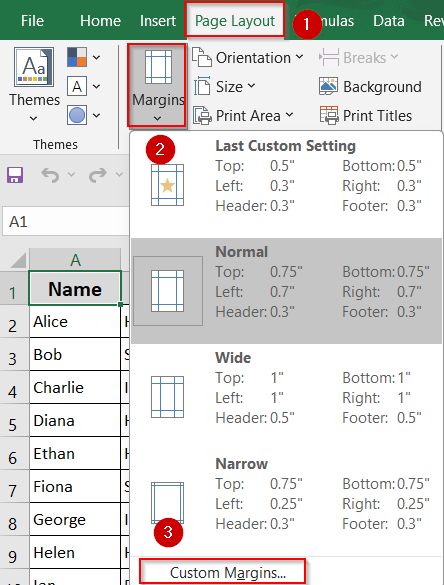
➤ In the Page Setup dialog box, set your preferred Top, Bottom, Left, Right, Header, and Footer margins.
➤ Click OK to apply the settings.
This method is ideal for most users and provides a reliable starting point for both basic and advanced margin adjustments.
Adjust Margins Directly from Print Preview
If you prefer a hands-on, visual method, Excel’s Print Preview mode allows you to adjust margins by simply dragging the lines. This is especially helpful when you’re refining a printed layout to fit data more cleanly on a page without guessing margin sizes.
Steps:
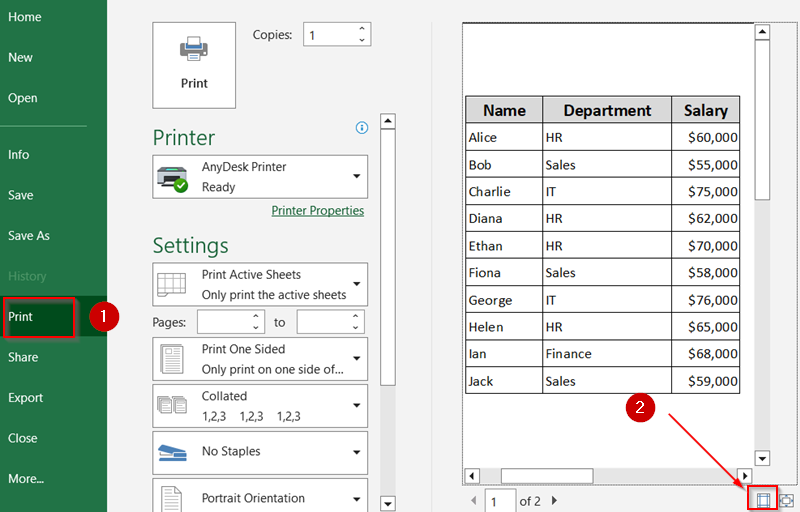
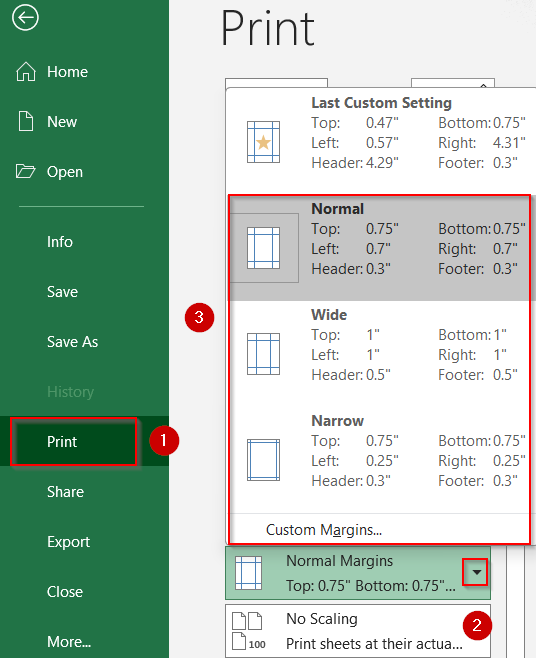
➤ Go to File tab >> Print to enter the Print Preview screen.
➤ In the lower-right corner, click Show Margins and margin guides will appear in the preview.
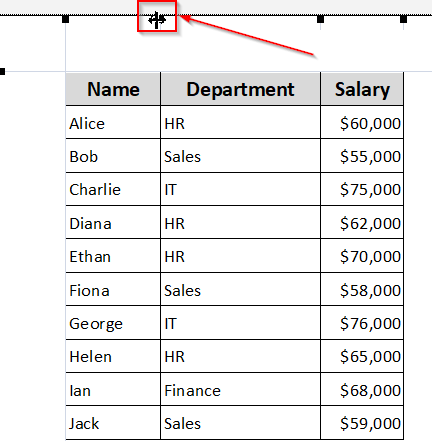
➤ Hover your cursor over the top, bottom, left, or right margin lines until it changes to a double-headed arrow.
➤ Click and drag the margin lines inward or outward to resize them manually.
➤ You can also use the Margins dropdown (just above Scaling) to apply presets like Normal, Narrow, or Wide without dragging.
This method is perfect for visually adjusting margins and immediately seeing how your content will print without random guesses.
Apply Margin Settings Across Multiple Worksheets
If you’re working with a workbook that contains several sheets, adjusting margins one by one can be repetitive. However, Excel allows you to group sheets and apply margin changes to all of them at once which ensures consistent formatting throughout.
Steps:
➤ Hold Ctrl on your keyboard and click on each worksheet tab you want to modify. This will activate group mode.
➤ Once grouped, go to the Page Layout tab or enter Print Preview, and apply your desired margin settings (e.g., Normal, Narrow, or Custom Margins).

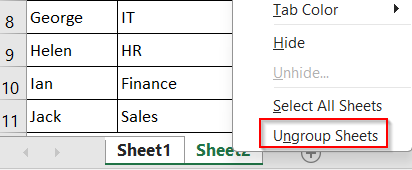
➤ After adjusting the margins, right-click any tab and select Ungroup Sheets to exit group mode.
This approach is efficient for reports, invoices, or any multi-sheet file that requires uniform print margins.
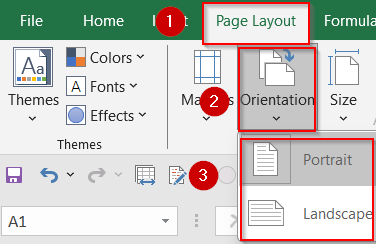
Change Page Orientation to Fit Content Better
In some cases, adjusting margins alone might not be enough to make your Excel data fit properly on the printed page, especially if you’re working with wide tables or datasets. Switching between portrait and landscape orientation can help optimize the layout and prevent columns from being cut off.
Steps:
➤ Go to the Page Layout tab on the ribbon.
➤ In the Page Setup group, click Orientation.
➤ Choose Portrait (vertical layout, default) or Landscape (horizontal layout).
Note:
Use Landscape to prevent data from spilling off the page when printing wide spreadsheets.
Shift Cell Content Using Indent Options
Although this method doesn’t change the printable page margins, it allows you to control the spacing of data within individual cells. This is especially useful when you want to create cleaner alignment, offset text for visual hierarchy, or make your spreadsheet easier to read without affecting the actual layout for printing.
Steps:
➤ Select the cells or range where you want to adjust text spacing.
➤ Go to the Home tab on the ribbon.
➤ In the Alignment group, click Increase Indent to move content inward or Decrease Indent to shift it back.
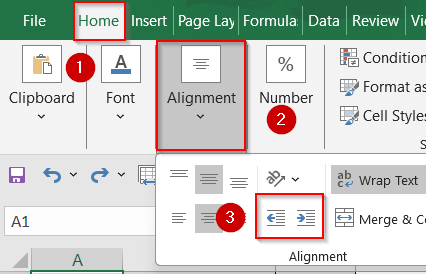
This adds visual padding within the cell, improving how your data looks on screen or paper.
Frequently Asked Questions
Can I apply margins to multiple sheets at once?
Yes, you can apply the same margin settings to several sheets. Just hold Ctrl, click the sheet tabs to group them, adjust the margins, and Excel will apply the changes to all selected worksheets.
Why do my margins look correct in Excel but print differently?
Margins may appear correct in Excel but still print off due to printer limitations, default paper sizes, or driver issues. Always check Print Preview and test with your actual printer before finalizing.
How can I reset the margins back to Excel’s default settings?
To return to default margins, go to Page Layout tab >> Margins and choose Normal. This resets top and bottom margins to 0.75 inches and left and right margins to 0.7 inches automatically.
Will margin settings be preserved if I share the file with someone else?
Yes, margin settings are saved within the Excel workbook. Anyone who opens your file will see the same margins you applied, unless they choose to manually change them after opening it.
Do indent changes inside cells affect printed margins?
No, indents only shift the content inside individual cells. They help with on-screen readability but do not alter the worksheet’s printed page margins or overall layout when you print the sheet.
Wrapping Up
In this tutorial, we learned all the essential methods for changing, customizing, and adjusting margins in Excel. From applying default margin presets to setting up custom values through Page Setup or Print Preview, each method helps you control how your worksheet appears on paper. We also explored ways to remove margins visually and adjust data spacing within cells for a more polished look. Feel free to download the practice file and share your feedback.