Working with Excel often involves importing or exporting CSV and text files for sharing data between different programs or systems. If the wrong encoding is used, you might see unusual text, strange characters, or missing symbols when opening files. Encoding determines how characters are stored and interpreted, so choosing the correct one like UTF-8 ensures your data displays properly.
In this article, we’ll explore multiple ways to change encoding in Excel, whether you’re saving a new file, importing external data, or troubleshooting issues in older versions. Let’s get started.
Steps to change encoding in Excel:
➤ Open your Excel file and click File >> Save As.
➤ Browse to your desired location and open the Save as type dropdown.
➤ Choose CSV UTF-8 (Comma delimited) (*.csv).
➤ Click Save, and your file will be stored with UTF-8 encoding for compatibility.

Save as CSV UTF-8 for Accurate Encoding (Modern Excel)
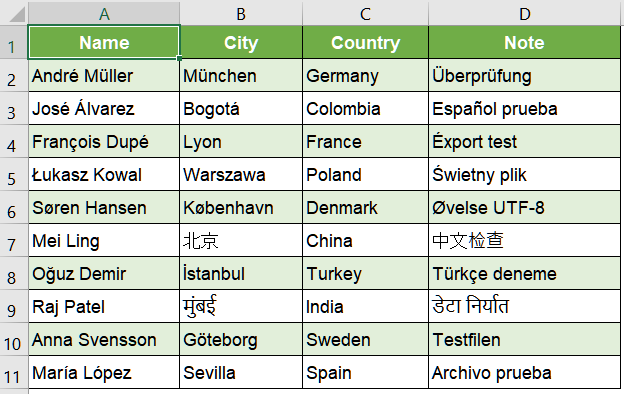
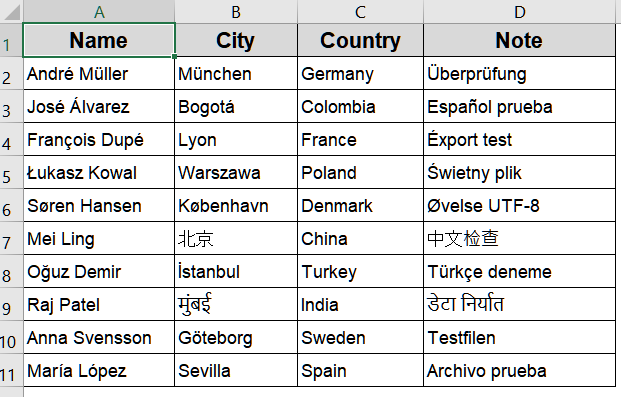
Saving your file as CSV UTF-8 (Comma delimited) is the most reliable way to preserve characters, accents, and symbols when sharing data. Modern Excel versions include this option to prevent corrupted text when transferring files between systems, languages, or platforms. This method is ideal for multilingual datasets or when exporting data to applications that strictly require UTF-8 formatting.
Steps:
➤ Open your Excel file and click File >> Save As.
➤ Browse to your desired location and open the Save as type dropdown.
➤ Choose CSV UTF-8 (Comma delimited) (*.csv).|
➤ Click Save, and your file will be stored with UTF-8 encoding for compatibility.

Set Encoding via Web Options for Older Excel Versions
In older Excel editions, the direct UTF-8 save option isn’t available. Using the Web Options dialog allows you to manually select the desired encoding, ensuring special characters are preserved when exporting or sharing CSV files. This method is essential for legacy systems or multilingual datasets.
Steps:
➤ Click File >> Save As and select CSV (Comma delimited).
➤ In the Save As dialog, click Tools (bottom-right) >> Web Options.
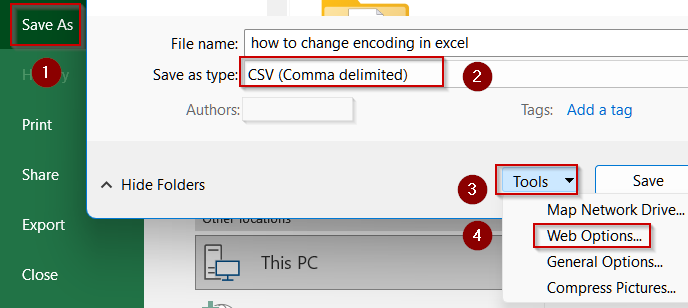
➤ You can also access Web Options via File >> Options >> Advanced >> General.

➤ Go to the Encoding tab and select Unicode (UTF-8) or another preferred encoding.
➤ Click OK, then Save to store the file with the chosen encoding.

Specify Encoding with the Text Import Wizard
When importing external CSV or text files, Excel may incorrectly interpret character encoding, causing scrambled text. The Text Import Wizard lets you explicitly set the correct encoding before loading data, ensuring all characters display properly. This method is ideal for multilingual datasets or files received from different systems.
Steps:
➤ Open Excel and click the Data tab >> Get Data/New Query >> From CSV.
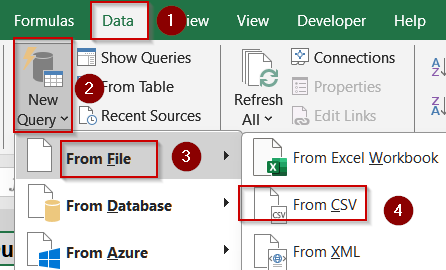
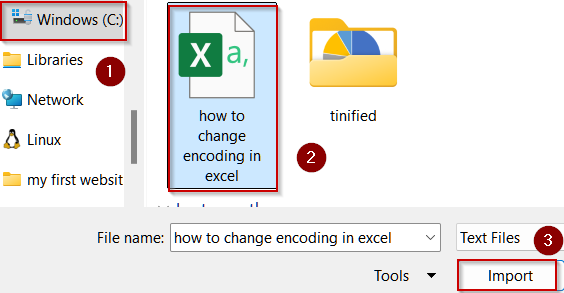
➤ Browse and select your CSV file, then click Import.

➤ In the wizard, locate the File Origin or Encoding dropdown.
➤ Choose 65001: Unicode (UTF-8) or the appropriate encoding.
➤ Complete the import by specifying delimiters and column formats as needed.

Manually Select Encoding When Opening a File
Encoding issues can occur at the moment of opening a file, leading to unusual characters. By manually specifying the encoding in Excel, you ensure that all special characters, accents, and symbols display correctly, preserving the integrity of your data. This method is especially useful when dealing with CSVs from different systems or languages.
Steps:
➤ Click Data on the ribbon >> Get External Data >> From Text.
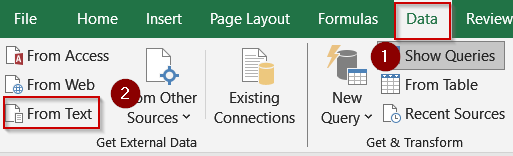
➤ Browse for your file and click Import.
➤ In the Text Import Wizard, select the correct encoding from the dropdown (e.g., UTF-8).

➤ Follow the wizard prompts to finish importing, ensuring your data displays correctly.
Re-save the File in Notepad to Fix Encoding Issues
When Excel cannot correctly interpret a file’s encoding, using Notepad as an intermediary allows you to re-save the file with the desired encoding. This ensures special characters, accents, and symbols are preserved, making the file compatible for Excel import.
Steps:
➤ Open your CSV or TXT file in Notepad (select All Files if needed).
➤ Click File >> Save As.
➤ In the dialog box, choose your preferred encoding (e.g., UTF-8) from the dropdown.

➤ Save the file with a new name, then reopen it in Excel to verify the correct character display.
Downloadable Resources
Get our practice workbook or necessary files that we have worked with to prepare this article.
Frequently Asked Questions
Why does my CSV show strange characters in Excel?
This happens when the file uses an encoding Excel doesn’t interpret correctly. Saving or importing the file with UTF-8 or the correct encoding ensures special characters display properly.
What’s the safest encoding for sharing international data?
UTF-8 is the most universal and widely supported encoding. It preserves accented letters, non-Latin characters, and symbols across most platforms, ensuring your data looks consistent worldwide without compatibility issues.
Can I fix encoding on an already saved CSV file?
Yes. Open the file in a text editor like Notepad or Notepad++, select Save As, choose UTF-8 encoding, save it, and reopen in Excel. This preserves characters without damaging your data.
Does Excel always save CSV files in UTF-8 by default?
No. Older Excel versions default to ANSI, which can cause character corruption. Only Excel 2016 and later include a CSV UTF-8 option. For older versions, you must use Web Options or a text editor.
How can I check a file’s encoding before opening in Excel?
Use tools like Notepad++, Visual Studio Code, or online encoding checkers. These display the current encoding, allowing you to confirm or convert it to UTF-8 before importing into Excel.
Wrapping Up
In this tutorial, we explored multiple methods to change encoding in Excel, including saving with CSV UTF-8, using Web Options for older versions, and leveraging the Text Import Wizard. By selecting the right encoding, you’ll avoid corrupted characters and ensure smooth data sharing. Feel free to download the practice file and share your feedback.