Parentheses in Excel often appear when data is imported or copied from external sources. It makes your spreadsheet look cluttered and inconsistent. For example, you might have names like John Doe (Manager) or product labels such as Widget X (Old). These extra brackets can interfere with sorting, filtering, or matching data accurately.
In this article, you’ll learn how to remove parentheses in Excel step by step using different methods.
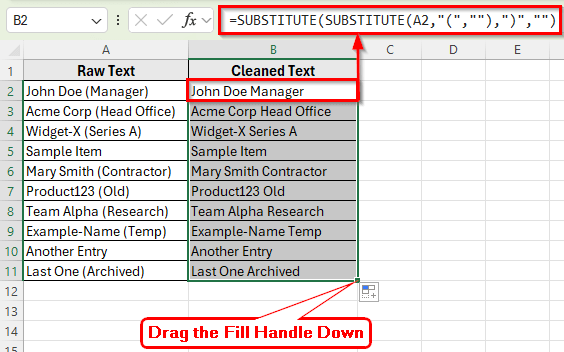
Here’s how to remove parentheses in Excel using SUBSTITUTE function:
➤ Open your dataset in Excel.
➤ Click on cell B2 where you want to display cleaned text of cell A2.
➤ Enter the following formula:
=SUBSTITUTE(SUBSTITUTE(A2,”(“,””),”)”,””)
➤ Press Enter. Excel will remove both opening and closing parentheses from the text in A2.
➤ Drag the fill handle down to apply the formula to the rest of the rows.
➤ After applying this formula, your cleaned data will be displayed in Column B.
What Are Parentheses in Excel?
Parentheses are round brackets ( ) that often appear around words, numbers, or notes in Excel cells. They are commonly used to add extra information such as job titles, product versions, or short comments. For example, a cell might contain John Doe (Manager) or Product X (Discontinued).
Although they help clarify details, parentheses can sometimes make your data harder to process or analyze. Removing them can simplify your dataset and make it easier to work with formulas, filters, and reports.
Using Find & Replace to Remove Parentheses in Excel
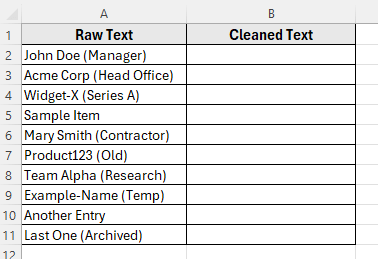
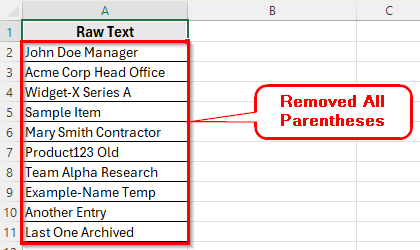
In this following dataset, Column A contains Raw Text that includes parentheses; Column B is empty where we’ll apply one or more of the methods to clean the text.
The Find & Replace tool is the easiest and fastest method to remove parentheses in Excel. It works well when you simply want to delete the ( and ) characters from your text. This method does not require any formulas and can be completed in a few simple steps.
Here’s how to do it:
➤ Open your dataset in Excel.
➤ Select the range of cells that contain the parentheses. For example, select A2:A10.
➤ Press Ctrl + H to open the Find and Replace dialog box.
➤ In the Find what box, type ( and leave the Replace with box empty.
➤ Click Replace All to remove all opening parentheses. Then, click Ok.
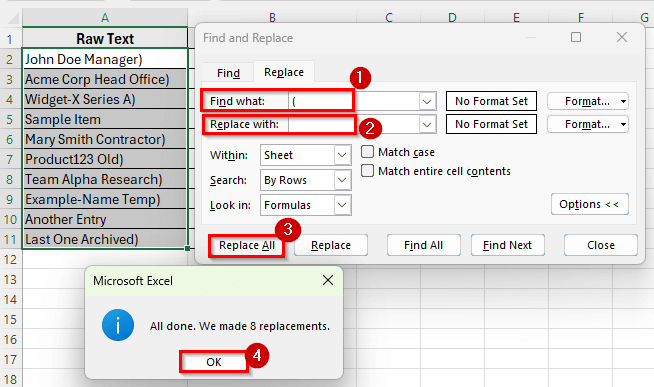
➤ Repeat the same steps for closing parentheses. Type ) in Find what and leave Replace with blank, then click Replace All again.
➤ Click Ok.

➤ After these steps, all parentheses will be removed from the selected cells.
Applying the SUBSTITUTE Function to in Excel
The SUBSTITUTE function is a simple and reliable way to remove parentheses using a formula. It replaces specific characters in a cell with something else. This method keeps your original data safe and creates a clean version in another column.
Here’s how to do it:
➤ Open your dataset in Excel.
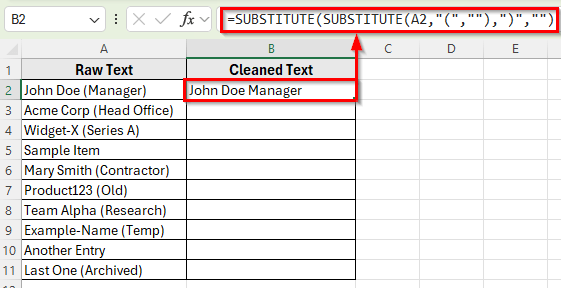
➤ Click on cell B2 where you want to display cleaned text of cell A2.
➤ Enter the following formula:
=SUBSTITUTE(SUBSTITUTE(A2,"(",""),")","")
➤ Press Enter. Excel will remove both opening and closing parentheses from the text in A2.
➤ Drag the fill handle down to apply the formula to the rest of the rows.
➤ After applying this formula, your cleaned data will be displayed in Column B.

Using Flash Fill to Remove Parentheses in Excel
The Flash Fill feature in Excel is another simple and smart way to remove parentheses. It automatically recognizes patterns based on your example and fills the rest of the column accordingly. This method is perfect when you want to clean up text without writing any formulas.
Here’s how to do it:
➤ In cell B2, type the cleaned version of the first entry manually.
➤ For example, if cell A2 contains John Doe (Manager), type John Doe Manager in B2.
➤ Press Enter to confirm.

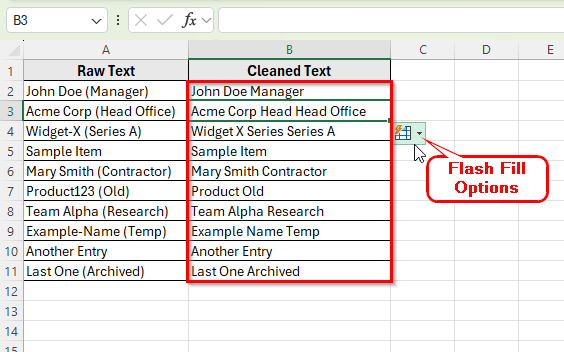
➤ Now go to cell B3, and press Ctrl + E on your keyboard. This activates Flash Fill.
➤ Excel will automatically detect the pattern and fill the rest of the column by removing the parentheses in each entry.
Combining LEFT, FIND, and IFERROR Functions to Remove Parentheses and the Text Inside
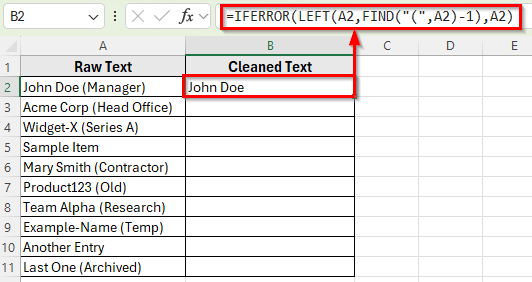
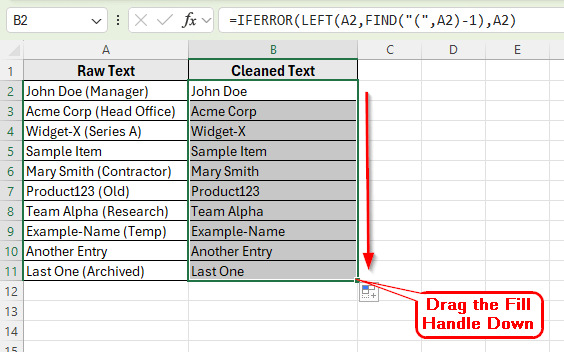
Sometimes you may want to remove not only the parentheses but also the text inside them. For example, turning John Doe (Manager) into John Doe. Excel can handle this using a combination of text functions such as LEFT, FIND, and IFERROR.
Here’s how to do it:
➤ Click on cell B2.
➤ Enter the following formula:
=IFERROR(LEFT(A2,FIND("(",A2)-1),A2)
➤ Press Enter. The formula will remove everything starting from the first opening parenthesis.
➤ Drag the fill handle down to apply the formula to the remaining rows.
Apply VBA Macro to Remove Parentheses in Excel
If you work with large datasets and need to remove parentheses frequently, using a VBA macro can save a lot of time. A macro can automatically go through all selected cells and delete parentheses in one click. This method is ideal for repetitive or large-scale cleanups.
Here’s how to do it:
➤ Press Alt + F11 to open the VBA editor.
➤ Click Insert on the menu bar, then select Module.
➤ In the module window, copy and paste the following VBA code:
Sub RemoveParentheses()
    Dim rng As Range
    Dim cell As Range
    Set rng = Selection
    For Each cell In rng
        cell.Value = Replace(cell.Value, "(", "")
        cell.Value = Replace(cell.Value, ")", "")
    Next cell
End Sub 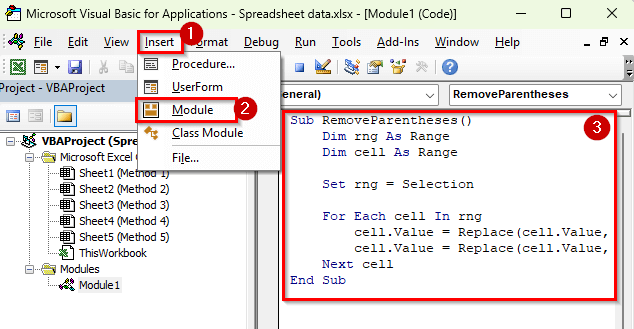
➤ Close the VBA editor and return to your Excel worksheet.
➤ Select the range of cells that contain parentheses. For example, A2:A10.
➤ Press Alt + F8 , choose RemoveParentheses, and click Run.
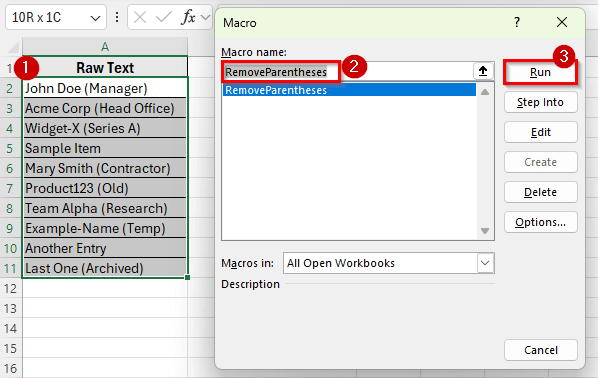
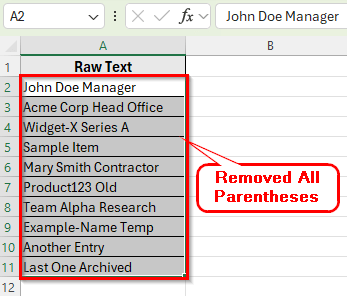
➤ After running the macro, all parentheses in the selected cells will be removed instantly.
Frequently Asked Questions
How do I remove only the parentheses and keep the text inside in Excel?
You can use the SUBSTITUTE formula:
=SUBSTITUTE(SUBSTITUTE(A1,"(",""),")","")
This removes both opening and closing parentheses but keeps the text inside them unchanged.
How to use Find & Replace to delete parentheses?
Press Ctrl + H , type ( in the Find what box, leave the Replace with box empty, and click Replace All. Repeat the same for ). This method removes the parentheses instantly without using any formulas.
Does Flash Fill work for removing parentheses in Excel?
Yes. Type one clean example in the next column and press Ctrl + E . Excel will detect the pattern and remove parentheses from all other cells automatically.
How do I automate the process for a large dataset?
You can create a VBA macro that loops through the selected range and removes parentheses from each cell. It’s the fastest option for repetitive or large-scale cleanups.
Wrapping Up
Removing parentheses in Excel helps keep your data clean and easier to manage. It becomes especially useful when working with imported files, employee lists, or product details that include extra notes in brackets. Cleaning these up makes sorting, filtering, and reporting more accurate.
Applying this cleanup improves efficiency in handling your data and gives your worksheet a polished, organized appearance. It keeps text consistent and makes it easier to analyze, share, or present without extra symbols interfering.