Grouping dates is an important part of data analysis. Suppose you have inventory data for a year or a month. You would need to group the data by months or weeks to calculate the turnover and understand trends. However, when Excel refuses to group the dates in a pivot table, it can slow down our data analysis and make us frustrated. In this article, we will learn how to fix “cannot group dates in a pivot table” in Excel so that you can group in your pivot table without any issues.
Try the following steps to fix date grouping issues in Excel Pivot Table:
➤ Check the source data for abnormal dates.
➤ Fix them, and recreate the pivot table.
➤Try to group the dates again.
This tutorial will go through a step-by-step guide on how to fix the date grouping issue in a pivot table. We will learn the reasons the pivot table can have issues and fix the table afterwards.
Visualization of the Dates Grouping Issues in Excel Pivot Table
Here we have a pivot table with some project tasks. There are task names, the people assigned to do those tasks, task status, priority of those tasks, and the due dates. We will group the dates by weeks, and if we cannot, we will look for why it is not possible and fix it.
A lot of times, the grouping does not work because we did not select the correct cell. Let’s try grouping normally first and see what happens.
➤ Go to PivotTable Analyze tab.
➤ Find the Group section and expand it.

➤ Here, the Group Field option is greyed out. That is because we have the A7 cell selected, and that cell does not contain any date. Let’s try going to the A8 cell.
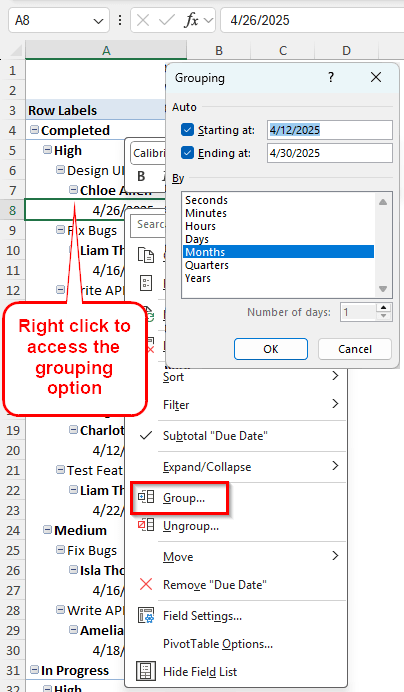
➤ Right-click on A8 and select Group.

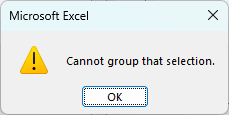
➤ Unfortunately, we cannot group the dates by selecting a date cell either.
Steps to Fix the Date Grouping Issue in a Pivot Table
Excel refused to group the dates even though we selected a cell that contained dates only. Now we need to fix the issue so that we can group the dates properly.
Step 1: Check the Source Data
Excel does not group dates when there is an issue with the source table. Therefore, we must verify the data in the source table.
➤ Go to the source data range that was used to create the pivot table. To find the source table, go to the PivotTable Analyze tab.
➤ In the Data section, select Change Data Source > Change Data Source.
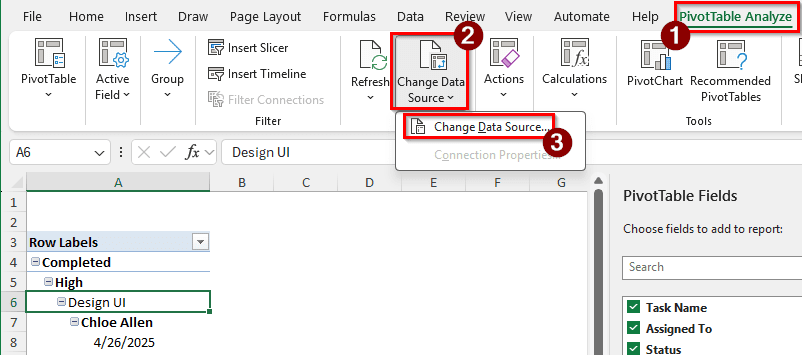
➤ Now the pivot table points to the original data range.
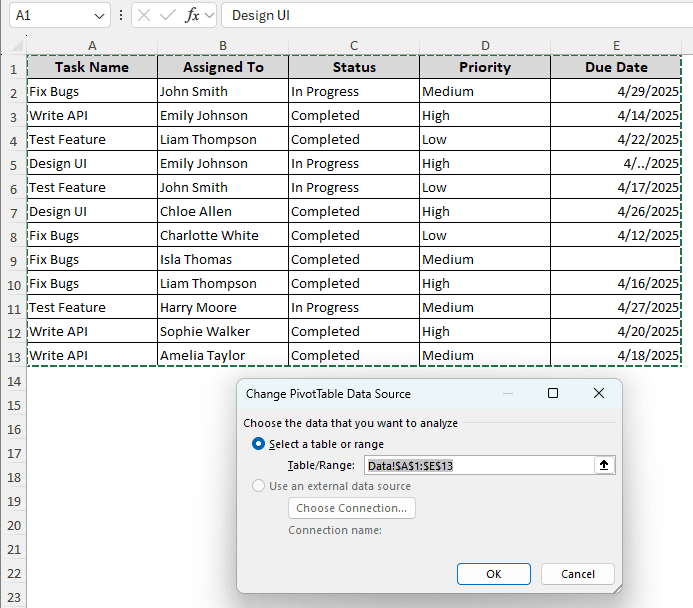
➤ Close the window and check the source data.
Step 2: Fix the Source Data Range
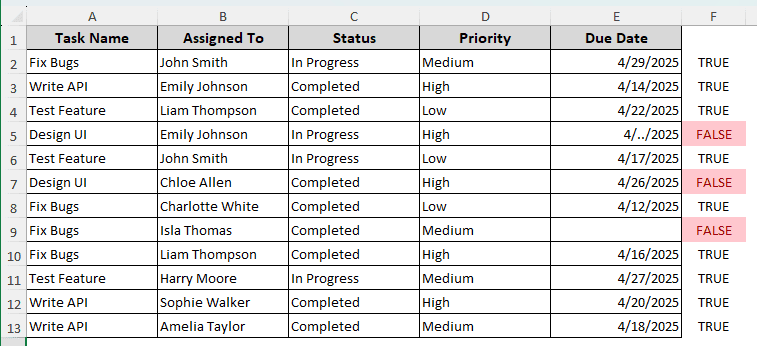
➤ After a visual check, we can confirm that there are issues in the source table. In column E, a field is clearly missing. There might be other issues in the date column. We must fix all of them.
➤ In the F2 cell, write the following formula:
=ISNUMBER(E2)
➤ Autofill the rest of the rows till F13.

➤ Select F2:F13 cells and go to the Styles group of the Home tab. From there, go to Conditional Formatting > Highlight Cells Rules > Text that Contains
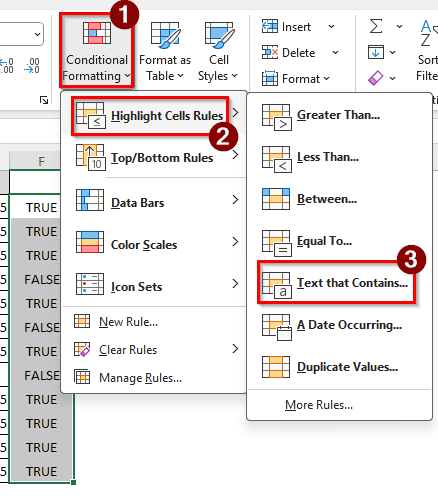
➤ In the new window, write FALSE in the edit box on the left and press OK.

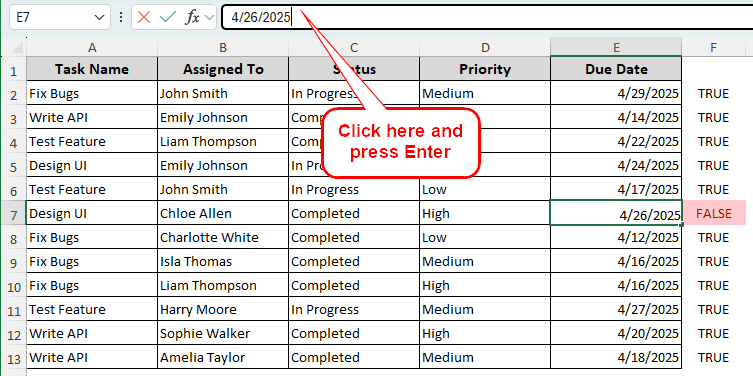
➤ We can see that the E5, E7, and E9 cells has issues. Let’s fix those:
➤ In E5 and E9 cells, we can write the correct date. But in the E7 cell, the issue is a bit more complicated. The date is written here properly, but the cell is formatted as text. We need to change it back to “Date”.
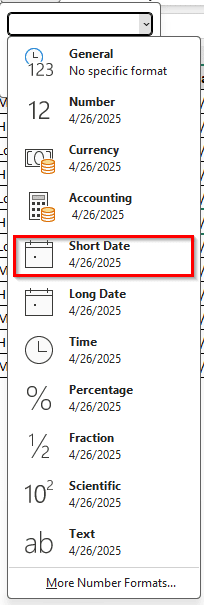
➤ In the Number group of the Home tab, open the dropdown menu.

➤ Select Short Date from the dropdown.
➤ Even after doing that, the F7 cell won’t turn to TRUE. That is because Excel still hasn’t registered the change.
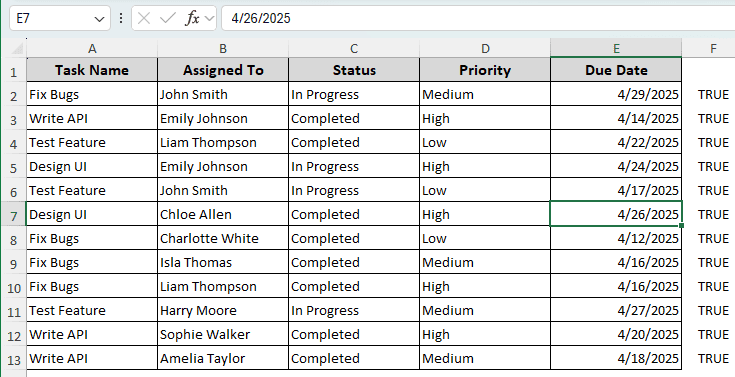
➤ To complete the change, we have to click on the formula bar for E7 and press Enter.
➤ Now the table has been fixed, and we can move on to creating a new pivot table.
Step 3: Create a New Pivot Table
Unfortunately, Excel will not register the changes properly even if we refresh the pivot table. We will need to create the table again. Follow the steps below to do it:
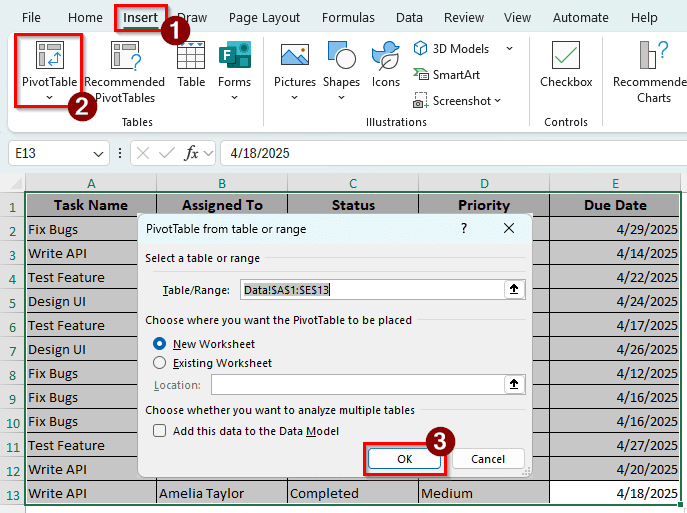
➤ Select A1:E13 cells and go to Insert > PivotTable.
➤ Press OK to create a new pivot table in a new worksheet.
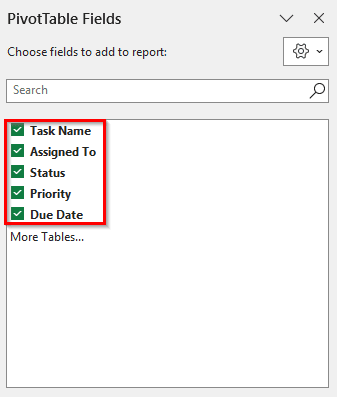
➤ In the new pivot table, select the required fields from the PivotTable Fields panel.
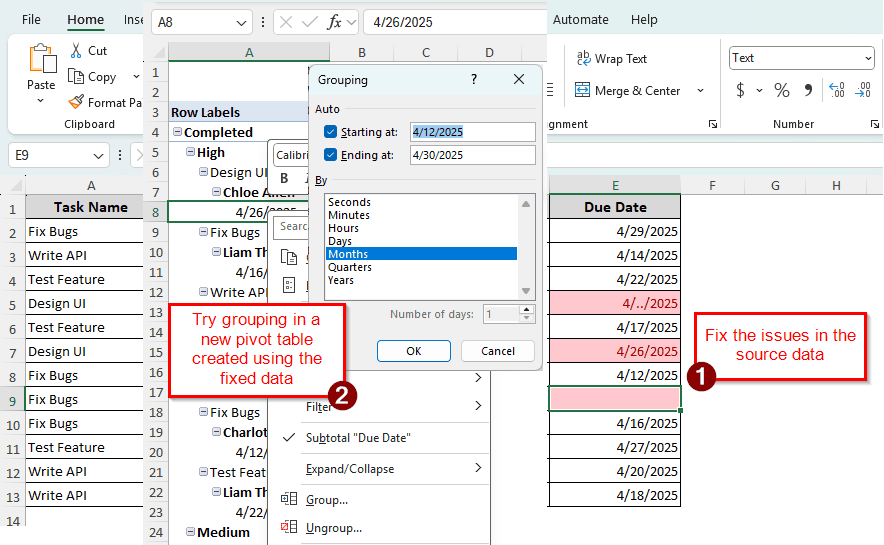
➤ Right-click on a cell that contains a date, and go to Group. The Grouping window should be available now.
Frequently Asked Questions
Why is grouping not working in the pivot table?
There could be several reasons for that. First of all, check whether you have selected the correct cell when you started grouping. For grouping using dates, you must select a cell that contains dates. Next, check the source data for formatting issues. Once you fix that, refresh the pivot table and try again.
How to group dates in a pivot table?
Right-click on a cell that contains a date in the pivot table. Select “Group” from the context menu that shows up. A small window called Grouping should pop up. Select Months and deselect other options in that window. Press OK to group the dates in your pivot table.
Why is the group field greyed out in a Pivot Table?
There could be two reasons why the group field is greyed out. First, you might not have selected a cell that contains numeric data. Grouping is not possible with text, so a cell with numeric data must be selected. Next, you must check the source dataset. If the column contains multiple types of data, grouping might be disabled in the pivot table.
How to group dates into weeks in Excel?
To group dates into weeks in Excel, you can take the help of a helper column. Create a column beside your dataset with the following formula:
=WEEKNUM(A1)
Replace A1 with a date reference, and autofill other cells. Now, the weeks of the year are identified in this column. You can use that column to group the table.
How to correct the date format in Excel?
Go to the Home tab, and find the Number group. From the dropdown menu, go to More Number Formats. From the Number tab, go to the Date category. Select the required type of date format from the right panel.
Wrapping Up
Today we have learned how to fix cannot group dates in pivot table issue in Excel. We hope that the fixes we mentioned here work for your dataset. If you are having more problems with your dataset, leave a comment below, and we will try our best to solve them. Stay tuned for more Excel tutorials and guides.