Working with project management often involves adjusting dates. When you have a bunch of deadlines, you might want to check which ones you need to do first by sorting by dates. Fortunately, Microsoft Excel makes it easier to sort dates in pivot tables. In this article, we will learn how to sort dates in pivot table in detail.
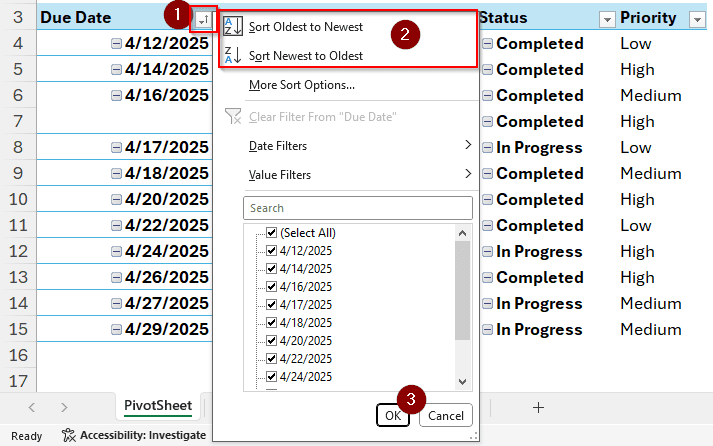
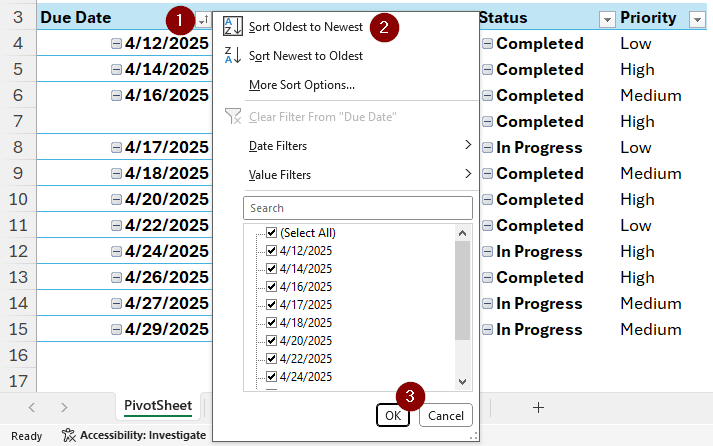
➤ Go to the heading of the date column.
➤ Click on the small arrow to the right of the heading to bring up the sorting options.
➤ Click on Sort Oldest to Newest or Sort Newest to Oldest and hit OK.
While that was a concise way of doing that, sometimes that method does not work for different reasons. To know how to make sorting work properly, keep reading the whole article.
Creating a New Pivot Table & Sorting
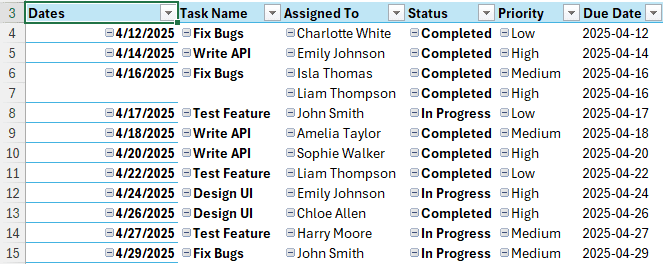
In this dataset, we have information about a project regarding building an app. We want to sort the tasks by date to know which parts of the project need to be done first. Here are the steps on how to do it:
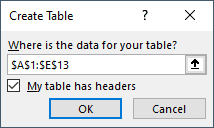
➤ Select the whole table and hit Ctrl+T to create a table.
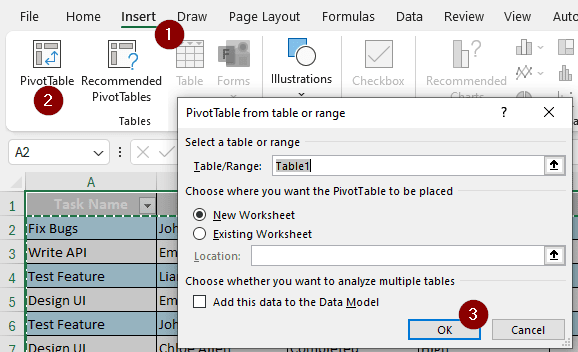
➤ Go to Insert > PivotTable to create a pivot table
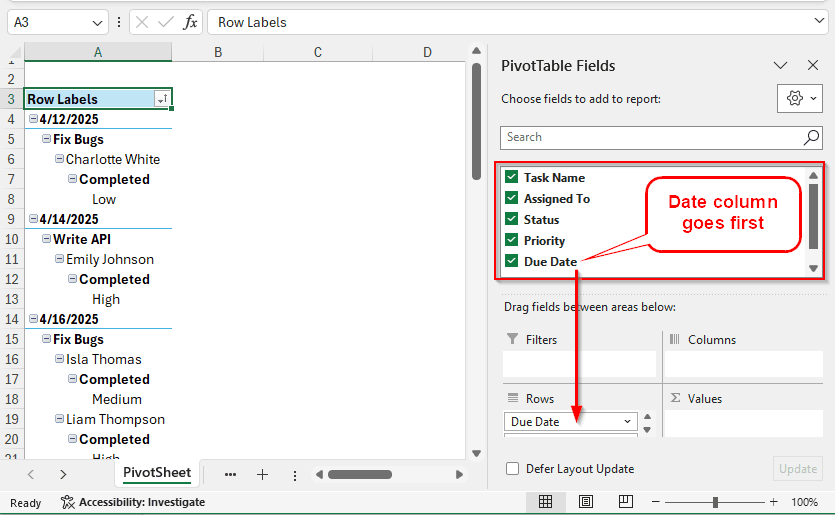
➤ In the new table, there will be no columns or rows at first. From the right panel of PivotTable Fields, select the Date column first. Excel sorts using the first field in a pivot table, so the date column must be the first. Then add the other columns.
➤ To improve the table, turn Grand Totals and Subtotals off, and set the report layout to Tabular form.
➤ From the Due Date column, we click the small arrow sign on the right. From there, we select Sort Oldest to Newest to sort the dates in the pivot table.
Sorting an Existing Pivot Table
If you already have a pivot table, you might not want to create another just to sort it using dates. Don’t worry, there is a way to do it for existing tables as well. Follow the steps below:
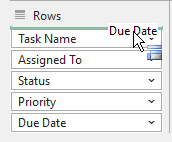
➤ In our existing pivot table, the columns are selected as the table suggests.

➤ We move the date column to the beginning by dragging it using a mouse.
➤ Now we can right-click on the Due Date column and select Sort > Sort Oldest to Newest.

Converting Date to a Proper Format
While excel recognizes dates and automatically gives you the option to sort from oldest to newest, that might not always be the case. Sometimes, the dates are written as text, and we need to convert them to date format to sort them properly. Here is how to do it:
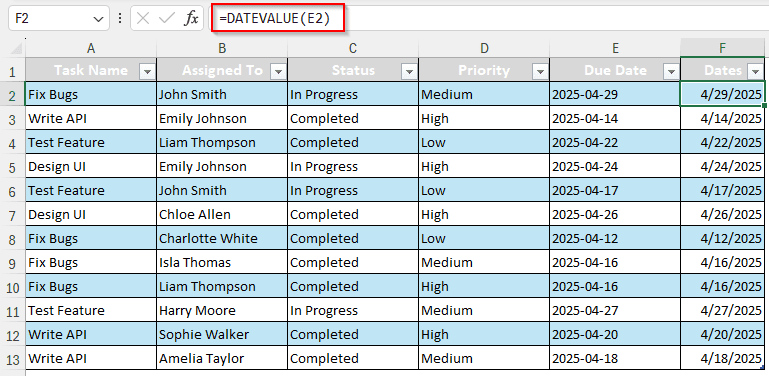
➤ To the right cell of the first row of the date value, write this formula:
=DATEVALUE(E2)
➤ Upon pressing Enter, Excel would automatically create a whole column with the new date values.
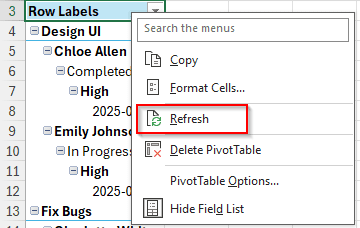
➤ Now we can create a pivot table with this new table. If we already have a pivot table, this column would be added to the table upon refreshing.
➤ After moving the Dates column to the front like the previous method, we can sort it. The table will look like this at the end.
Frequently Asked Questions
How do I sort a list of dates?
In your Excel sheet, select the whole list of dates, but do not select the heading of the column. From the Home tab, go to Sort & Filter > Sort Oldest to Newest. You can choose to sort from newest to oldest as well if you want. Hit OK on the warning box.
How do I fix date formatting?
Select the cells with the dates. Using your keyboard, use the Ctrl+1 shortcut. From the new window, you can select the format you want to use.
How do I pivot dates by month?
In your pivot table, select the column heading with the dates. Click on the small arrow on the right, go to Date Filters, and select the month style you want to use to sort the data.
How do I view PivotTable details?
Go to your pivot table, and click on any cell to select it. Then right-click on a field and select Show Details to view the details.
How to sort a PivotTable?
Select the leftmost column of the pivot table. From the heading of the column, click on the small arrow on the right, and select Sort A to Z or Sort Z to A.
Wrapping Up
In this article, we learned how to sort dates in pivot table, along with how to do it with existing tables, new tables, and how to format from text to date. We hope that you learned what you came for from this tutorial. All the methods, along with the dataset used in this tutorial, are available to download for your convenience. Bookmark this site and leave a comment with suggestions for future tutorials.