Adding a picture to an Excel comment (or note in newer versions) can make your worksheet more visually informative which is perfect for showcasing product images, reference diagrams, or company logos directly in your data. Instead of relying on plain text comments, you can customize the comment background with any image you choose.
In this article, you’ll learn step-by-step how to insert a picture into an Excel comment or note. We’ll create a new note, format it using the Format Comment dialog, and apply your chosen image as the comment background.
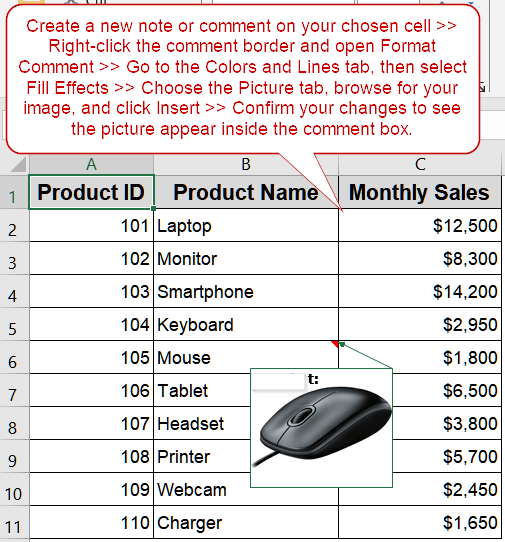
Steps to insert picture in an Excel comment:
➤ Create a new note or comment on your chosen cell.
➤ Right-click the comment border and open Format Comment.
➤ Go to the Colors and Lines tab, then select Fill Effects.
➤ Choose the Picture tab, browse for your image, and click Insert.
➤ Confirm your changes to see the picture appear inside the comment box.
Steps to Insert a Picture in an Excel Comment
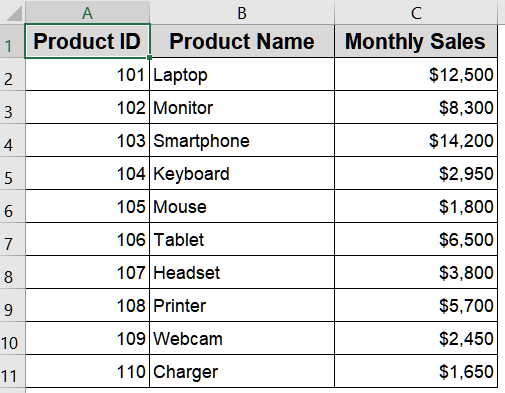
Adding pictures inside Excel comments is a creative way to enhance your spreadsheet’s usability. It allows you to display relevant images like product photos, diagrams, or logos directly when hovering over a cell. This is especially helpful for product catalogs, dashboards, or interactive worksheets where quick visual references save time. To illustrate, let’s assume we’re using the following dataset:
Step 1: Create a New Comment or Note
Before inserting a picture, you first need to create a comment container to hold the image. Excel supports two types of annotations which are threaded comments (modern) and notes (legacy). Since pictures can only be inserted into legacy Notes, you’ll start by creating one.
Steps:
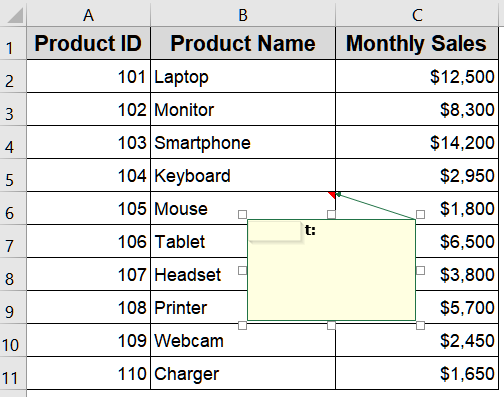
➤ Right-click the cell where you want to add a picture (e.g., B6).
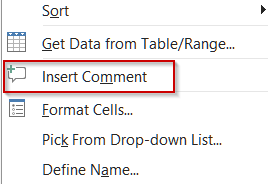
➤ Choose New Note (or Insert Comment in older Excel versions).
➤ A text box will appear next to the cell.
Step 2: Access the Format Menu
Formatting options are hidden behind the comment’s border menu, which is why this step is critical. Accessing the format menu allows you to customize the comment’s background and insert images. Make sure you select the border correctly, not just the text area.
Steps:
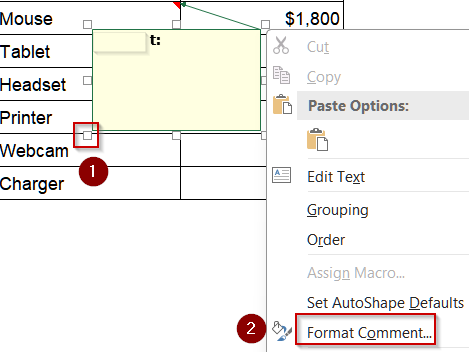
➤ Hover over the border of the new comment box until a four-arrow cursor appears.
➤ Right-click the border and select Format Comment from the context menu.
Step 3: Navigate to Fill Effects
The Format Comment dialog provides various formatting tools, but the Fill Effects option is what you need for inserting pictures. Here, you’ll switch from plain color fills to a custom image background for your comment.
Steps:
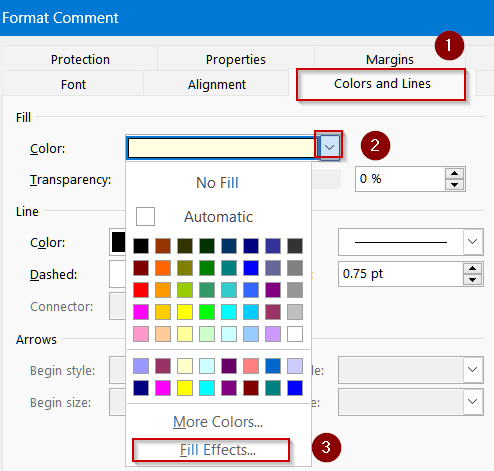
➤ In the Format Comment dialog box, go to the Colors and Lines tab.
➤ Under the Fill section, click the dropdown arrow next to Color.
➤ Select Fill Effects.
Step 4: Choose and Insert Your Picture
Now comes the core step: selecting the image to display inside your comment. Excel allows you to browse your computer for any local file, making it easy to insert product photos or diagrams directly.
Steps:
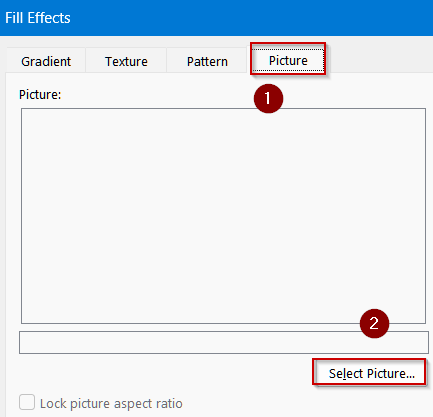
➤ In the Fill Effects dialog box, click the Picture tab.
➤ Click Select Picture and browse your computer for the desired image.
➤ Select your image from your desired location >> Click Insert or Open to confirm your selection.
➤ Click OK in the Fill Effects box, and then OK again in the Format Comment box.
Step 5: Finalize and Test the Comment
At this stage, you can clean up the comment to ensure only the picture appears, if desired. Testing the result ensures that the picture preview works perfectly when hovering over the cell.
Steps:
➤ Delete any default text inside the comment if you prefer only the picture.
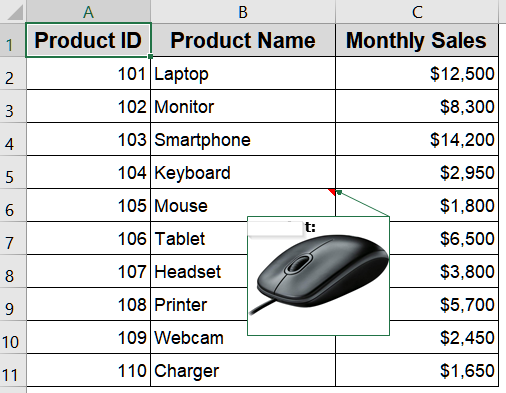
➤ Hover your mouse over the cell (e.g., B6) to see the picture inside the comment box.
This process can be repeated for all product names in your list which is ideal for building a product catalog with quick image previews.
Frequently Asked Questions
Can I resize the comment box to fit the picture?
Yes. After inserting your picture, hover the cursor over the comment’s border until the four-arrow icon appears. Drag any corner or side to resize the comment box and perfectly fit your inserted image.
Does this method work with threaded comments in modern Excel?
Threaded comments introduced in newer Excel versions do not allow images. Instead, use legacy Notes and right-click the cell, choose New Note, and follow the insertion steps to add pictures to classic-style comments.
Can I change or remove a picture later?
Yes. Right-click the comment border, select Format Comment, and choose a new picture or adjust its appearance. To remove, select No Fill in the formatting options. This allows flexible picture management within comments anytime.
Will the picture be visible when printing the sheet?
No. By default, pictures inserted in comments remain visible only when hovering over cells on-screen. To include them in printouts, open Page Layout >> Page Setup >> Sheet tab, then enable “Print Comments”.
Is there a shortcut for applying the same picture to multiple comments?
No, Excel lacks a direct shortcut for this. You’ll need to repeat insertion manually for each cell or use a VBA macro for bulk automation, which simplifies applying identical images across comments.
Wrapping Up
In this tutorial, you learned how to insert a picture into an Excel comment or note. By adding images, you can make your spreadsheets more interactive which is perfect for product catalogs, instructional worksheets, or any scenario where visual cues are helpful. Feel free to download the practice file and share your feedback.

