While saving an Excel spreadsheet as a PDF, you will find that your data is split across multiple pages, or the file size is too large. This is a common issue that can be frustrating, especially when you need to share a clean, single-page document. Excel’s default settings don’t provide the full width of your data, leading to a disorganized PDF output.
In this article, we will explore the common reasons behind Excel to PDF size problems and provide you with simple, step-by-step solutions to fix them.
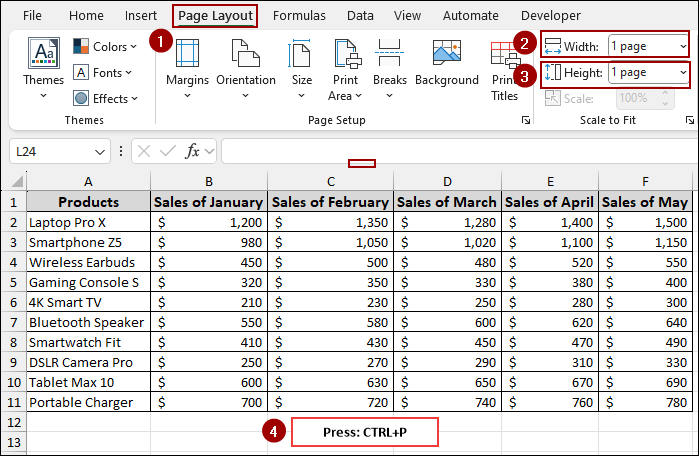
To properly save Excel to PDF without facing size issues, here’s one simple solution by setting page width & height:
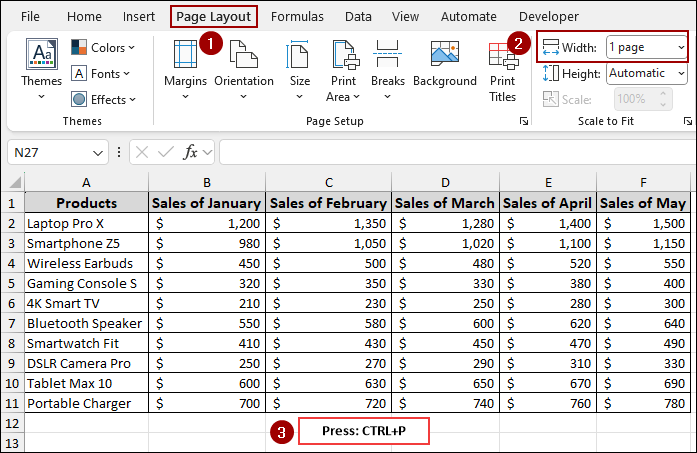
➤ Go to Page Layout and change the Page Width and Height to 1 page.
➤ Press Ctrl + P to open the Print Preview window, and you will see that the Excel sheet fits inside a single page.
Fixing Oversized PDF Output with the Scale to Fit Option
You have created a spreadsheet with important data, and you are ready to save it as a PDF. However, when you preview the file or open the PDF, you see that the last column is placed on a separate page. This creates a messy and unprofessional document.
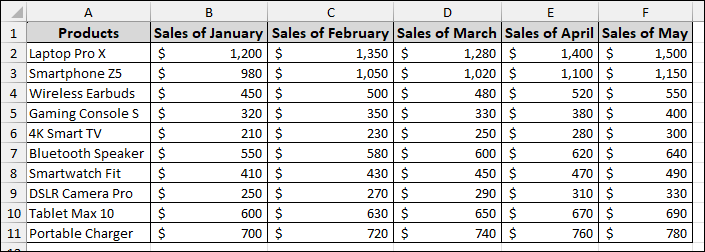
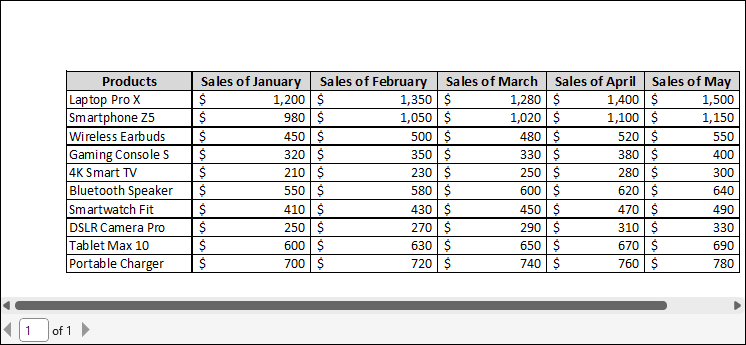
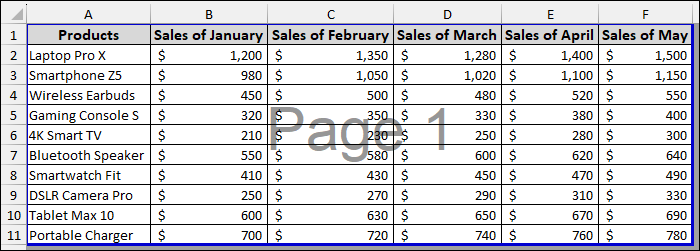
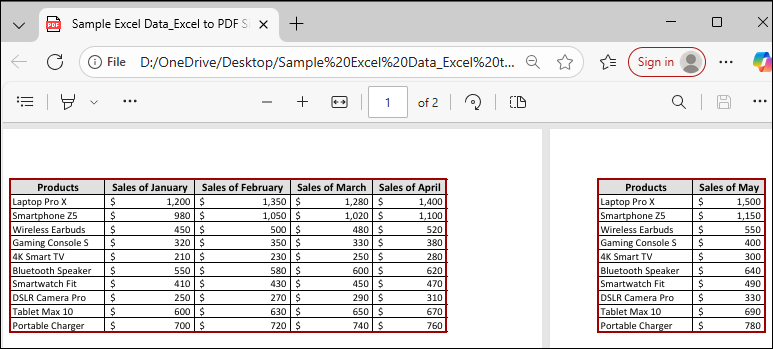
Let’s look at an example. We have a sales report in an Excel sheet that consists of products and their monthly sales. Now, let’s save the Excel sheet as a PDF.
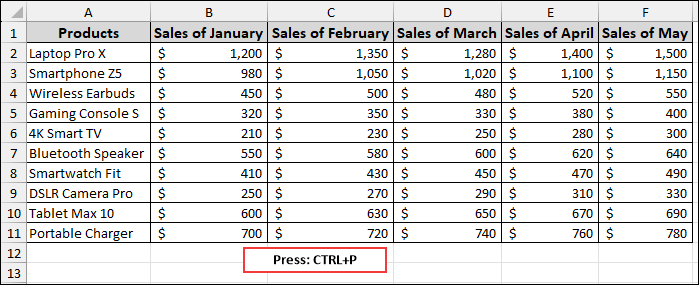
➤ Press the Ctrl + P key to open the Print Preview window.
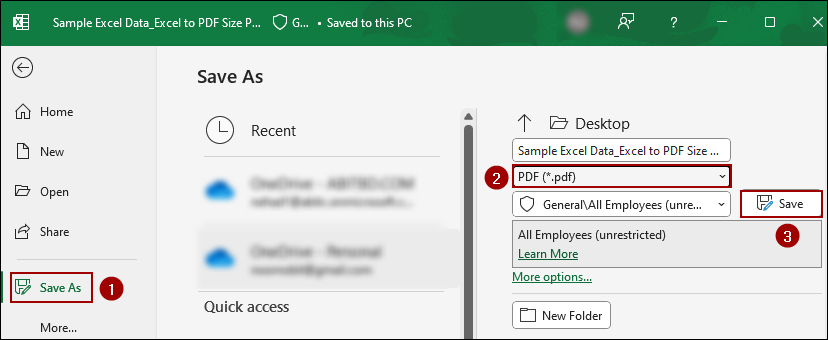
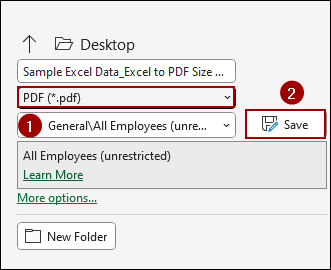
➤ Click Save as from the left pane.
➤ Choose PDF from the drop-down list and click Save.
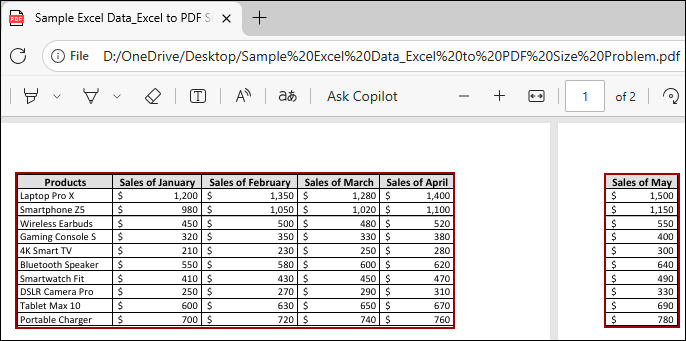
Thus, the Excel sheet will be saved as a PDF.
Opening the PDF, you will see the “Sales of May” column on a completely different page. This is a classic Excel to PDF problem. Now, let’s explore how to fix it using some simple methods.
The quickest and most common solution is to use the “Scale to Fit” feature. This feature automatically adjusts your spreadsheet content to fit within a specific number of pages, ensuring that all your columns appear on one page.
To use this feature:
➤ Go to the Page Layout tab.
In the Scale to Fit group, you will see dropdown menus for Width and Height.
➤ Set Width to 1 page and leave Height as Automatic.
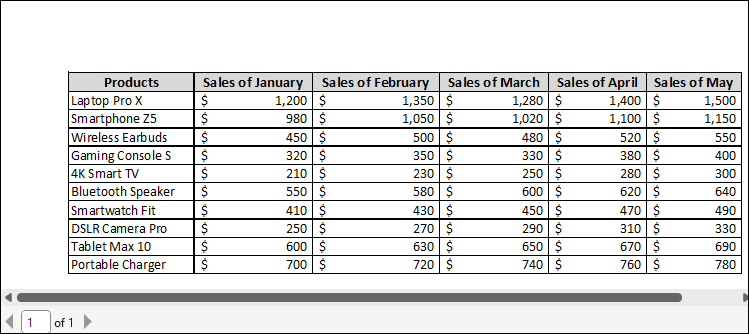
This will force all your columns to fit horizontally on a single page.
➤ Now, press Ctrl + P to open the Print Preview.
As a result, you can now see that all the data, from “Products” to “Sales of June,” fits neatly on one page.
Correcting Page Size Mismatch Using the Page Setup Feature
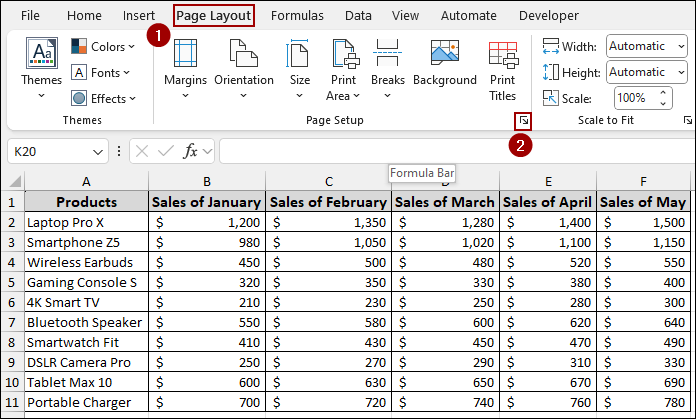
If you need more control, the Page Setup dialog box offers additional options to fit your data. This is particularly useful if you want to specify a more precise scale percentage or fit your data to both a specific width and height.
➤ Go to the Page Layout tab.
➤ Click the small arrow in the bottom-right corner of the Page Setup group.
➤ In the dialog box, go to the Page tab.
➤ Under Scaling, select the Fit to option.
➤ Set the fields to 1.
This will scale your Excel file to fit exactly on one page.
➤ Click Print Preview to see the result.
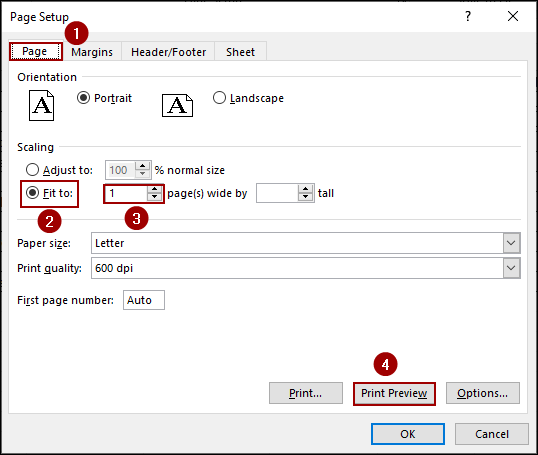
Finally, your data will now be perfectly fit inside a single page.
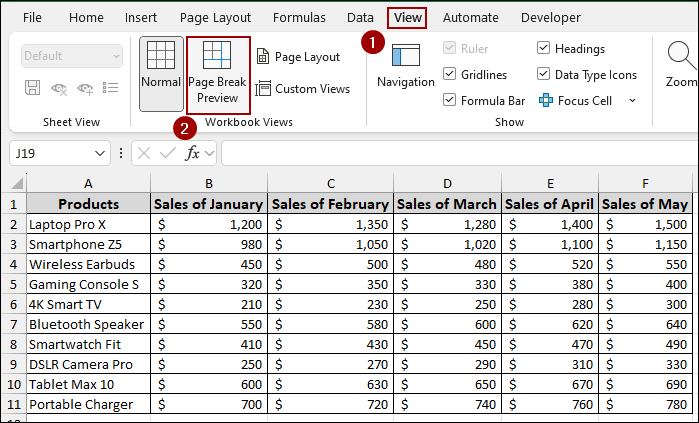
Adjusting Content Spread via the Page Break Preview Option
Sometimes, you might need to manually control where your pages break. The Page Break Preview feature allows you to visually adjust the print area and page breaks by simply dragging lines.
➤ Go to the View tab.
➤ Click on Page Break Preview in the Workbook Views group.
Excel will now show you where your page breaks are with blue dashed lines. To include more data on the same page:
➤ Simply click and drag the blue line to expand your print area.
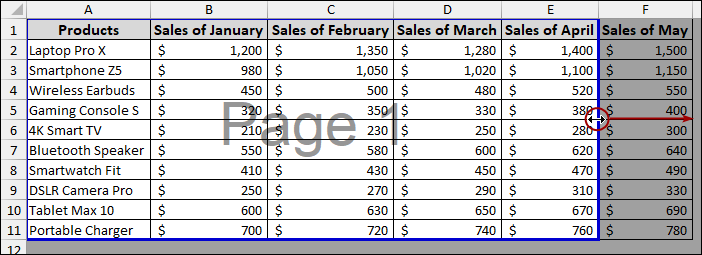
Once the blue line encompasses all your columns, the entire table will be treated as one page. Now, when you go to print or save as a PDF, all your data will be on a single page.
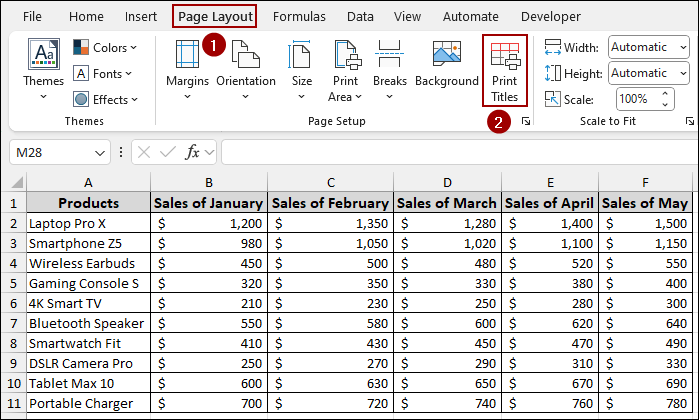
Ensuring Repeated Headers in Multi-Page PDFs Using Print Titles
If your spreadsheet is too large to fit on a single page and you have to split it, you will face another problem regarding the header. The headers will only appear on the first page, and the other pages will be missing the context. To fix this, you can use the Print Titles feature to repeat the necessary columns or rows on every page.
➤ Go to the Page Layout tab.
➤ Click on Print Titles.
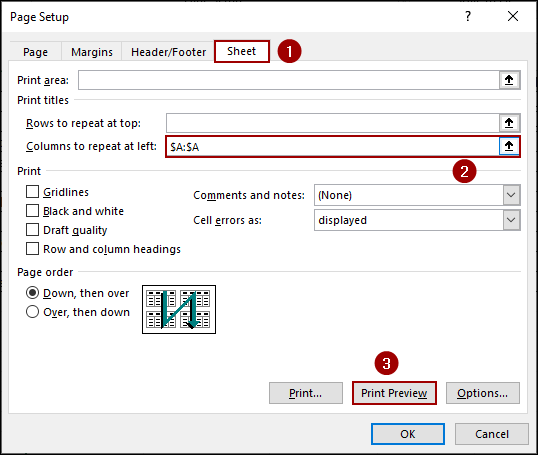
➤ In the Page Setup dialog box, select the Sheet tab.
➤ In the Print titles section, click the button next to Columns to repeat at left.
➤ Select the column you want to repeat (e.g., column A).
➤ Click Print Preview to see the result.
In the Print Preview window, you will see the following results.
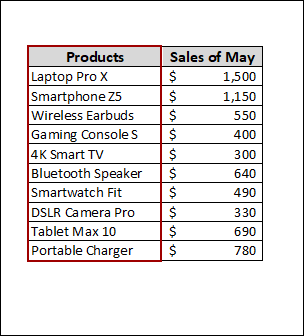
1st page: This is the first page with the headers and sales Data where the Sales of May is missing.

2nd page: This is the second page with the same headers and sales of May.
➤ To save it as a PDF, choose the PDF option and click Save.
Thus your PDF will have the “Products” column repeated on every page, providing an easy-to-read document.
Frequently Asked Questions
My PDF is still too big in file size. How can I fix this?
The PDF file size can be reduced by compressing the file. When you save as PDF, in the “Save As” window, click on “Options” and look for a setting to compress the file. You can also use online compression tools after saving the PDF.
How do I remove extra blank pages in the PDF?
You can clear the print area, delete unused rows and columns, and check the page breaks in the Page Break Preview window.
Is there a difference between ‘Save as PDF’ and ‘Print to PDF’?
Yes. “Save as PDF” uses Excel’s internal export method, while “Print to PDF” follows your printer settings. One may produce better sizing depending on your layout.
Concluding Words
Above, we have explored several effective methods to fix Excel to PDF size problems. Whether you choose to adjust scaling, change page setup, manage page breaks, or repeat titles for multi-page documents, these solutions will help you create PDFs with the exact layout and size you need. If you have any further questions or need assistance with other Excel formatting issues, feel free to share them below.