If you’ve ever printed a long Excel spreadsheet, you may have noticed that the header row disappears on the second page and beyond. This makes it hard to follow the data, especially in sheets with many columns. Without visible headers, you won’t know what each column represents, leading to confusion and mistakes in reading your printed report.
In this article, you’ll learn how to repeat your header row on every printed page in Excel. We’ll cover methods using Print Titles, Page Setup, and actual print settings. These techniques will help keep your printouts organized and professional, no matter how many pages they span.
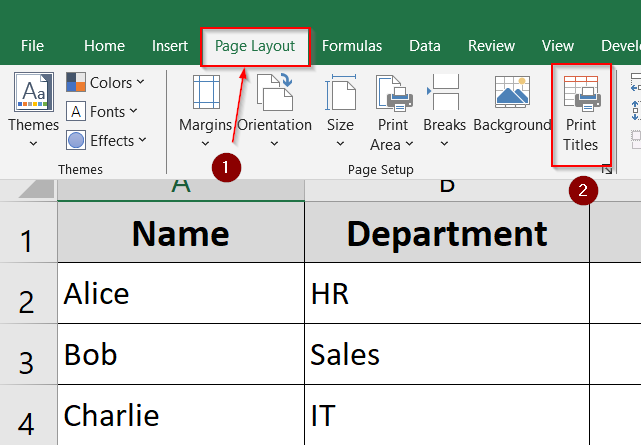
Steps to keep header when printing using print tiles:
➤ Go to Page Layout >> Print Titles.
➤ Under “Rows to repeat at top”, type $1:$1 to repeat the first row on every printed page.
➤ Click OK.

What Is a Header Row in Excel?
A header row usually refers to the first row in your Excel sheet that contains the column labels, like “Name,” “Date,” or “Amount.” These labels help you understand what each column of data represents.
By default, Excel only prints this header on the first page. You need to adjust your print settings if you want it to appear on every page.
Use Print Titles to Repeat Header Row
The Print Titles feature in Excel is designed specifically to help you repeat specific rows (usually the header row) at the top of every printed page. This is especially helpful when you’re printing long tables, reports, or forms and want to maintain consistent headers throughout. Using this feature not only improves readability but also eliminates confusion in multi-page printouts.
Steps:
➤ Go to the “Page Layout” tab.
➤ Click Print Titles in the Page Setup group.
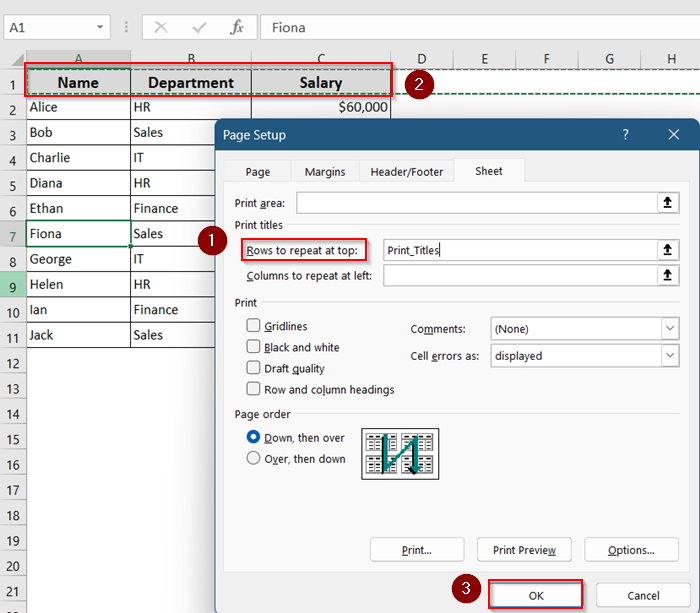
➤ In the dialog box, under “Rows to repeat at top”, select the header row or type $1:$1.
➤ Then go to the View tab and insert page breaks in Preview mode.
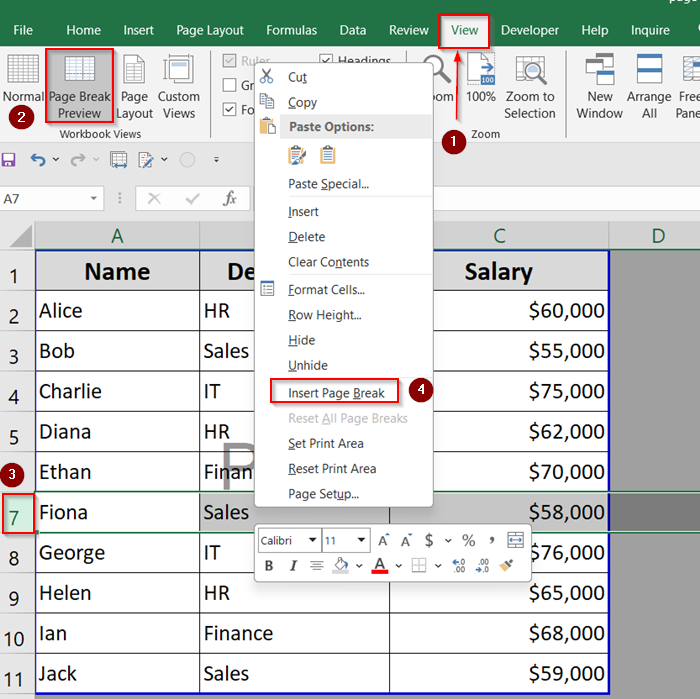
➤ Drag the blue line to move break position.
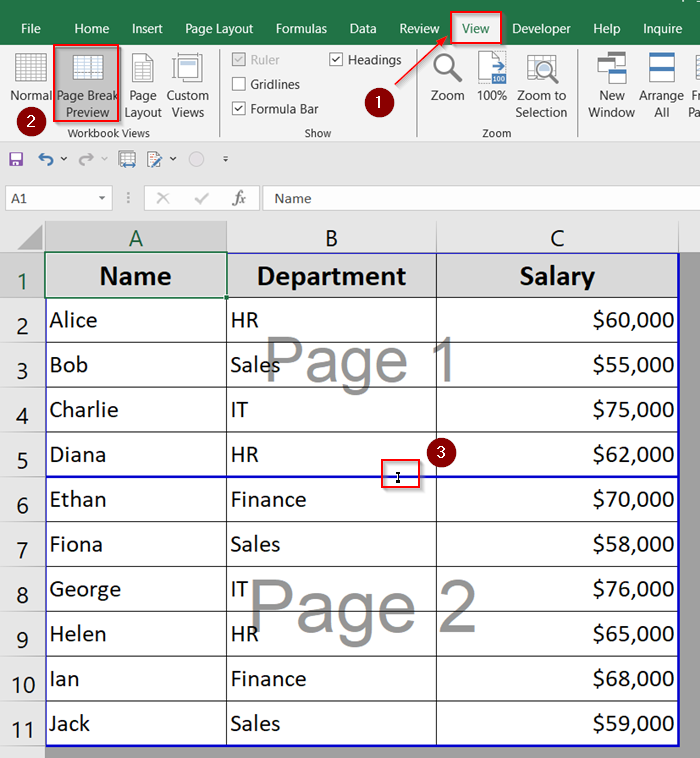
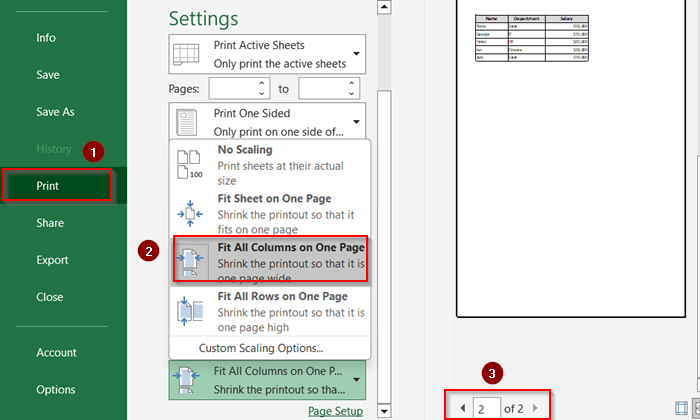
➤ Go to File >> Print >> Choose Fit All Columns on One Page from the drop-down.
➤ Use the arrow button to move through your print preview.
This way, each printed page will start with the headers and follow your custom breaks.
Use Page Setup from the File Menu
If you’re already in the Print Preview screen, there’s no need to go back to the ribbon. The Page Setup dialog under File >> Print offers the same settings in a slightly different place. This method is perfect when you’re making last-minute adjustments before printing, such as repeating header rows or adjusting page layout.
Steps:
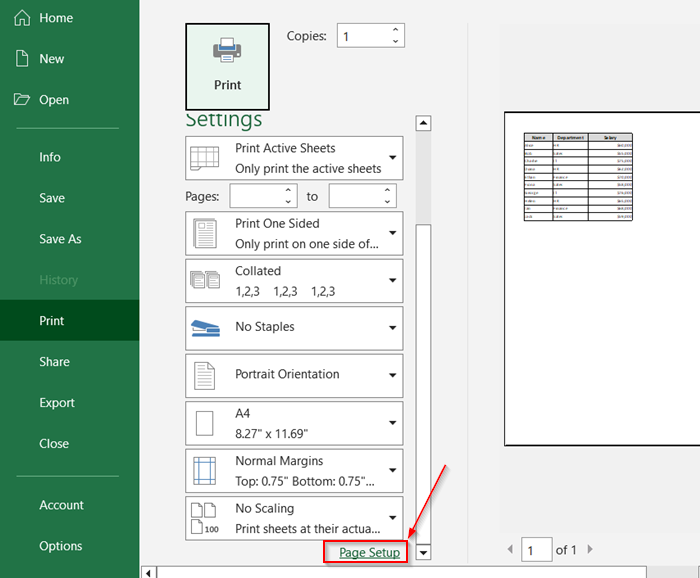
➤ Press Ctrl + P to open the Print Preview window.
➤ At the bottom, click Page Setup.
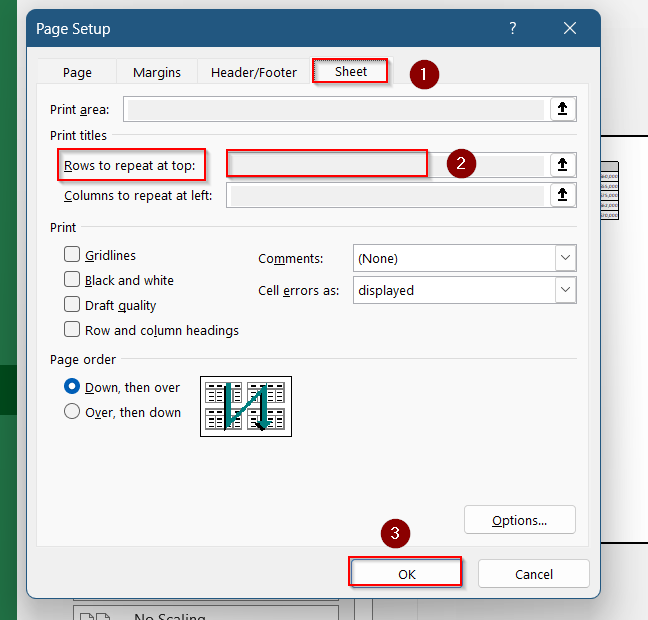
➤ In the dialog box, go to the Sheet tab.
➤ In “Rows to repeat at top,” enter $1:$1.
➤ Click OK, then print your sheet.
Now your customised changes will be visible when printed.
Frequently Asked Questions
Why doesn’t my header show up on every page?
If your header row isn’t showing up on every printed page, it’s likely because you haven’t set the “Rows to repeat at top” option in Page Setup. Go to the Page Layout tab, click Print Titles, and in the Page Setup dialog box, define the header row under Rows to repeat at top (e.g., $1:$1). Without this step, Excel will only print the header on the first page, even if the Freeze Panes feature is enabled which doesn’t affect printing.
Can I repeat multiple header rows?
Yes, Excel allows you to repeat more than one header row on each printed page. In the Page Setup dialog (accessible through Page Layout >> Print Titles), you can enter a range like $1:$3 in the Rows to repeat at top field. This ensures that rows 1 through 3 appear at the top of every printed page. It’s especially helpful when your headers span multiple lines or contain subcategories that need to be visible for context across all pages.
Is Freeze Panes the same as repeating headers?
No, the Freeze Panes feature is meant only for on-screen navigation and does not apply to printing. When you freeze panes, the top rows (or left columns) stay visible as you scroll in Excel but they won’t repeat when you print. If you want headers to appear on every printed page, you must use the Print Titles function under the Page Layout tab and set the “Rows to repeat at top” option. Freeze Panes helps while editing, but not with printed output.
Will this work on Excel 365, 2021, and older versions?
Yes, the steps for repeating header rows when printing are consistent across most modern Excel versions. Whether you’re using Excel 365, Excel 2021, Excel 2019, or even Excel 2016, the process of setting rows to repeat via the Page Layout >> Print Titles feature remains the same. The user interface and dialog boxes have remained unchanged for this function over the years, ensuring compatibility and ease of use no matter which version you’re working with.
Wrapping Up
In this tutorial, you learned how to keep the header row in Excel visible when printing by using the Print Titles feature. Whether you’re preparing reports, invoices, or long lists, repeating the headers on every page keeps your printed documents clear and professional.
Feel free to download the practice file and share your thoughts and suggestions.