
In Excel, we regularly need to display long text entries clearly within a single cell. That may happen in many situations such as addresses, product details, or notes. We need to do that without the text spilling into adjacent cells. This becomes important when creating organized, readable spreadsheets for reports or forms. A common scenario is when users paste data or type paragraphs, but everything remains on one line. It becomes hard to read or print.
To make excel go to next line automatically, follow these steps:
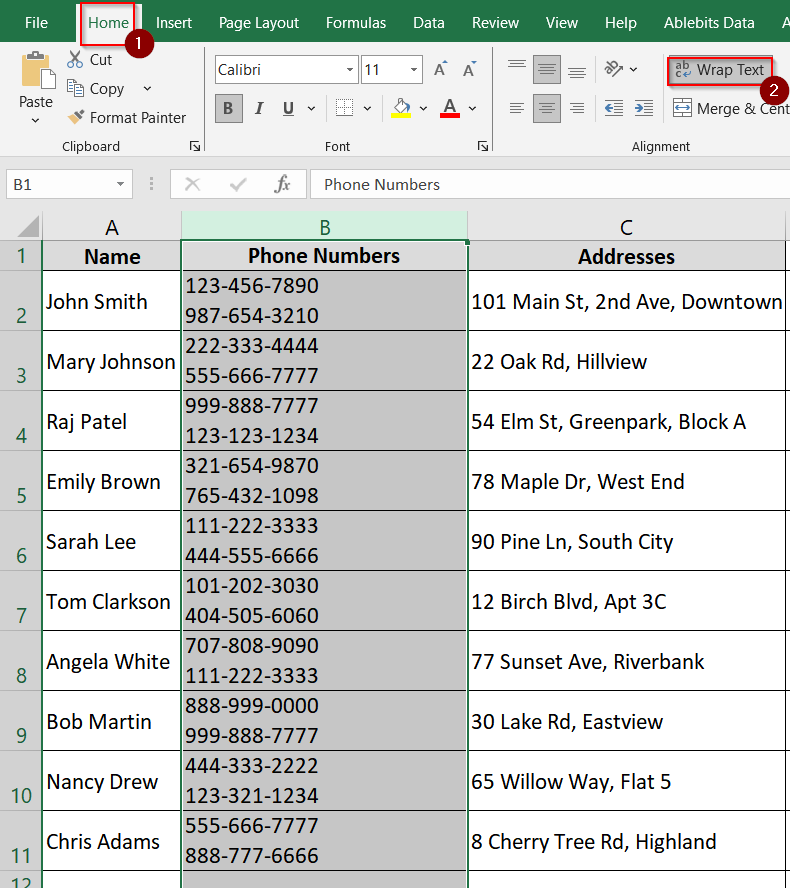
➤ Select the cells where the text should go to the next line automatically.
➤ Go to the Home tab and click on Wrap Text in the Alignment group.
➤ Adjust the row height if needed so all lines are visible.
In this article, we have come up with 3 very useful and easy to apply methods. It will make Excel go to the next line automatically. We will use features like Wrap Text, Alt + Enter, and Find and Replace with Ctrl + J.
Quick Video Tutorial: Make Excel Go to Next Line Automatically
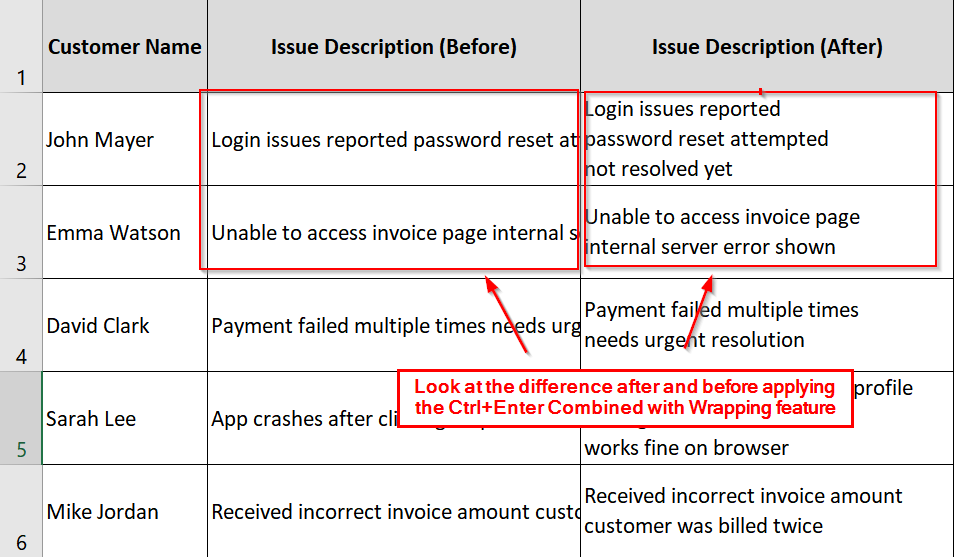
Apply Wrap Text Feature in Excel
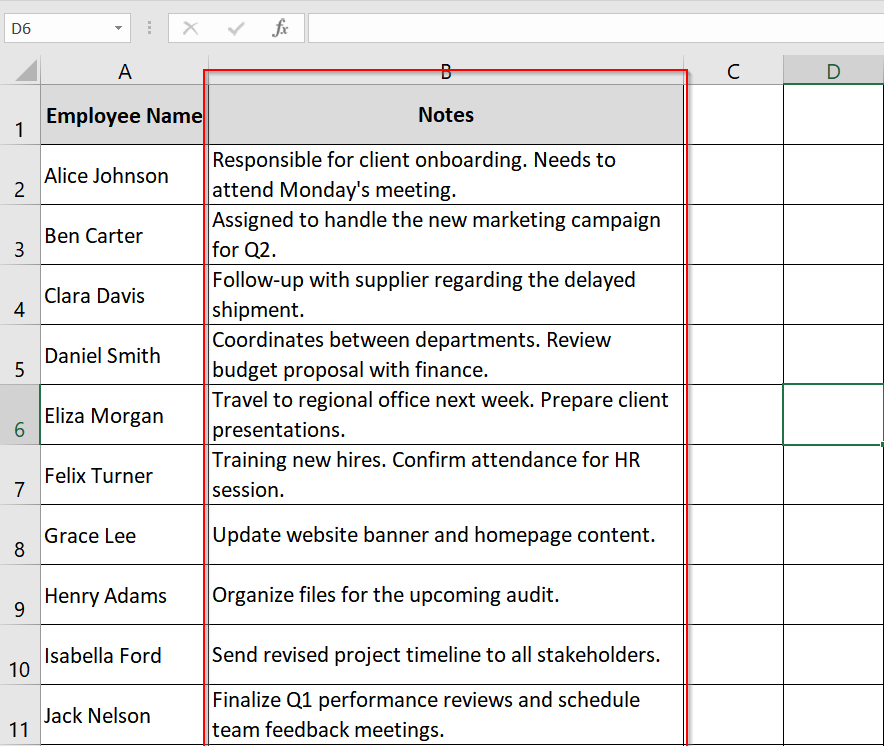
The Wrap Text feature in Excel can automatically move text to a new line within a cell. This works when texts are too long to fit in a regular cell. We use this when we have to work with long notes, addresses, and any cell content that should stay within column boundaries for better readability.
Steps:
➤ Open your Excel file where you want to wrap text. You should have a dataset with long text in at least one column (e.g., “Notes”).
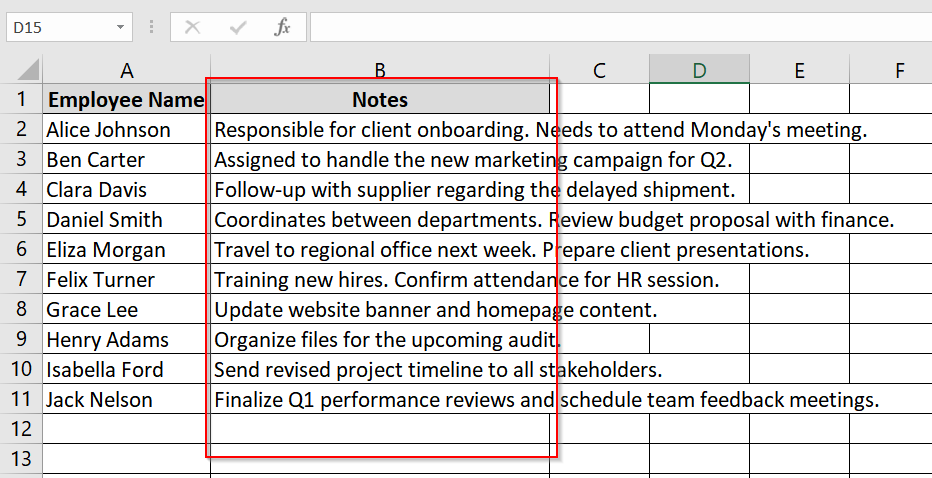
➤ Select the entire “Notes” column (where your long text appears).
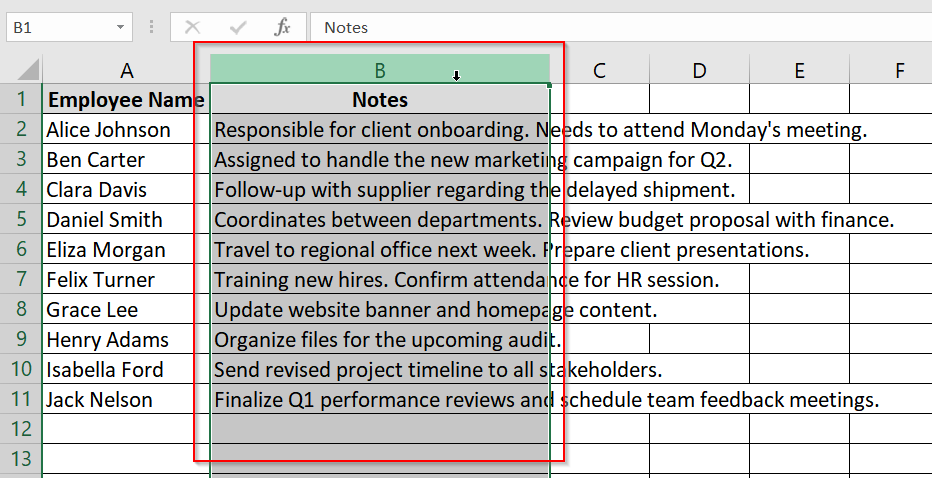
➤ Go to the Home tab on the Ribbon. In the Alignment group, click on the Wrap Text button.
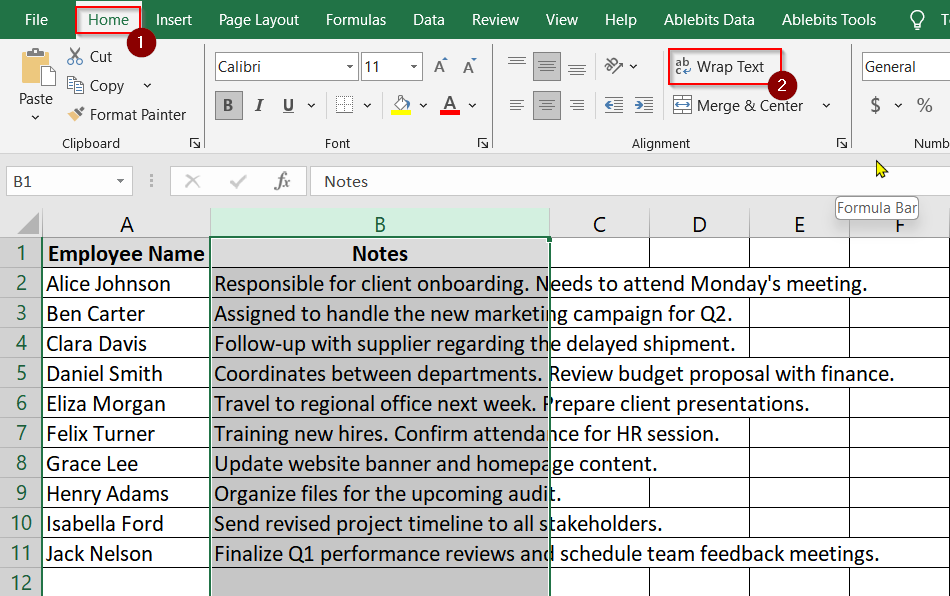
➤ You will have the text wrapped by now.
➤ If the wrapped text still looks confined, adjust the column width by dragging the edge of the column letter. This will help in controlling how the lines break automatically.

Note:
➧ Wrap Text works based on column width: The narrower the column, the more lines your text will break into.
➧ Wrap Text does not break words manually: It only breaks lines at spaces or punctuation.
Insert Manual Line Break in Excel With Keyboard Shortcut (Alt + Enter)
The Manual Line Break method in Excel lets you control exactly where the text wraps inside a cell. This is needed when the data contains multiple phrases or points that should appear on separate lines for better readability. For example: like customer complaints or contact logs. This method works best when automatic wrapping isn’t enough or when consistent formatting is needed.
Steps:
➤ Open the Excel file where you want to apply line breaks.
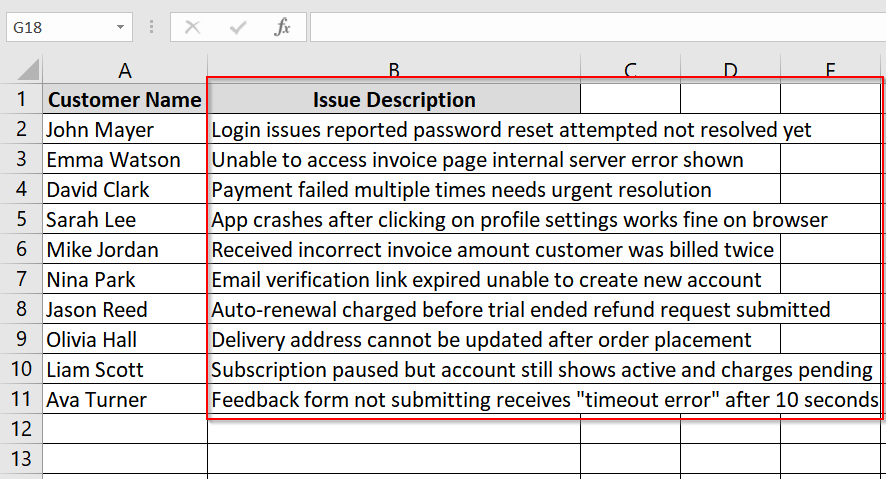
➤ Double-click the cell you want to edit, or press F2 to enter edit mode. (Here B2)

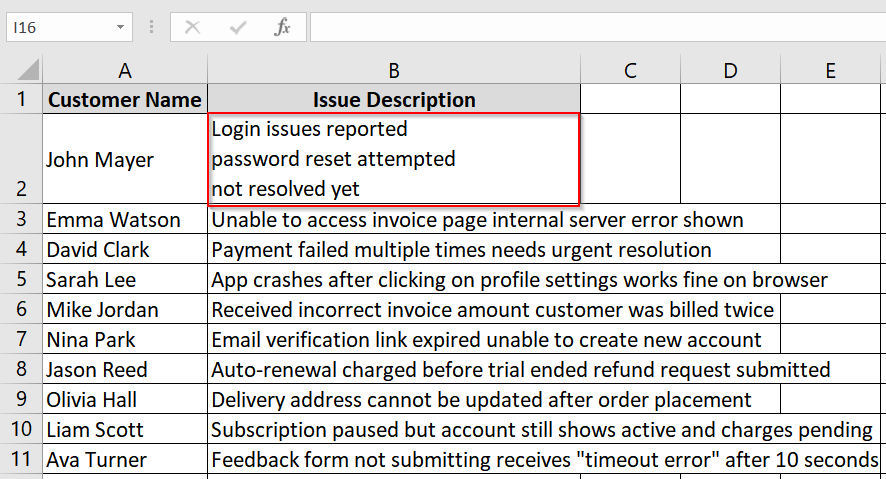
➤ Place the text cursor where you want the line to break.
- On Windows, press Alt + Enter.
- On Mac, use Control + Option + Return, or Command + Option + Return.
➤ Continue pressing Alt + Enter at desired points in the same cell.
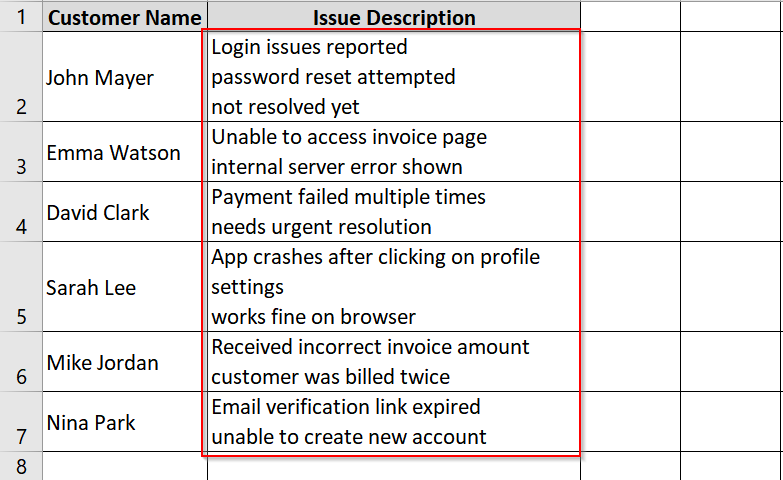
➤ Press Enter when done to exit the cell.
➤ Repeat steps for other cells like B3, B4, etc., to create consistent line breaks.
Find and Replace with Ctrl + J to Insert Line Breaks Automatically in Excel
The Find and Replace with Ctrl + J method lets you insert automatic line breaks. It works in place of a specific character (e.g., a comma) across multiple cells. It’s good for splitting items in a cell onto separate lines mainly in long lists like phone numbers, addresses etc. This works best with Wrap Text enabled so that Excel displays content on multiple lines.
Steps:
➤ Open the Excel workbook containing comma-separated values. For example, look at Column B (Phone Numbers) or Column C (Addresses).
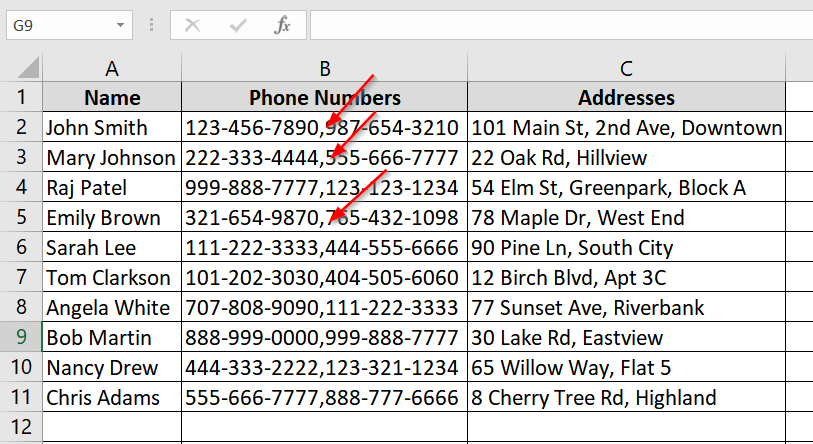
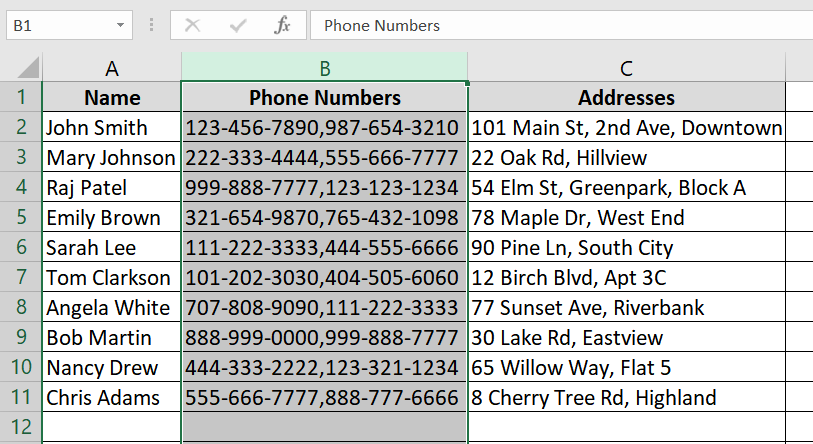
➤ Select cells B2:B11 or C2:C11 depending on where your data is.
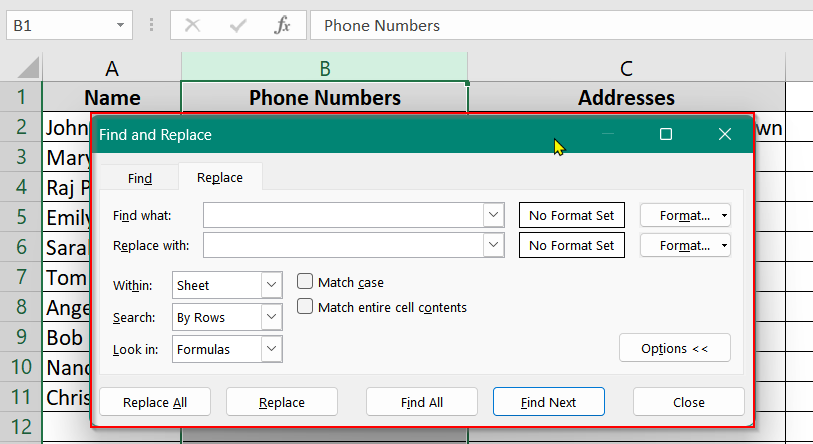
➤ Press Ctrl + H to open the Find and Replace dialog box.
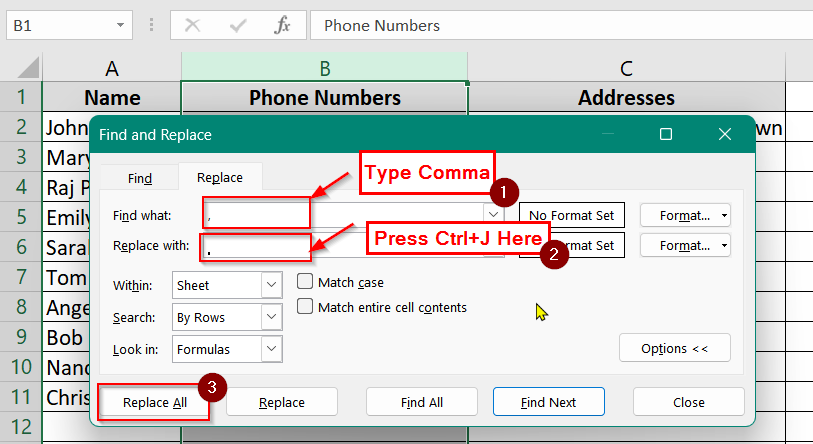
➤ In the “Find what” field, type the character you want to replace. For example, type a comma ( , ). In the “Replace with” field, Press Ctrl + J on your keyboard. This will insert a hidden line break character. You won’t see anything appear in the box, but the line break is there.
➤ Then click “Replace All” Excel will replace every comma with a line break in the selected cells.
➤ Select the modified cells (e.g., C2:C11). Go to the Home tab, then in the Alignment group, click Wrap Text.
Note:
➧ Ctrl + J works only in the Replace With field (not Find What).
➧ The method works only in Windows versions of Excel.
➧ Always ensure Wrap Text is enabled to see the effect of the line break.
Frequently Asked Questions (FAQs)
How do I jump to the next cell with data in Excel?
Use Ctrl + Arrow Keys (e.g., Ctrl + ↓) to jump to the next filled cell in that direction.
How do I insert an automatic line in Excel?
Enable Wrap Text to allow text to wrap into a new line based on column width automatically.
How do I go to the next line in wrap text?
First, enable Wrap Text, then use Alt + Enter inside the cell to manually create a new line at a desired point.
How to break text in Excel?
You can break text using:
- Alt + Enter for manual line breaks,
- Wrap Text for automatic breaks,
- Or Find and Replace with Ctrl + J.
Concluding Words
Making Excel go to the next line automatically is an important feature we all should learn. It enhances the clarity and readability of our data. Wrap Text, shortcuts, or formula based line breaks help structure our content neatly. We have discussed 3 easy to go with methods and hope you found it helpful. If you have any thoughts to share let us know in the comment section.