Numbered lists in Excel are a fundamental tool for organizing data, making reports, and tracking items clearly. They improve readability and help maintain order in everything from simple task lists to complex datasets. Whether you’re managing inventory, creating financial reports, or preparing presentations, numbered lists add clarity and structure to your work.
In this article, we’ll learn several practical methods to create numbered lists in Excel ranging from easy manual techniques to advanced formulas and VBA macros that automate the process for large or frequently changing datasets.Let’s get started.
Steps to make a numbered list in Excel:
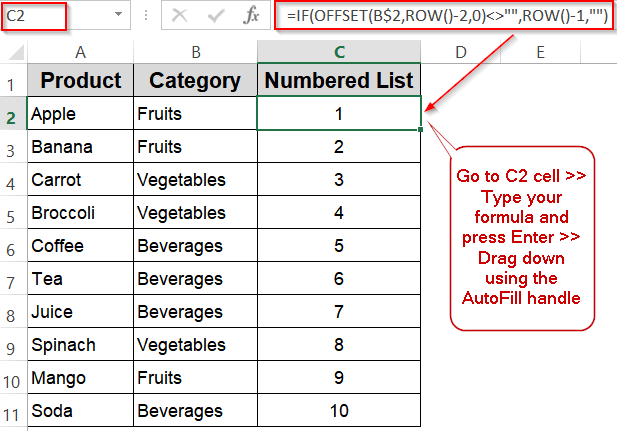
➤ In C2, enter this formula: =IF(OFFSET(B$2,ROW()-2,0)<>””,ROW()-1,””)
➤ Drag the formula down alongside your data in column C. This will number only the rows that have data in column C, leaving blanks for empty rows.
Quick Sequential Numbering Using Fill Handle
This is the quickest and most straightforward way to create a numbered list in Excel. By typing the first two numbers, you establish a pattern that Excel can recognize and continue automatically. Using the fill handle, you can easily extend this sequence as far as needed, making it ideal for beginners or anyone who wants a fast numbering solution without using formulas. This method works well for static lists or when you have a clear starting point and want to quickly number rows or items in your dataset.
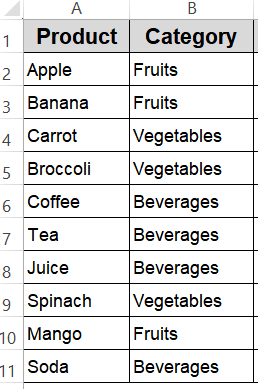
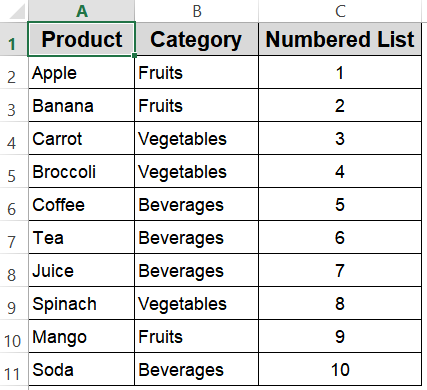
This is the dataset we will be using:
Steps:
➤ In two adjacent cells (e.g., C2 and C3), type the starting numbers, such as 1 and 2.
➤ Select both cells to highlight them.
➤ Hover over the bottom-right corner of the selection until the cursor changes to a plus sign (fill handle).
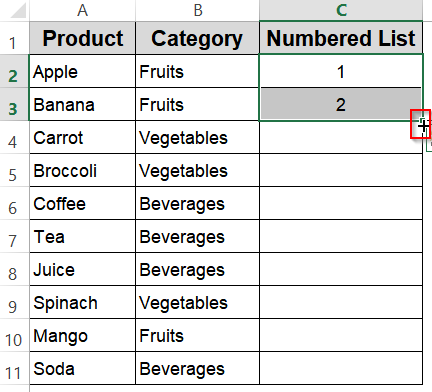
➤ Click and drag the fill handle down to fill the cells with incremented numbers automatically.
This method quickly creates a simple numbered list and is perfect for beginners.
Create a Numbered List Using the SEQUENCE Function
The SEQUENCE function is a powerful and flexible way to generate numbered lists dynamically in Excel. Unlike manual methods, SEQUENCE automatically fills the list based on the parameters you set, such as the number of rows, columns, starting number, and increment step. This makes it ideal for users who want a quick, formula-driven approach that updates automatically if you adjust the inputs. It’s especially useful in Excel 365 and later versions where dynamic arrays are supported, allowing the list to spill automatically into adjacent cells without dragging the fill handle.
Steps:
➤ Select the cell where you want the list to begin (e.g., C2).
➤ Enter the formula:
=SEQUENCE(10)
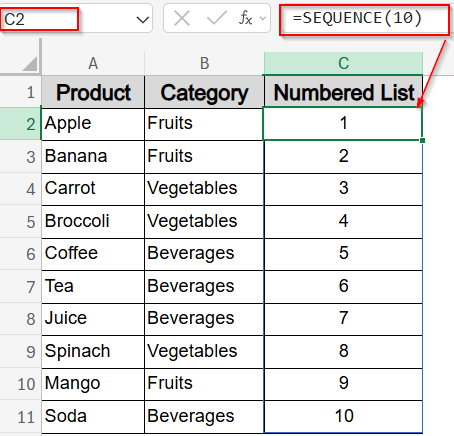
This creates a list of 10 numbers starting from 1.
➤ To customize, use:
=SEQUENCE(10, 1, 5, 2)
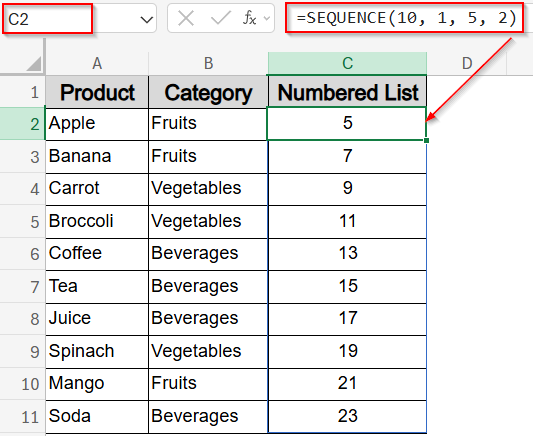
This starts numbering at 5 and increments by 2 (5, 7, 9, …).
Dynamic Numbered List with COUNTA Function
When working with lists that frequently change in size, creating a dynamic numbered list that updates automatically is a huge time-saver. Using the COUNTA function, which counts the number of non-empty cells in a range, combined with the SEQUENCE function, you can generate a numbered list that expands or contracts as you add or remove items from your dataset. This method eliminates the need to manually adjust your numbering every time the list changes and keeps your spreadsheet neat and accurate.
Steps:
➤ Assume your product list is in column A starting at A2.
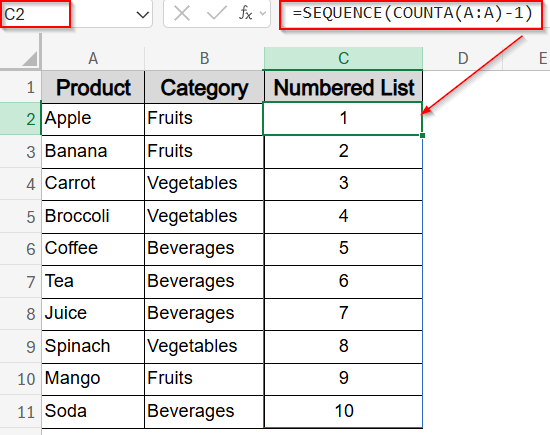
➤ In C2, type this formula:
=SEQUENCE(COUNTA(A:A)-1)
This formula counts all non-empty cells in column A, subtracts 1 to exclude the header, and creates a numbered list matching the length of your data.
➤ Press Enter to spill the formula.
This dynamic approach works best in Excel 365 and later versions that support dynamic arrays, making your numbering automatically adapt to changes in your data.
Numbering with Text Using ROW and TEXT Functions
If you need numbered lists that include formatted text like order numbers, invoice IDs, or any sequence with leading zeros, the combination of the ROW and TEXT functions is a perfect solution. This method lets you generate customized codes that maintain consistent formatting, which is especially important for professional documents where uniform appearance matters. By using the ROW function to generate sequential numbers and TEXT to format them with leading zeros or specific patterns, you can create lists like 000-001, 000-002, and so on, that automatically update as you drag the formula down.
Steps:
➤ In C2, enter:
=TEXT(ROW(A1),"000-000")
➤ Drag the fill handle down.
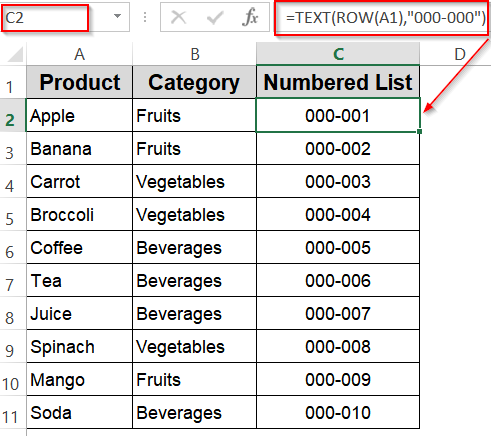
You’ll see numbered codes formatted with leading zeros, perfect for purchase orders or custom identifiers.
Applying Custom Number Formatting
Custom number formatting in Excel lets you display numbers exactly how you want without changing the underlying values. This method is especially useful when you want your numbered list to include leading zeros, dashes, or other text elements like order numbers, employee IDs, or product codes while keeping the numbers easy to work with for calculations. By applying a custom format, you can instantly transform plain numbers into professionally formatted sequences that maintain consistency across your spreadsheet.
Steps:
➤ Select the cells you want to number such as C2:C11.
➤ Press Ctrl + 1 to open Format Cells >> Go to the Number tab >> Custom.
➤ Enter a format like: 000-000
➤ Click OK.
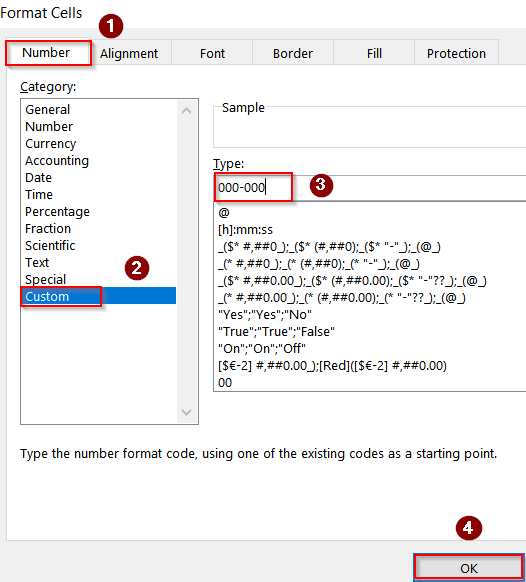
Now, when you type numbers in these cells, they will display with leading zeros and hyphens automatically.

Try Flash Fill for Numbered Lists
Flash Fill is an intelligent Excel feature that detects patterns in your data and completes the rest automatically. When creating numbered lists, you can start by typing a few numbers to establish the pattern, and Excel will recognize it as you begin typing the next entry. It then suggests the remaining sequence, saving you from manually filling or writing formulas. This tool is excellent for quick numbering, especially when combined with text or specific formatting, and works well when your list isn’t perfectly uniform.
Steps:
➤ Type the first few numbers manually in a column.
➤ Start typing the next number in the series; Excel will suggest the rest automatically.
➤ Press Enter to accept the Flash Fill suggestions.
➤ If suggestions don’t appear, click on the Flash Fill feature from the Data tab.
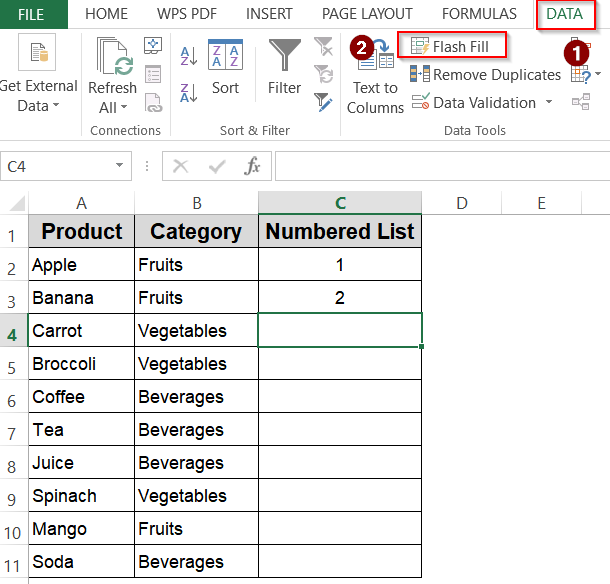
Now your numbered list will be automatically filled up.

Insert OFFSET Function for Dynamic Numbering
The OFFSET function allows you to create dynamic numbered lists that adjust automatically to the size of your dataset. This is especially helpful when your data range changes frequently, as the formula checks for the presence of data in adjacent cells before assigning numbers. Using OFFSET in combination with the ROW function helps number only the rows that contain data, keeping your list tidy and accurate without manual updates.
Steps:
➤ In C2, enter this formula:
=IF(OFFSET(B$2,ROW()-2,0)<>"",ROW()-1,"")
➤ Drag the formula down alongside your data in column C. This will number only the rows that have data in column C, leaving blanks for empty rows.
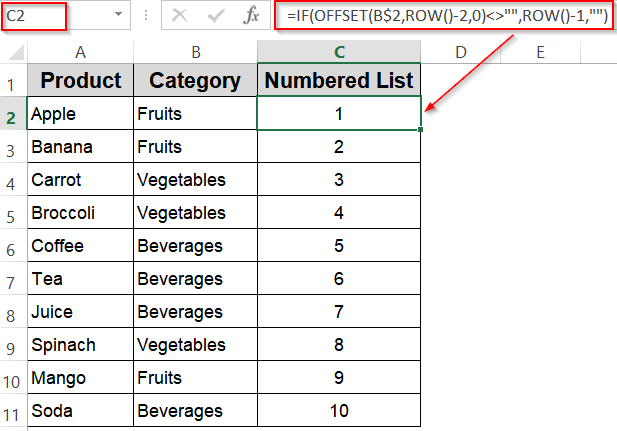
This method is ideal for maintaining dynamic and clean numbering in lists where data length can vary frequently.
Make Use of CHAR Function for Alphabetical Numbering
If you want to create alphabetical sequences instead of numbers, Excel’s CHAR function is a simple and effective way to do this. By using the ASCII code for letters and combining it with the ROW function, you can generate a list of letters (A, B, C, etc.) dynamically. This method works well for labeling rows alphabetically or for custom coding systems. However, it’s limited to 26 letters, so creating sequences beyond ‘Z’ requires more advanced formulas or approaches.
Steps:
➤ In C2, enter:
=CHAR(64+ROW(A1))
➤ Drag the fill handle down to generate letters A, B, C, and so forth, up to 26 entries.
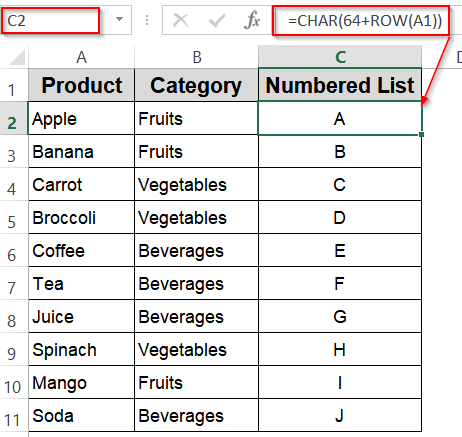
This technique is great for simple alphabetical labeling tasks or when you want to mix letters with your numbered lists.
Running a VBA Macro to Create a Numbered List
For those who frequently work with large datasets or want to automate repetitive tasks, using a VBA macro is a powerful way to generate numbered lists quickly. With just a few lines of code, you can fill a specified range with sequential numbers, saving time and reducing errors compared to manual entry. This method is ideal for advanced Excel users who want to customize their workflows or automate numbering as part of larger macros.
Steps:
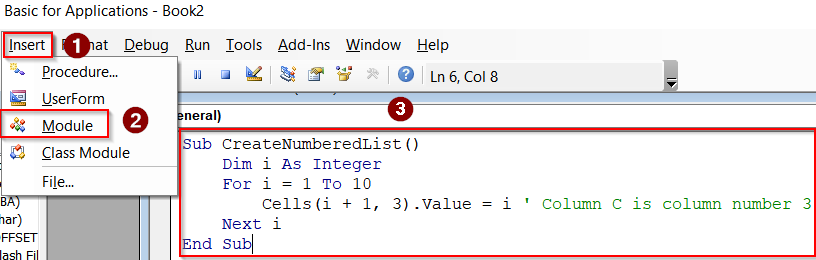
➤ Press Alt + F11 to open the VBA editor.
➤ Go to Insert >> Module.
➤ Paste the following code:
Sub CreateNumberedList()
    Dim i As Integer
    For i = 1 To 10
        Cells(i + 1, 3).Value = i ' Column C is column number 3
    Next i
End Sub
Here, the macro fills cells C2 through C11 with numbers 1 to 10 automatically.
➤ Press F5 key to run the macro and close the VBA editor.

This approach provides a scalable way to add numbering, especially useful in complex workbooks or when handling multiple lists.
Frequently Asked Questions
How can I quickly create a basic numbered list in Excel without formulas?
You can start by typing the first two numbers in adjacent cells, then select them both and drag the fill handle down. Excel recognizes the pattern and automatically fills the rest with sequential numbers.
What formula can I use to create a numbered list that automatically adjusts when I add or remove items?
Using the SEQUENCE function combined with COUNTA allows you to generate a dynamic list. This formula counts the number of items in your dataset and creates a matching numbered list that updates as your data changes.
How do I format numbers with leading zeros or add text prefixes like order codes?
The TEXT function combined with the ROW function is perfect for this. For example, =TEXT(ROW(A1), “000-000”) generates numbers with leading zeros and custom formatting, useful for invoice numbers or product codes.
What are the benefits of dynamic numbered lists over static lists?
Dynamic lists automatically update based on your data, reducing manual work and errors. Static lists need manual changes whenever data changes, which can be time-consuming and error-prone, especially for large datasets.
Can I automate creating numbered lists in Excel without using formulas?
Yes. Using VBA macros, you can write scripts to fill cells with sequential numbers or customized sequences. This is particularly helpful for repetitive tasks or when dealing with large datasets requiring complex numbering.
Wrapping Up
In this tutorial, we covered a wide range of methods for creating numbered lists in Excel, from the simplest manual fill handle technique to advanced formulas like SEQUENCE and OFFSET, custom formatting with TEXT and CHAR, and powerful VBA automation. Each method offers unique advantages depending on your Excel version, data size, and complexity. Feel free to download the practice file and share your feedback.