When working with multiple versions of Excel workbooks, comparing and merging changes efficiently becomes crucial, especially for teams collaborating on reports, budgets, or project plans. Doing this manually is time-consuming and prone to errors. However, Excel offers several ways to compare and merge workbooks to keep your data accurate and up-to-date.
In this article, you’ll learn the best methods to compare and merge Excel workbooks using built-in Excel features, third-party add-ins, Power Query, and VBA automation. Each method has its strengths depending on your version of Excel and the complexity of your workbooks.
Steps to compare and merge Excel workbooks:
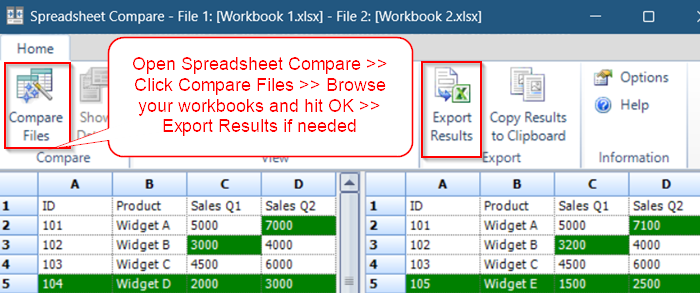
➤ On Windows, open the Start menu and type Spreadsheet Compare, then open it.
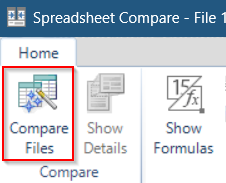
➤ Click Compare Files under Home tab.
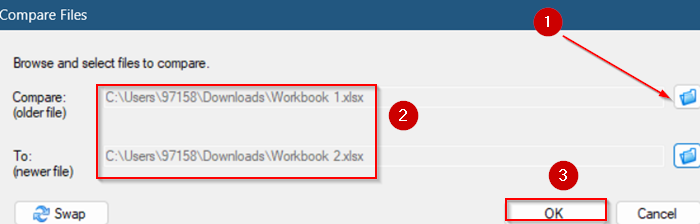
➤ Browse and select your two Excel files to compare (e.g., Workbook1.xlsx and Workbook2.xlsx).
➤ Click OK to start the comparison.
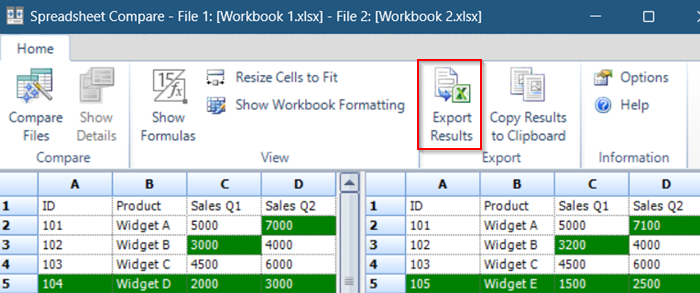
➤ Review the differences and Export Results if needed.
Use Excel’s Spreadsheet Compare Tool
Excel includes a dedicated Spreadsheet Compare utility that can highlight differences between two workbooks. This tool is part of Microsoft Office Professional Plus and certain Microsoft Office 365 subscriptions.
Steps:
➤ Close both workbooks you want to compare.
➤ On Windows, open the Start menu and type Spreadsheet Compare, then open it.

➤ Click Compare Files under Home tab.
➤ Browse and select your two Excel files to compare (e.g., Workbook1.xlsx and Workbook2.xlsx).
➤ Click OK to start the comparison.
➤ The tool will display a detailed side-by-side comparison showing differences in values, formulas, formatting, and more.
➤ Review the differences and export a report if needed.
This method is great for pinpointing exact changes before merging manually or automating with VBA.
Use the Inquire Add-in to Compare Excel Workbooks
The Inquire add-in lets you visually compare two Excel workbooks and highlight differences in formulas, values, formatting, macros, and more. It’s ideal for structured comparisons between versions.
Steps:
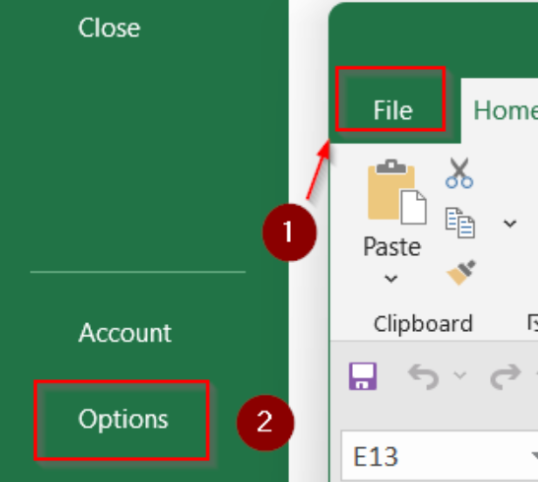
➤ Go to File tab >> Choose Options.
➤ Go to Add-ins >> Select COM Add-ins next to Manage and click Go…
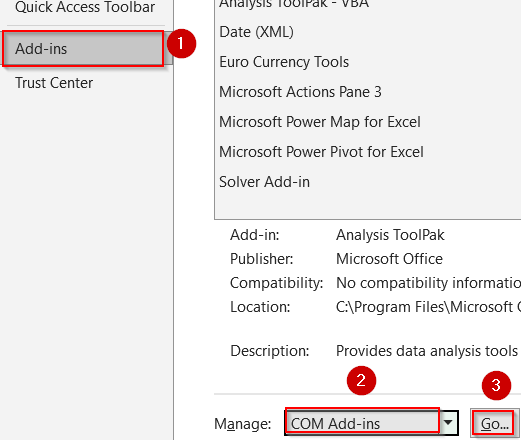
➤ Check the box for Inquire and click OK.

➤ The Inquire tab will now appear in the ribbon.
➤ Open both Excel workbooks you want to compare.
➤ Go to the Inquire tab >> Click Compare Files.
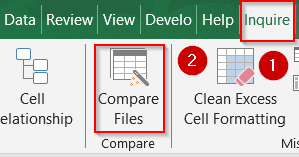
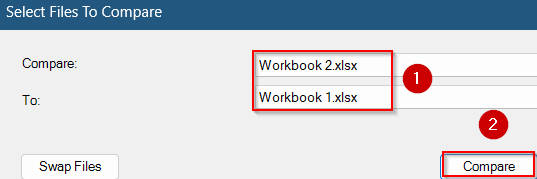
➤ In the dialog box, choose the first file under “Compare” and the second under “To” and hit Compare.
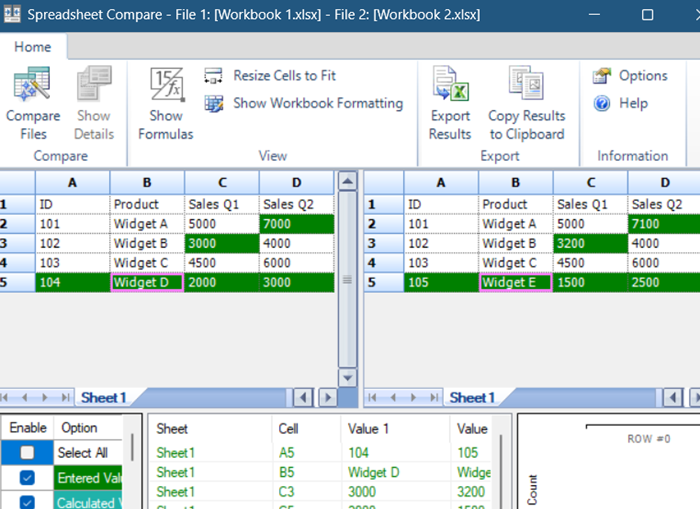
➤ A side-by-side report opens, showing all differences.
➤ Use filters to highlight only formulas, values, formatting, etc. and hover over any highlighted cell to see changes in detail.
Compare and Merge Workbooks Feature in Excel
Excel offers a Compare and Merge Workbooks feature designed to consolidate changes made to shared workbooks. By default, this feature is disabled in Excel. Let’s see how to bring the tool back and get the job done.
Steps:
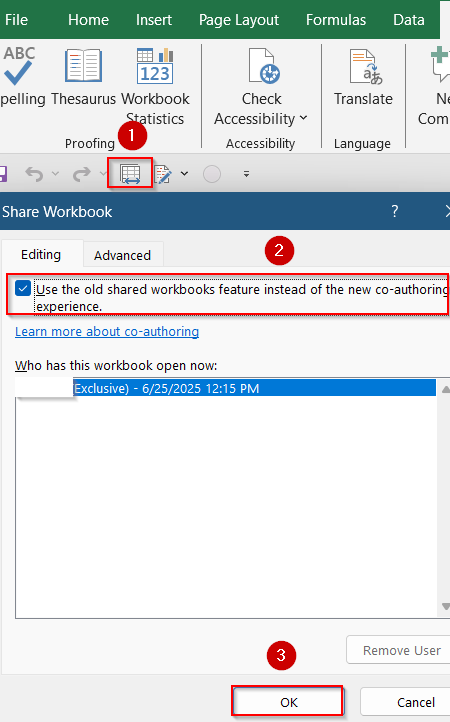
➤ Open the original workbook and save it as a Shared Workbook.
➤ Go to the Share Workbook tool below ribbon >> check Use the old shared workbook feature >> Click OK.
➤ Send the shared workbook copies to collaborators.
➤ Once collaborators make changes and save, open the original workbook.
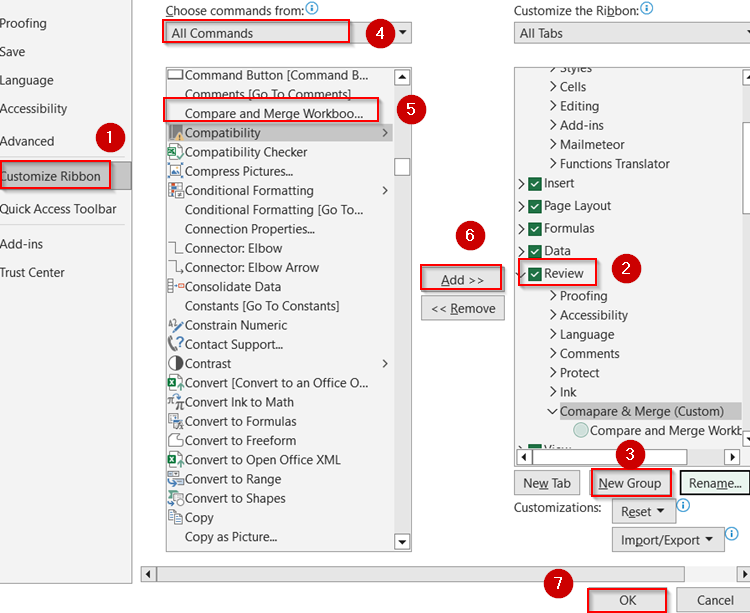
➤ Go to the File tab >> Options.

➤ Under Customize Ribbon, click on the Review drop-down and create a New Group using the button below. Give it a name like Compare & Merge.
➤ Choose All Commands >> Scroll down to Compare and Merge Workbooks >> Click Add and then OK.
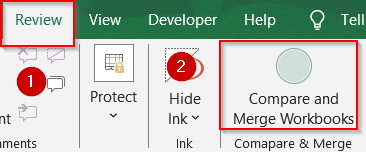
➤ Go to Review tab >> click Compare and Merge Workbooks.
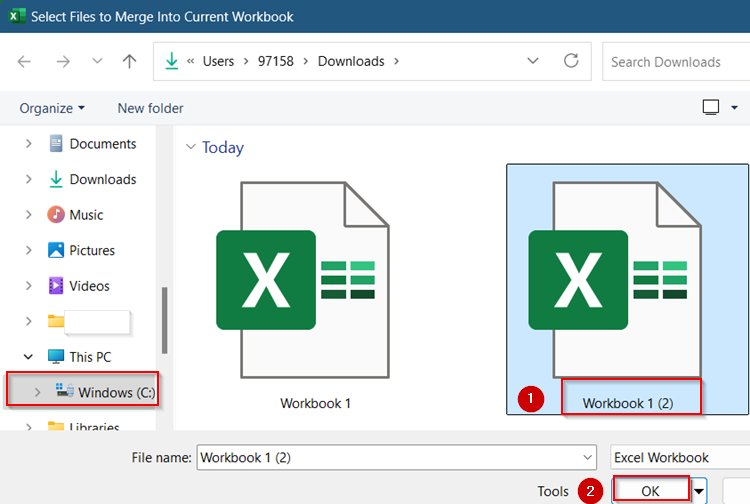
➤ Select the workbook copies to merge and click OK.
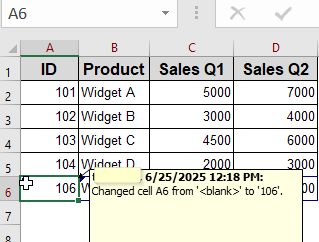
➤ Excel will merge changes into one workbook, highlighting conflicts.
Note:
Because Shared Workbooks is a legacy feature, Microsoft recommends using OneDrive or SharePoint for collaboration.
Merge Workbooks Using Power Query
Power Query is a powerful Excel feature for importing, transforming, and combining data from multiple files. You can use it to merge data tables from different workbooks by matching keys (e.g., ID).
Steps:
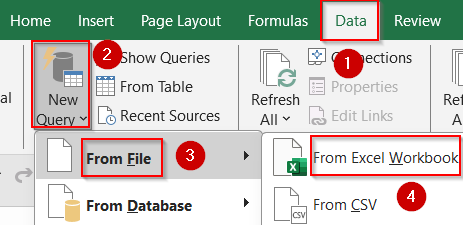
➤ Go to the Data tab >> click Get Data >> From File >> From Workbook.
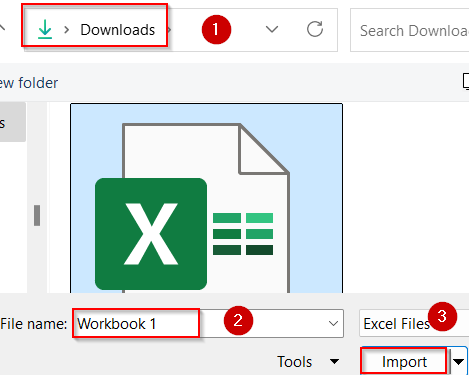
➤ Browse and Import the first workbook table called Workbook 1.
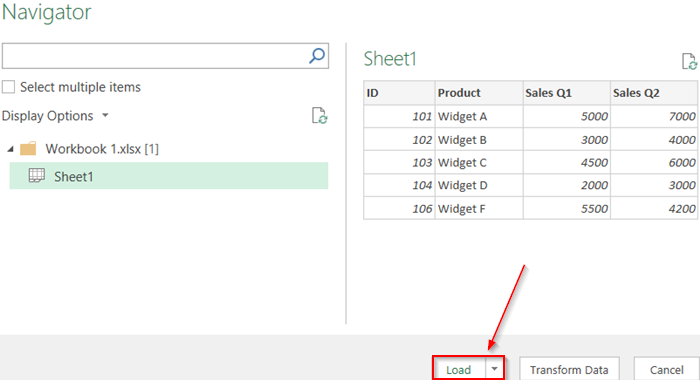
➤ Click Load in the Navigator tab.
➤ Repeat to import the second workbook table.
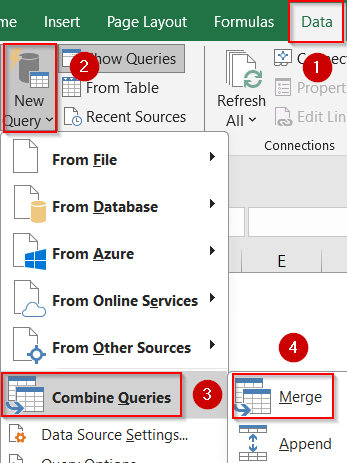
➤ Head to Data tab >> Combine Queries under New Query and click Merge.
➤ In Power Query Editor, select your sheets and use Merge Queries to join tables on common columns (like ID).
➤ Choose the type of join (Left, Inner, Outer) depending on your merging needs and click OK.
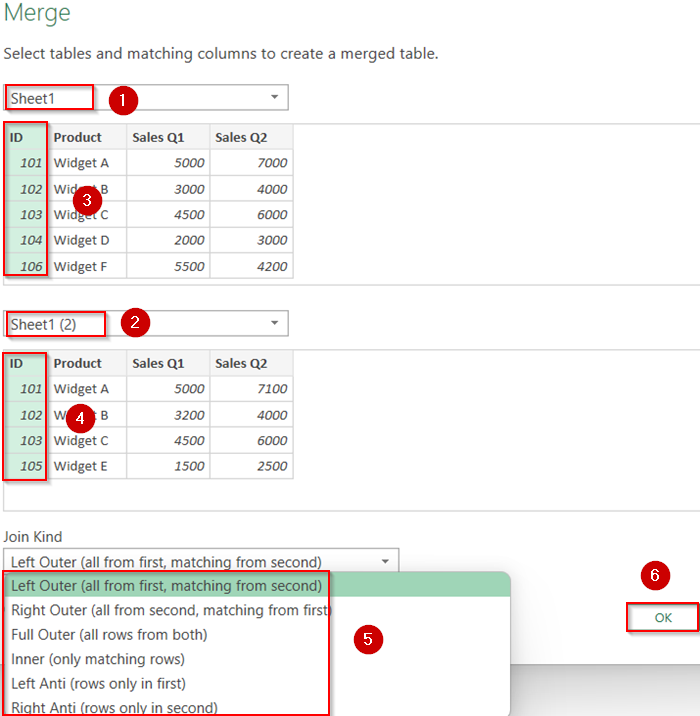
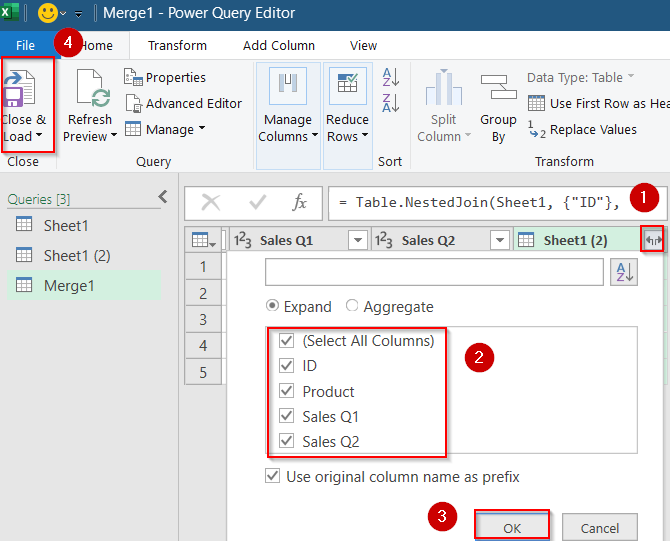
➤ Expand the merged columns to include desired fields by clicking the small icon and click OK.
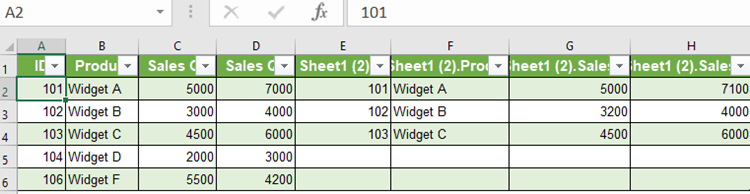
➤ Click Close & Load to bring the merged table into Excel.
Now you can compare both your workbooks by merging them together under the same table.
Automate Compare and Merge Using VBA
For advanced users, VBA macros can be created to compare and merge Excel workbooks automatically. This is useful for repetitive tasks or integrating into larger Excel-based workflows.
Steps:
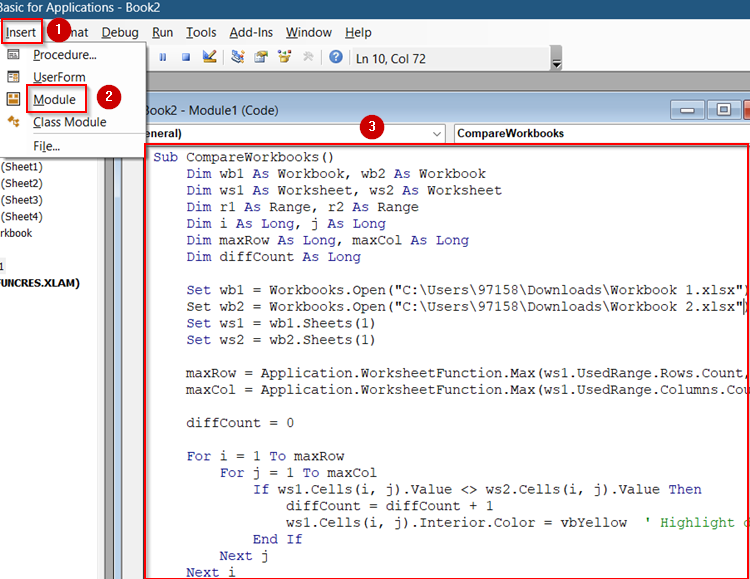
➤ Open a new workbook and press Alt + F11 to open VBA Editor.
➤ Go to insert tab >> Click on Module.
➤ Paste this code inside the blank box that shows:
Sub CompareWorkbooks()
    Dim wb1 As Workbook, wb2 As Workbook
    Dim ws1 As Worksheet, ws2 As Worksheet
    Dim r1 As Range, r2 As Range
    Dim i As Long, j As Long
    Dim maxRow As Long, maxCol As Long
    Dim diffCount As Long
    Set wb1 = Workbooks.Open("C:\Path\Workbook1.xlsx")
    Set wb2 = Workbooks.Open("C:\Path\Workbook2.xlsx")
    Set ws1 = wb1.Sheets(1)
    Set ws2 = wb2.Sheets(1)
    maxRow = Application.WorksheetFunction.Max(ws1.UsedRange.Rows.Count, ws2.UsedRange.Rows.Count)
    maxCol = Application.WorksheetFunction.Max(ws1.UsedRange.Columns.Count, ws2.UsedRange.Columns.Count)
    diffCount = 0
    For i = 1 To maxRow
        For j = 1 To maxCol
            If ws1.Cells(i, j).Value <> ws2.Cells(i, j).Value Then
                diffCount = diffCount + 1
                ws1.Cells(i, j).Interior.Color = vbYellow  ' Highlight difference
            End If
        Next j
    Next i
    MsgBox diffCount & " differences found and highlighted in Workbook1."
    wb1.Save
    wb1.Close
    wb2.Close
End Sub
Here, replace “C:\Path\Workbook1.xlsx” and “C:\Path\Workbook2.xlsx” with your original file path.
➤ Run pressing F5 key and you will see a system message. Click OK.
➤ Now go to Workbook 1 and check your differences.

Frequently Asked Questions
Will formatting be preserved after merging?
Not always. Power Query and VBA mainly focus on values, not formatting. You may need to reapply conditional formatting or cell styles manually afterward.
Is Power Query suitable for large workbooks?
Yes, Power Query handles large datasets efficiently and allows refreshable queries. It’s great for merging or comparing structured tables from multiple Excel files.
Can VBA merge two Excel files automatically?
Yes, VBA macros can compare and highlight differences or even copy updated data across files. It’s ideal for repeated tasks or automated workflows.
Is the Inquire add-in available in all Excel versions?
No, Inquire is only included in Microsoft 365 Enterprise and Office Professional Plus editions. It must be enabled manually from the COM Add-ins menu.
Wrapping Up
In this tutorial, we learned multiple ways to compare and merge Excel workbooks using Excel’s Spreadsheet Compare tool, legacy shared workbook merging, Power Query, add-ins, and VBA automation. Each method serves different needs, from simple manual checks to fully automated workflows. Feel free to download the practice file and share your feedback.