When you’re working with several Excel files containing similar or related data, it can be time-consuming to open them one by one. Instead, you can combine multiple Excel files into one workbook, while keeping each file’s data on a separate sheet. This is especially useful when gathering monthly reports, regional sales sheets, or department-wise records into a single consolidated file.
In this article, we’ll learn several effective ways to combine multiple Excel files into a single workbook, each placed on a separate tab starting from simple manual tricks to Power Query and VBA automation. Let’s get started.
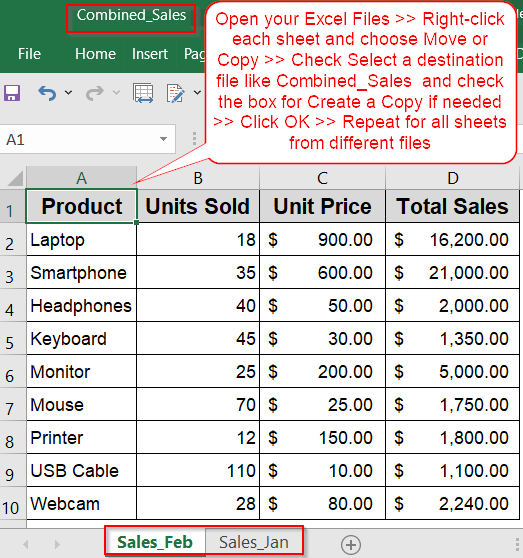
Steps to combine multiple files into one workbook separate sheets in Excel:
➤ Open all the Excel files you want to combine (e.g., Sales_Jan.xlsx and Sales_Feb.xlsx) in separate windows or tabs.
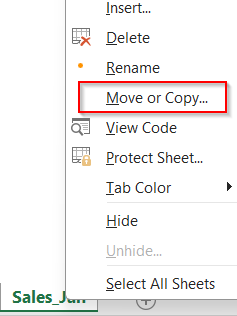
➤ Go to the workbook that contains the first sheet you want to move (e.g., open Sales_Jan.xlsx), and right-click on the sheet tab at the bottom.
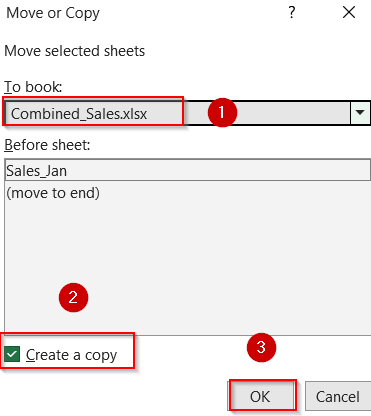
➤ Select Move or Copy from the right-click menu.
➤ In the pop-up dialog box, go to the To book dropdown and choose the destination workbook where you want to merge everything (e.g., a new file called Combined_Sales.xlsx).
➤ Tick the Create a copy checkbox if you want to leave the original sheet untouched in the source file.
➤ Click OK to complete the action and your selected sheet will now appear in the combined file.
➤ Repeat the same process for the other files such as Sales_Feb.xlsx to move or copy their sheets into the destination workbook.
Manually Combine Excel Files Using the Move or Copy Sheet Option
This method is perfect if you’re working with a small number of Excel files and prefer a manual, no-code solution. It’s especially helpful when each file contains a single worksheet (or a few), and you want to bring them all together into one consolidated workbook using the built-in Move or Copy feature. While it’s not ideal for automating large batches of files, it’s straightforward, reliable, and doesn’t require formulas, Power Query, or VBA.
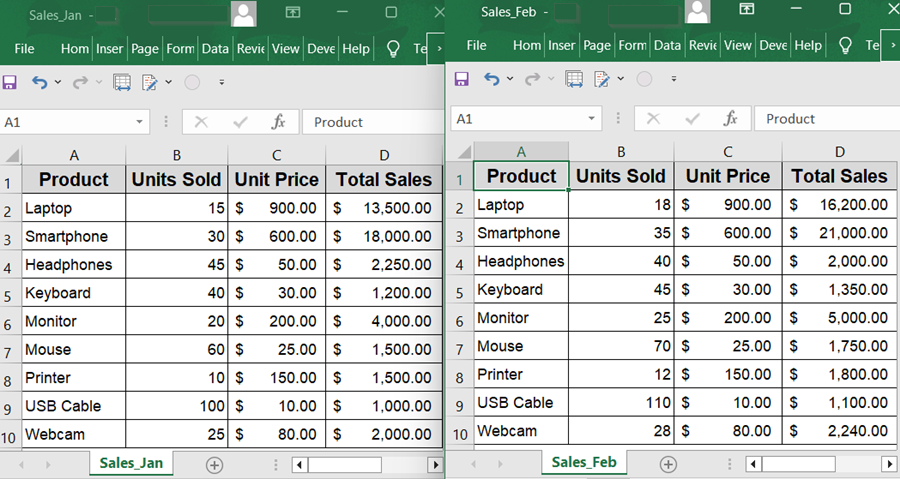
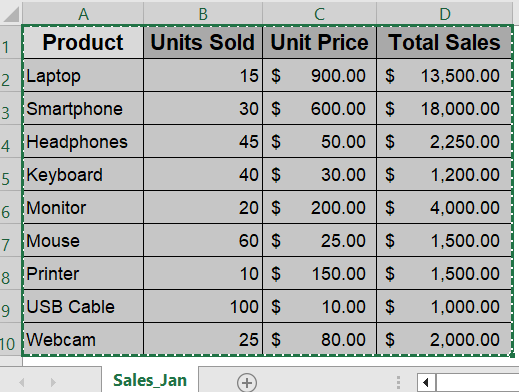
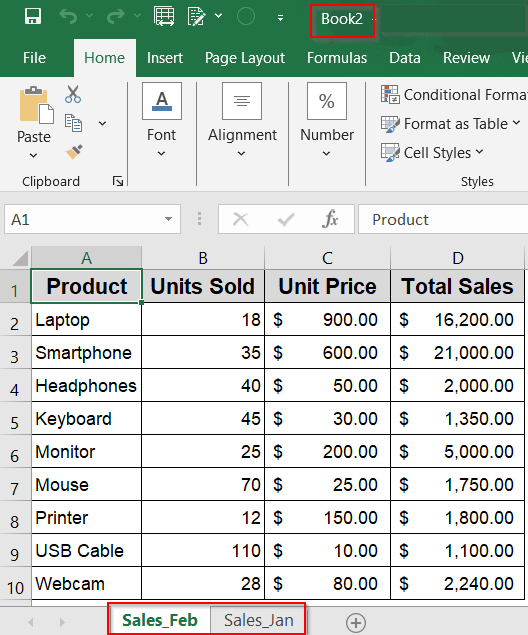
Below are the sample files called Sales_Jan and Sales_Feb having a relatable format that we will use for demonstration purposes.
Steps:
➤ Open all the Excel files you want to combine (e.g., Sales_Jan.xlsx and Sales_Feb.xlsx) in separate windows or tabs.
➤ Go to the workbook that contains the first sheet you want to move (e.g., open Sales_Jan.xlsx), and right-click on the sheet tab at the bottom.
➤ Select Move or Copy from the right-click menu.
➤ In the pop-up dialog box, go to the To book dropdown and choose the destination workbook where you want to merge everything (e.g., a new file called Combined_Sales.xlsx).
➤ Tick the Create a copy checkbox if you want to leave the original sheet untouched in the source file.
➤ Click OK to complete the action and your selected sheet will now appear in the combined file.
➤ Repeat the same process for the other files such as Sales_Feb.xlsx to move or copy their sheets into the destination workbook.

This hands-on method gives you complete control over the sheet arrangement but may become tedious if you’re dealing with dozens of files. For larger merges, consider Power Query or VBA alternatives.
Link Data Dynamically Using the Paste Link Feature
If your goal is to keep data live and connected across files, this method is ideal. By using Excel’s Paste Link feature, you can pull in values from multiple source files such as monthly sales sheets into one master workbook. This way, any updates made to the original files will automatically reflect in the combined file, making it perfect for live reporting or real-time dashboards. However, since this approach creates links between files, those connections can break if you move, delete, or rename the original workbooks.
Steps:
➤ Open the destination workbook where you want to compile all the data (e.g., Combined_Sales.xlsx) along with all the source workbooks (e.g., Sales_Jan.xlsx and Sales_Feb.xlsx).
➤ In the source file (e.g., Sales_Jan.xlsx), highlight the entire data range you want to bring over (for example, A1:D11) and press Ctrl + C to copy it.
➤ Switch to the destination workbook, select a blank worksheet, right-click cell A1, and choose Paste Link under Paste Options.
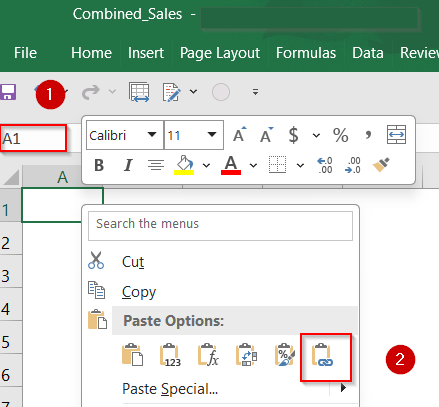
➤ Rename the sheet to reflect the month (e.g., rename it to January for clarity).
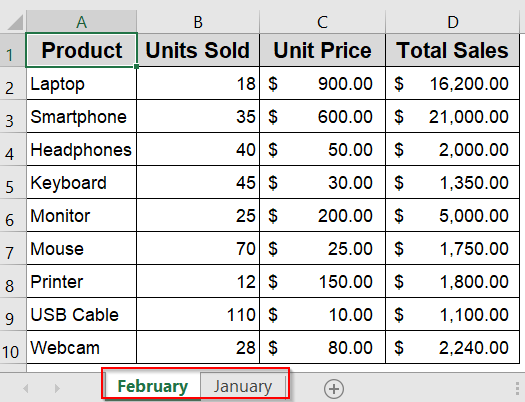
➤ Repeat the same process for other files like Sales_Feb.xlsx and rename each sheet accordingly.
Note:
If the source files are renamed, moved to a new folder, or deleted, Excel will display broken link errors and you’ll need to manually update the references.
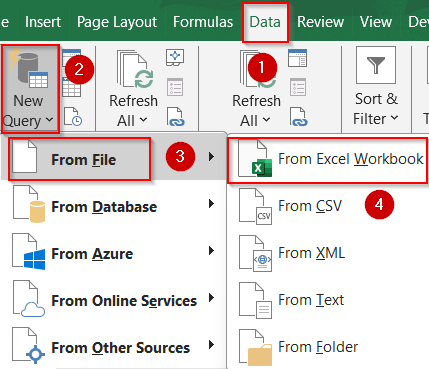
Use Power Query to Automatically Import Multiple Excel Files
Power Query is one of the most effective tools in Excel for combining data, especially when working with multiple files that follow the same structure. It allows you to load and consolidate data from all Excel files and place them into a single workbook using the Get Data/New Query feature. This method is ideal for automating repeatable data tasks, especially when new files are added regularly to the same folder.
Steps:
➤ Open a new Excel workbook and go to the Data tab >> click Get Data/New Query>> choose From File >> then select From Excel Workbook.
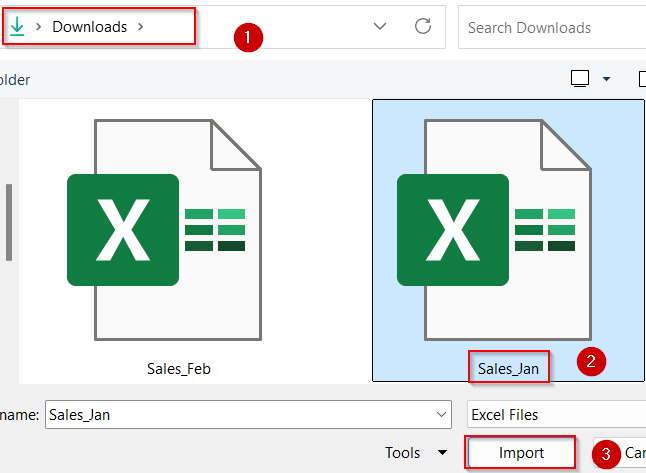
➤ Browse to the folder containing your sales files and click Import.
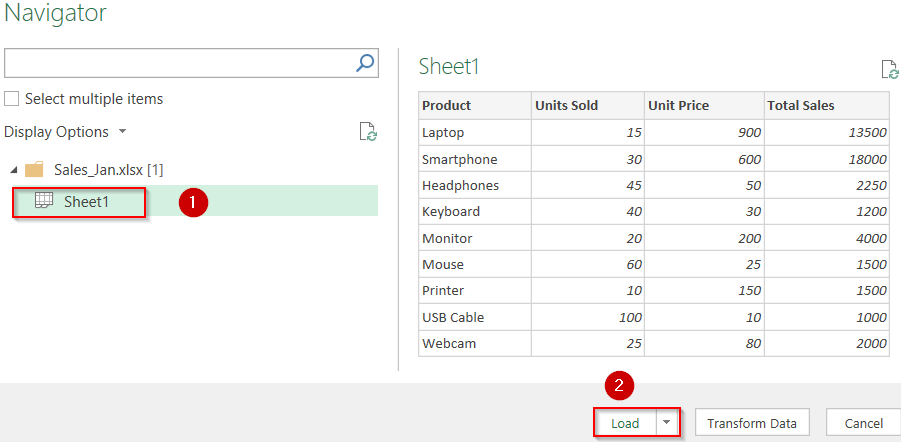
➤ In the preview window (Navigator), click on Sheet1 and hit the Load button.
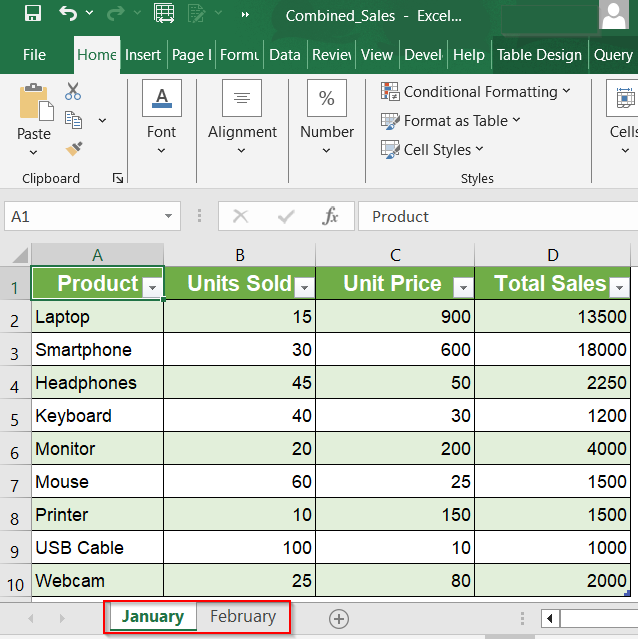
➤ Power Query Editor will launch your file on a new sheet.
➤ Repeat the same for other files and rename them accordingly.
Use Excel VBA to Automatically Merge Multiple Files into One Workbook
When you’re regularly working with dozens or even hundreds of Excel files, manual methods quickly become inefficient. With just a small macro using VBA (Visual Basic for Applications), you can automatically import every sheet from all .xlsx files by selecting them altogether into a single workbook, each on its own tab. This method is effective, repeatable, and saves considerable time for anyone managing recurring monthly reports or departmental submissions.
Steps:
➤ Press Alt + F11 to open the VBA Editor in Excel.
➤ From the menu, go to Insert tab >> Click on Module, and paste the full script into the blank window:
Sub CombineFiles()
Dim FilesSelected, i As Integer
Dim tempFile As FileDialog
Dim MainBook, sourceBook As Workbook
Dim Sheet As Worksheet
Set MainBook = Application.ActiveWorkbook
Set tempFile = Application.FileDialog(msoFileDialogFilePicker)
tempFile.AllowMultiSelect = True
FilesSelected = tempFile.Show
For i = 1 To tempFile.SelectedItems.Count
Workbooks.Open tempFile.SelectedItems(i)
Set sourceBook = ActiveWorkbook
For Each Sheet In sourceBook.Worksheets
Sheet.Copy after:=MainBook.Sheets(MainBook.Worksheets.Count)
Next Sheet
sourceBook.Close
Next i
End Sub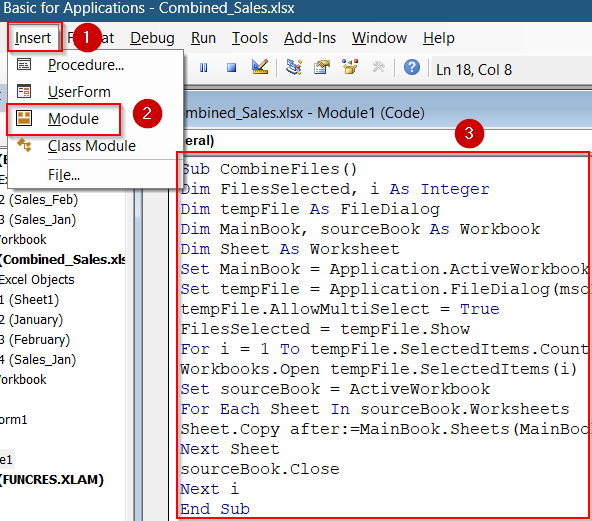
➤ Press F5 to execute the macro. Then, select the files you wish to combine from the dialog and hit OK.

Each file in the folder will be opened one-by-one, and all its worksheets will be copied into a new workbook as individual tabs automatically named after the original file.
Frequently Asked Questions
Can I merge Excel files even if their column headers are different or in different orders?
Yes, but you’ll need to use Power Query or VBA. These methods allow you to dynamically map and align mismatched headers, unlike manual copy methods which assume identical structures across files.
Will any formulas or formatting be lost when combining multiple Excel files into one workbook?
It depends on the method used. Manual and VBA methods typically preserve formulas and formatting. However, Power Query may convert formulas to static values unless you structure your queries very carefully.
What if some of my source files have sheet names that conflict with others?
Excel does not allow two sheets to have the same name in one workbook. To avoid conflicts, rename your source sheets before importing, or use VBA to automatically assign unique names during the merge.
How many Excel files can I realistically combine without slowing down performance?
There’s no strict upper limit, but performance may degrade with too many sheets. For smooth navigation and usability, it’s best to keep combined workbooks under 100 sheets or break them into logical groups.
Can I set this up once and refresh the data automatically in the future?
Yes. Both Power Query and VBA support automation. Power Query can refresh with a single click or on file open, while VBA scripts can be set to run automatically using workbook events or Windows Task Scheduler.
Wrapping Up
In this tutorial, we learned how to combine multiple Excel files into a single workbook, with each file organized into its own sheet. We covered several techniques including manual Move or Copy, the Paste Link method, Power Query, and VBA which are suited for different levels of complexity and automation. Feel free to download the practice file and share your feedback.