
Working with growing datasets, we often have to refer to specific cell ranges repeatedly. For calculations, charts, drop-down menus, and conditional formatting, references to cell ranges are created. However, it is time-consuming to manually update the data; plus, it is more error-prone. That’s why dynamic named ranges are used in Excel. It automatically updates and adjusts the values of the selected cells, keeping formulations and validations up to date.
To create a dynamic named range in Excel, go through these steps-
➤ Open the main worksheet and go to the Formula tab -> Name Manager.
➤ Click on the New button and give the formula your preferred name (e.g, RevenueData).
➤ In the Refers to input box, write the following formula –
=OFFSET(SalesData!$E$2,0,0,COUNTA(SalesData!$E:$E)-1)
where SalesData is the name of the worksheet and column E is dynamically used for a named range.
➤ Click OK to save the new formula.
➤ Test it using the AVERAGE or SUM formula and by adding and removing new rows to observe if the final output updates or not.
This article will explore multiple dynamic methods to create a dynamic named range. From the simplest ways, like the OFFSET and INDEX formulas, to Excel Tables and the most advanced VBA Macros, we have got you covered. Guiding you through each step, we will also explain how you can delete and edit the existing named ranges. So, stay tuned until we walk you through the main part.
OFFSET with COUNTA for Auto-Updating Range
If you need to apply a formula to a specific cell range or column that is growing and constantly changing, the combination of OFFSET & COUNTA functions can be a powerful formula for reflecting the dynamic change. For speed running basic Excel formulas like SUM, AVERAGE, or even charts, you can use this method for dynamic named ranges.
The following worksheet, named SalesData, has column E showing the revenue of each employee.
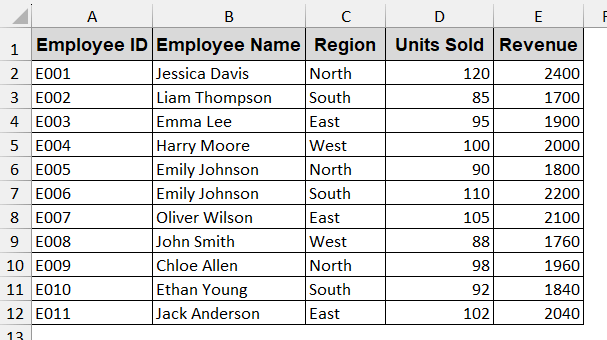
This method will automatically update the formula-based calculations when new data is added to this column. It will reflect the modified values if any data is changed.
Steps:
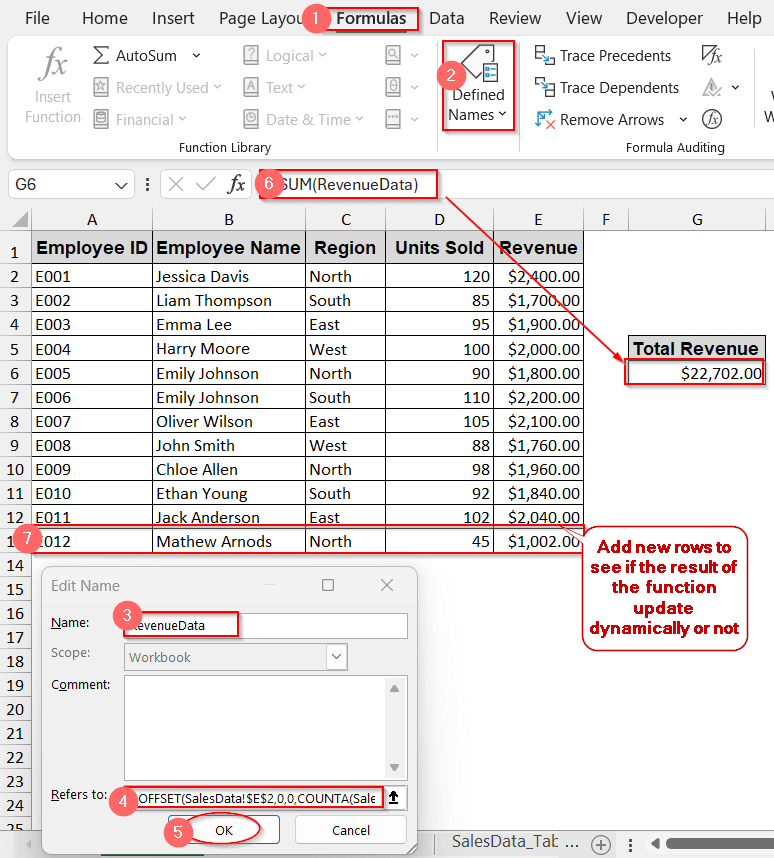
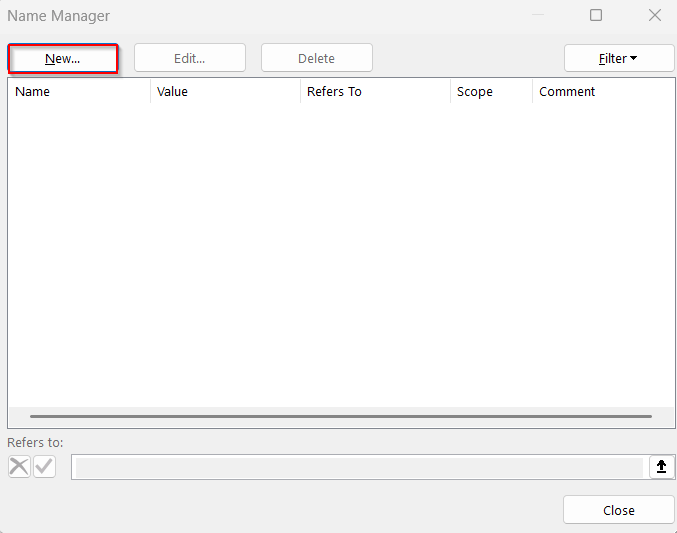
➤ Go to the Formula tab -> Name Manager.

➤ In the Name Manager Option, click the New button to enter a new formula.
➤ In the Name, write your preferred formula name (e.g, RevenueData).
➤ In the Refers to section, write the OFFSET+COUNTA formula –
=OFFSET(SalesData!$E$2,0,0,COUNTA(SalesData!$E:$E)-1,1)
where SalesData is the worksheet name and column E is used to dynamically name ranges.
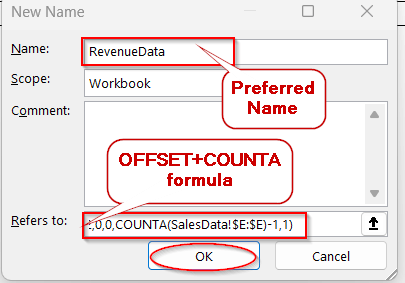
➤ Click OK to save the formula.
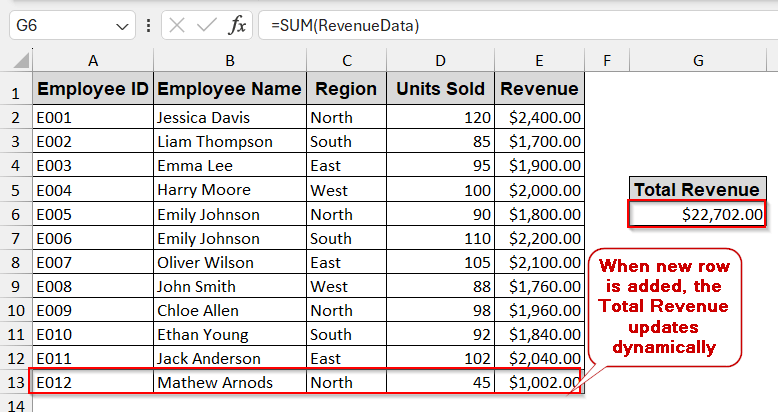
➤ Use formulas like SUM or AVERAGE to see if the values are modified if any new row is added.
=SUM(RevenueData)
where RevenueData is the newly created formula.

➤ The value of the SUM of the revenue is automatically updated when a new row is added.
Notes:
➨ The formula assumes the data starts from cell E2, which has headers in E1. Adjust the starting point as needed.
➨ COUNTA(SalesData!$E:$E)-1 counts the non-empty cells, excluding the headers.
Use Non-Volatile Dynamic Named Ranges with INDEX Function
The INDEX function provides a more stable and dynamic way of creating named ranges. Unlike the OFFSET formula, it is non-volatile and does not lag the performance due to constant recalculations. Dealing with larger datasets and multiple formulas, it can be the best possible way.
Steps:
➤ Go to the Formulas tab -> Name Manager.
➤ Click the New button on the top left of the Name Manager window.
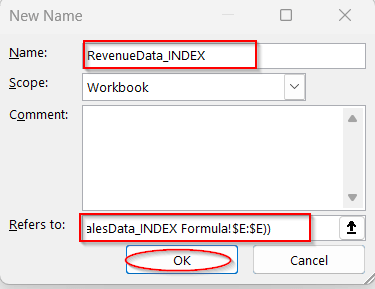
➤ In the Name field, give your preferred name (e.g, RevenueData_INDEX).
➤ In the Refers to option, write down the following formula –
=SalesData_INDEX_Formula!$E$2:INDEX(SalesData_INDEX_Formula!$E:$E,COUNTA(SalesData_INDEX_Formula!$E:$E))
where, SalesData is the original sheet name from which the data has been extracted, and column E is used for the named range.
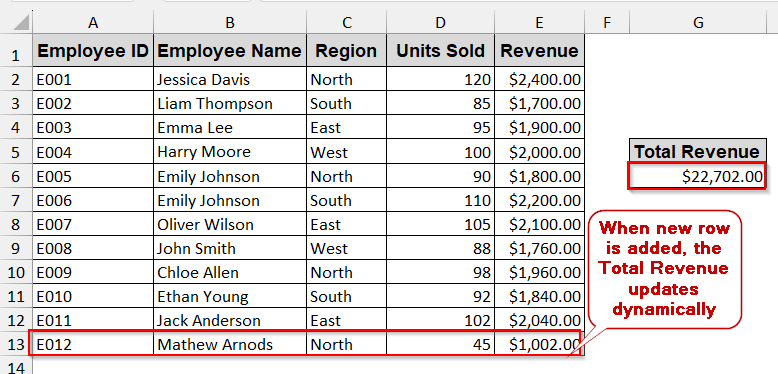
➤ Use the formula pair up with the basic ones like SUM or AVERAGE to see if it works dynamically.
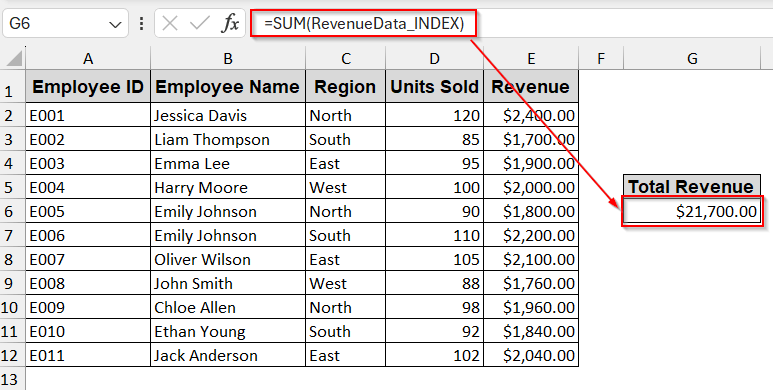
➤ Add new rows to see if the actual value gets dynamically changed.
Notes:
This formula only works for single-column cells. Additional logic is needed for a multi-column named range.
Creating Dynamic Named Ranges with Excel Table Format
It’s completely okay if you don’t feel comfortable with the basic formula approach, including OFFSET or INDEX. In that case, it is best if you use an Excel Table to convert your cells into dynamic named ranges. Once you have converted your datasets into a Table, any rows or columns will automatically be updated. But make sure you have a clean and structured data table on the other hand.
Steps:
➤ Select the entire dataset of your worksheet.
➤ Press Ctrl + T or go to Insert tab -> Table to create an Excel Table.
➤ The Create Table dialog box appears similar to the one below –
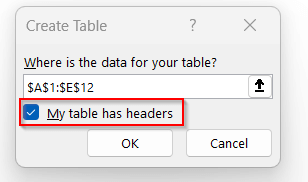
➤ Make sure the selected range is correct and check the box My table has headers for proper creation.
➤ Clicking OK will create an Excel Table in the existing worksheet.
➤ In the Table Name, give your preferred name (e.g, SalesTable)
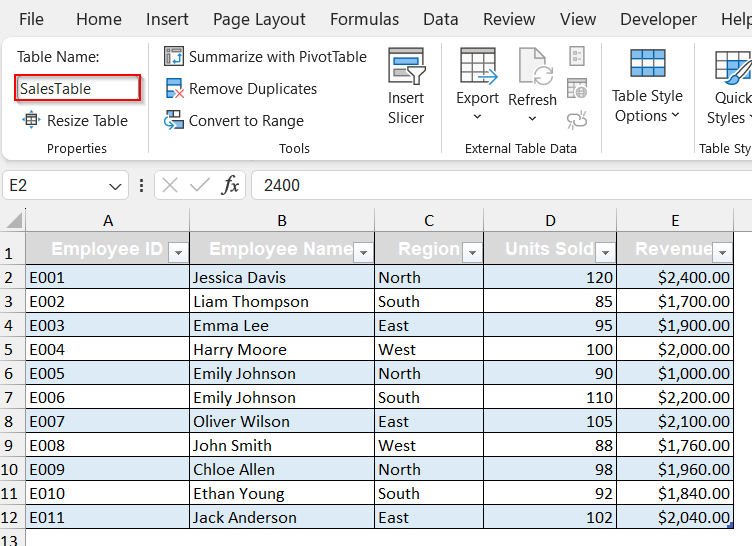
➤ You can create a dynamic reference of any range by using the Table name along with the column name in the third brackets (e.g, SalesTable[Revenue]).
➤ Use basic formulas like before to see if the output changes.
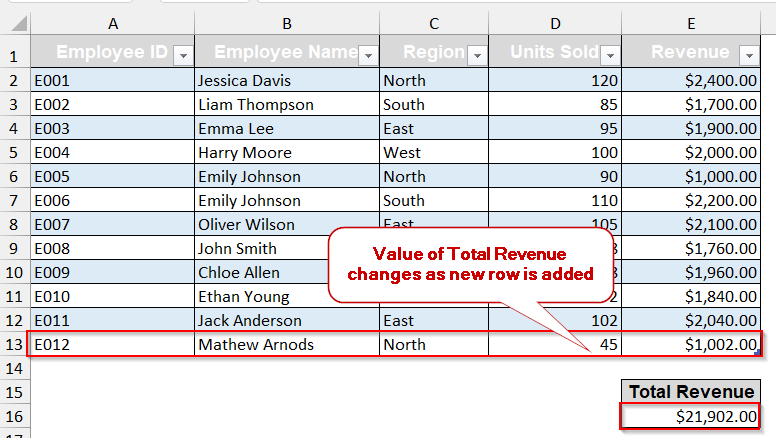
=SUM(SalesTable[Revenue])

➤ You can add new rows to see if the function’s final output changes.
Notes:
Each column must have consistent data types to make the Excel Table fully functional.
Define Dynamic Named Ranges with VBA For Advanced Control
When reusing the same named logic in multiple workbooks, using formulas or tables can waste time. Writing a macro for defining a workbook can give you flexibility to apply the logic across various worksheets and trigger updates automatically.
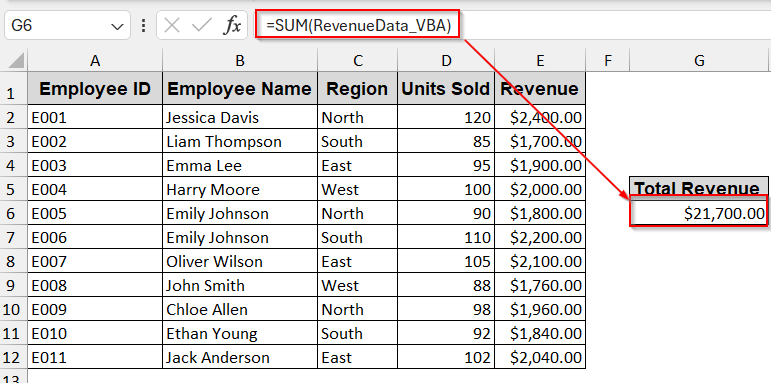
In this method, we will be writing a VBA script, RevenueData_VBA, using the worksheet SalesData_VBA.
Steps:
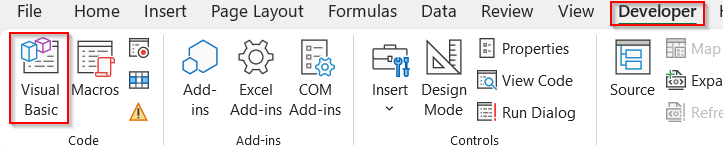
➤ Go to the Developers tab and select the Visual Basic option.
➤ In the VBA editor window, go to Insert -> Module to write your VBA script.
➤ Paste the following code in the blank space of the Module-.
Sub CreateDynamicNamedRange()
Dim ws As Worksheet
Set ws = ThisWorkbook.Sheets("SalesData_VBA")
ThisWorkbook.Names.Add Name:="RevenueData_VBA", _
RefersTo:="=OFFSET(" & ws.Name & "!$E$2,0,0,COUNTA(" & ws.Name & "!$E:$E)-1,1)"
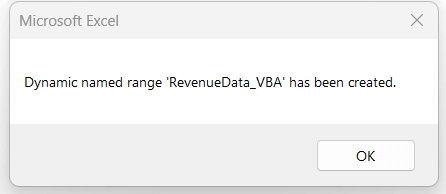
MsgBox "Dynamic named range 'RevenueData_VBA' has been created."
End Sub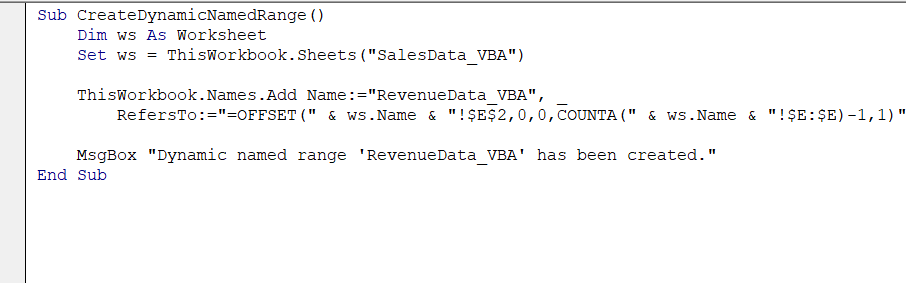
➤ Click Ctrl + S to save the VBA script.
➤ Click on the Macros beside the Visual Basic option and Run the new VBA-defined function.

➤ This will create a new Formula as the pop-up window shows successful creation.
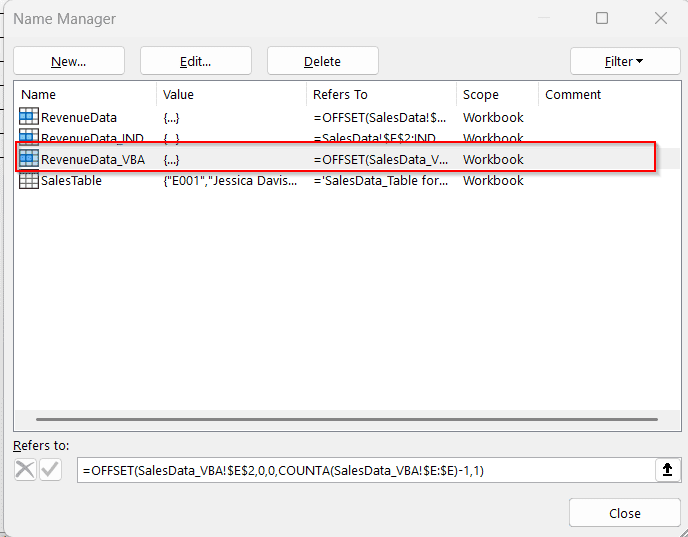
➤ To see the VBA-generated formula, go to the Formula -> Name Manager.
➤ To check its functionality like before, you can use basic formulas like AVERAGE and apply the new VBA-defined function.
=AVERAGE(RevenueData_VBA)
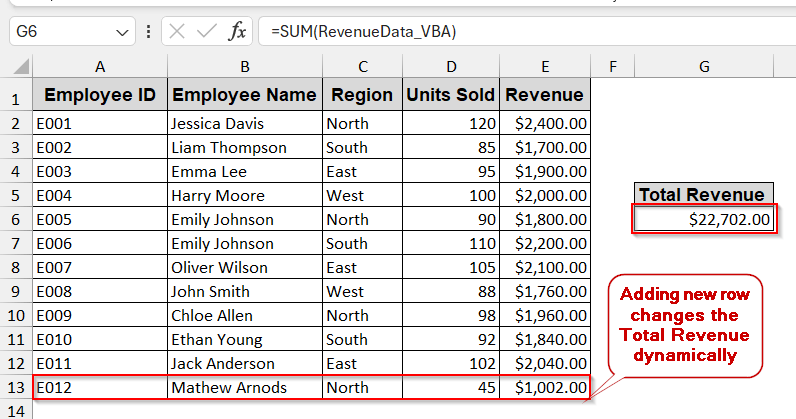
➤ You can add new rows to see if the function’s output changes dynamically.
Notes:
Replace the SalesData_VBA line 3 with your sheet name to make this VBA script function.
Set ws = ThisWorkbook.Sheets(“SalesData_VBA”)
Editing or Deleting Dynamic Named Ranges in Excel
Once you have created dynamic named ranges, you must know how to edit or delete them when necessary. Whether you have created using basic formulas, an Excel Table, or VBA methods, it’s important to audit or delete them when necessary. Luckily, Excel’s Name Manager helps to list all those in one window to make that work easier.
Steps:
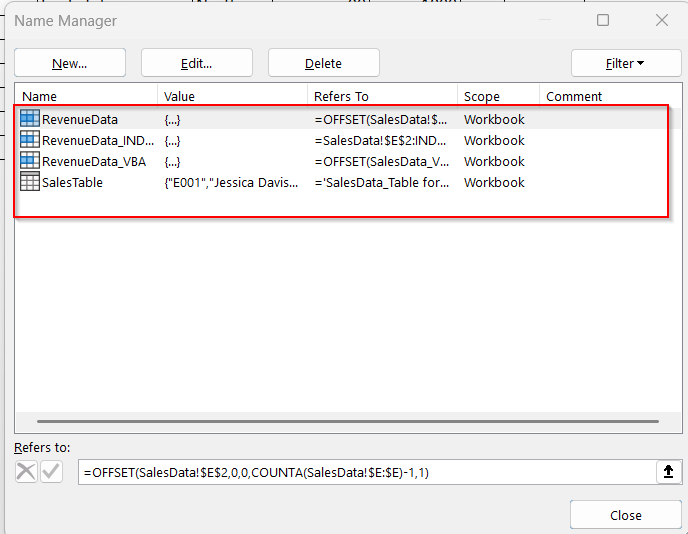
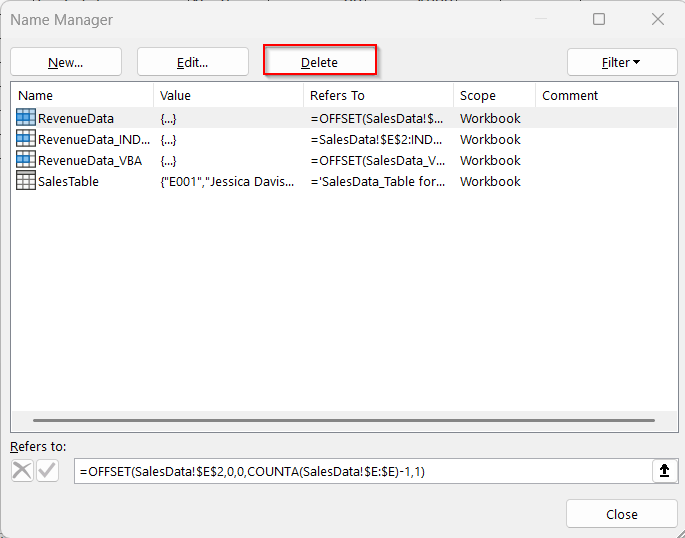
➤ Go to the Formula Tab and click on Name Manager.
➤ The Name Manager window shows the list of formulas created.
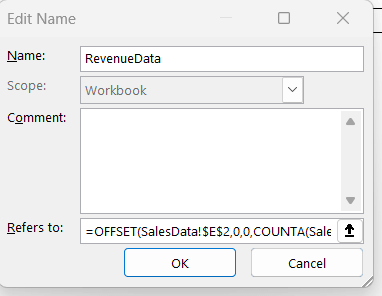
➤ To edit any formula, click the Edit button at the top of the window.
➤ It will take you to the Edit Name window where you can edit the name, give a comment, and also change the formula from Refers to.
➤ To delete any formula, click the Delete button on the top section of the Name Manager window.
Notes:
Deleted formulas can’t be restored with the Undo option. So, it is preferable to have a backup option.
Frequently Asked Questions(FAQs)
Can I use dynamic named ranges in data validation lists?
You can create dynamic named ranges in the data validation lists by simply using the Data Validation option. Choose the List option to include your named range to create the dropdown lists.
Why is my dynamic named range not updating?
A dynamic named range may not update properly due to improper formula construction or calculation settings. Check your formulas time and again. Also, go to the Formula tab -> Calculation Option to ensure it is Automatic.
Is OFFSET better than INDEX for dynamic ranges?
Though both OFFSET and INDEX are widely used in dynamic ranges, INDEX is preferable and better due to its performance benefits. Due to its non-volatile nature, it does not need to recalculate the output every time any data is updated, minimizing performance lags.
Can a dynamic named range span multiple columns or rows?
Dynamic named range can be used for multiple columns and rows. However, general OFFSET and INDEX functions won’t work in that case. You need extra logic and a few more formulas to accomplish that.
What happens if there are blank cells in a dynamic named range column?
The blank cells in the dynamic named range column give a wrong visualization of the specific range. In turn, this can lead to incorrect results in formulas and chargers that heavily rely on the dynamic named ranges.
Concluding Words
Dynamic named ranges are one of the most efficient ways of transforming your Excel file into scalable and reusable datasheets. Throughout this write-up, we explored many practical methods that can help you create dynamic named ranges. Along with the common formulas like OFFSET and INDEX, we paired up methods of Excel Table and automated VBA Macros to spice things up.
Each approach has its own speciality, simplicity, and performance benefits. Feel free to explore them and implement them as per your needs. Also, if you are confused, download our workbook and go through the steps individually. Surely, you can save both time and errors.