Let’s say you’re a manager of a small business. And you have to maintain an Excel sheet with lots of rows and columns. When you print it, it looks messy across pages, making it unprofessional for your client. You can fix it easily. In Microsoft Excel, you can make the sheet fit on one or two clean pages with relevant information at the top or bottom of the page. For example, a title at the top and date with time, sheet name, and page numbers at the bottom. Now it’s a professional report. Print it or save it as a PDF to share. In this article, we have used sales data and demonstrated a step-by-step guide to make your Excel data look like a page.
➤ First, select the entire data by pressing Ctrl + A .
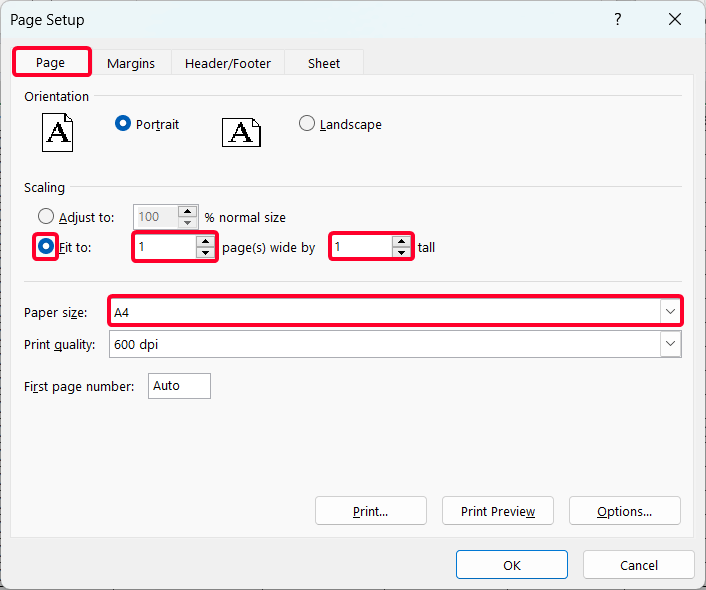
➤ Go to Page Layout tab >> Page Setup dialog box >> Page tab >> check the Fit to: option.
➤ To make your Excel data look like a page, select “1 page(s) wide by 1 tall” in the Fit to options.
➤ Then you can add a header/footer if needed. After that, click the Print…option to print your data.

This article covers three suitable ways to fit your Excel data within a page and add some information at the top or bottom of the page, similar to a Word document.
Steps to Make an Excel Spreadsheet Look Like a Page
The Page Setup window is the most comprehensive method for fitting your data and adding information at the top or bottom of the page, as well as customizing your margins and more.
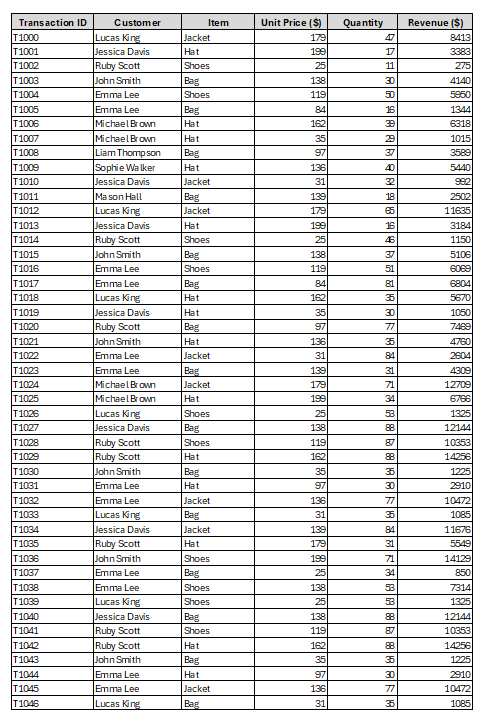
We’ll work on the monthly sales data in Sheet 1. This sheet contains data down to row 67.

Step 1: Open Page Setup Dialog Box
➤ First, select the entire data by pressing Ctrl + A .
➤ Navigate to the Page Layout tab >> click on the small arrow in the bottom-right corner of the Page Setup ribbon group.

Step 2: Fit the Data to One Page
➤ Go to the Page tab >> check the Fit to: option.
➤ To make your Excel data on just one page, select “1 page(s) wide by 1 tall” in the Fit to boxes. Remember, other tasks in this method are for better presentation, but this task is a crucial task.
➤ Choose your desired paper size (e.g. A4).
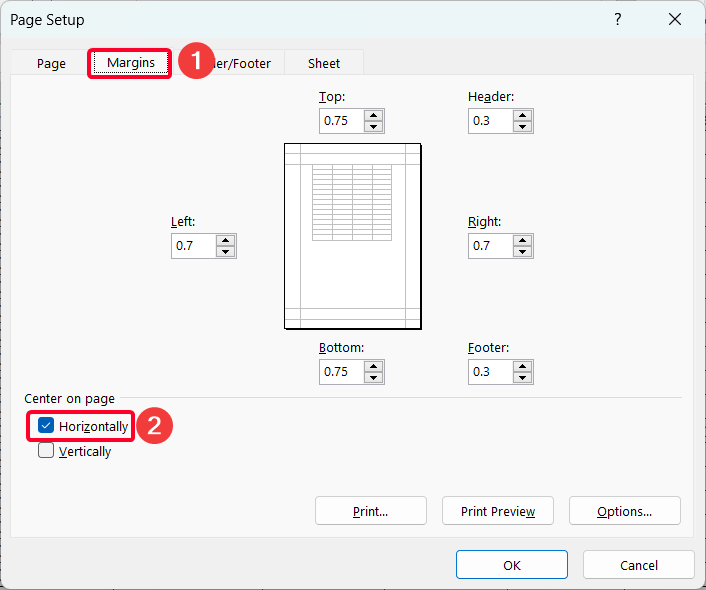
Step 3: Set the Margins and Alignment
➤ In the Margins tab, you can adjust Top, Bottom, Left, Right, and Header, Footer margins.
➤ Check the box before the Horizontally box to center the data.
Step 4: Add a Header at the Top of the Page
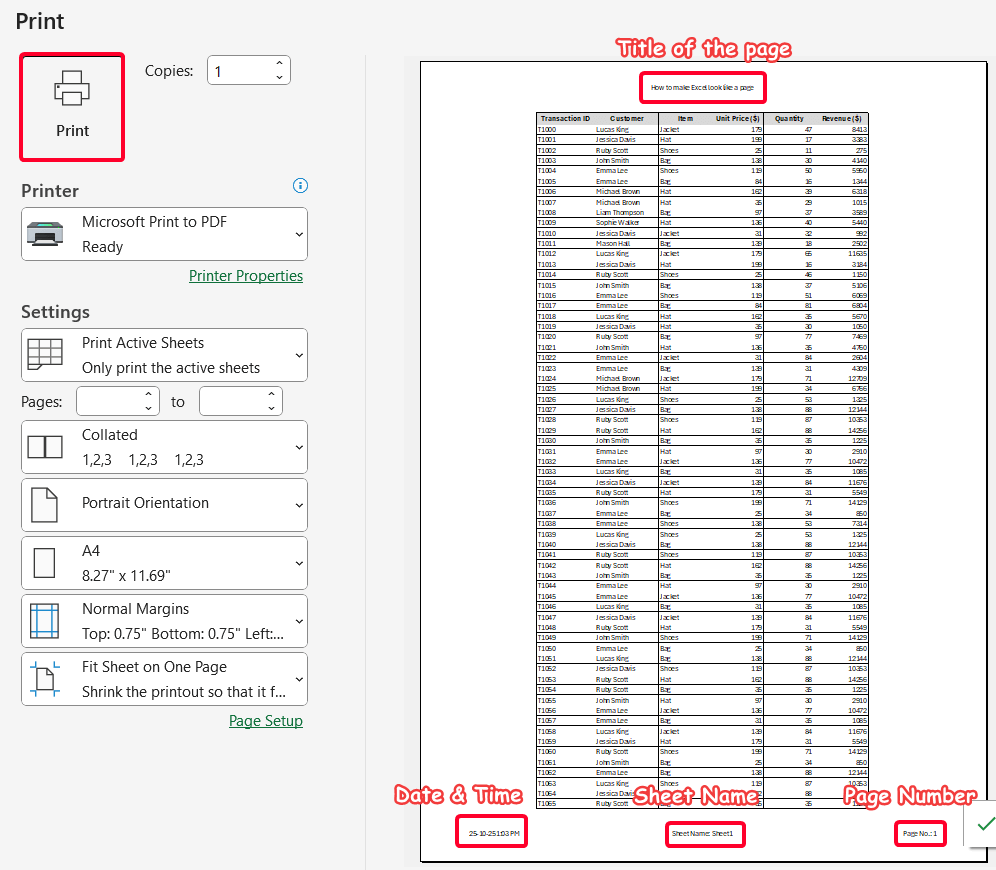
At this moment we’ll make the Excel file look like a page. For this, we’ll now add the title of the page at the top and some basic information (e.g. date & time, sheet name, page number) at the bottom of the page.
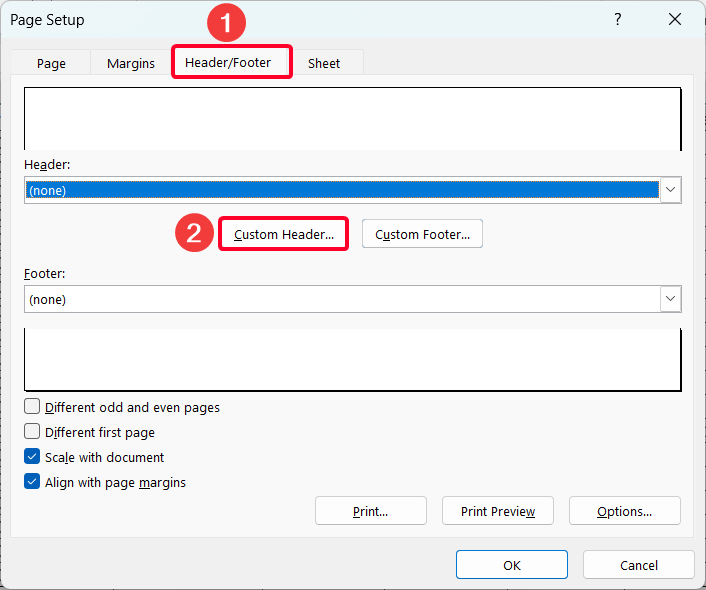
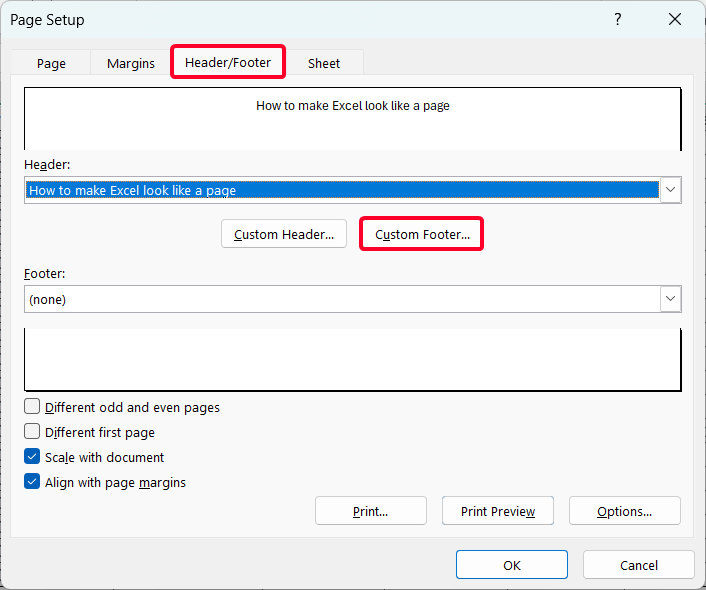
➤ To add title, navigate to Header/Footer tab >> Custom Header…
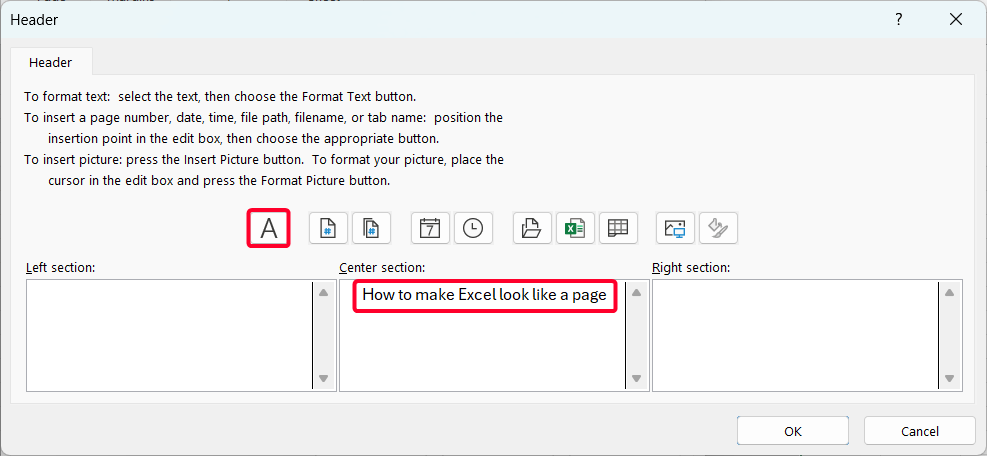
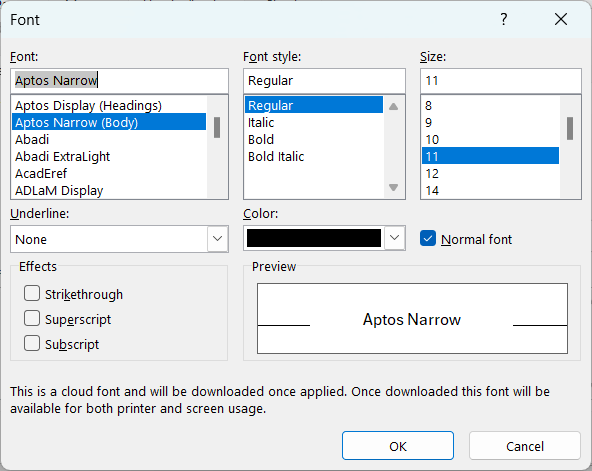
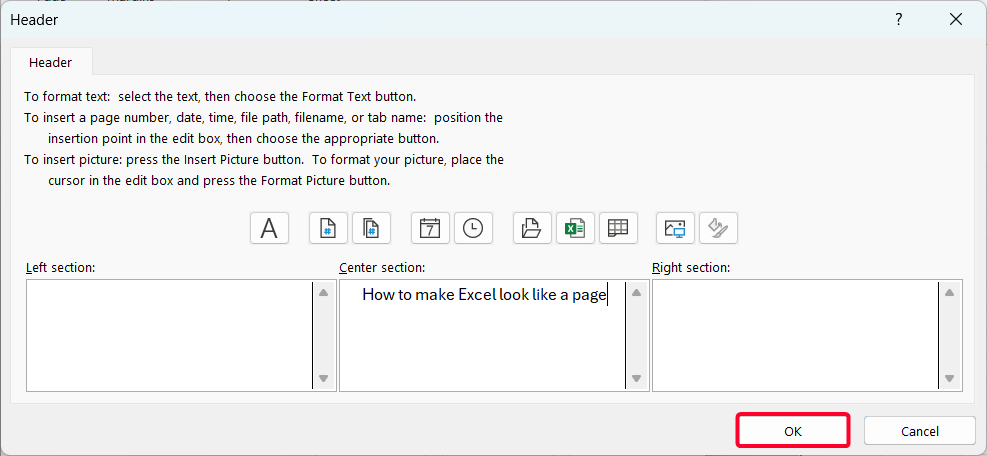
➤ In the Center section, type your title (e.g. How to make Excel look like a page). Use the Format Text button to change its font, style, and size.
➤ After pressing the Format Text button, you’ll get these options.
➤ Now press OK to set your header.
Step 5: Add Footer at the Bottom of the Page
➤ We’ll now add some relevant information at the bottom of the page. To do that, go to Custom Footer…from the Header/Footer tab.
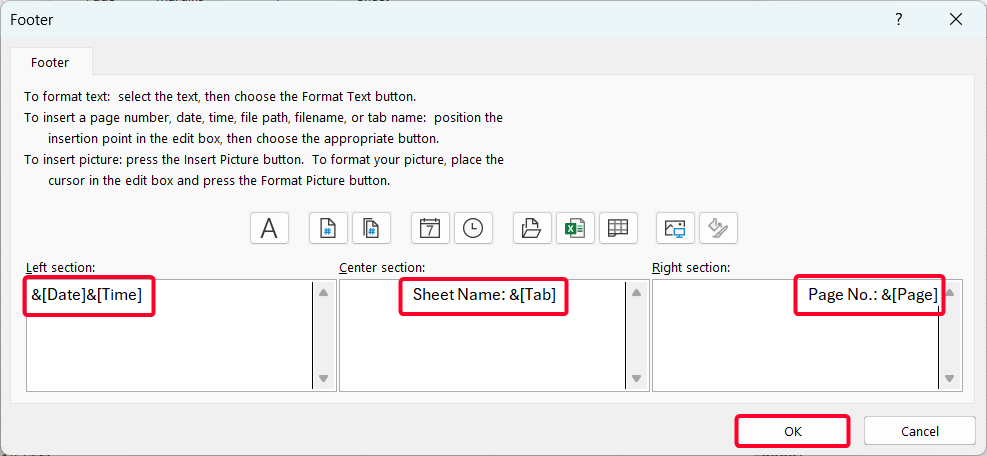
➤ In the Left section, insert date and time (click the respective buttons while keeping the mouse in the section).
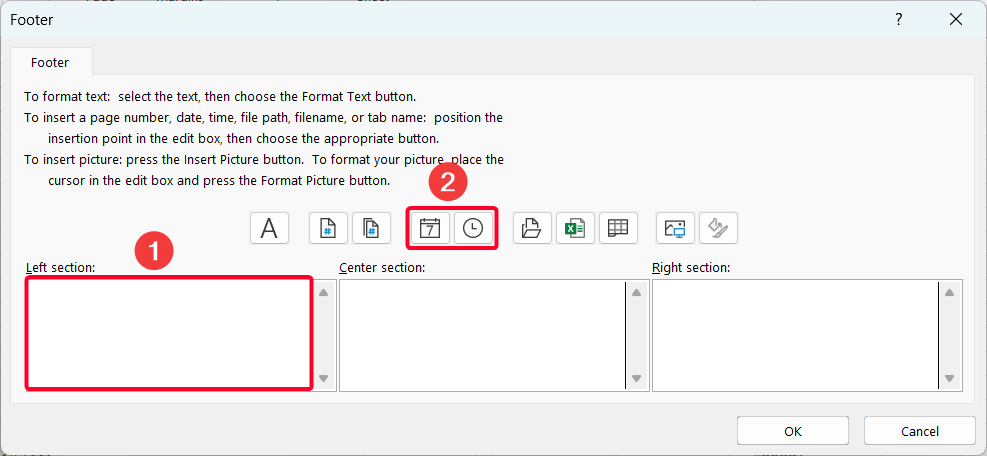
➤ In the Center section, type ‘Sheet Name:‘ and insert the Sheet Name button from the buttons

➤ After adding buttons in the Left, Center, and Right sections, press OK.
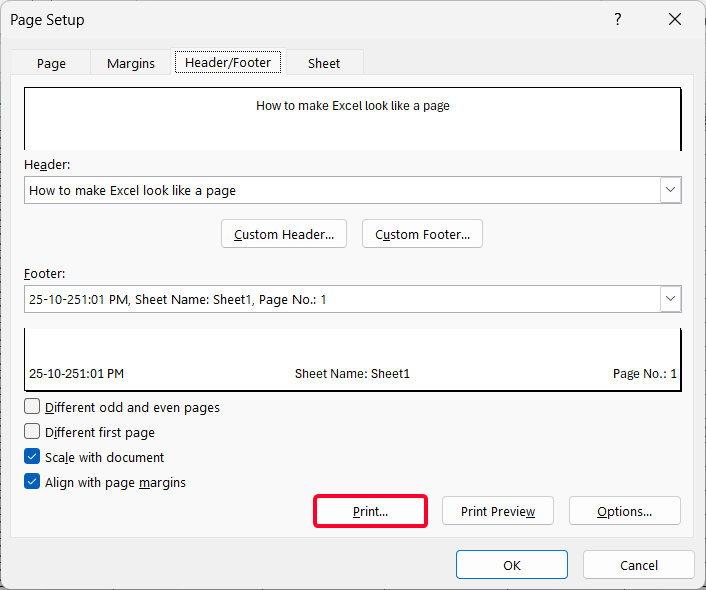
Step 6: Print the Data
➤ You’re ready to print the file. Click on the Print… option.
Finally, your data is ready to print, which looks like a page. Select your printer and press the Print button.
Customizing Page Layout in Excel
Here, we’ll show you two ways to customize your page layout to fit your data to a single page. These methods only help you fit the data on a page, but you cannot add the header/footer or other options.
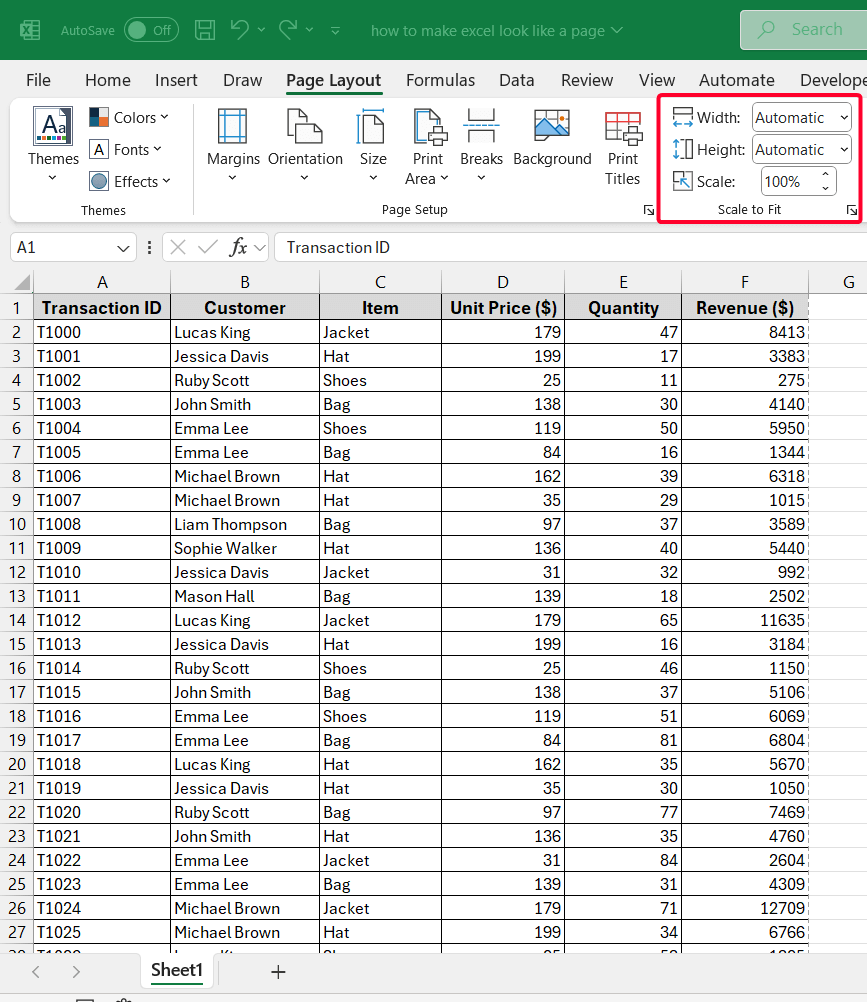
Use Scale to Fit Option
A quicker way to adjust the page appearance is by using the Scale to Fit settings on the Page Layout tab. This is useful when you want to force data to fit within a page.
The Scale to Fit ribbon group is found on the Page Layout tab, where Width and Height are set to Automatic by default.
Steps:
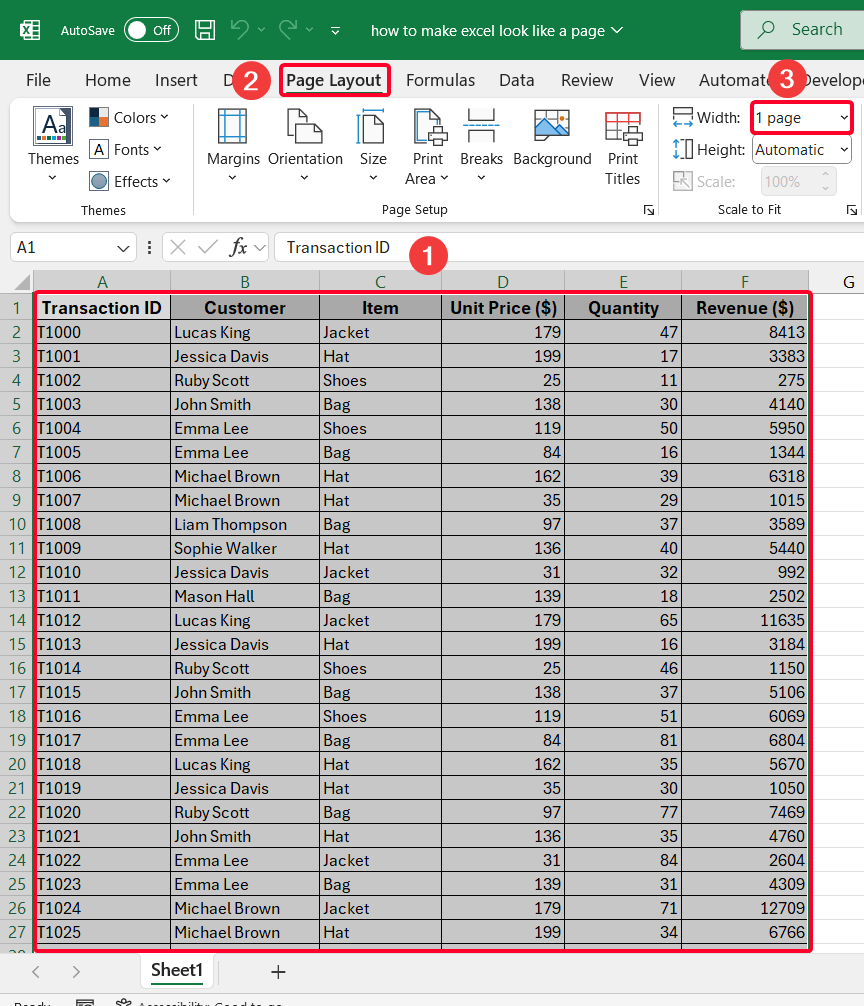
➤ Select the entire data by pressing Ctrl + A >> go to the Page Layout tab.
➤ In the Scale to Fit group, select 1 page from the Width dropdown. This ensures that all your columns will fit within a single page width.
Note:
If the number of rows of your data is less, you can also set the Height to 1 page. As we have a large number of rows, it’s not possible to show them on a single page. That’s why we keep it Automatic.
Apply the Print Preview Option
Also, you can use the Print Preview option to adjust scaling to make your Excel file look like a page.
Steps:
➤ First, select entire data >> File >> Print (or press Ctrl + P).
➤ Under the Settings section, look for the scaling options. The default is No Scaling. Pick one of the three scaling options below.
- Fit Sheet on One Page: Choose if the number of rows and columns is adjustable within a page.
- Fit All Columns on One Page: If you want to keep all columns of your data on a single page though the number of rows won’t be limited within a page.
- Fit All Rows on One Page: When you need to keep all rows within a single page, but columns are flexible.
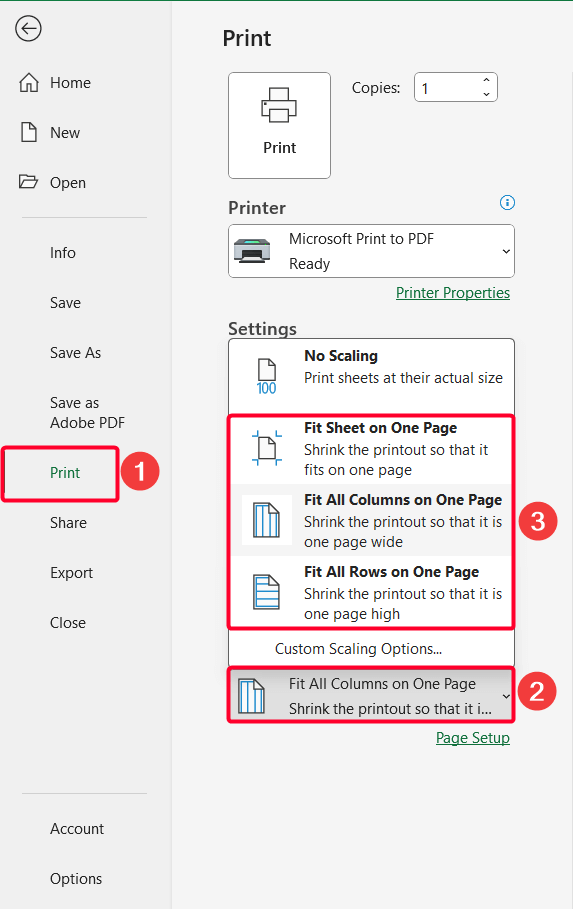
We have chosen the Fit All Columns on One Page scaling option and the print preview now appears like this.
Frequently Asked Questions
How to Remove Borders to Make Excel Look Like a Page?
First, select all data >> Home tab >> click the dropdown menu of Borders >> choose No Border.
How Can I Preview How Multiple Pages Will Break When Printed?
Use the Page Break Preview available in the View tab to see how Excel divides your content across pages.
Is It Possible to Print Column Headers on Every Page in Excel?
Go to Page Layout tab >> choose Print Titles >> select the row of column headers in the Rows to repeat at top option.
Wrapping Up
This is how you can fit the Excel data to a page with a professional look. I tested the method using the Microsoft 365 version. They will work on the old version too. Download the practice workbook and practice hands-on. Let me know if you face any trouble!