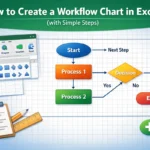
Flowcharts are excellent tools for illustrating workflows, processes, or decision-making steps in a visual format. While Excel isn’t specifically built for diagramming, it includes a wide range of shape tools that make it possible to design structured, professional flowcharts without any extra software. Whether you’re outlining a business process or mapping out logic, Excel has everything you need to build a clear and customizable diagram.
In this article, you’ll learn how to create and format a flowchart in Excel step by step. We’ll start with a sample dataset that outlines a basic purchase order process, then use Excel’s drawing tools to translate it into a visual flowchart with directional connectors and clear formatting.
Steps to create a flowchart in Excel:
➤ Prepare a dataset outlining Task Description, Responsible Dept, and Action Type.
➤ Use Excel’s built-in Shapes (Insert tab) to place Start, Process, and End blocks.
➤ Add directional arrows to show how steps connect logically.
➤ Align and format the shapes for clarity and structure.
➤ Customize colors, borders, and text to polish the final design.

Steps to Create a Flowchart in Excel
Creating a flowchart in Excel is a simple process once you understand the structure and the available shapes. We’ll use a sample dataset that outlines a practical employee onboarding workflow, listing each task, the responsible department, and action type to create a step-by-step flowchart in Excel.

Step 1: Set Up Dataset and Insert Flowchart Shapes
Before we begin designing a flowchart in Excel, it’s important to define the process we’re trying to visualize. A clear and structured dataset acts as our blueprint and it ensures that every step in the process is accounted for and logically ordered. Once the dataset is ready, the next step is to turn it into a flowchart using Excel’s built-in flowchart shapes. Let’s get started.
Steps:
➤ Open a new Excel sheet and enter your dataset into columns A to C such as Task Description, Responsible Dept, and Action Type.

➤ Go to the Insert tab and click Shapes under the Illustrations group.
➤ Under the Flowchart category, choose the right shape based on the action type.
➤ Use Terminator shapes for Start and End.
➤ Use Rectangles for Process steps.

➤ Click and drag to draw your first shape, for example, “Receive Offer Acceptance”.
➤ Double-click to edit text and type the task name inside.

➤ Add the rest of the shapes from the dataset, arranging them vertically or horizontally as preferred.
➤ Maintain consistent size and spacing between all shapes for a clean layout.

Step 2: Add Connectors to Link Each Step
With all the shapes placed on the sheet, the next task is to connect them. Arrows help communicate how each task flows into the next, turning your static shapes into a real process diagram.
Steps:
➤ Go to Insert >> Shapes under the Illustrations group and scroll to the Block Arrows section. Choose arrows based on your direction.

➤ Click and drag from the edge of one shape to the next, based on the task order in your dataset.
➤ Keep the arrows consistent in direction, avoiding unnecessary overlaps.
➤ Continue adding arrows until every step is connected from Start to End.

Step 3: Align and Distribute Shapes for a Professional Layout
Even with all shapes and arrows in place, the layout needs to be polished. This step ensures your flowchart looks organized and easy to read.
Steps:
➤ Hold down Shift and click each shape in a similar order to select them.
➤ Go to the Shape Format tab on the ribbon.
➤ Click Align and choose Align Top, Align Middle, or Align Center.
➤ Go back to Align and select Distribute Vertically or Distribute Horizontally.

➤ Make manual adjustments to arrows if needed to avoid overlap or clutter.

Step 4: Customize Formatting for Visual Clarity
A well-designed flowchart should be both functional and visually appealing. Using color and formatting helps differentiate between steps and makes your chart easier to understand.
Steps:
➤ Click on a shape and go to the Shape Format tab.
➤ Use Shape Fill to apply color codes, for example, gray for Start/End and blue for Process.
➤ Adjust Shape Outline to modify border color or thickness. You can also add preset Shape Effects if needed.

➤ Insert a chart title at the top of the sheet such as “New Employee Onboarding Flowchart” using a Textbox from the Shapes tool.
➤ Adjust Font and Alignment from the Home tab.

➤ Add a small legend if your chart uses multiple shape types or colors.
➤ Then select everything using Shift and Group together from the Shape Format tab to move around easily.

Now we have our fully customized flowchart in Excel.

Frequently Asked Questions
Can Excel create a flowchart automatically?
No, Excel does not generate flowcharts automatically from data inputs. You need to manually insert and arrange shapes and connectors. This manual process offers complete flexibility, allowing you to customize the design and layout exactly as you want.
What types of shapes should I use?
Standard flowchart conventions suggest using Terminator shapes for Start and End points, Rectangles for process steps, and Diamonds for decision points. These shapes help maintain clarity and consistency throughout your flowchart design, making it easier to follow.
Can I copy this flowchart into PowerPoint or Word?
Yes, once your flowchart is complete in Excel, you can select all the shapes, copy them, and then paste into PowerPoint or Word. The layout and formatting will be preserved, allowing seamless integration into presentations or documents.
Is Excel better than dedicated flowchart tools?
Excel works well for simple, straightforward flowcharts, especially if you’re already managing data in spreadsheets. However, for complex or highly detailed diagrams, specialized tools like Microsoft Visio or Lucidchart provide more features and greater ease of use.
Wrapping Up
In this article, we learned how to create a flowchart in Excel using a structured dataset and the built-in Shapes tool. From inserting shapes and arrows to aligning elements and applying visual formatting, every step helps you convert a linear process into a visual diagram. While Excel doesn’t automate flowchart creation, it offers enough flexibility to design effective workflows that are easy to update and share. Feel free to download the practice file and share your feedback.