
When you work with many sheets in one Excel file, it can easily get messy and it seems like you’ve lost yourself in the sea of tabs. If they’re all out of order, this makes it harder to find what you need quickly. This is why keeping the excel tabs organized becomes essential.
Unfortunately excel doesn’t have any built-in function to sort them alphabetically or as you want. But there are easy ways to fix this. You can move the tabs by just drag and drop, or use a small bit of code to sort them all at once. Either way, it helps keep your file clean and easier to use.
In this guide, I’ll show you both methods so you can organize your tabs without any hassle.
➤ Click on the tab you want to move.
➤ Hold the mouse button and drag the tab left or right.
➤ Drop it in the spot where you want it.
➤ Repeat for other tabs until they’re in the order you like.

Now let’s go through each method step-by-step so you can keep your workbook neat and easy to use.
Sorting Excel Tabs by Drag and Drop
Drag and drop is the simplest way to sort tabs in excel, especially when you’re working with just a few tabs. It’s a quick method that doesn’t require any coding or special tools. While it might not be the fastest option for very large workbooks, it’s perfect when you want full control over the order of your sheets.
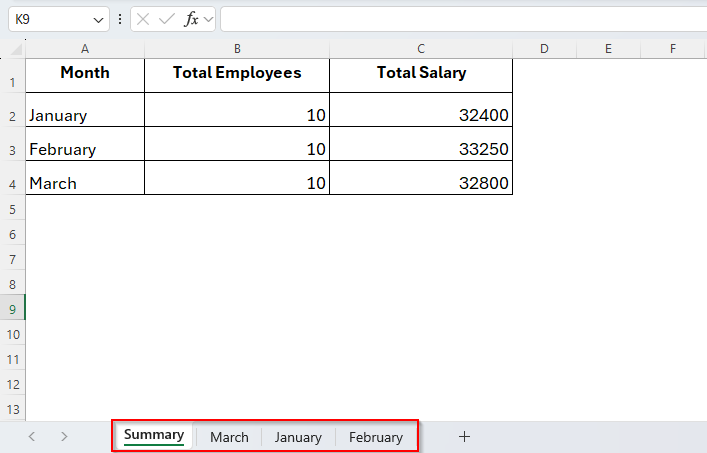
Below is an example workbook that we would be using in this tutorial. This workbook includes tabs named March, January, February, April and Summery, as you can see in the following image.
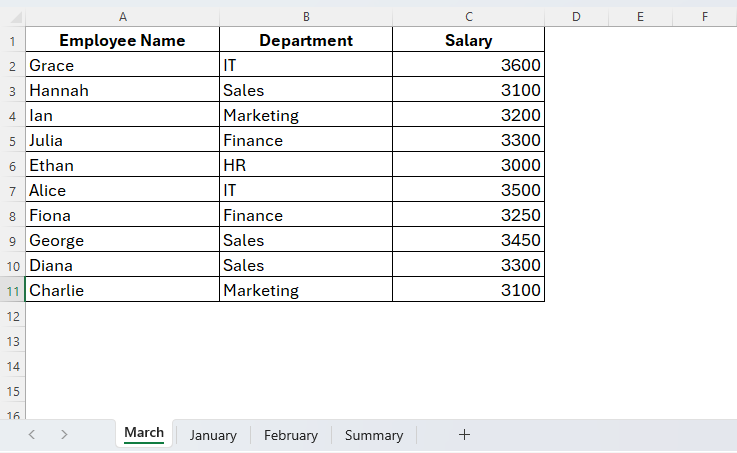
Right now, they’re not in order, and we want to sort them as January, February, March, while keeping the Summary tab at the front or end.
So, here’s how you can easily sort your tabs using drag and drop.
Steps:
➤ First, go to the bottom of your Excel file where the sheet tabs are located.
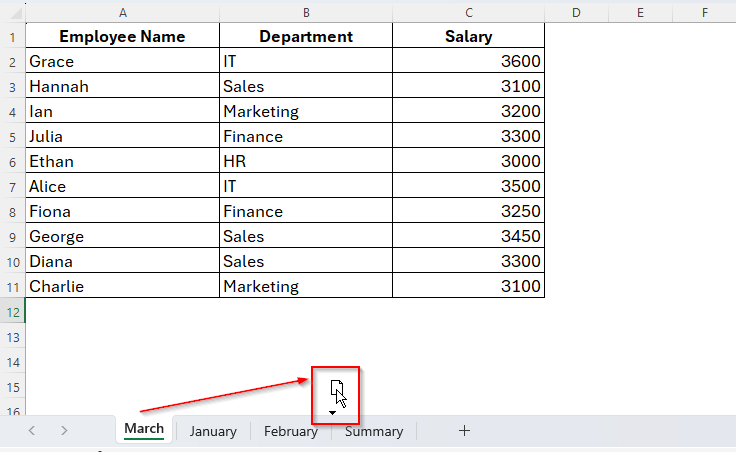
➤ Click on the tab you want to move. For example, click on the March tab.
➤ Hold down the left mouse button, then drag the tab to the position where you want it. Here, we’ll move it after February. And you’ll see a small black triangle and a copy-paste sign showing where the tab will be placed.
➤ Release the mouse button when you’re happy with its new position.
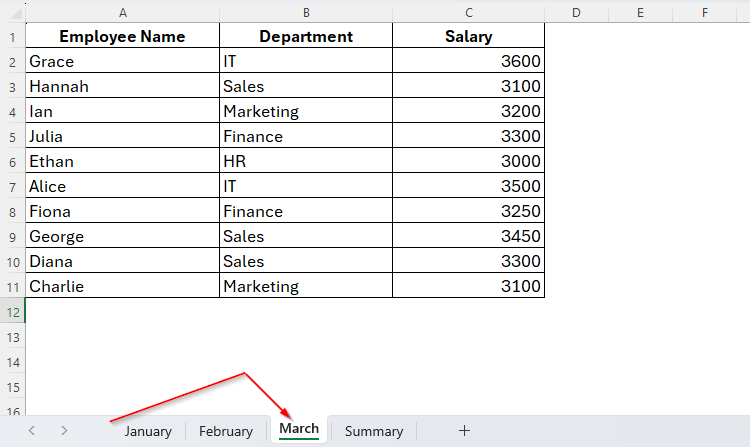
You can repeat the same steps for other tabs until they’re in the order you like. For example, you can move the Summary tab in the beginning similarly.
Using VBA to Sort Excel Tabs Alphabetically
This method is the most useful one when you work with a lot of tabs in your workbook. Sorting them by just doing drag and drop is a huge time consuming. In this case, applying a VBA code will help you the best.
It won’t take much time and effort. You can also sort the tabs in a A-Z or Z-A order with some simple steps using the VBA macro. Let’s begin with ascending.
Sort Excel Tabs Ascending (A-Z)
➤ Locate the Developer tab.
➤ Select Visual Basic and open the Visual Basic Editor to write the VBA code.
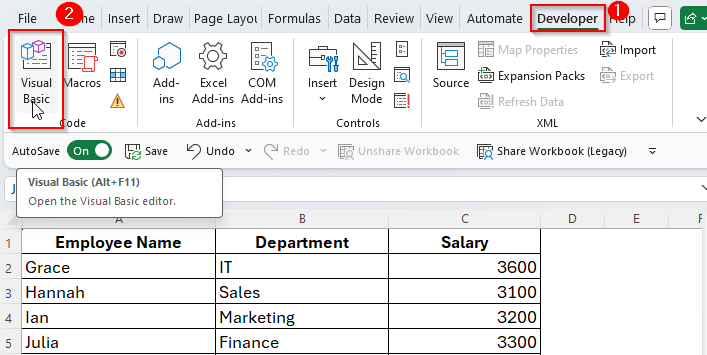
➤ We can also do so by pressing Alt + F11 to open the Visual Basic for Applications (VBA) editor.
➤ Alternatively, you can right-click on any tab on your spreadsheet and choose the View code opinion.
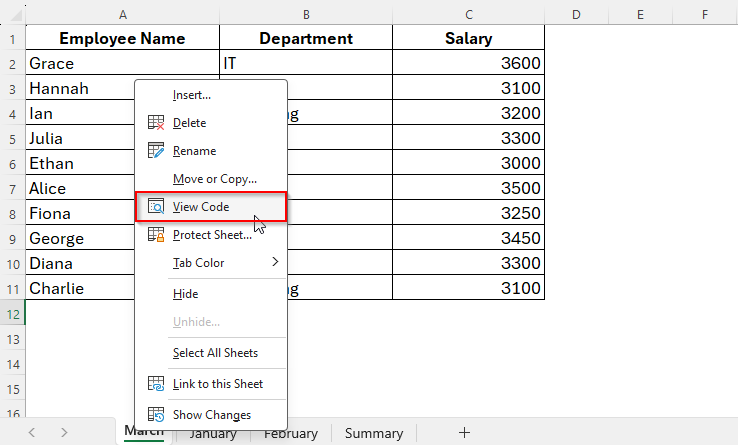
➤ By doing so, the Visual Basic Editor will appear on the screen.
➤Now go to Insert > Module.

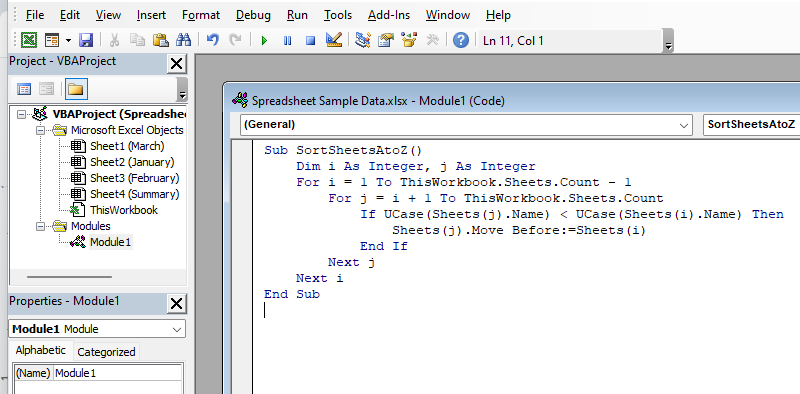
➤ Then copy and paste the following code into the module window.
Sub SortSheetsAtoZ()
    Dim i As Integer, j As Integer
    For i = 1 To ThisWorkbook.Sheets.Count - 1
        For j = i + 1 To ThisWorkbook.Sheets.Count
            If UCase(Sheets(j).Name) < UCase(Sheets(i).Name) Then
                Sheets(j).Move Before:=Sheets(i)
            End If
        Next j
    Next i
End Sub
➤ Once you’re done, the code will appear as follows.
➤ Now click the Run Sub button or simply tap the F5 key to run the code.
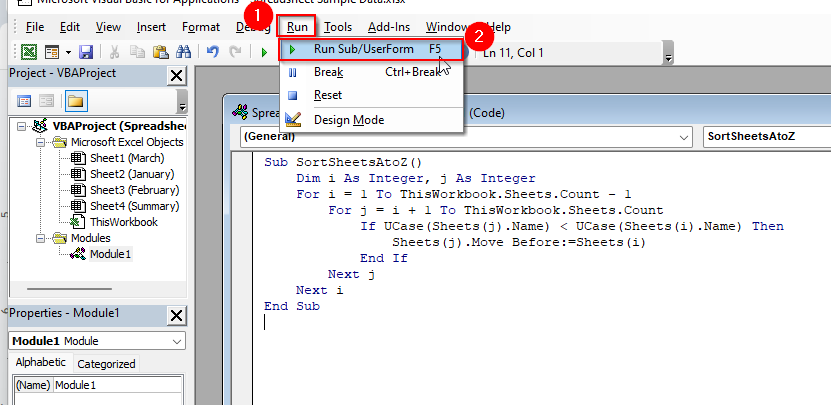
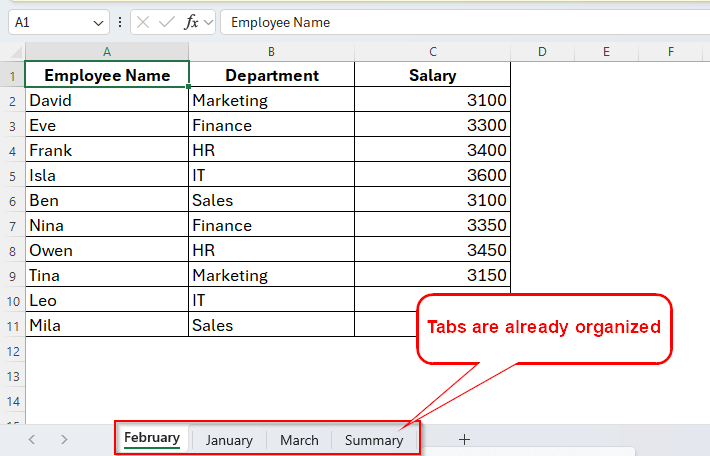
➤ This will organize the tabs in ascending alphabetical order as we can see in the image below.
Sort Excel Tabs Descending (Z-A)
➤ Similarly to the previous method, open the Visual Basic Editor.
➤ Locate Insert and choose Module.

➤ Then insert the VBA Code as follows:
Sub SortSheetsZtoA()
    Dim i As Integer, j As Integer
    For i = 1 To ThisWorkbook.Sheets.Count - 1
        For j = i + 1 To ThisWorkbook.Sheets.Count
            If UCase(Sheets(j).Name) > UCase(Sheets(i).Name) Then
                Sheets(j).Move Before:=Sheets(i)
            End If
        Next j
    Next i
End Sub
➤ Run the code by clicking on the Run Sub button or tap F5 key.
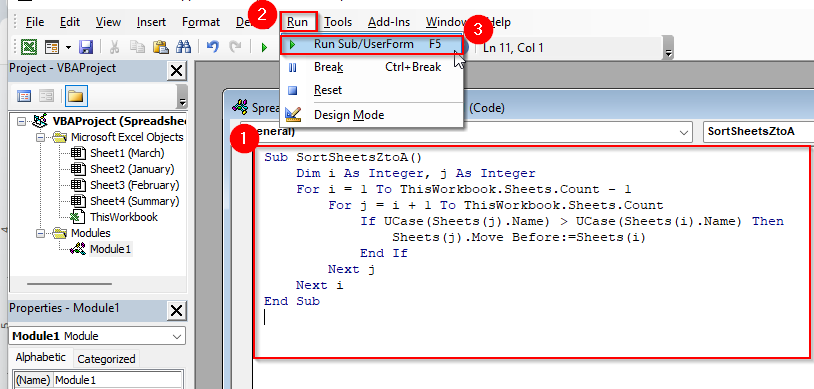
➤ Now as you can see in the following image, the tabs in this workbook are in descending alphabetical order, starting with the tab named with S and ending with the tab named with F.
Keeping a Tab Always at the Ending or Beginning While Sorting
Sometimes, we may also need to keep a single tab at the very beginning or the ending of the workbook’s tab lists. We don’t want it to be affected while sorting in ascending or descending order. For example, here we want the Summary tab always in the ending.
In this case, we just need to bring some changes in the VBA code. For your easy understanding, we’ve attached the codes below so you can just copy them and paste on your Visual Macro window. Let’s find them out.
Sort Tabs A to Z Keeping Summary Last
➤ Open the Visual Basic Editor accordingly.
➤ Locate the Module window from the Insert tab and put the following VBA code:
Sub SortSheetsAtoZ_KeepSummaryLast()
Dim i As Integer, j As Integer
Dim wsSummary As Worksheet
' Set reference to the Summary sheet
On Error Resume Next
Set wsSummary = ThisWorkbook.Sheets("Summary")
On Error GoTo 0
' Temporarily move Summary to the end
If Not wsSummary Is Nothing Then
wsSummary.Move After:=Sheets(Sheets.Count)
End If
' Sort remaining sheets alphabetically
For i = 1 To ThisWorkbook.Sheets.Count - 2
For j = i + 1 To ThisWorkbook.Sheets.Count - 1
If UCase(Sheets(j).Name) < UCase(Sheets(i).Name) Then
Sheets(j).Move Before:=Sheets(i)
End If
Next j
Next i
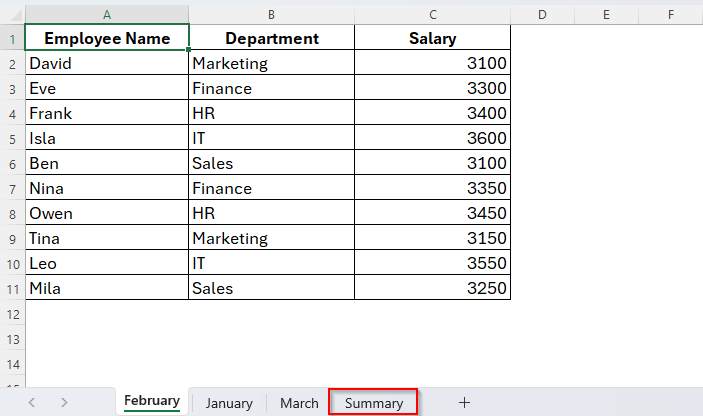
End Sub➤ Run the code code from the Run tab and you’ll get the result as the image shows below.
Sort Tabs Z to A Keeping Summary Last
➤ Just as the previous methods, locate the Visual Basic Editor and open the Module.
➤ Then insert the following VBA code inside the module window:
Sub SortSheetsZtoA_KeepSummaryLast()
Dim i As Integer, j As Integer
Dim wsSummary As Worksheet
' Set reference to the Summary sheet
On Error Resume Next
Set wsSummary = ThisWorkbook.Sheets("Summary")
On Error GoTo 0
' Temporarily move Summary to the end
If Not wsSummary Is Nothing Then
wsSummary.Move After:=Sheets(Sheets.Count)
End If
' Sort remaining sheets in descending order
For i = 1 To ThisWorkbook.Sheets.Count - 2
For j = i + 1 To ThisWorkbook.Sheets.Count - 1
If UCase(Sheets(j).Name) > UCase(Sheets(i).Name) Then
Sheets(j).Move Before:=Sheets(i)
End If
Next j
Next i
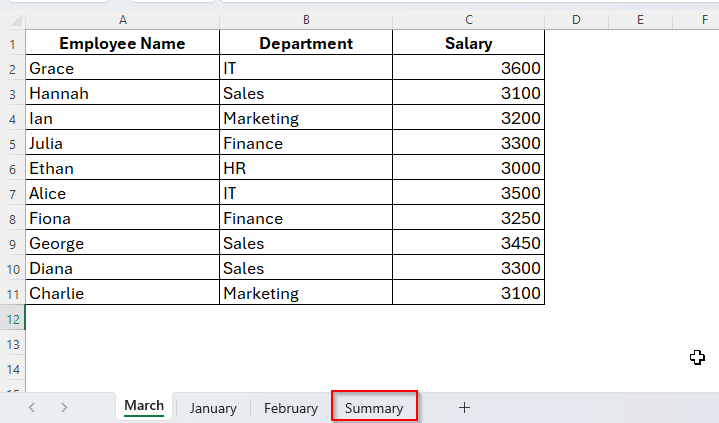
End Sub➤ Now as you can see in the following image, the Summary tab is still in the ending of the serial, although the tabs are organized in the Z-A order.
But if you’ve a tab with another name, all you need to do is just replace the Summary word in code with your tab’s name. If you want it in the starting, then also replace the Last word from the code with the word First. And there you go.
Frequently Asked Questions
Is there any Shortcut to Move Tabs Quickly without Dragging in Excel?
Yes, there is. All you need to do is just right click on the tab and choose Move or Copy. Now, from the dialogue box, select where you want to move the tab inside the workbook.
Can I Sort Tabs in a Reverse Order?
Of course you can. But you’ll need to modify the VBA code. Change the comparison so it sorts from Z to A instead of A to Z.
Can Excel Online Version Sort Tabs Alphabetically?
No, the web version of Excel doesn’t support VBA Macros. While using the online version, you have to reorder tabs manually.
Concluding Words
Organizing your Excel tabs may seem like a small task, but it can make a big difference when working with large workbooks. Whether you’re tracking monthly data, managing departmental sheets, or building dashboards, keeping your tabs in order saves time and reduces errors.
While Excel doesn’t offer a built-in feature to sort tabs automatically, simple solutions like drag-and-drop or using a quick VBA macro can help you stay organized. So, now that you’ve learned both manual and automated methods, your Excel files can stay neat, searchable, and stress-free.


Only works as a subroutine in your PERSONAL.XLSB if ActiveWorkBook is used instead of ThisWorkBook.
Hello,
You’re correct, and this behavior is expected in Excel VBA.
ThisWorkbook always refers to the workbook where the VBA code is stored. So if the macro is placed in PERSONAL.XLSB, ThisWorkbook points to PERSONAL.XLSB—not the file whose sheet tabs you want to sort. That’s why the code won’t work on other workbooks in this case.
When the macro is stored in PERSONAL.XLSB and you want it to sort tabs in the currently open file, you must use ActiveWorkbook instead.
Use this version of the code when running it from PERSONAL.XLSB:
Sub SortSheetsAlphabetically()
Dim i As Long, j As Long
For i = 1 To ActiveWorkbook.Worksheets.Count – 1
For j = i + 1 To ActiveWorkbook.Worksheets.Count
If ActiveWorkbook.Worksheets(j).Name < ActiveWorkbook.Worksheets(i).Name Then ActiveWorkbook.Worksheets(j).Move _ Before:=ActiveWorkbook.Worksheets(i) End If Next j Next i End Sub