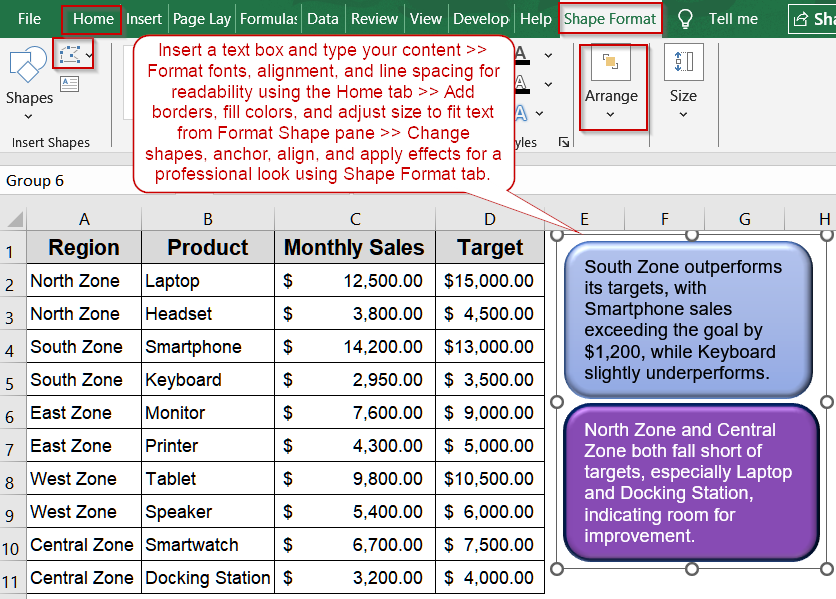
Text boxes in Excel are versatile tools for highlighting important information, adding annotations, or enhancing the visual appeal of your worksheets. When formatting a text box, you can control its appearance by adjusting fonts, colors, borders, fills, and effects to make your data stand out. Whether you’re creating dashboards, reports, or presentations, properly formatted text boxes help improve readability and give your spreadsheet a professional finish.
In this article, we’ll learn how to format a text box in Excel step by step. We’ll start with a sample dataset, then demonstrate multiple formatting techniques, including adjusting font properties, adding borders, applying gradient fills, and using Shape Effects to enhance your layout.
Steps to format text box in Excel:
➤ Insert a text box and type your content anywhere in the worksheet.
➤ Format fonts and text alignment to enhance readability and match your dashboard style.
➤ Enable Resize shape to fit text and Wrap text to keep content neatly contained.
➤ Add borders and fill colors to make text boxes stand out from the dataset.
➤ Adjust line spacing for multi-line text boxes to improve clarity and visual flow.
➤ Align and anchor text boxes to maintain consistent layout across your sheet.
➤ Change shapes or edit points to create custom, attention-grabbing designs.
➤ Apply advanced styling like gradients, shadows, or glow effects for a professional look.
Steps to Format a Text Box in Excel
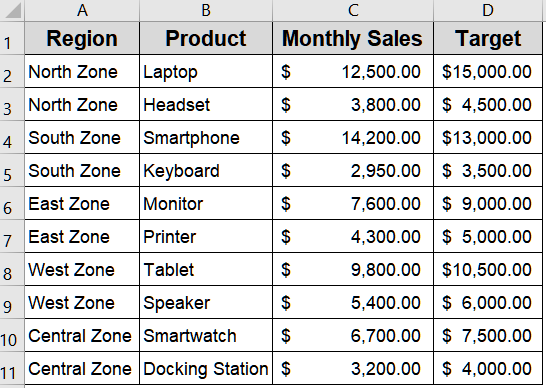
Formatting a text box in Excel helps your reports and dashboards look clean and easy to read. We’ll use a 10-row sales dataset of products and their monthly performance to help you learn how to adjust fill colors, outlines, fonts, line spacing, resizing, wrapping, alignment, anchoring, and even reshaping text boxes to enhance visual appeal and clarity.
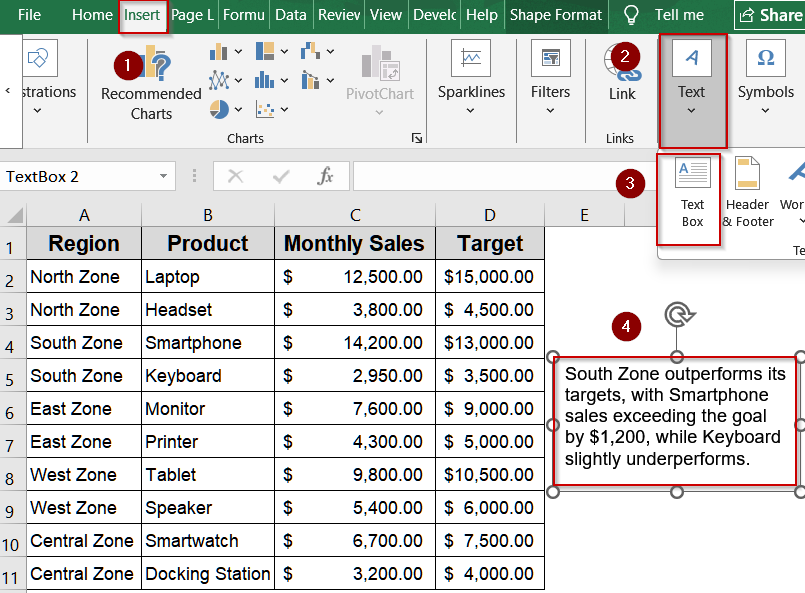
Step 1: Insert a Text Box
Before applying any formatting, you need a text box to hold your content. Text boxes allow flexible placement, making it easy to annotate or highlight dataset insights without affecting the spreadsheet’s structure.
Steps:
➤ Go to Insert >> Text >> Text Box.
➤ Click and drag anywhere on the sheet to draw the text box.
➤ Double-click inside the blank box and type your sample text as preferred.
➤ Move the position of the textbox and adjust it’s size by using the textbox handles.
Step 2: Format Font and Text Alignment
Proper font styling and alignment improve readability and visual hierarchy. Adjusting font size, style, and alignment ensures that your text communicates effectively, matches your dashboard theme, and highlights key information.
Steps:
➤ Select the text box and go to the Home tab.
➤ Use the Font group to change the font family (e.g., Calibri to Arial), size, color, or apply bold/italic formatting.
➤ In the Alignment group, center or right-align text as needed.
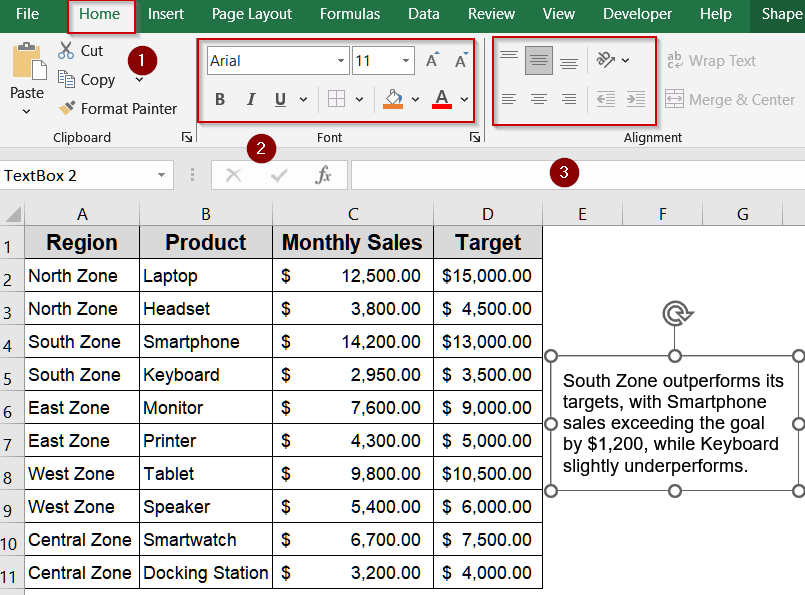
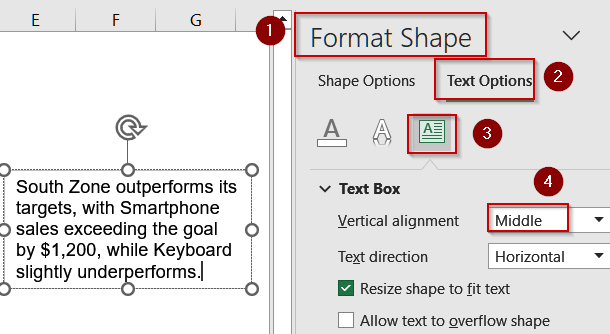
➤ For vertical centering, right-click the text box, select Format Shape >> Text Options >> Text Box, and set Vertical Alignment to Middle.
Step 3: Resize to Fit and Wrap Text
Automatically resizing text boxes ensures that your content always fits neatly without being cut off. Enabling wrap text prevents overflow, keeping your text contained within the boundaries of the box and aligned properly with your data.
Steps:
➤ Right-click the text box and select Format Shape, then open the Text Options pane.
➤ Under Text Box, check Resize shape to fit text.
➤ Enable Wrap text in shape to prevent text from spilling outside the box.

Step 4: Add Borders and Change Fill Color
Borders and fill colors make text boxes stand out and visually separate them from the worksheet. By choosing contrasting colors or subtle gradients, you can draw attention to critical metrics like high-performing products.
Steps:
➤ Right-click the text box and select Format Shape.
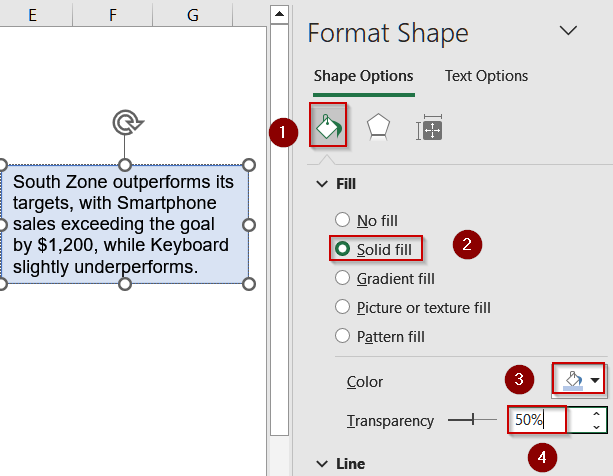
➤ In the Format Shape pane, select Fill & Line (paint bucket icon).
➤ Under Fill, choose Solid Fill and pick a color (e.g., light blue).
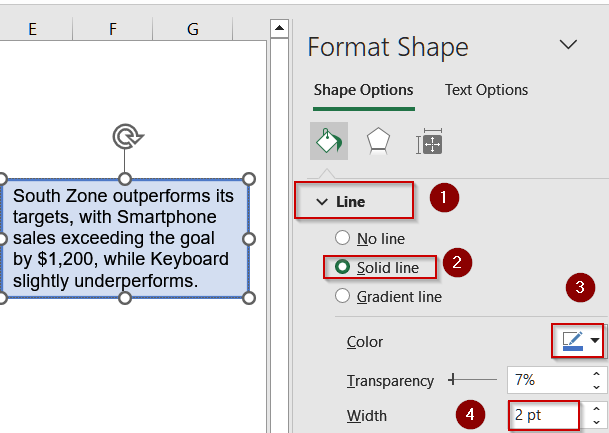
➤ Under Line, select Solid Line, choose a contrasting border color (e.g., dark blue), and adjust Width as desired.
Step 5: Adjust Line Spacing Inside a Text Box
Line spacing improves readability, especially for multi-line text boxes or notes within dashboards. Proper spacing ensures your content looks clean, prevents crowding, and enhances the overall visual flow of your worksheet.
Steps:
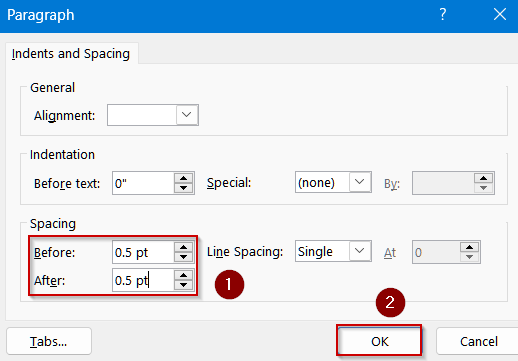
➤ Right-click inside the text box and choose Paragraph…
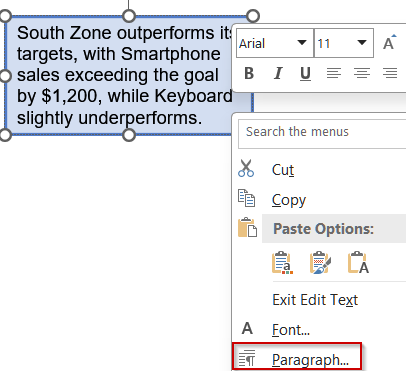
➤ Adjust Line Spacing to add or reduce spacing between lines.
➤ Click OK to preview the changes instantly.
Step 6: Aligning and Anchoring Text Boxes
Proper alignment and anchoring ensure consistency across your dashboard. By aligning multiple text boxes and anchoring them to the grid or cells, your layout remains organized and visually professional, even when adjusting cell sizes.
Steps:
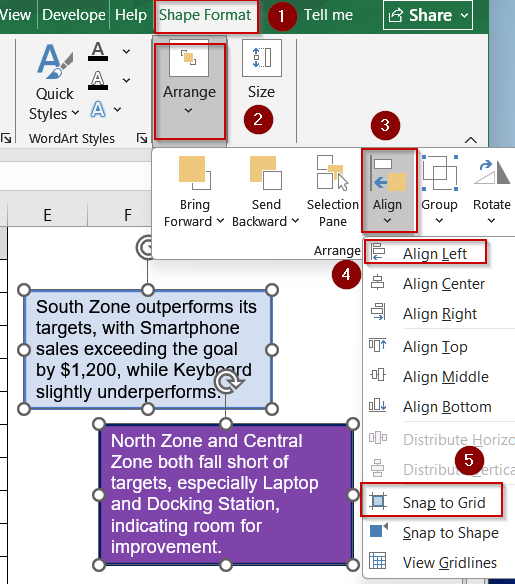
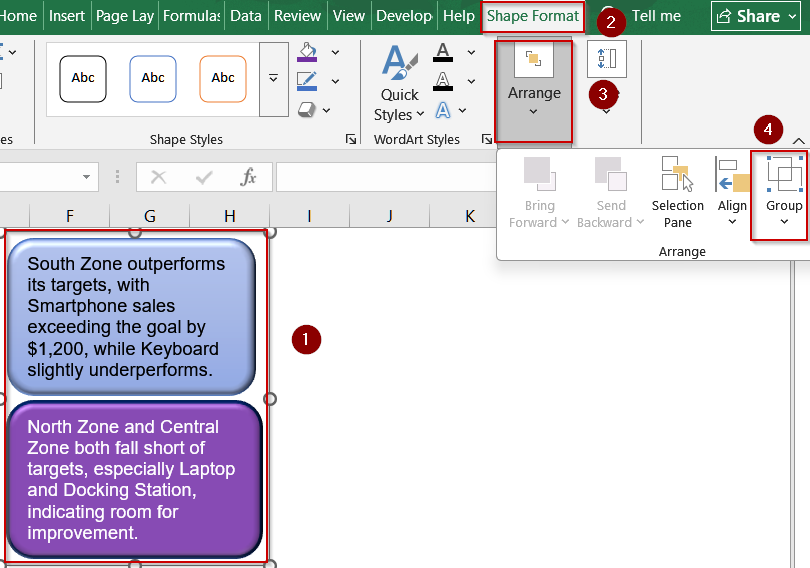
➤ Select multiple text boxes (hold Shift while clicking each).
➤ Go to Shape Format tab >> Click Align under the Arrange group, then choose Align Left, Align Center, or Distribute Vertically.
➤ Enable Align to Grid for perfect positioning.
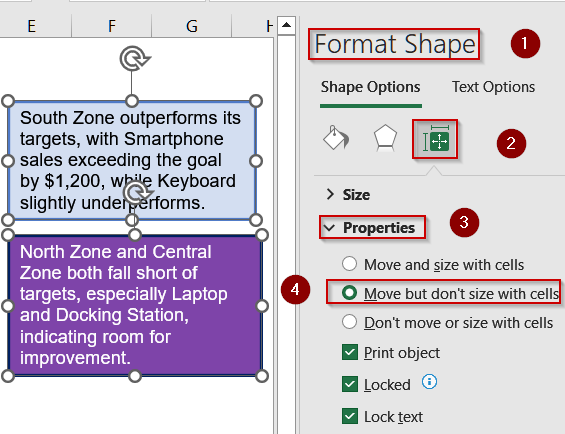
➤ Right-click a text box, select Format Shape >> Properties, and choose either Move but don’t size with cells or Move and size with cells to anchor as needed.
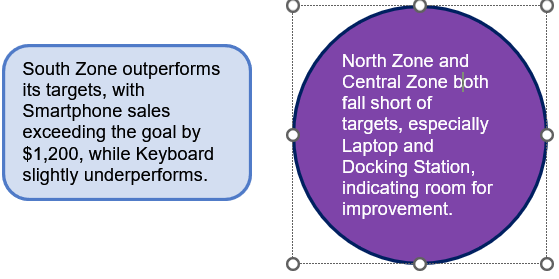
Step 7: Change Shapes and Edit Points
Custom shapes add visual interest and highlight important data points. Editing shape points allows for unique callouts or curves that match your dashboard’s aesthetic, making your text boxes more dynamic and engaging.
Steps:
➤ Select the text box and go to Shape Format >> Edit Shape >> Change Shape to swap the current box for a circle, arrow, or other shape.
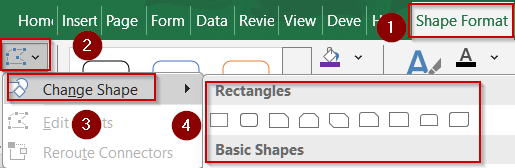
➤ Choose Edit Points under the same menu to drag points and adjust curves or angles.
Step 8: Advanced Styling for a Professional Look
Final enhancements like gradients, shadows, and glow effects create a polished, visually appealing dashboard. Combined with dataset-specific highlights, these styles draw attention to key performance indicators effectively.
Steps:
➤ Apply Gradient Fill or Picture Fill in Format Shape.
➤ Use Shape Effects >> Shadow or Glow to make important labels pop.
➤ Combine styling with dataset context for meaningful visual emphasis.
➤ Additionally, group the textboxes using the Group option under the Arrange group in the Shape Format tab.
Frequently Asked Questions
What is the easiest way to format a text box in Excel?
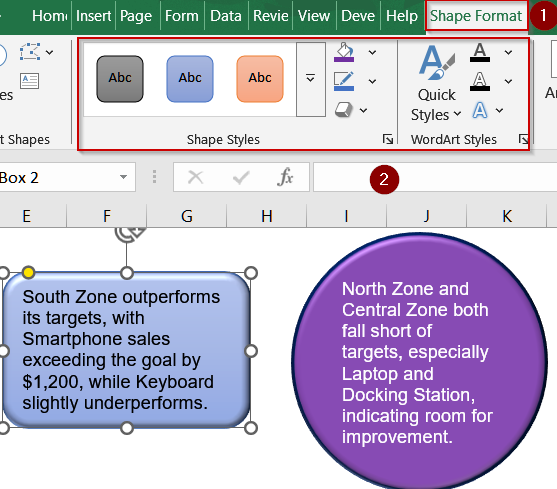
The quickest method is to select the text box, go to the Shape Format tab, and adjust fill, outline, and text options. These tools provide instant control over appearance, alignment, and style.
How can I change line spacing within a text box?
Right-click inside the text box, choose Paragraph, and modify the Line Spacing value. Increasing or decreasing spacing improves readability, making your reports or dashboards cleaner and easier to interpret without crowding.
Can text boxes resize automatically to fit their content?
Yes. Right-click the text box, choose Format Shape, open Text Options, and check Resize shape to fit text. This ensures the box expands or shrinks dynamically, preventing overflow or unnecessary white space.
How do I anchor a text box so it doesn’t move unexpectedly?
Right-click the text box, choose Format Shape, then Properties. Select Move but don’t size with cells or Move and size with cells depending on whether you want the box to stay fixed or follow resizing.
What’s the purpose of changing shapes or editing points for text boxes?
Changing shapes or editing points customizes the box outline like turning a rectangle into an arrow or callout. It allows more creative, attention-grabbing designs for dashboards, presentations, or highlighting critical insights.
Wrapping Up
In this tutorial, we learned how to format a text box in Excel to enhance your spreadsheet’s readability and design. From adjusting fonts and fills to applying effects and grouping, these tools let you create polished, professional worksheets. Whether for dashboards or simple reports, properly formatted text boxes can make your Excel projects stand out. Feel free to download the practice file and share your feedback.