
When we work with various excel files, Sometimes it often comes with sheet protection enabled either accidentally or intentionally. Locked worksheets prevent editing of formulas, values, or formatting. Even if you cannot open the excel file sometimes. If you have a password-protected sheet or just restricted editing due to read-only settings, there are few reliable ways to unlock it.
To unlock Excel sheet for editing, follow these steps:
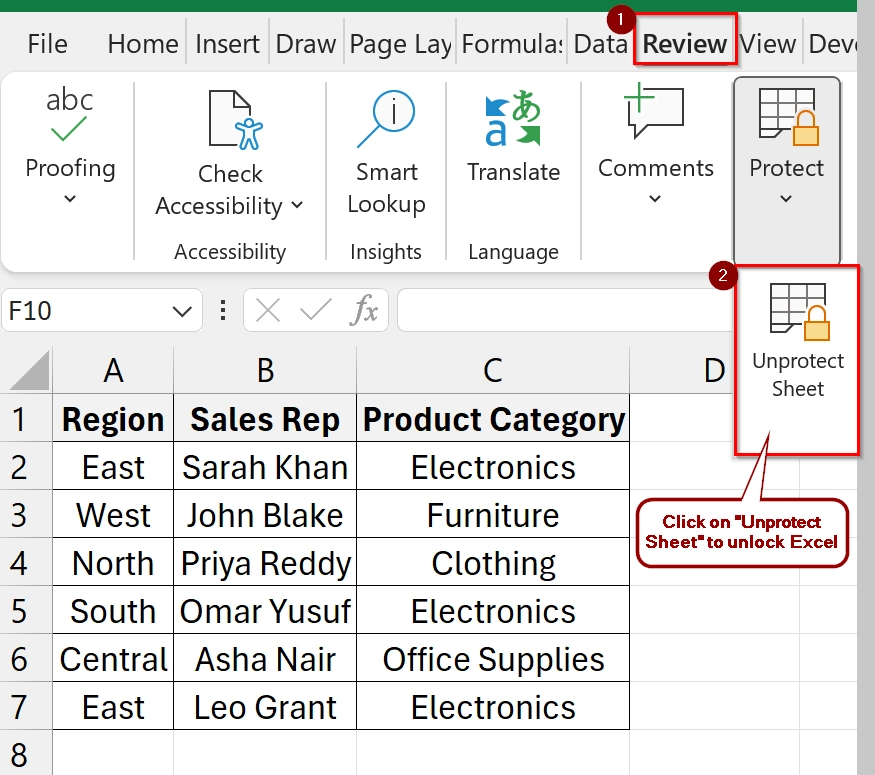
➤ Open the Excel file and navigate to the protected worksheet.
➤ Right-click the Review tab and choose Unprotect Sheet (enter password if required) to unlock the excel file.
In this article, we will go over multiple methods to unlock an Excel sheet using simple in-app features to advanced techniques like modifying the XML file.
Unlock the Excel Sheet for Editing with Password
This method is easy to unlock an Excel sheet if you know the password. It uses the built-in “Unprotect Sheet” feature available under the Review tab. Use this method when a sheet is locked for editing, but you have permission (or know the password) to unprotect it.
Steps:
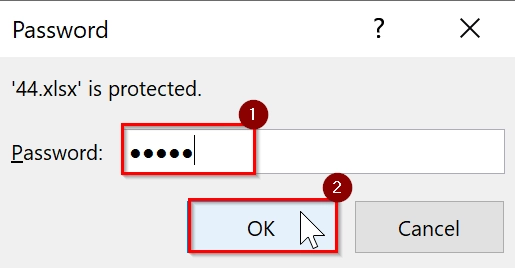
➤ Open the Excel file that is protected by Password. If you know the Password, Open the file by giving the correct password in the Password field. Then Click Ok.
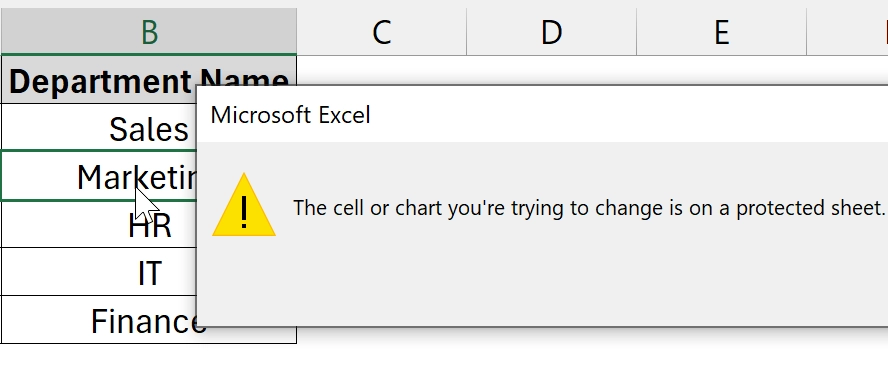
➤ Your worksheet is opend. But your data sheet has already been protected from the Protect Sheet feature, and you still can not modify or edit anything.
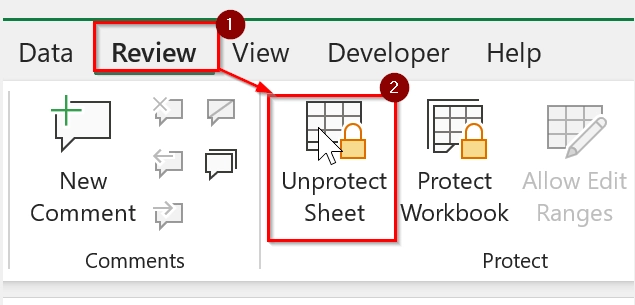
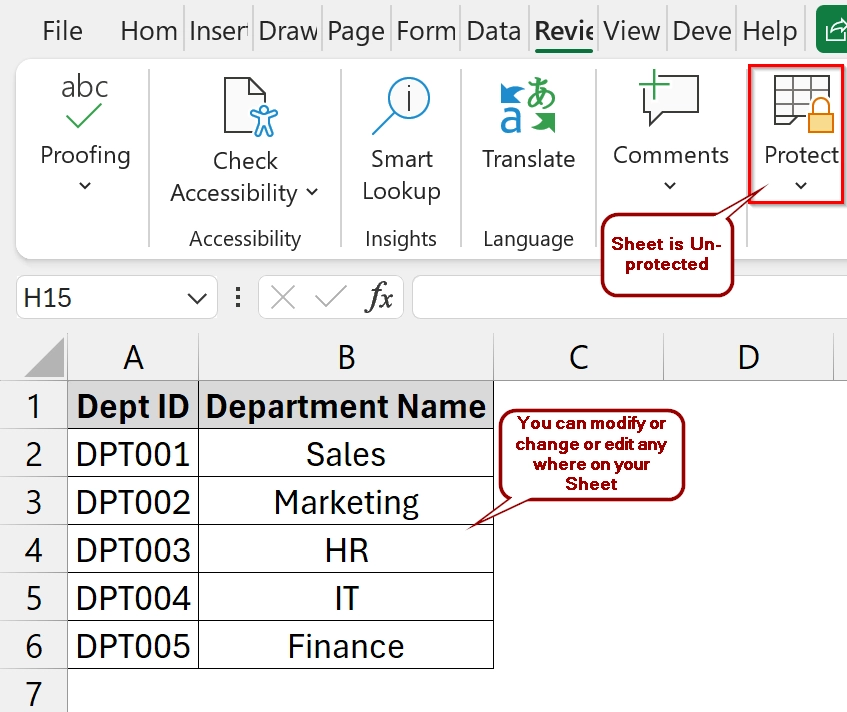
 ➤ Click on the “Review” tab in the top ribbon menu. Then click on “Unprotect Sheet” under the “Changes” group.
➤ The sheet is now unprotected. You can now edit it freely.
Note:
➥ This method won’t work if you don’t know the password.
➥ The Unprotect Sheet button won’t appear if the sheet is already unprotected.
➥ You need to unlock each sheet individually if the workbook has multiple protected sheets.
Unlocking Excel Sheet Using the XML Editing without Password
This method helps you to unlock a protected Excel worksheet if you don’t know the password by modifying the files internal XML structure. It is useful when you have forgotten the sheet protection password.
Steps:
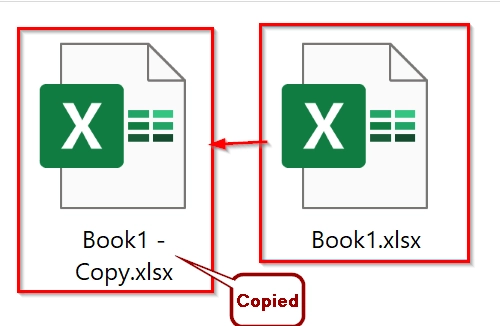
➤ Make a backup of the Excel file you want to unlock. To do that, Right-click the File → Select “Copy” → Paste it in the same folder or in a different location.
➤ Select the newly copied file → Click on the “View” tab → Check the box labeled with “File name extensions”.
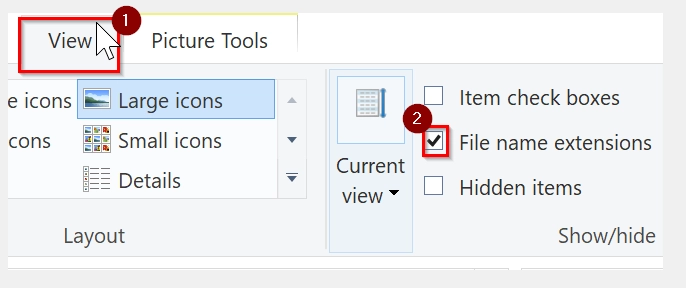
➤ Select the copied file and press F2. Then rename the extension name from “.xlsx” to “.zip” and press Enter. Now your excel file with “.xlsx” will turn into a zip file with the extension “.zip”.

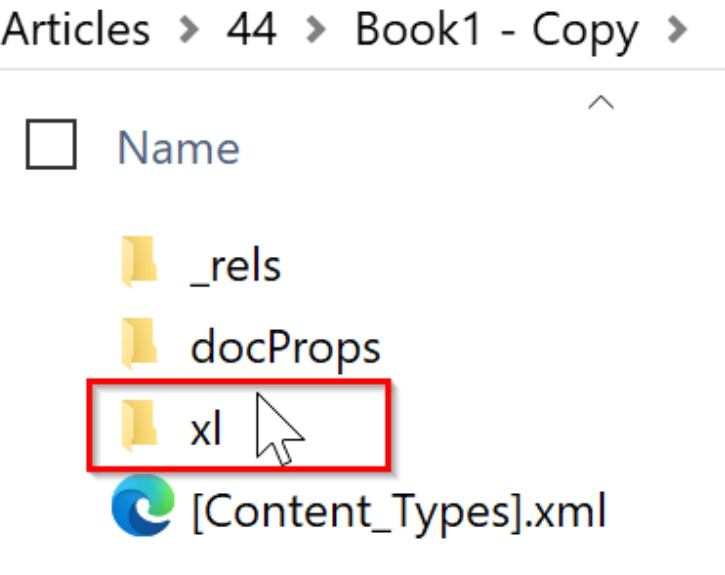
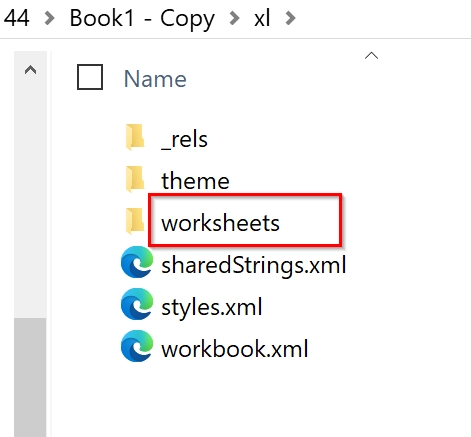
➤ Double-click the newly created “.zip” file to open it. Then click on the “xl” folder to open it
➤ Now select the “worksheets” folder and open it.
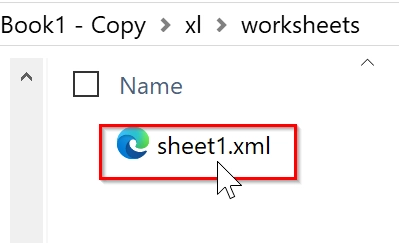
➤ After opening you will see an xml file. Double-click on the “.xml” file to open it (eg. sheet1.xml) using your default browser (in my case it is Microsoft Edge). If you cannot open it with your default browser, you can try opening it using your Notepad app.
➤ You will see a lot of code. Press Ctrl + F and search for the word “sheetProtection”
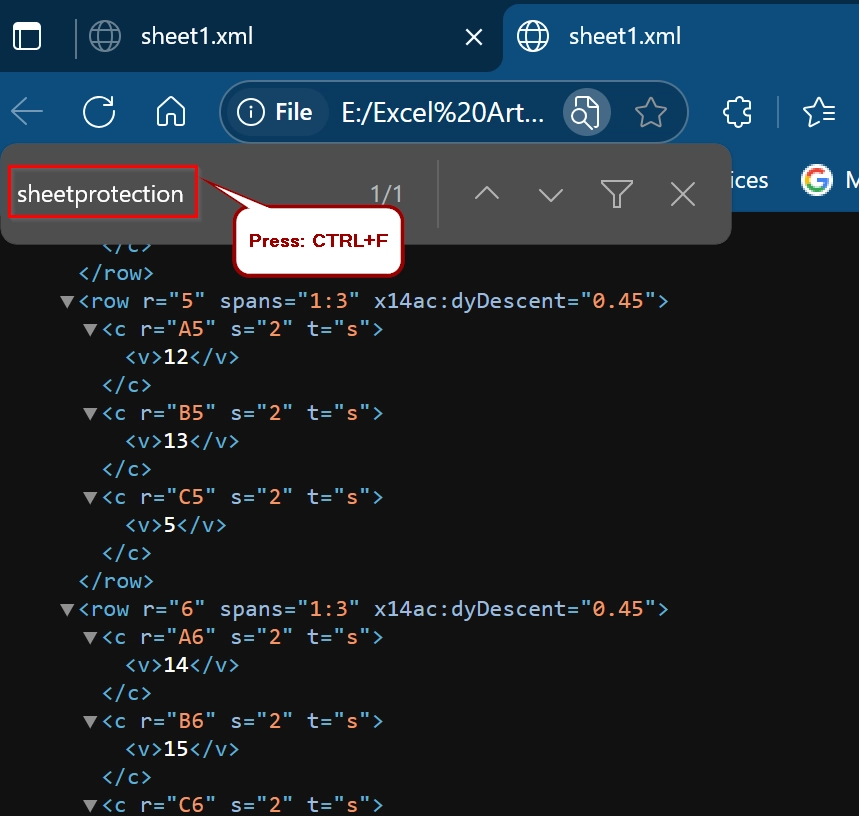
➤ You will find out the word “sheetProtection”.
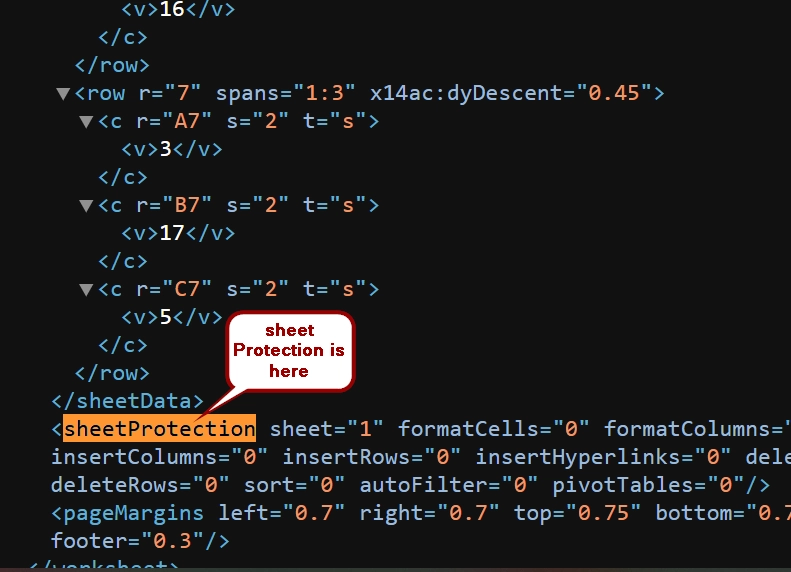
➤ Delete the entire tag that starts with “sheetProtection” and save the file. In my case I have removed the following code-
<sheetProtection sheet="1" formatCells="0" formatColumns="0" formatRows="0" insertColumns="0" insertRows="0" insertHyperlinks="0" deleteColumns="0" deleteRows="0" sort="0" autoFilter="0" pivotTables="0"/>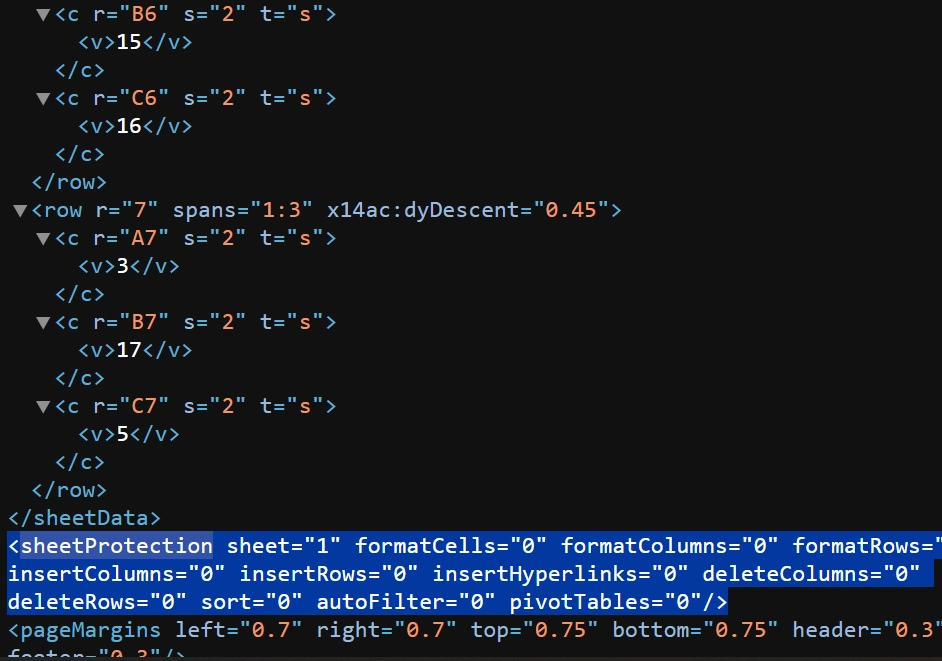
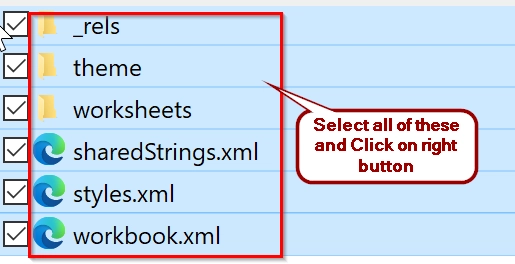
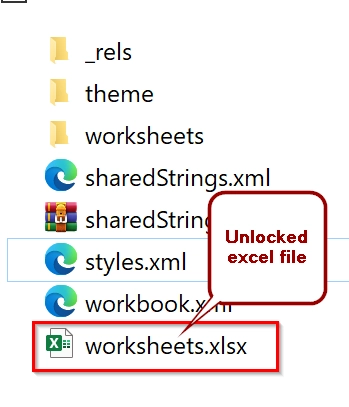
➤ Now, select all of these .xml files and right click on the mouse.
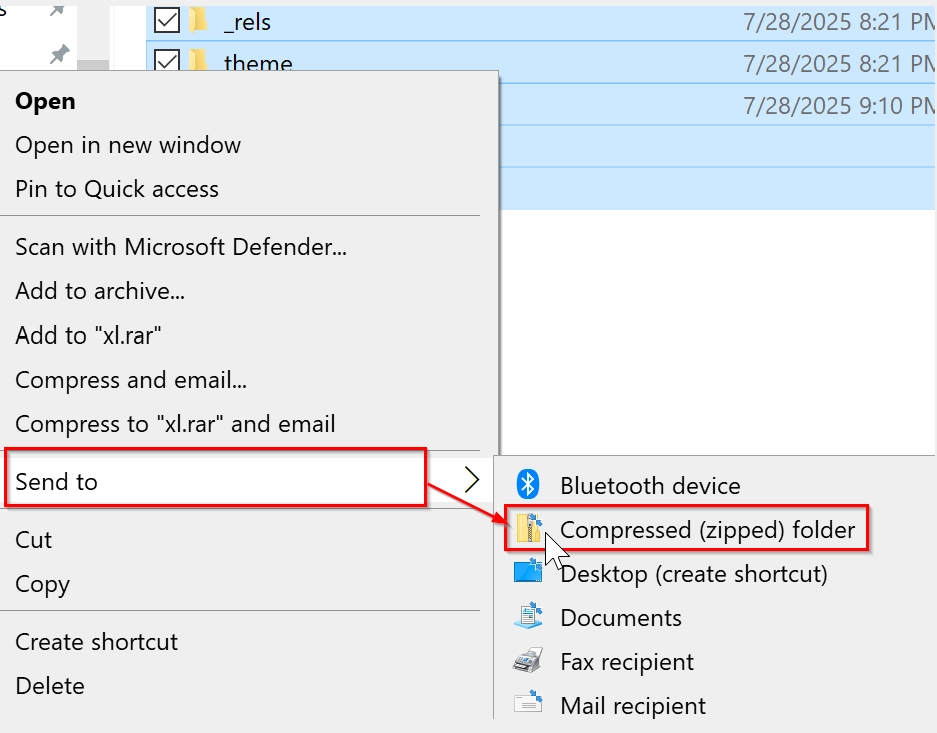
➤ Then click on Send to→ { Compressed(zipped) folder}.
➤ Right-click the .zip file → Rename it to .xlsx again (e.g., sharedString.xlsx).
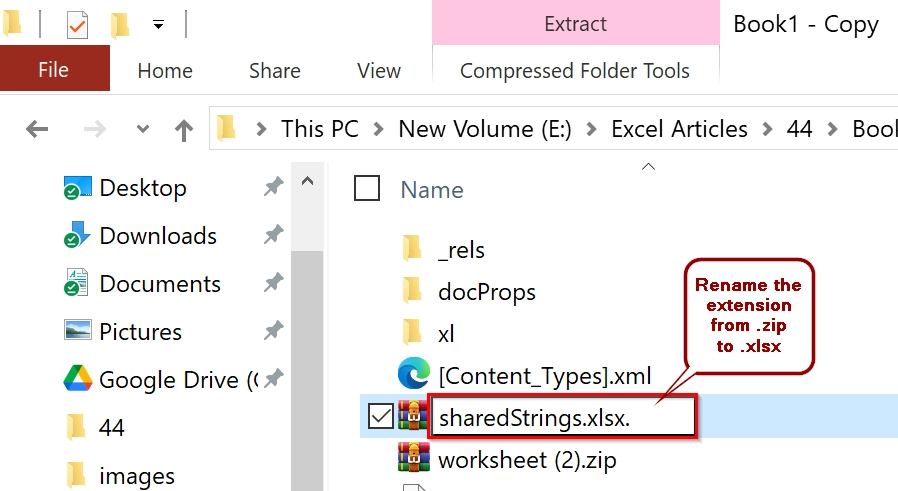
➤ After renaming back to “.xlsx” you see your excel file again but unlocked. You should now be able to edit previously protected worksheets without being asked for a password.
Note:
➥This method does not retrieve the password. It simply removes protection from the worksheet XML.
➥Only works with .xlsx or similar formats, not .xls (older Excel binary files).
➥Be cautious while editing XML. Deleting the wrong code may corrupt your file.
Frequently Asked Questions
How do I enable Excel for editing?
Go to the File tab → click Enable Editing if prompted in the yellow banner. If the file is in Protected View, this will allow editing.
How do I remove editing permissions in Excel?
To remove restrictions, go to Review → Unprotect Sheet (enter password if needed). You can also check under File > Info > Protect Workbook for document-level protection.
Why is my Excel not allowing me to edit?
The file may be in read-only mode, Protected View, or the sheet may be password-protected. Ensure the sheet is unlocked and that the workbook is not restricted.
How to lock and enable editing in Excel?
If you want to allow editing, simply uncheck protection via the Review tab. If you want to lock editing, apply sheet protection under Review > Protect Sheet.
How to edit Excel if locked?
Try unlocking using known passwords via Review > Unprotect Sheet. If the password is unknown, consider uploading the file to Google Sheets (which sometimes removes protection), or editing the file’s XML structure after converting it to .zip.
Concluding Words
Unlocking an Excel sheet can be easy or advanced depending on the protection method it has. In the article, we showed two methods. If you have the password or not, one of these approaches should help you to regain editing access.