If you want to create a compact header, design custom labels, or simply organize information for better readability, rotating text in Google Sheets is quick and simple. This article will help you with some easy methods to rotate text horizontally, vertically, or at any angle using built-in tools and formatting options in Google Sheets.
Rotating text is specially useful for formatting tight spaces, improving visual appearance, and making your spreadsheets more readable and organized.
Steps to Rotate Texts in Google Sheets:
➤ Select the cell containing text to be rotated.
➤ Use the Text Rotation button in the Toolbar and choose any preset rotation options, such as Tilt up, Rotate up, or Stack vertically.
➤ You can follow Format > Text Rotation from the menu bar.
➤ Use Custom angle for precise rotation.
➤ Insert a Drawing as a Text Box to rotate texts freely.
➤ Use a formula to stack characters vertically.
➤ Automate text rotation with Google Apps Script for repetitive formatting.
Rotate Text Using the Toolbar Option
This is the easiest and quickest way to rotate text in Google Sheets. Just use the Toolbar’s Rotation Icon.
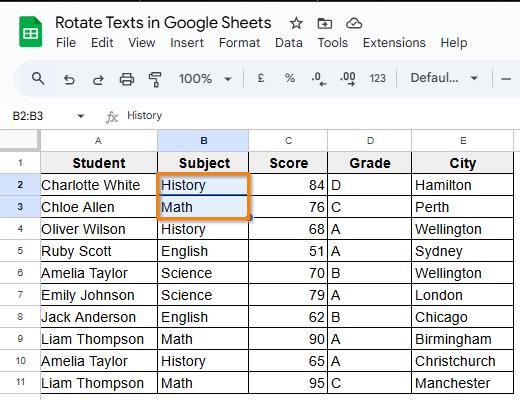
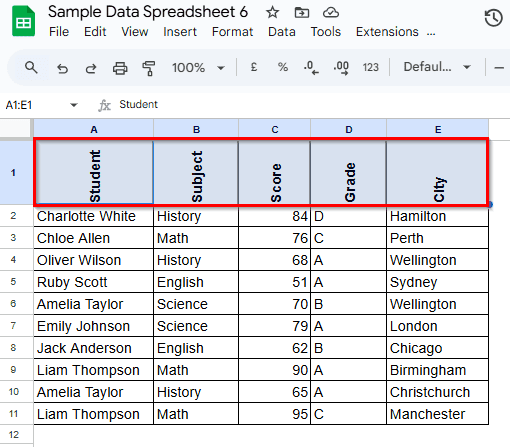
Here’s a sample dataset regarding students’ grades in different subjects. You can rotate any desired text to present the sheet more cleanly and compactly. For that, we’ll simply use the Rotate Text built-in tool from the Toolbar to rotate texts as needed.
Steps:
➤ Select the cells B2 & B3.
➤ Click the Text Rotation button on the toolbar.
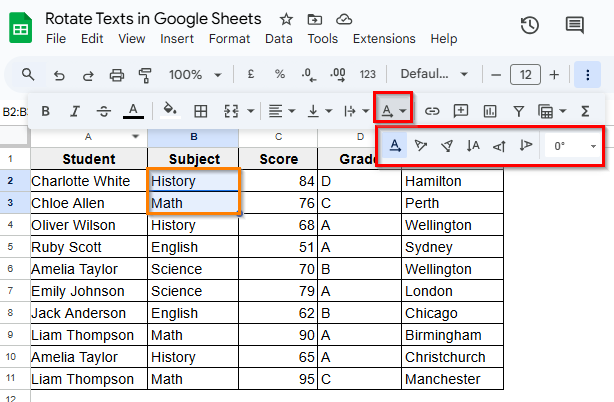
➤ Choose from the following options:
- None – Horizontal text by default.
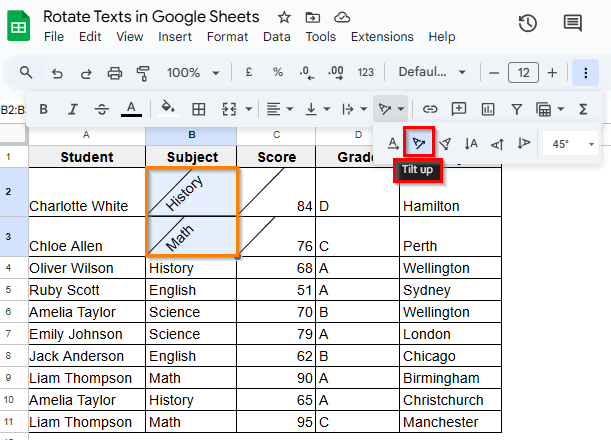
- Tilt Up – Text leaning upward.
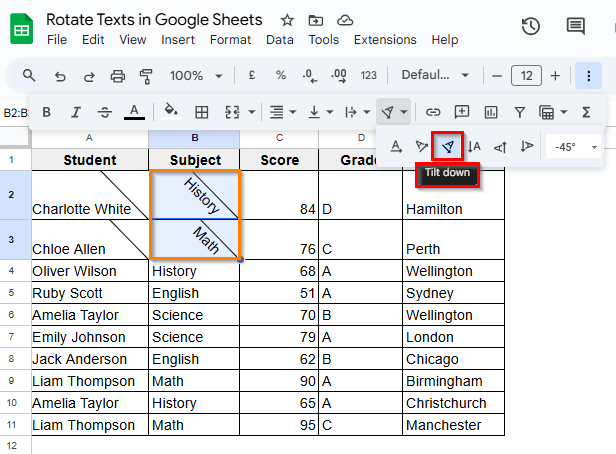
- Tilt Down – Text leaning downward.
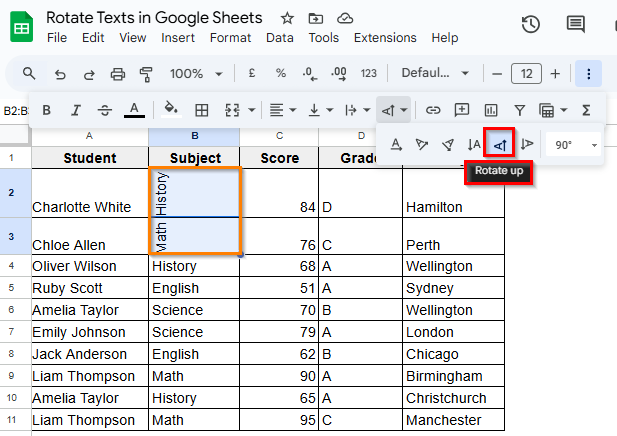
- Rotate Up – Rotates 90° counterclockwise.
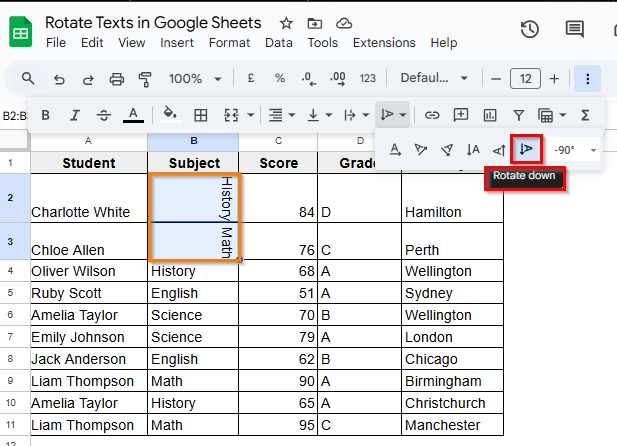
- Rotate Down – Rotates 90° clockwise.
- Stack Vertically – Stacks one letter per line.
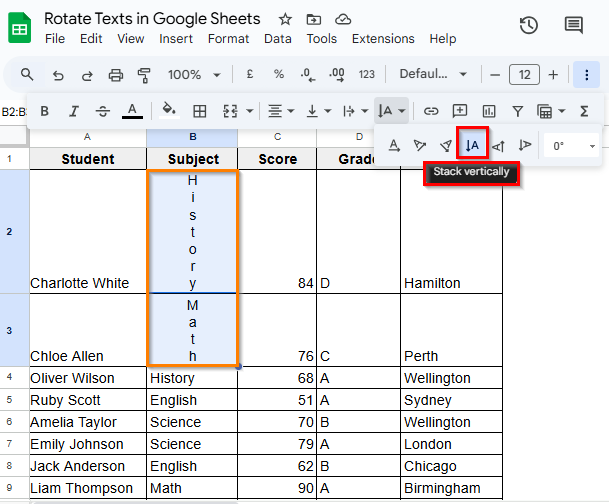
- Custom Angle – Enter any specific rotation angle.
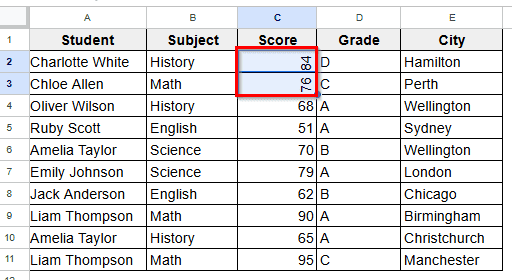
➤ After selecting Rotate Up, the result will appear as such:

Rotate Text with a Custom Angle
In Google Sheets, Custom Angle in text rotation is mostly used to improve limited space or present more clearly in the form of grade sheets or report tables.
A common case is rotating headers or numbers/grades vertically or diagonally. It allows fitting of texts within narrow columns. Just choose any of the rotation styles from the pre-existing options in the Format menu.
Steps:
➤ Select the cells.
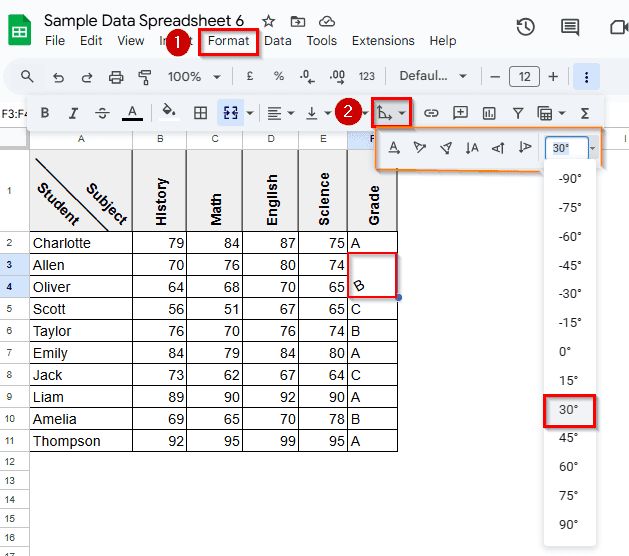
➤ Go to Format > Text Rotation.
➤ Now select Custom angle to customize the degree of rotation according to your needs.
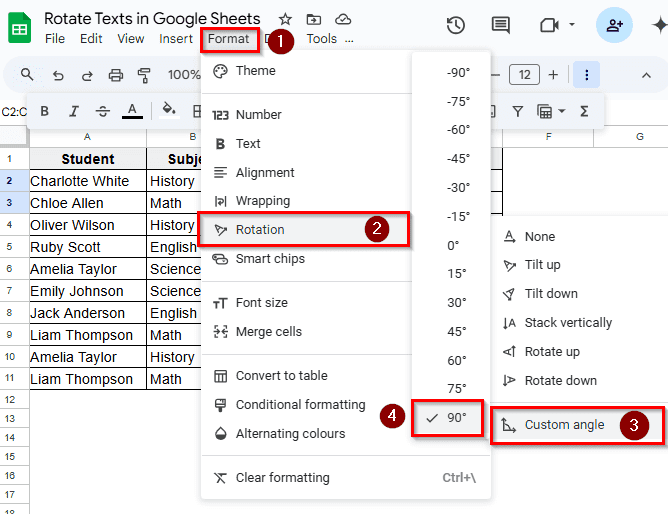
➤ The text will appear rotated as 90° counterclockwise as here we have selected 90° from the Custom angle options
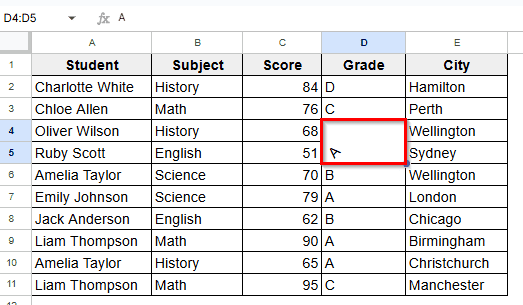
Rotate Texts in Merged Cells
Merged cells are often used in headers or grouped data. You can rotate text here, too.
Steps:
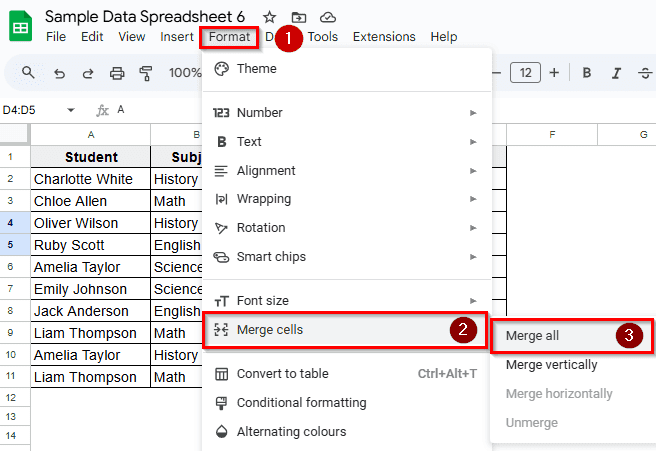
➤ Select your desired cells D4 and D5.

➤ Merge the cells using Format > Merge cells > Merge all.
➤ After selecting the merged cells, use the Text Rotation button or the Format menu to apply rotation according to your choice.
➤ The tilted text will show in a merged cell of D4 and D5.
Rotating Using the Drawing Tool
You can use the Drawing tool for more visual freedom. You can achieve precise angled positioning as a freely rotatable text that appears as an image.
Steps:
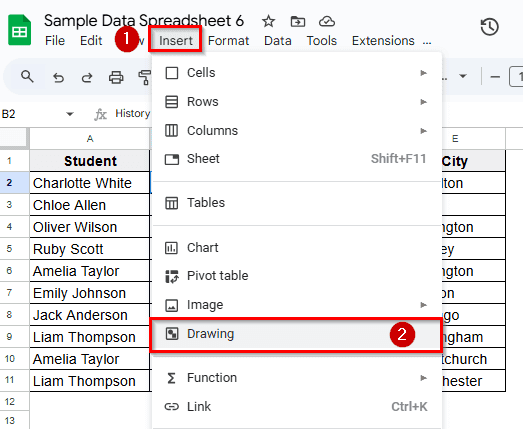
➤ Selecting your desired cell B2, go to Insert > Drawing.
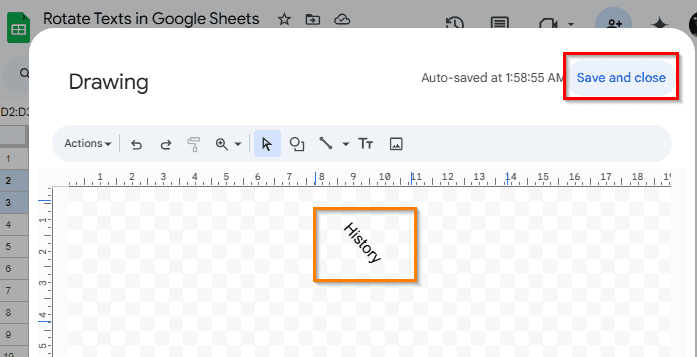
➤ Click the Text Box icon and draw a text box.
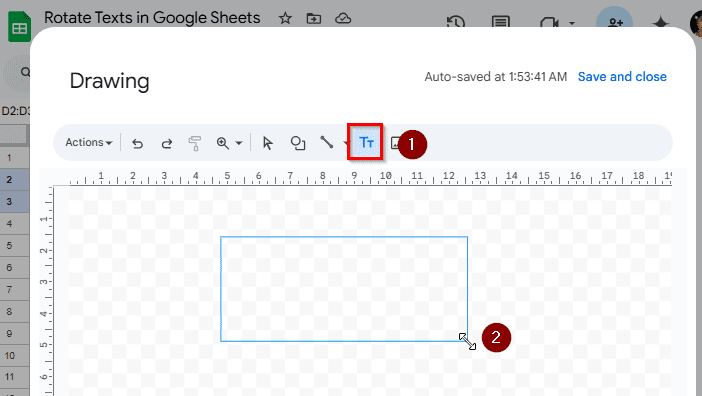
➤ Enter your text and format it as needed.
➤ Use the Rotation Handle above the text box to rotate freely.
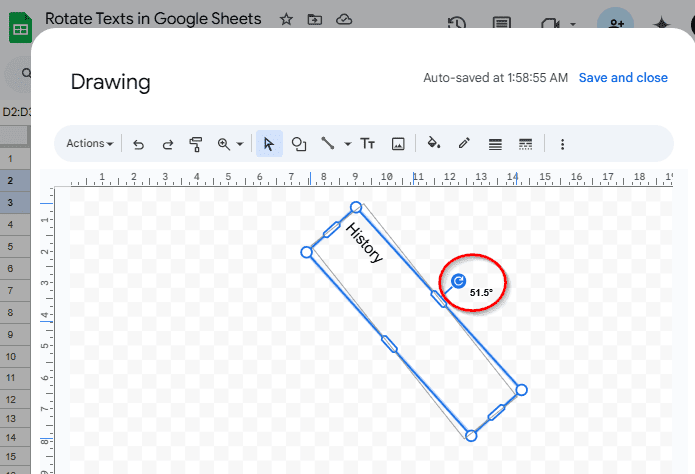
➤ Click Save and Close to add it to the Sheet.
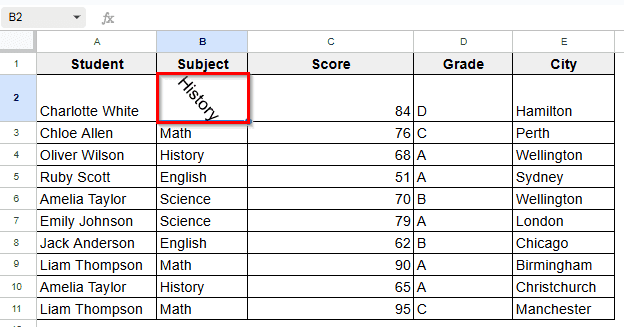
➤ Text in B2 will appear rotated per your drawing.
Note:
This method inserts the rotated text as an image object and can’t be edited like standard cell content.
Rotate Header Text Using Google Apps Script
If you are creating dynamic sheets from a form or template, you don’t have to rotate text manually every time. A simple script can do it for you, like auto-rotating the headers, and it is easier with Google Apps Script.
Steps:
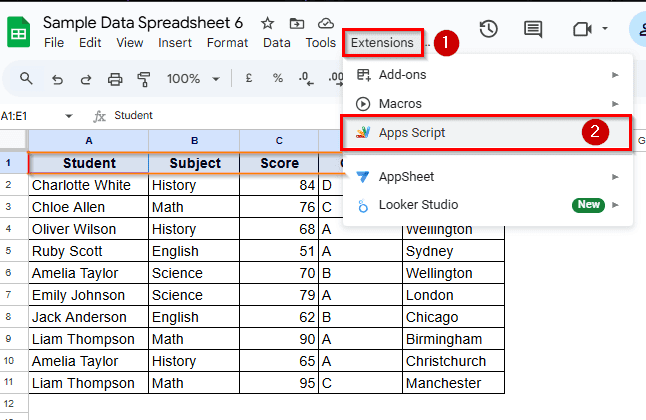
➤ After selecting the header row from A1 to E1, go to Extensions > Apps Script.
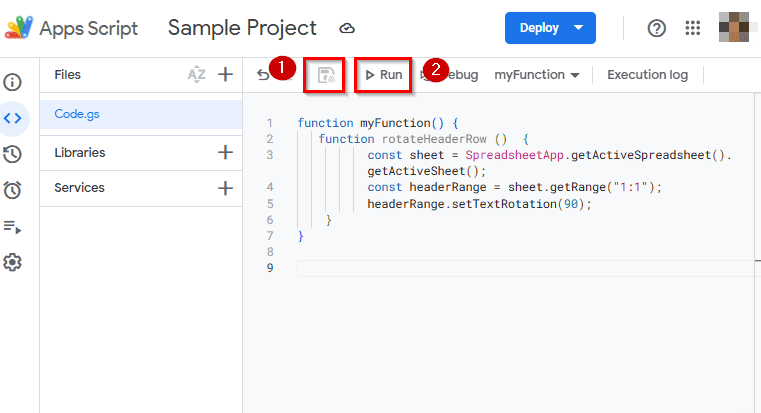
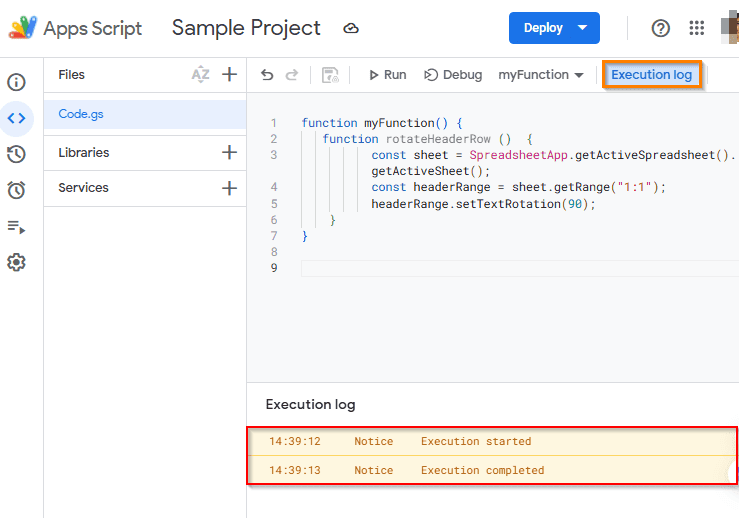
➤ Paste the following code:
function rotateHeaderRow()  {
const sheet = SpreadsheetApp.getActiveSpreadsheet().getActiveSheet();
const headerRange = sheet.getRange(“1:1”);
headerRange.setTextRotation(90);
}
➤ Save and click the Run Button.
Note:
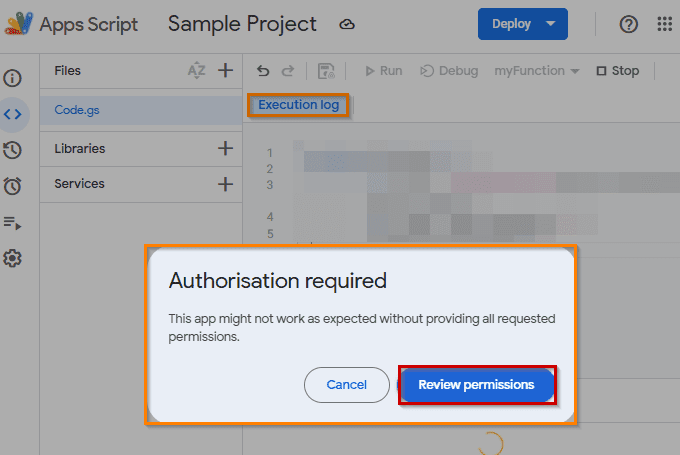
This requires authorization to run the script.
➤ Click Review Permission.
➤ An execution log will appear below the code.
➤ The texts will appear vertically aligned.
Rotate Text Using a Formula to Subdivide a Cell
Sometimes you might need to display multiple pieces of information in a single cell as multi-level headers. Instead of merging two rows, a formula has to be used to stack “Students” and “Subjects” in a single cell using line breaks and spacing characters.
Steps:
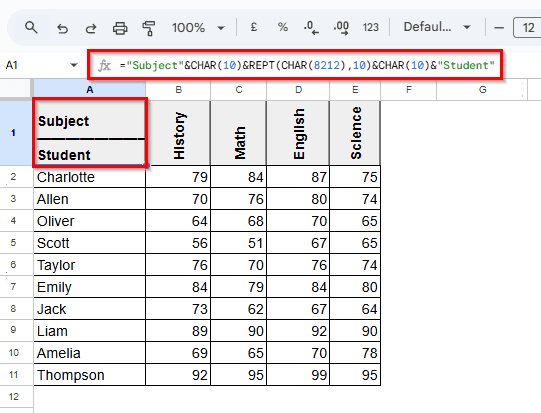
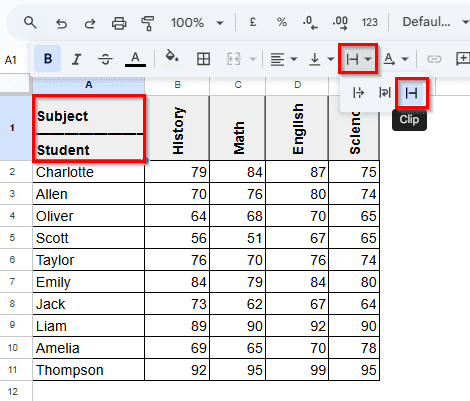
➤ Select A1 where two headers are needed, as Student & Subject.
➤ To format the cell, write this formula:
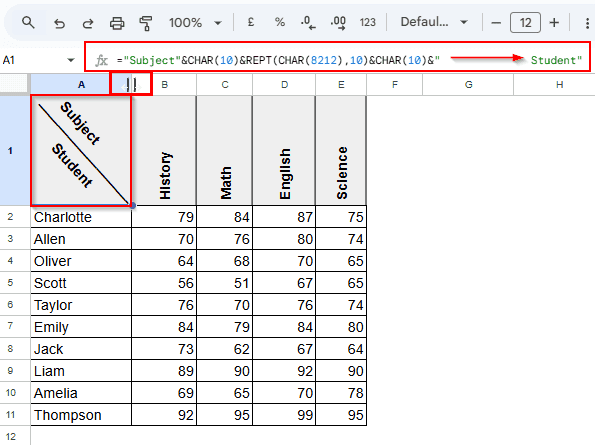
=”Students”&CHAR(10)&REPT(CHAR(8212),10) &CHAR(10) &”Subjects”
Note:
CHAR(10) and CHAR(8212) insert line breaks and work as a visual divider. Again, REPT function repeats a dash to create spacing between the two labels.
➤ Press Enter, and the result will show in a subdivided style. Then follow Text Wrapping > Clip to avoid misalignment.
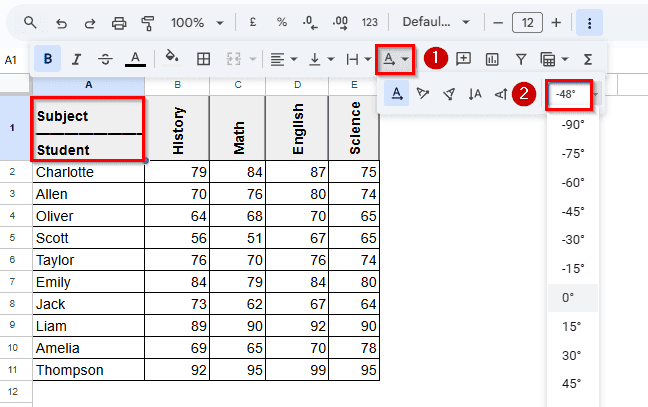
➤ Now customize the angle to -48⁰ (as needed) for better fitting of the texts.
➤ Now add space into the formula to adjust the cell content, and then adjust the row height and header column manually as needed.
Note:
This is just a visual trick to adjust texts as a proper subdivision.
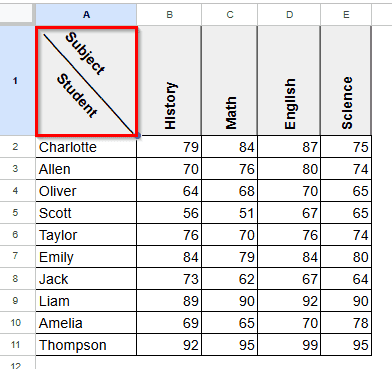
➤ The result will appear as a subdivision of cell A1.
Note:
As Google Sheets doesn’t support diagonal cell borders, visual adjustment is an easy way out.
Frequently Asked Questions
Will text rotation interfere with sorting or formulas?
No, it won’t. Rotating text is only a formatting change. It doesn’t have any impact on formulas, sorting, or filtering.
Why does rotated text get clipped or misaligned?
When you rotate text upward, long headers may get clipped if the row height is too small. Wrapping the text from the menu bar or rotating downward prevents this clipping. The best solution is to adjust row height and column width accordingly.
Can conditional formatting automatically rotate text?
No, Google Sheets doesn’t support rotating text through conditional formatting rules. It must be applied manually or using a script.
Can images or charts be rotated similarly?
No, images and charts can not be rotated via these methods. You need to edit the images using external tools before you import them into the sheet.
What’s the best practice to align rotated text?
The best practice is to adjust the row height and column width after rotating the text, and vertical or middle alignment to center the text. Combine rotation with cell borders or background color for a clean look.
Wrapping Up
Rotating text in Google Sheets offers flexibility and helps make your spreadsheets cleaner and easier to read. You’ll mostly need it while aligning headers, customizing labels, or making the best use of space. Google Sheets provides multiple ways to rotate texts, from the toolbar to scripts and formulas. Now you can improve your data layout’s function and look with just a few clicks. Feel free to try these out and share your feedback with us.