Adding a drop-down list in Google Sheets is a simple way to make your spreadsheet easier to use. It helps keep data clean and consistent by letting users choose from a list of preset options instead of typing manually. This reduces errors and saves time, especially when working with large tables or shared files. Whether you’re sorting categories, tracking progress, or managing tasks, dropdowns help keep everything organized.
In this article, we will provide clear, step-by-step instructions for adding drop-down lists to your sheet.
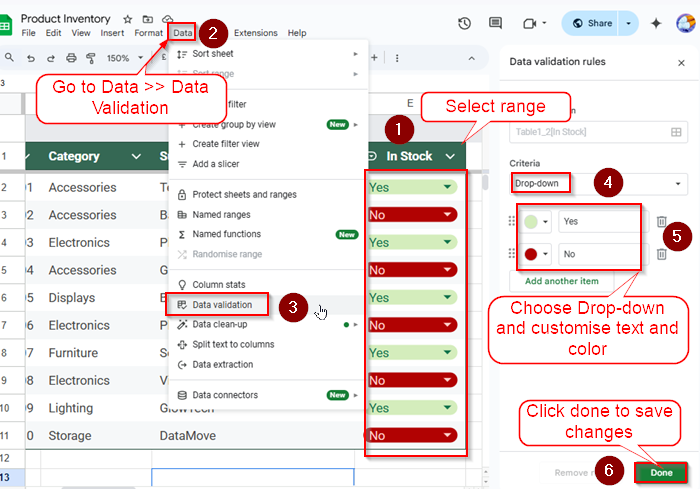
Steps to Create Drop-Down List Using Data Validation (Manual Entry):
➤ Select the cell range where you want the list.
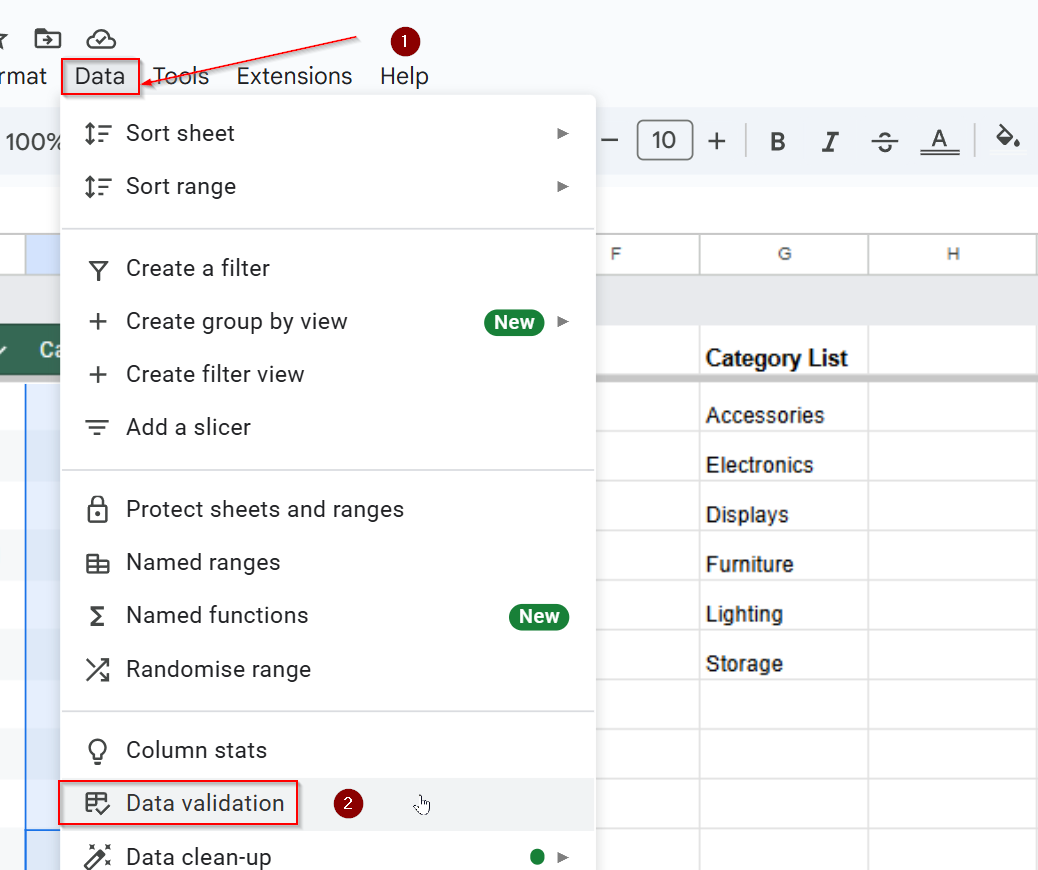
➤ Go to Data >> Data validation.
➤ Choose “Dropdown” as the criteria and manually enter the items.
➤ Click Done to save.
What is a Drop-Down List in Google Sheets?
A drop-down list in Google Sheets lets you choose from a set of options in a cell. Instead of typing each time, you can just click and pick an answer. This helps keep your data clean and avoids spelling mistakes. Drop-downs are great for things like product lists, categories, or tracking progress. They make your spreadsheet easier to use and more organized.
Create a Drop-Down List Using Manual Entry in Google Sheets
The quickest way to create a drop down list in Google Sheets is by manually entering the items yourself. This method is ideal when you have a short list of fixed options and don’t need to update them often.
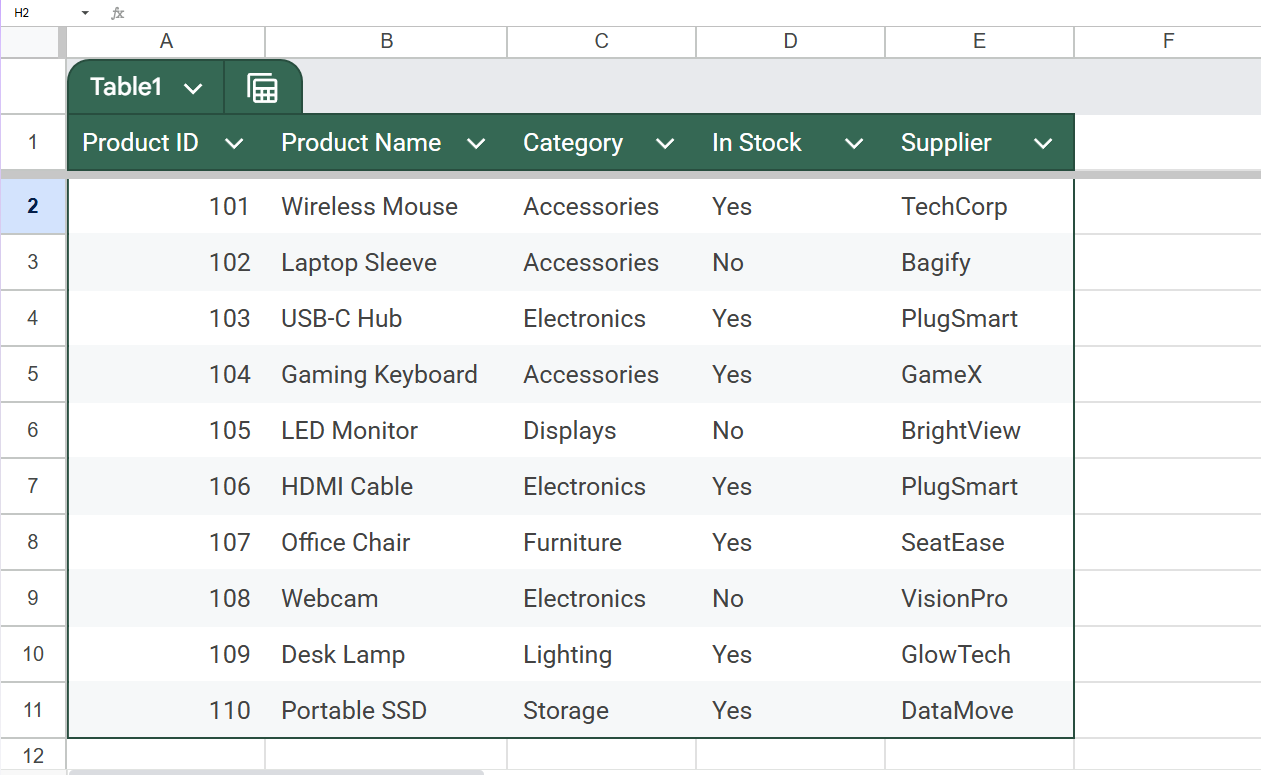
In this example, we’ll use a product inventory dataset to add a drop-down to the In Stock column so users can select either Yes or No to indicate product availability. Follow the steps below to insert a drop-down list directly into your cells using manual input.
Steps:
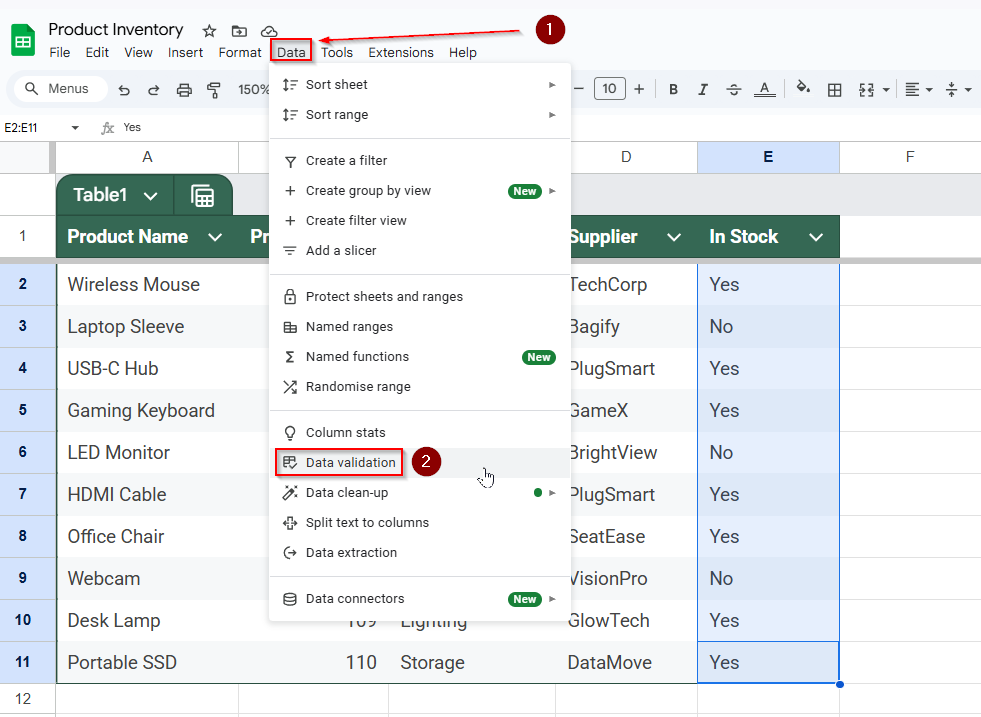
➤ Select the cells where you want the drop-down list to appear (e.g., Column E: In Stock).
➤ Go to Data >> Data validation from the top menu.
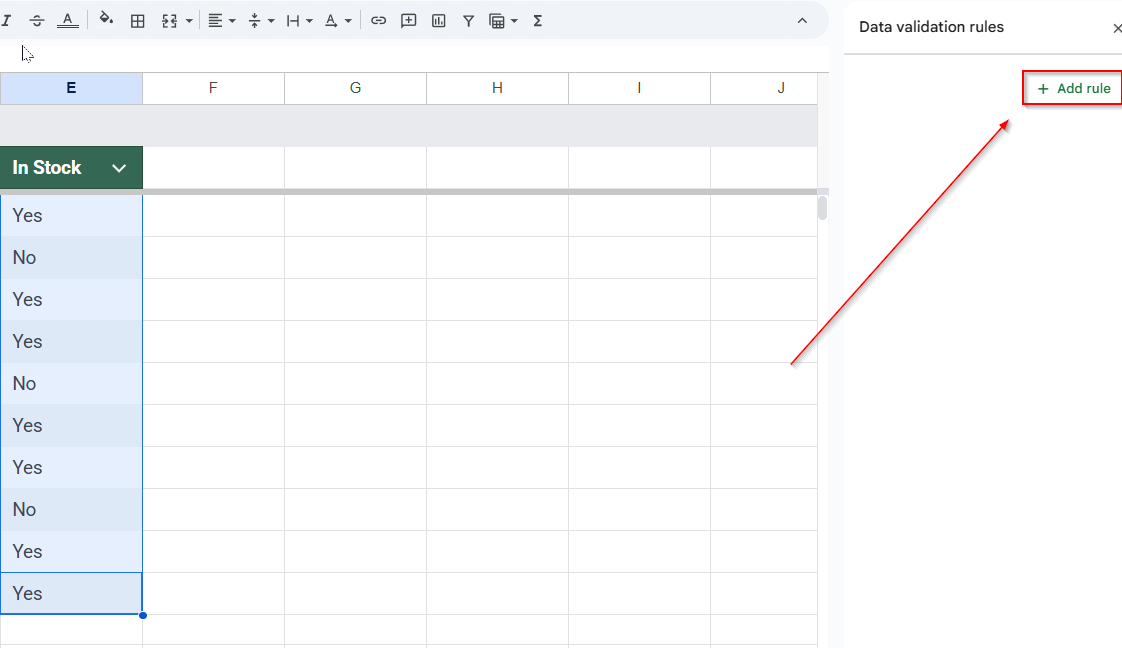
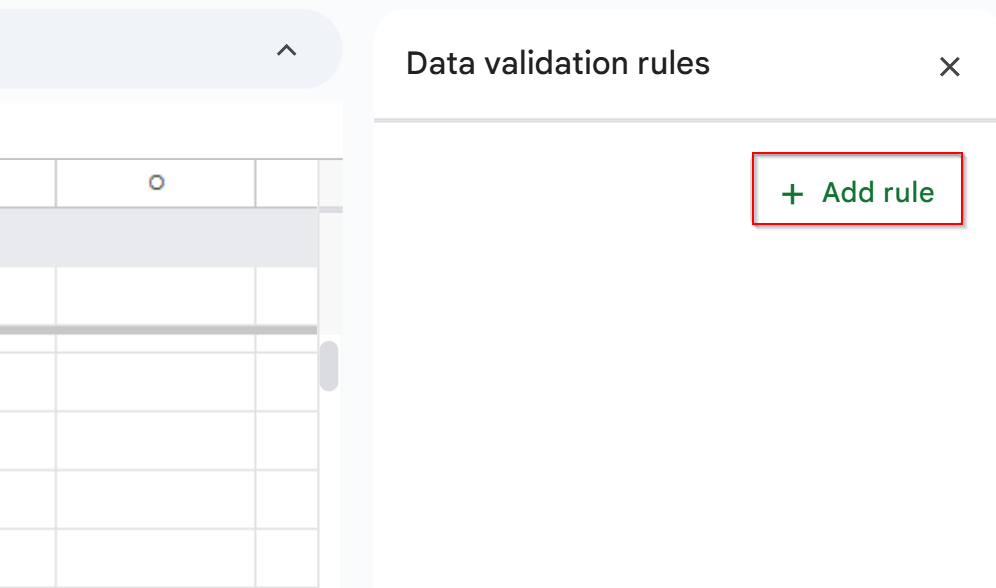
➤ Click on Add rule on the right side of your screen
➤ Under the Criteria section, choose Dropdown.
➤ Enter the values manually, such as Yes or No. AccessDisplays, Furniture, Lig
➤ Click Done to apply changes.
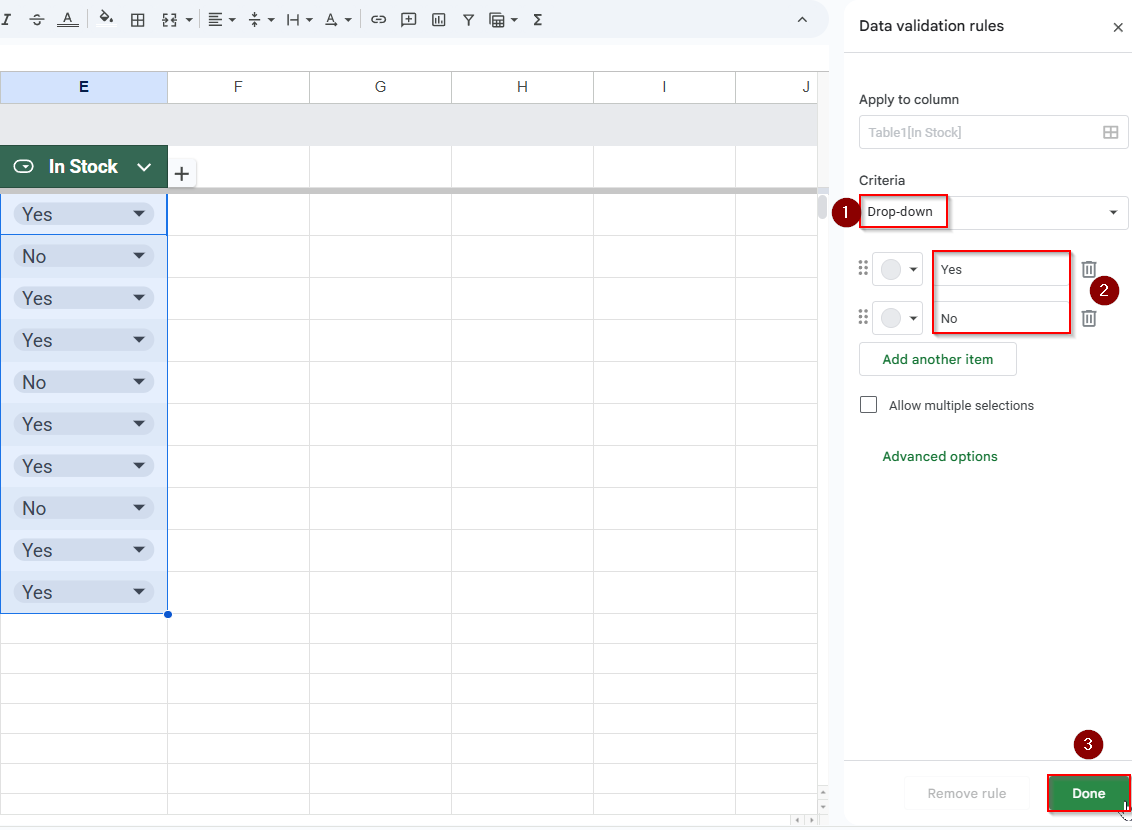
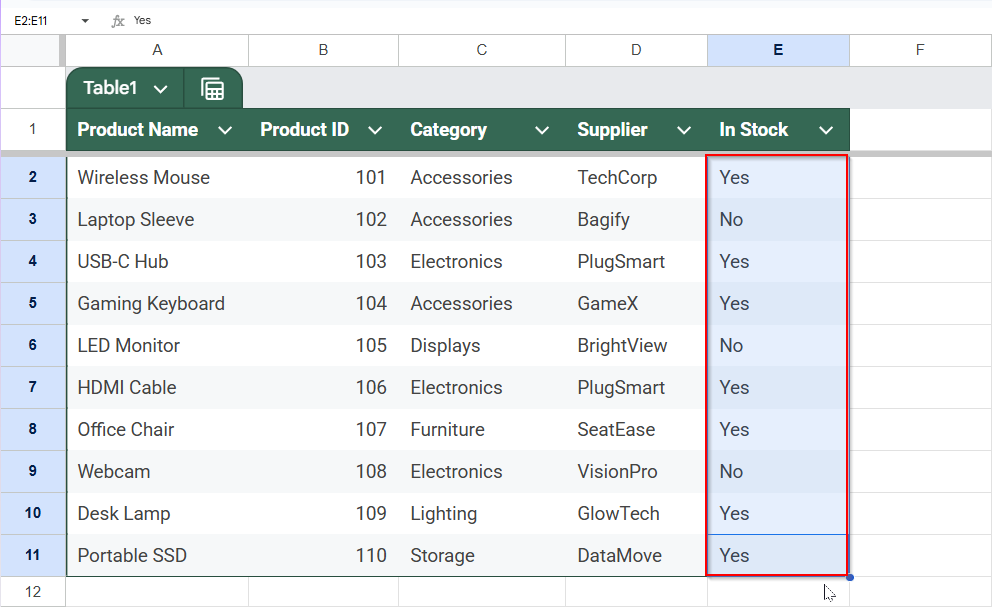
Now the selected cells have a clickable drop-down arrow with your custom entries.
Generate a Drop-Down List from a Selected Cell Range in Google Sheets
If your list of values already exists somewhere in your sheet or if you expect it to change over time, you can use a cell range as the source for your drop-down menu. This method makes updating easier since you can manage your options from a single location without repeatedly editing the drop-down menu setup.
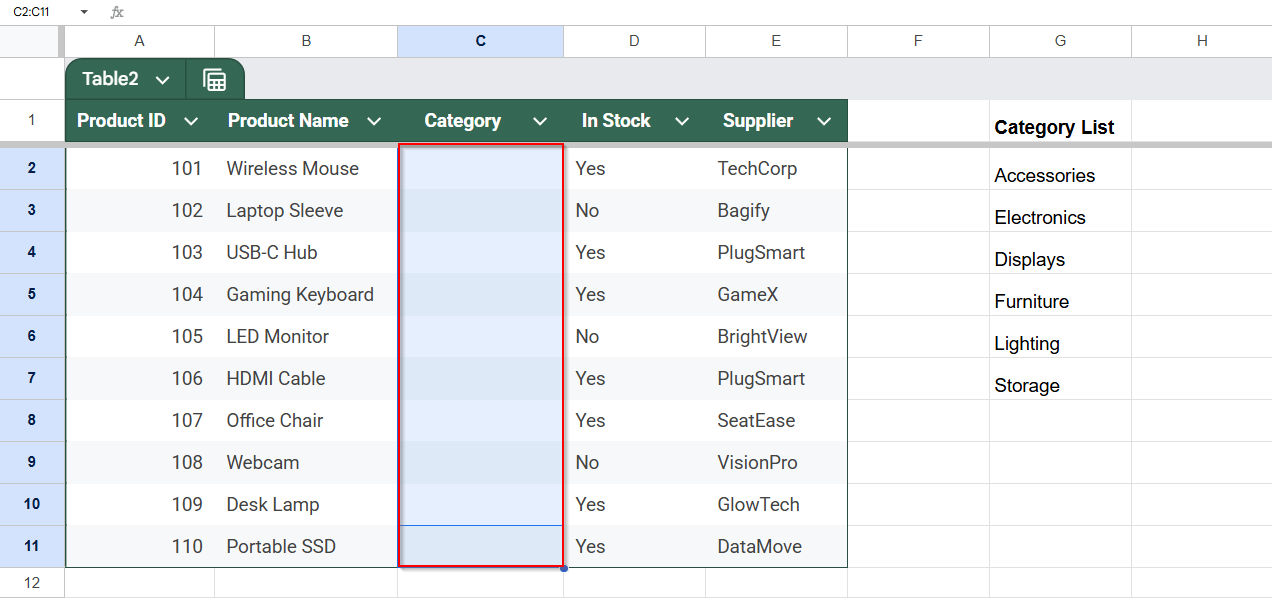
In this example, we’ll use the Category List column on the right to create drop-downs in the Category column of our product dataset. Here’s how to set it up.
Steps:
➤ Create a reference list of categories in another column or sheet (e.g., Column G)
➤ Select your target cell range (e.g., C2:C11).
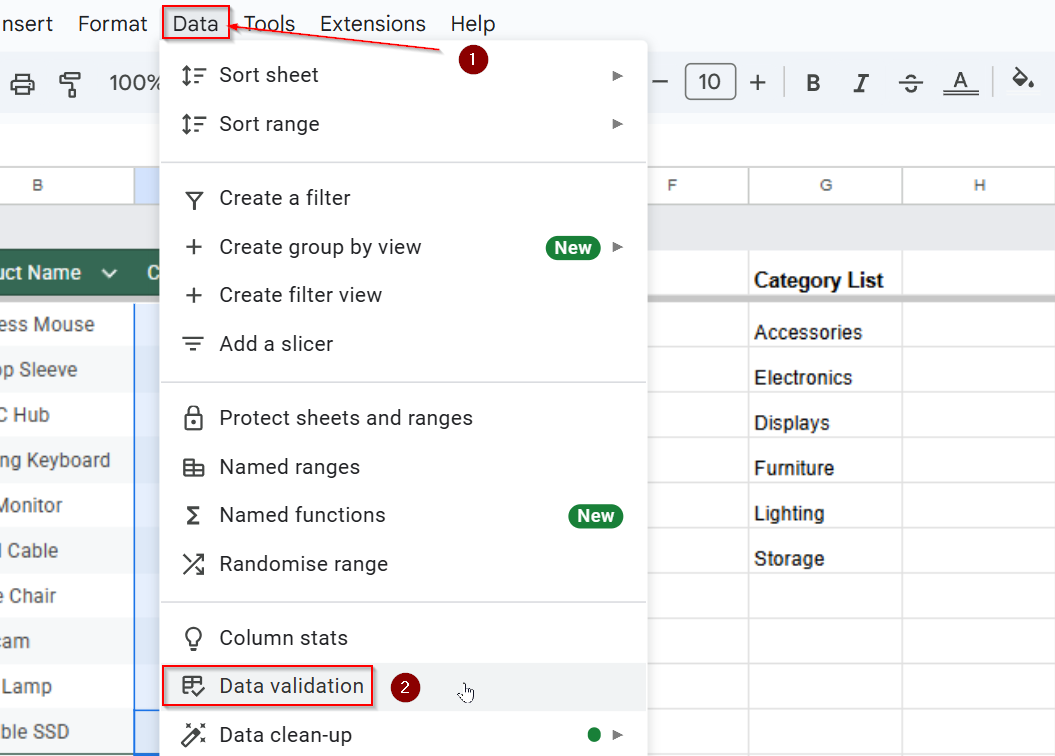
➤ Go to Data >> Data validation.
➤ Click on Add Rule at the right side of your screen.
➤ Under Criteria, choose Dropdown (from a range) and click on the Data Range icon.
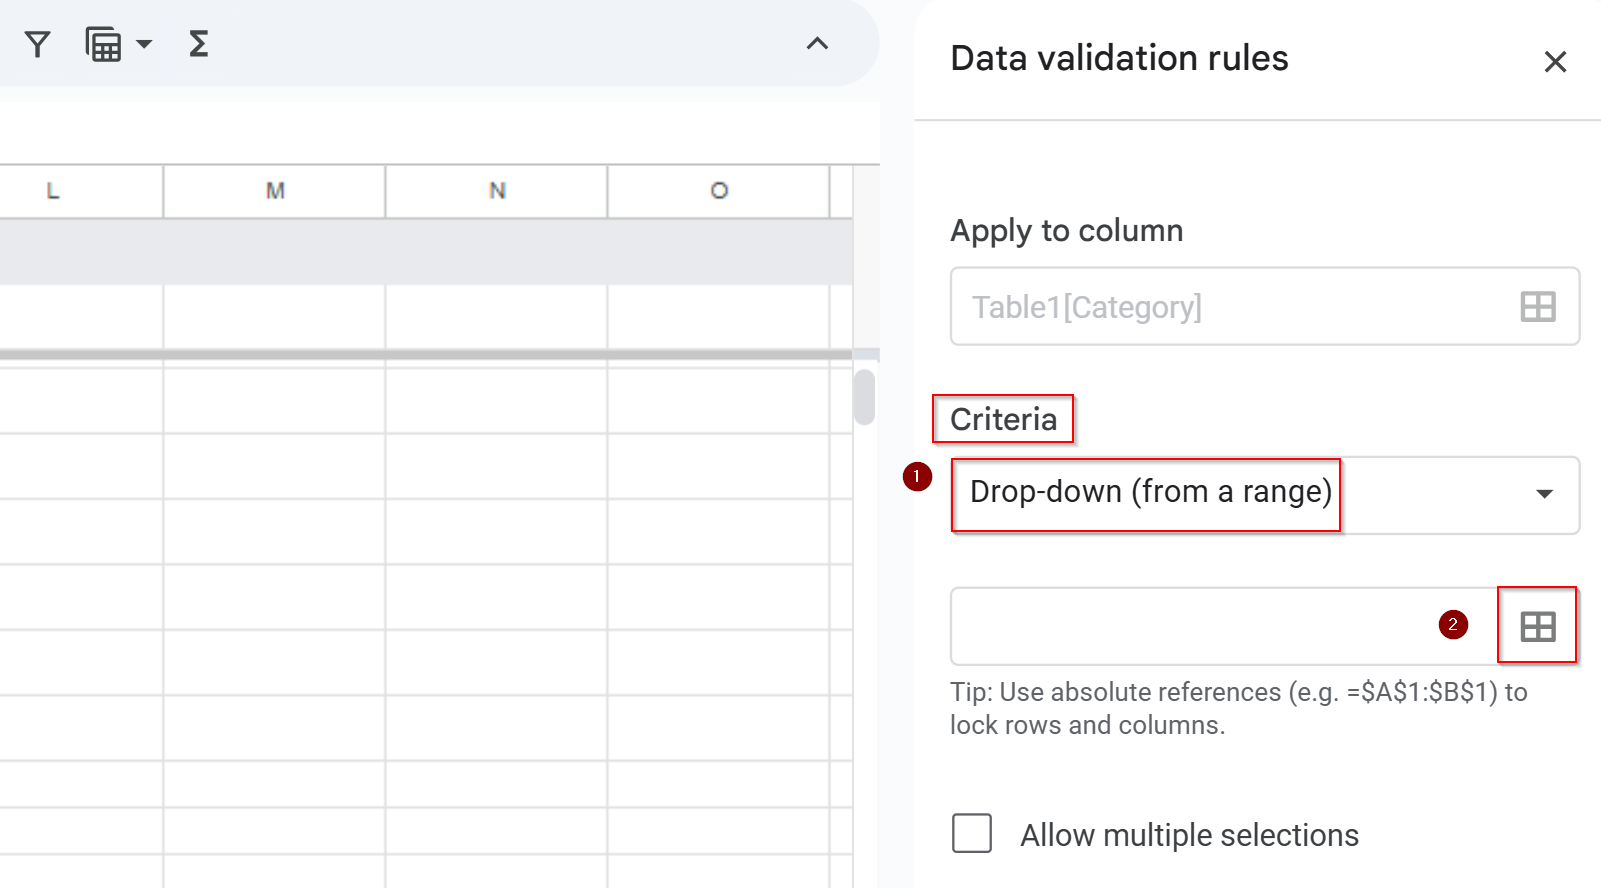
➤Highlight the reference range G2:G7 and click OK.
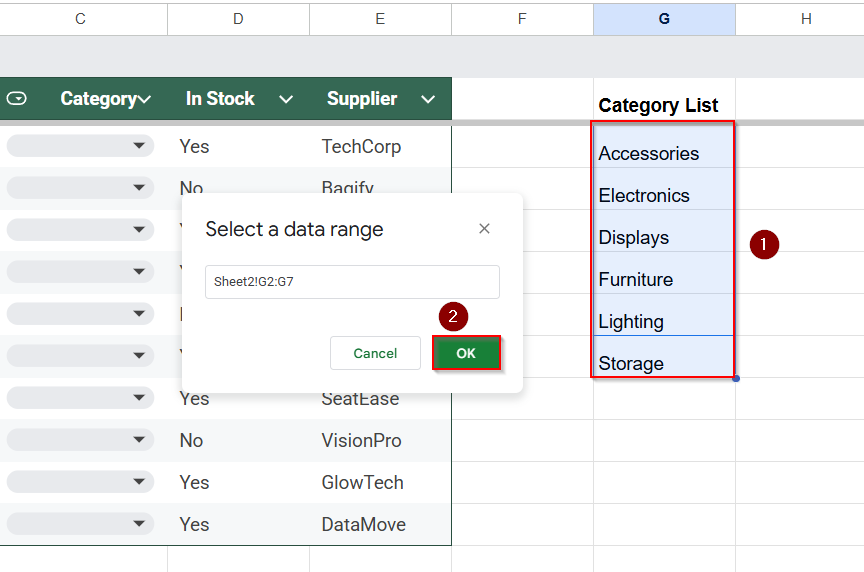
➤ Click on Done and then check the final results.

The drop down list is now linked to your reference range. Updating the reference list will update the dropdown as well.
Using Named Ranges to Create a Drop-Down List in Google Sheets
If you’re working with data that may change or need to be reused in different parts of your spreadsheet, using named ranges for drop-down lists is a smart option. Named ranges give you a flexible and readable way to reference your list items, and they make your sheet easier to manage as it grows.
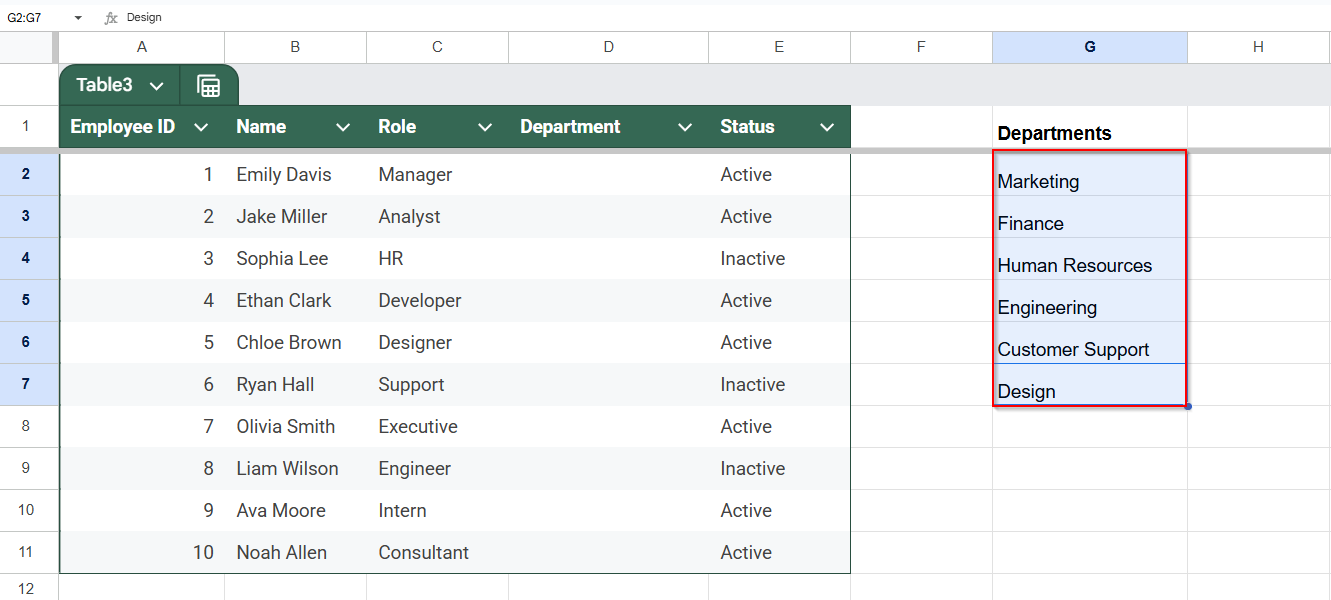
In this example, we’ll use a named range to populate a drop-down in the Department column.
Steps:
➤ Select the source list (G1:G7)
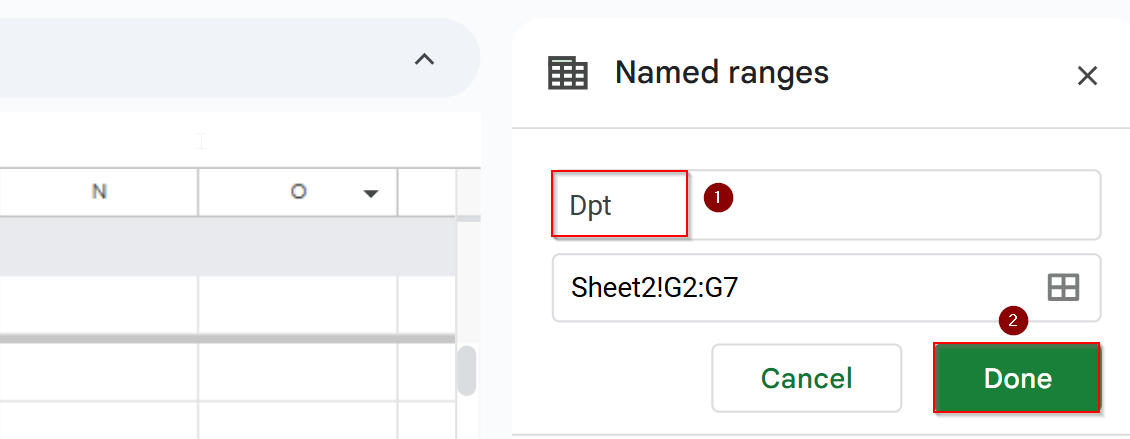
➤ Go to Data >> Named ranges.

➤ Name the range (e.g., Dpt) and click Done.
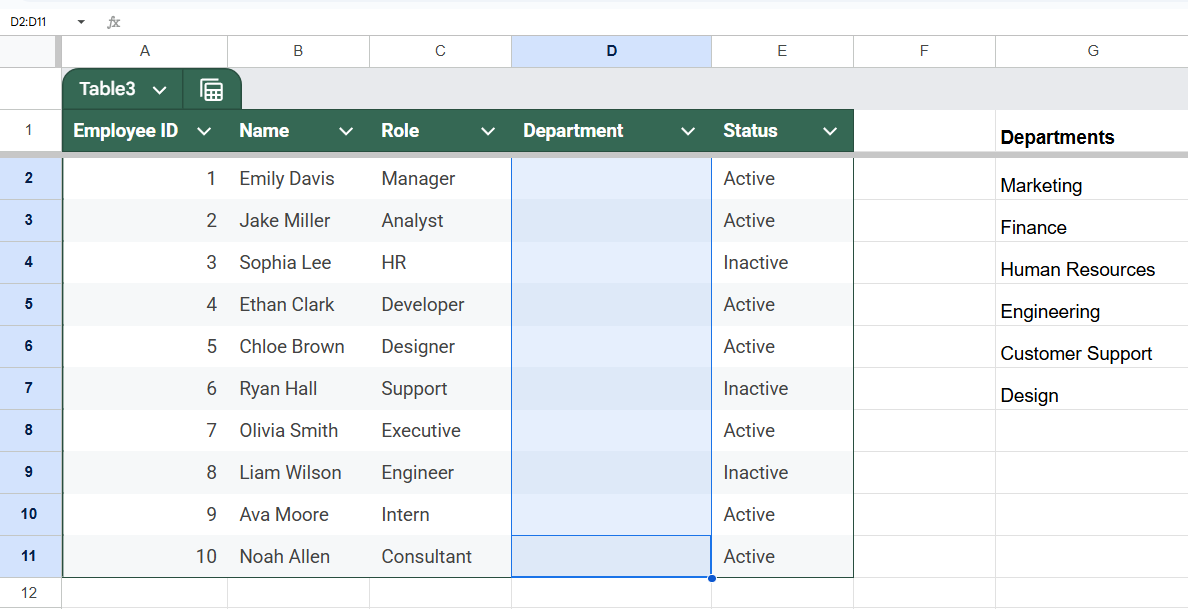
➤ Select your target cell range (e.g., C2:C11).
➤Go to Data >> Data validation.
➤ Click on Add Rule at the right side of your screen.

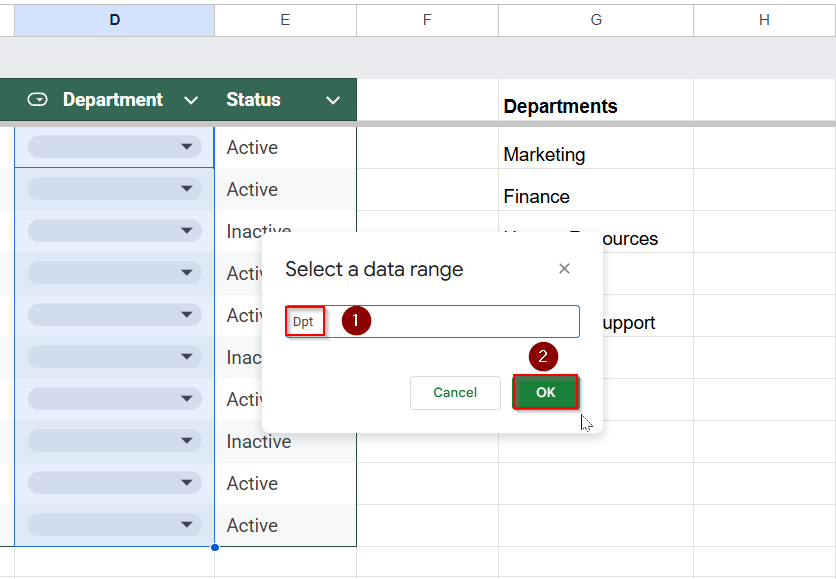
➤ Under Dropdown (from a range), type: =Dpt inside data range icon.
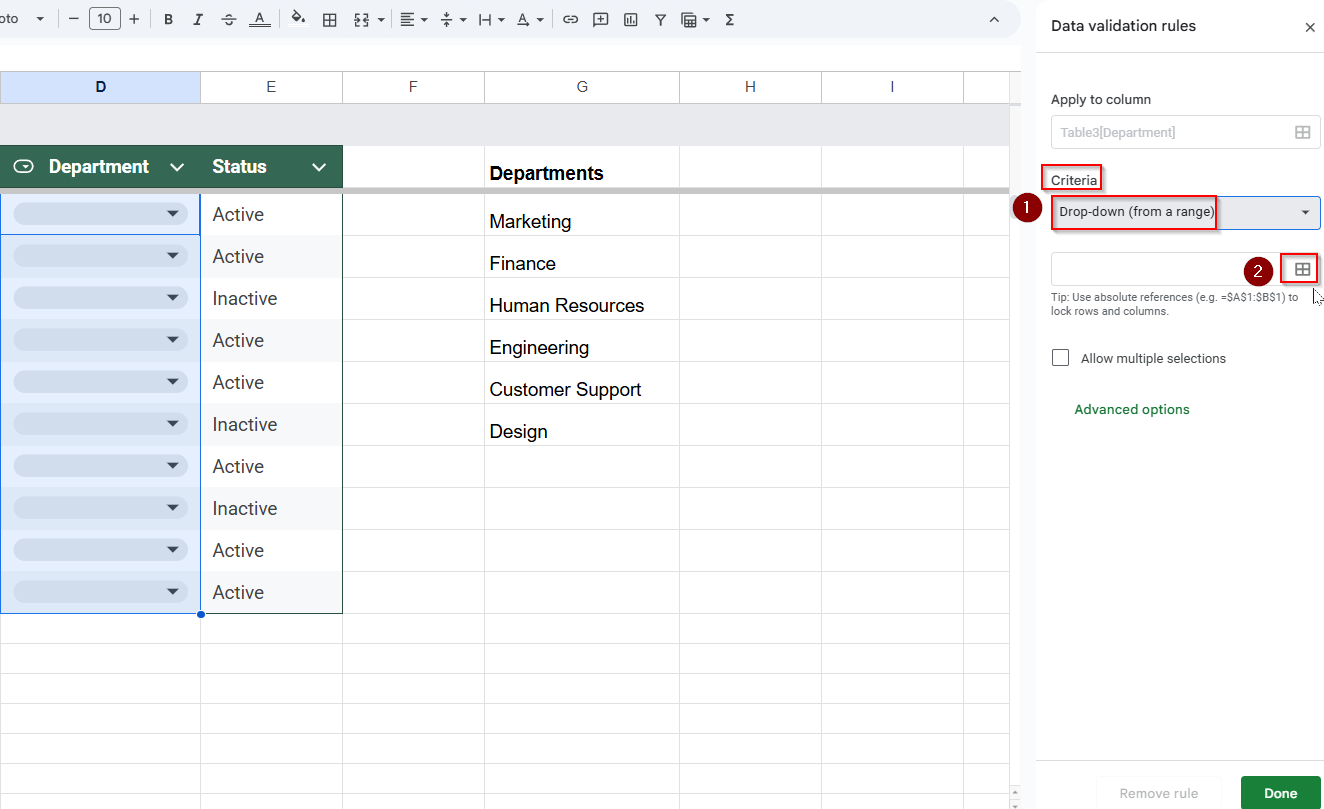
➤ Enter the Named Range value (e.g., Dpt) and click OK.
➤Click Done to view your output.

Now the dropdown list references your named range, making it easier to maintain.
Frequently Asked Questions
Can I make a drop-down list appear in multiple sheets?
Yes, you can. The best way is to use a named range that refers to a list on one sheet, then apply that named range in Data Validation across other sheets. This way, the dropdown will work across tabs and update automatically when the source list changes.
How do I remove a drop-down list in Google Sheets?
This is how you can remove drop-down lists in Google Sheets:
➤ Select the cell(s) and then click on Data >> Data validation. On the right sight of the screen the Data Validation Taskbar should open.
➤ Click Remove rule to remove your drop-down list.
Can I create dependent drop-down lists in Google Sheets?
Yes, but it’s a bit more advanced. Dependent drop-downs change based on another selection (like Category >> Subcategory). You can use FILTER function, INDIRECT function, or even Apps Script to create these dynamic dropdowns based on user selections. It takes extra setup, but it is doable.
Is there a limit to how many items can be in a drop-down?
Google Sheets technically supports long lists, even hundreds of items. However, for better usability, it’s recommended to keep dropdowns under 50 entries. This makes it easier for users to find and select items without scrolling through an overwhelming list.
Wrapping Up
Creating drop-down lists in Google Sheets is a simple yet highly effective way to control data entry, minimize errors, and keep your spreadsheet organized. Whether you’re adding items manually, using a cell range, or applying named ranges, each method offers flexibility based on your needs.
These tools help improve your workflow, make collaboration easier, and ensure consistent information in areas like inventories, employee records, or order forms.