When working with Excel, you may often find that dates or times imported from external sources appear as text. Text-formatted dates and times can cause errors in calculations, sorting, or analysis. Converting these text values into actual Excel date or time values ensures that all formulas and formatting work correctly.
In this article, we will explore several practical methods to convert text to date and time in Excel, including formulas, built-in tools, and special techniques for handling tricky text formats. Let’s get started.
Steps to convert text to date and time in Excel:
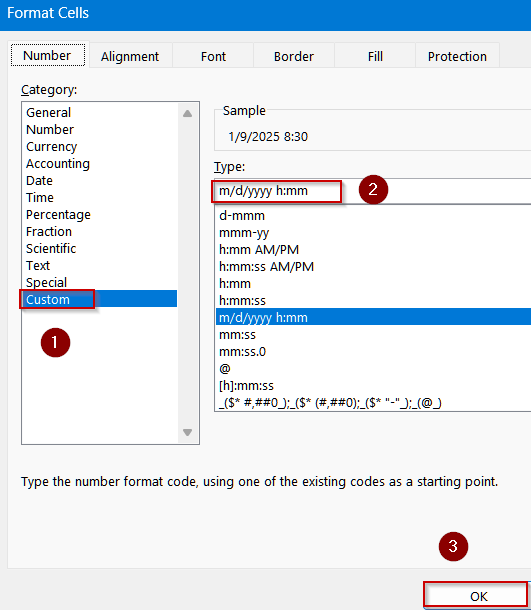
➤ Go to a blank cell like B2. Format the cell by pressing Ctrl + 1 to open Format Cells dialog >> Choose Custom.
➤ Type the following format:
m/d/yyyy h:mm
➤ Click OK to view changes.
➤ Enter the formula in B2 cell: =VALUE(A2)
➤ Press Enter and copy the formula down for all rows.

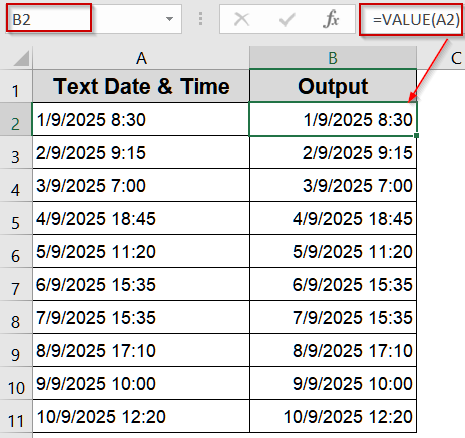
Apply the VALUE Function to Convert Text to Date and Time
The VALUE function is a straightforward way to convert text that represents numbers or dates into actual numeric values Excel can recognize. This approach is particularly useful for text entries that look like dates but remain stored as plain text after import or manual entry. Once converted, you can easily format these numbers as dates or date-time values. VALUE is reliable, lightweight, and works well for large datasets where consistency is important.
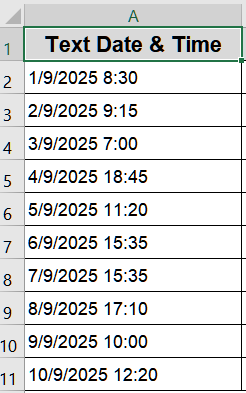
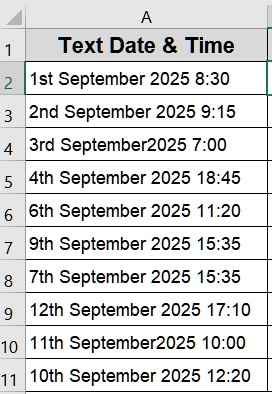
We’ll use the following dataset:
Steps:
➤ Go to a blank cell like B2. Format the cell by pressing Ctrl + 1 to open Format Cells dialog >> Choose Custom.
➤ Type the following format:
m/d/yyyy h:mm
➤ Click OK to view changes.

➤ Enter the formula in B2 cell:
=VALUE(A2)
➤ Press Enter and copy the formula down for all rows.
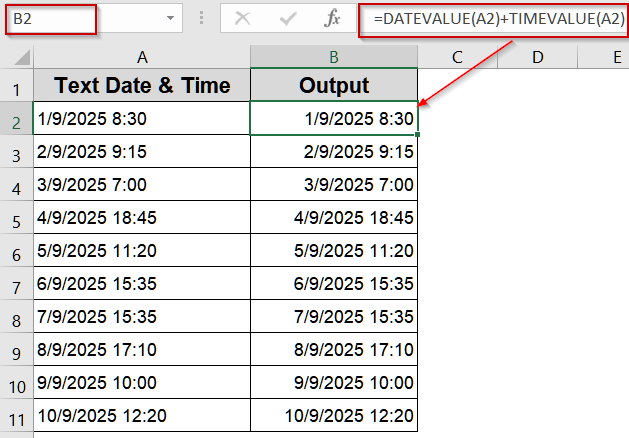
Insert the DATEVALUE and TIMEVALUE Functions for Conversion
When Excel fails to recognize a text string as a date or time, the DATEVALUE and TIMEVALUE functions become powerful tools. They allow you to manually convert text-based dates and times into valid Excel values, giving you full control over the process. This method is especially helpful when working with unusual text formats, imported data from external sources, or strings that contain both date and time components.
Steps:
➤ Select a blank cell (e.g., B2).
➤ Format the cell by pressing Ctrl + 1 to open Format Cells dialog >> Choose Custom.
➤ Type the following format:
m/d/yyyy h:mm
➤ Click OK to view changes.

➤ Enter the formula in B2 cell:
=DATEVALUE(A2)+TIMEVALUE(A2)
➤ Press Enter.
➤ Copy the formula down for all rows.
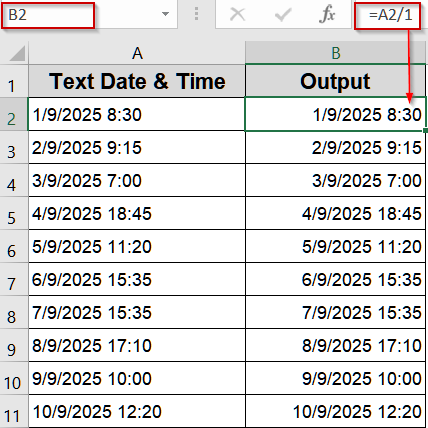
Using Mathematical Operations for Conversion
Sometimes, the text-formatted dates in your worksheet are already close to a valid Excel date format, but Excel still treats them as text. In these cases, applying a simple mathematical operation such as dividing by 1, multiplying by 1, or using a double minus can force Excel to re-evaluate the text as a numeric value.
Steps:
➤ Select a blank cell (e.g., B2).
➤ Format the cell by pressing Ctrl + 1 to open Format Cells dialog >> Choose Custom.
➤ Type the following format:
m/d/yyyy h:mm
➤ Click OK to view changes.

➤ Enter the formula in B2 cell:
=A2/1
➤ Press Enter.
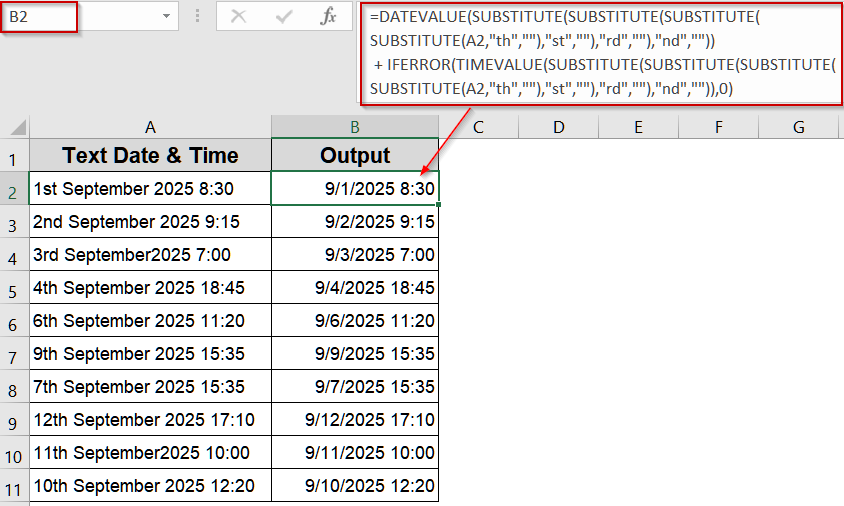
Correcting Two-Digit Year or Special Text Formats
Imported or manually entered data often includes unconventional date formats such as 04-09-25 or ordinal suffixes such as “1st,” “2nd,” “3rd,” and “4th.” These extra characters or incomplete year values confuse Excel’s date system, leading to errors or unrecognized text. By combining the DATEVALUE function with multiple SUBSTITUTE functions, you can clean up the text removing unwanted suffixes or standardizing the year format before converting it into a valid Excel date. We’ll use the following dataset:
Steps:
➤ Go to a blank cell like B2. Format the cell by pressing Ctrl + 1 to open Format Cells dialog >> Choose Custom.
➤ Type the following format:
m/d/yyyy h:mm
➤ Click OK to view changes.

➤ Enter the formula in B2 cell:
=DATEVALUE(SUBSTITUTE(SUBSTITUTE(SUBSTITUTE(SUBSTITUTE(A2,"th",""),"st",""),"rd",""),"nd",""))+IFERROR(TIMEVALUE(SUBSTITUTE(SUBSTITUTE(SUBSTITUTE(SUBSTITUTE(A2,"th",""),"st",""),"rd",""),"nd","")),0)
➤ Press Enter and copy down.
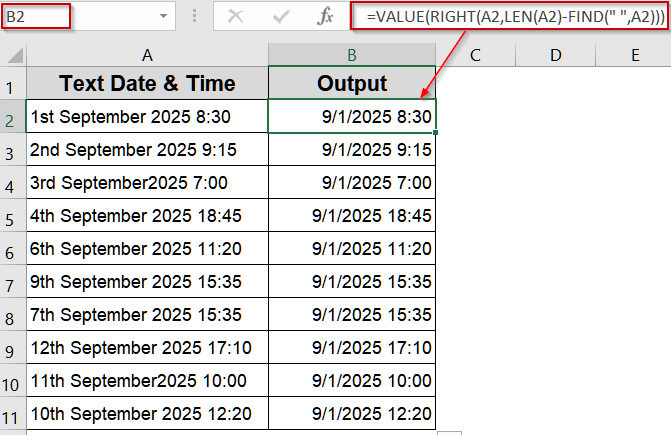
Convert Text with Date and Time into Excel Date-Time
When dates and times are stored as text in a single cell (for example, 4-Sep-2025 8:30), Excel may not automatically recognize them as valid date-time values. This often happens when importing data from external sources like CSV files or databases. To convert such text into a proper Excel date-time format, you can use the VALUE function, which interprets both the date and the time portions correctly.
Steps:
➤ Go to a blank cell like B2. Format the cell by pressing Ctrl + 1 to open Format Cells dialog >> Choose Custom.
➤ Type the following format:
m/d/yyyy h:mm
➤ Click OK to view changes.
➤ Enter the formula in B2 cell:
=VALUE(RIGHT(A2,LEN(A2)-FIND(" ",A2)))
➤ Press Enter and copy the formula down the column.
Make Use of Paste Special for Quick Conversion
Sometimes your text values already resemble valid date numbers but remain stored as plain text, perhaps after importing data or copying from another source. Instead of using formulas, you can force Excel to re-interpret these entries as numeric dates with a quick Paste Special trick. By multiplying the text values by 1, Excel refreshes the cell format and converts them into recognizable dates without altering their appearance.
Steps:
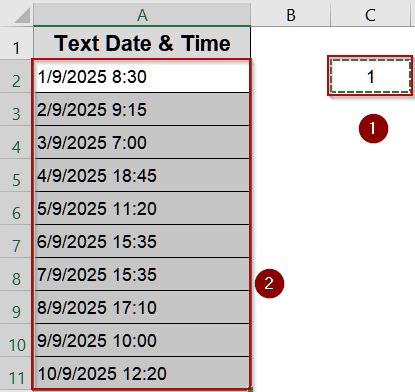
➤ Enter 1 in a blank cell and copy it.
➤ Select your text date cells.
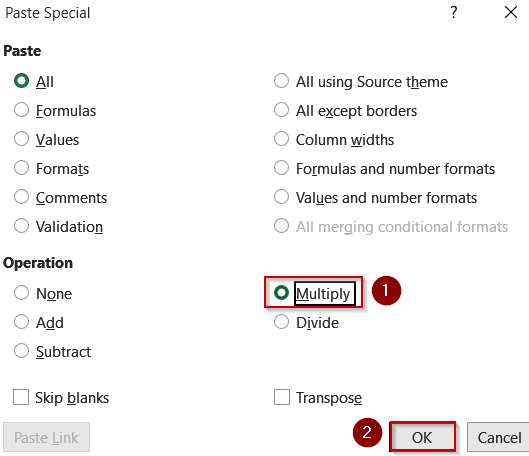
➤ Right-click >> Paste Special >> Choose Multiply >> Click OK.
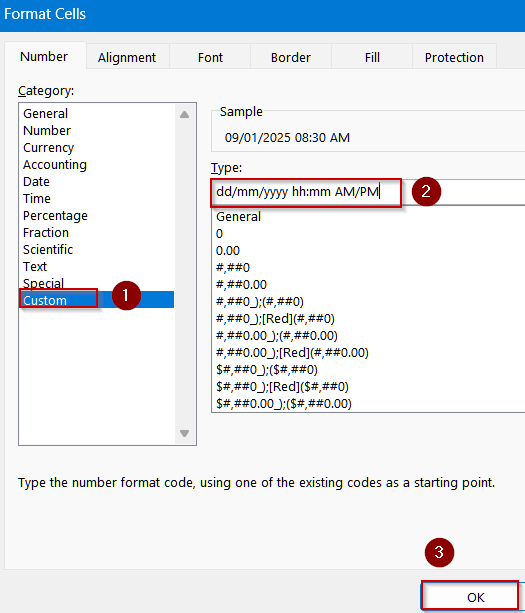
➤ Format the cells by pressing Ctrl + 1 to open Format Cells dialog >> Choose Custom.
➤ Type the following format:
dd/mm/yyyy hh:mm AM/PM
➤ Click OK to view changes.
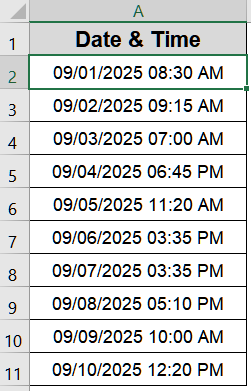
Now your data will be formatted as Date and Time.
Utilize Find and Replace to Standardize Separators
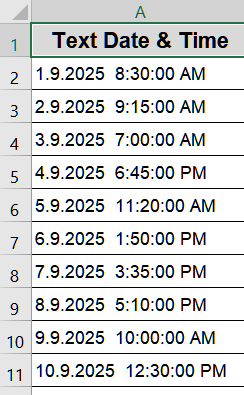
Imported or manually entered dates sometimes use unusual separators such as dots (.), spaces, or even mixed characters. Excel often fails to interpret these formats as valid dates, leaving them stored as plain text. By standardizing the separators, for example, replacing dots or spaces with slashes (/) or hyphens (–), you can quickly transform these strings into a format Excel can process.
This is the dataset we will use for demonstration:
Steps:
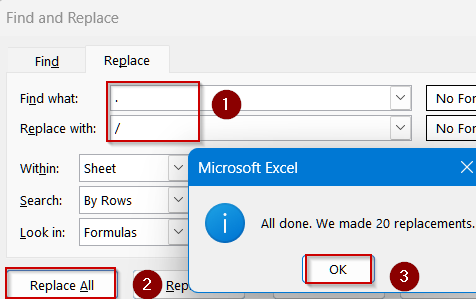
➤ Select your text cells.
➤ Press Ctrl + H to open Find and Replace.
➤ Replace unusual separators (like .) with / or -.
➤ Format the cells by pressing Ctrl + 1 to open Format Cells dialog >> Choose Custom.
➤ Type the following format:
m/d/yyyy h:mm
➤ Click OK to view changes.

Try Error Checking for Conversion
When Excel detects a value that looks like a date but is stored as text, it places a small green triangle in the top-left corner of the cell. This built-in Error Checking feature offers a quick way to fix such entries without typing formulas or running complex operations. By simply clicking the warning icon and selecting Convert to Date, you can instantly convert multiple text-formatted dates into proper date values.
Steps:
➤ Click the cell with a green triangle.
➤ Click the warning icon that appears.
➤ Choose Convert XX to 20XX.
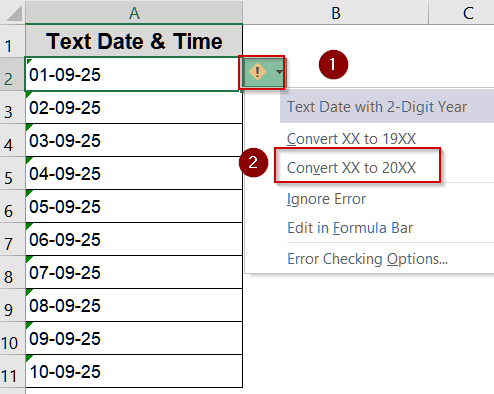
➤ Excel immediately converts the text to a proper date format.

Quick Conversion Using Text to Columns
When dealing with multiple text-formatted dates or times in a single column, converting each one manually or with formulas can be tedious. The Text to Columns wizard in Excel provides a fast, no-formula solution that recognizes date formats and converts them in bulk. This method is perfect for cleaning up imported data from external sources like CSV files or databases, ensuring all your entries are immediately usable for calculations, sorting, or formatting.
Steps:
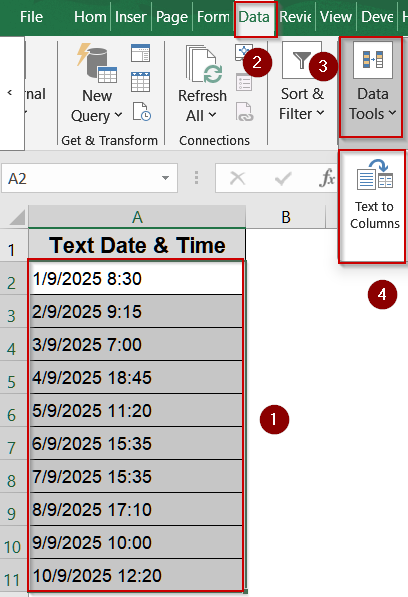
➤ Select the cells containing your text dates (e.g., A2:A11).
➤ Go to the Data tab on the Excel ribbon.
➤ Click on Text to Columns.
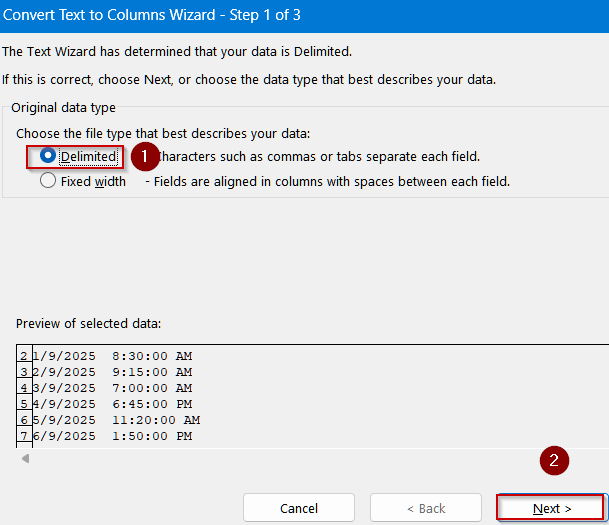
➤ In the wizard, choose Delimited (or Fixed Width if needed) and click Next.
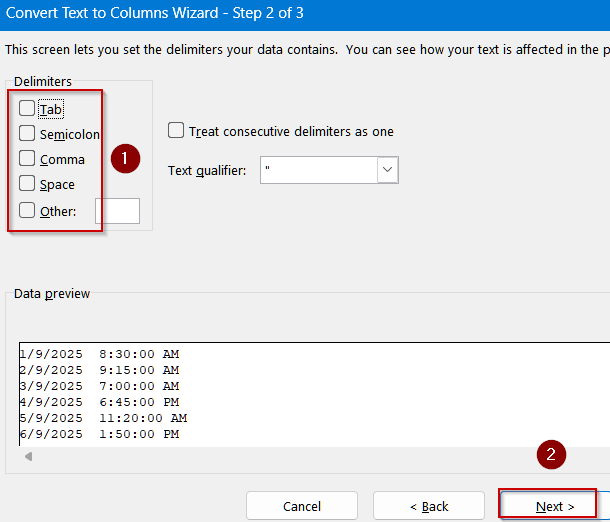
➤ Deselect all delimiters if you chose Delimited, then click Next again.
➤ Under Column data format, select Date.
➤ Choose the date format that matches your data (e.g., DMY).
➤ Type a destination cell like B2 and Click Finish.

➤ Format the cell by pressing Ctrl + 1 to open Format Cells dialog >> Choose Custom.
➤ Type the following format:
m/d/yyyy h:mm
➤ Click OK to view changes.

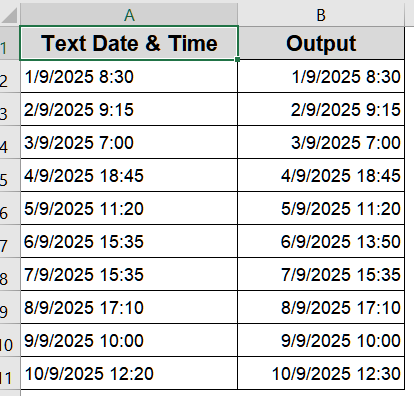
Excel will convert the text into proper date values that can be formatted or used in calculations.
Frequently Asked Questions
Why does Excel show numbers instead of dates after conversion?
Excel stores dates as serial numbers internally. After conversion, you must Format the cell using Short Date, Long Date, or a custom Date & Time format from the Number group for the proper display.
Can I convert text dates in different regional formats?
Yes. Use Text to Columns or DATEVALUE function with correct formatting. For example, choose MDY for U.S. dates or DMY for UK/European formats to ensure Excel interprets the text correctly.
How do I handle text dates with unusual separators?
Replace uncommon separators with standard slashes or dashes using the SUBSTITUTE function. Then apply DATEVALUE or TIMEVALUE. This allows Excel to correctly recognize dates formatted with dots, spaces, or other characters.
What if my text date includes ordinal suffixes like “st” or “th”?
Use multiple SUBSTITUTE functions to remove suffixes before applying DATEVALUE. For example: =DATEVALUE(SUBSTITUTE(SUBSTITUTE(A2,”st”,””),”th”,””)). This cleans the text, making Excel recognize it as a valid date.
Can I convert text to date and time at once for large datasets?
Yes. Using formulas like =DATEVALUE(A2)+TIMEVALUE(A2) or the Text to Columns method allows batch conversion of multiple rows. You can then format all cells as combined date and time efficiently.
Wrapping Up
In this tutorial, we explored multiple methods to convert text to date and time in Excel, from using Text to Columns and DATEVALUE/TIMEVALUE formulas to handling special formats. These approaches ensure accurate dates for calculations, sorting, and analysis. Feel free to download the practice file and share your feedback.