If you’re working with Excel and need to clean up your dataset fast, deleting rows where a certain cell contains a specific word or value can save a lot of time. Also you can filter out zeros, remove blank rows, or remove spam entries. If your Excel Sheet has unwanted rows, you don’t have to scroll and delete them one by one.
This guide walks you through different ways to delete rows, with or without using formulas or code based on cell content.
Ways to delete rows with specific content:
➤ Using Excel Filter option.
➤ Using Find tool from the menu.
➤ Using Formula in the Helper column.
➤ Using VBA Editor.
Using Excel Filters to Delete Rows Based on a Specific Text
This method is best when you can easily filter out the rows you don’t want to include. It’s perfect for basic cleanups and visual control. It is not necessary to know any formulas and scripts. You can use Excel’s built-in filter tool to hide and delete.
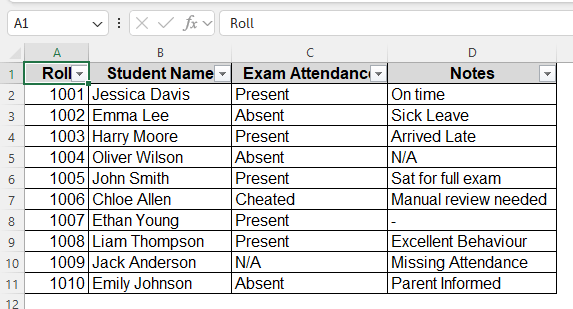
We’ll use a simple exam attendance dataset to show each method in action. You’ll see how to clean up entries without harming the rest of the sheet. It is more helpful if you are new to using Excel.
Steps:
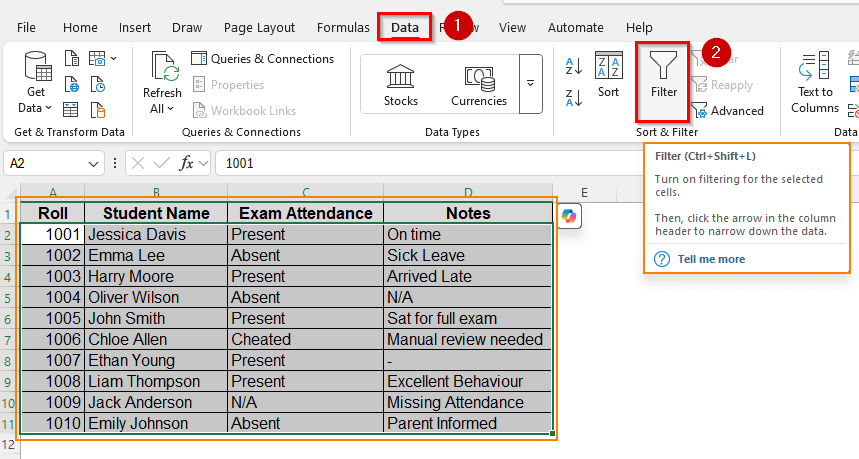
➤ Select the entire dataset.
➤ Go to the Data Tab > click Filter. Small drop-downs will appear in each header.
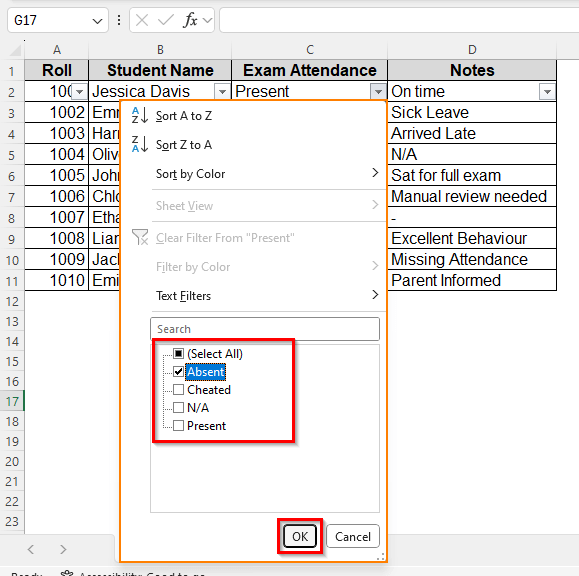
➤ Click the dropdown on column C that you want to filter.
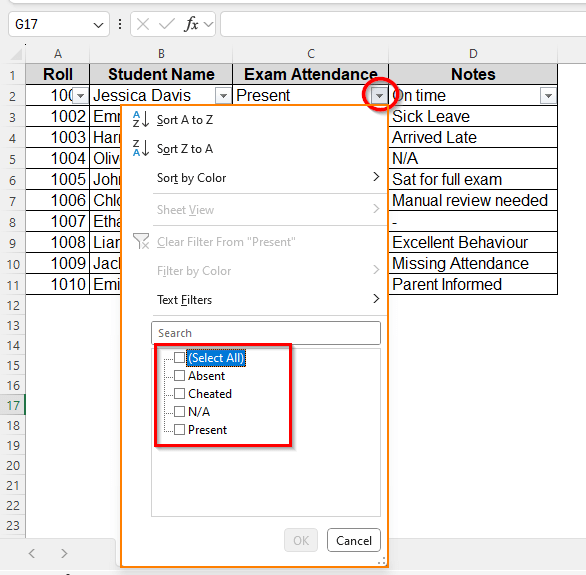
➤ Uncheck everything and only select the value you want to delete, like “Absent”.
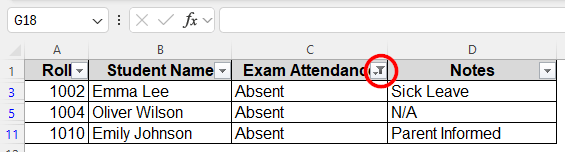
➤ Select all the filtered rows (row numbers will be blue).
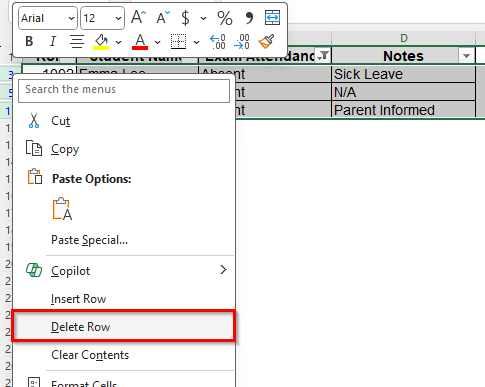
➤ Right-click on the filtered row numbers > click Delete Row.
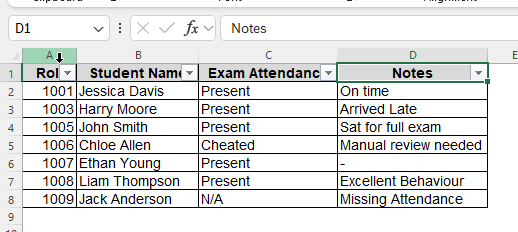
➤ Then go back to Data > Filter to remove the filter.

➤ This is the result.
Note:
Use this when the value is visible and doesn’t need a partial match.
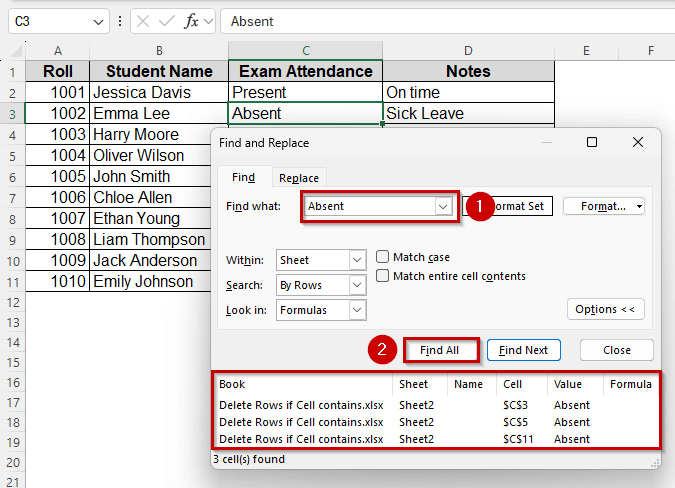
Use Find Tool from Menu Bar Groups
This method works great for messy or inconsistent values where filtering won’t help. It finds any cell that contains part of the word, not just exact matches.
Steps:
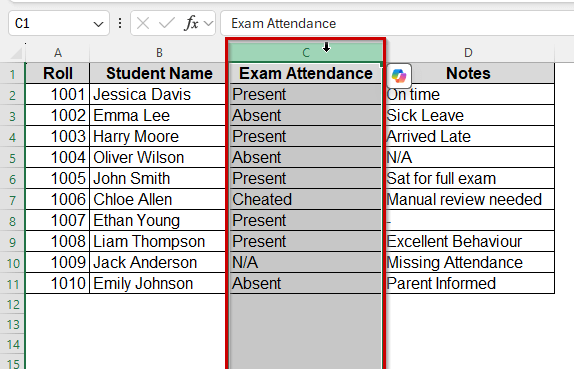
➤ Select column C that you want to search in.
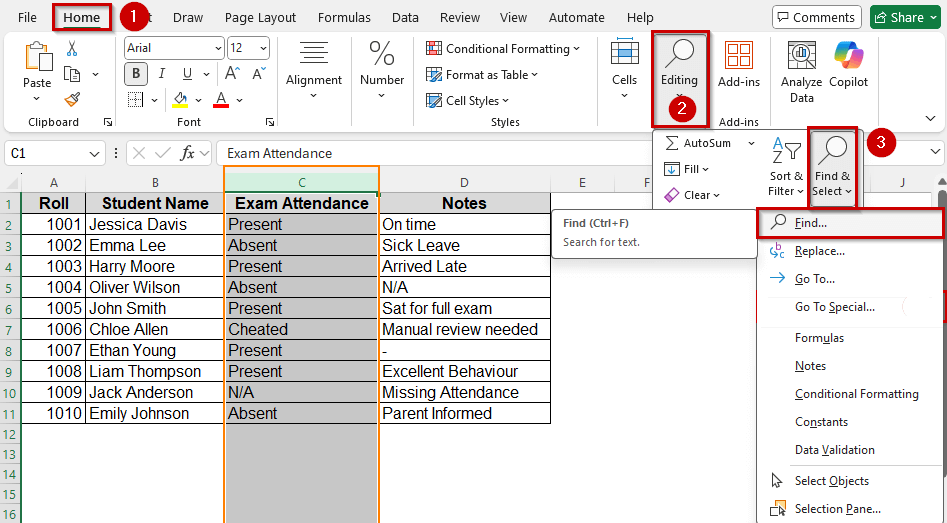
➤ Go to Home > FInd & Select > Find.
➤ Type the word you want to search for (e.g., “Absent”). Click Find All.
➤ Press Ctrl + A in the results to select all found cells.
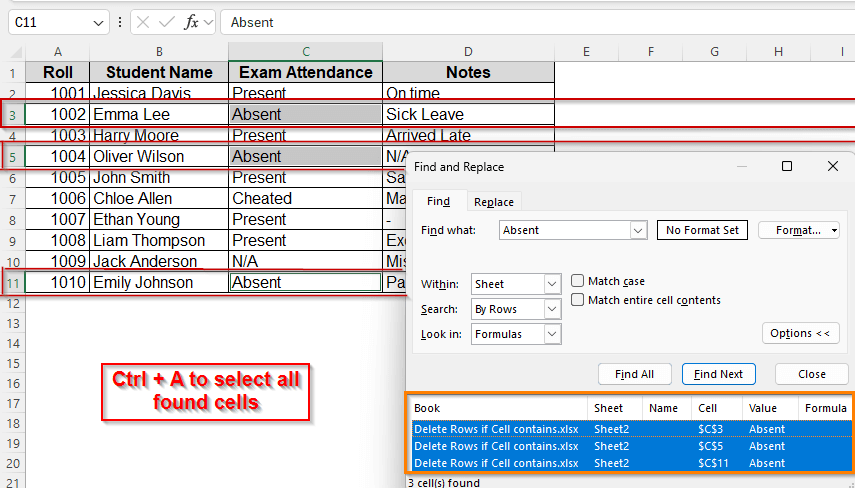
➤ Press Esc to close the Find Box.
➤ Right-click any selected cell > choose Delete.

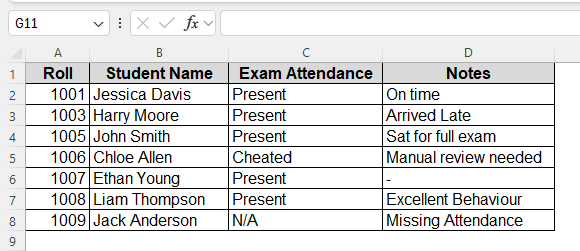
➤ This will delete all rows containing the word “Absent” anywhere in column C.
Note:
This method finds cells that contain a string, even if it is part of a longer sentence.
Add a Helper Column and Find Rows to Delete
This is safer for large data or when conditions are complex. If you are not confident about deleting rows right away, or you want to flag rows before removing them, this method lets you mark them before removing them and delete later. You’ll use a formula to mark which rows to delete.
This approach gives you full control and avoids accidental deletions.
Steps:
➤ Insert a new column, column F, beside your data.
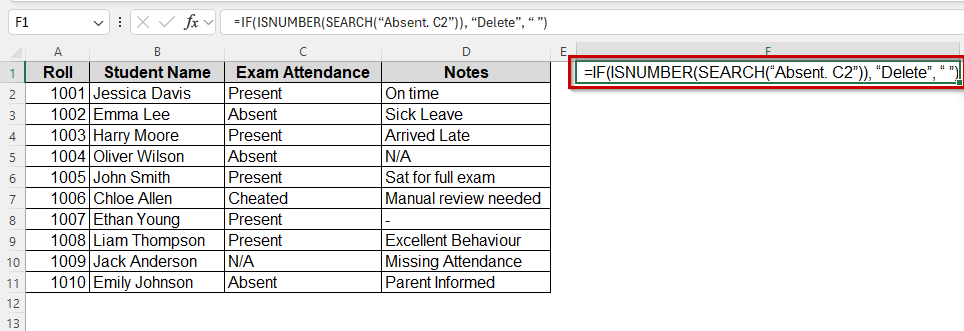
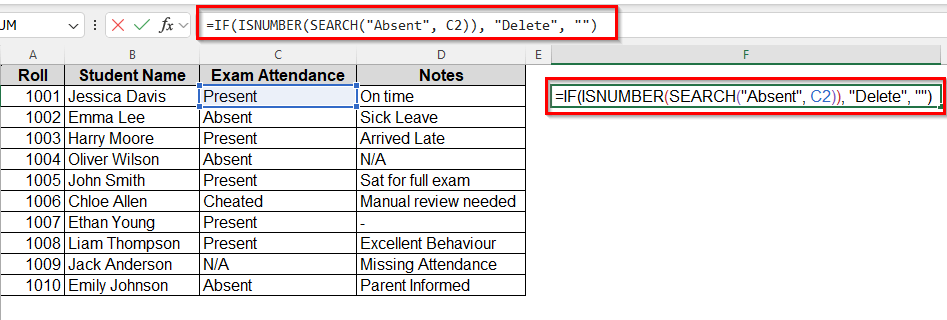
➤ In column F, use a formula like:
=IF(ISNUMBER(SEARCH(“Absent. C2”)), “Delete”, “ ”)
This looks inside cell C2. If it finds “Absent”, it returns “Delete”.
➤ Drag the formula down the column.
➤ Now filter helper column F for “Delete”.
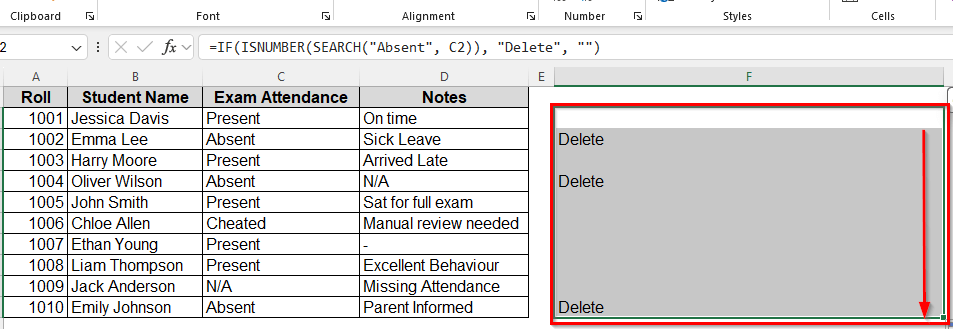
➤ Select rows 3,5, and 11 where the word “Delete” appears and delete them as before.
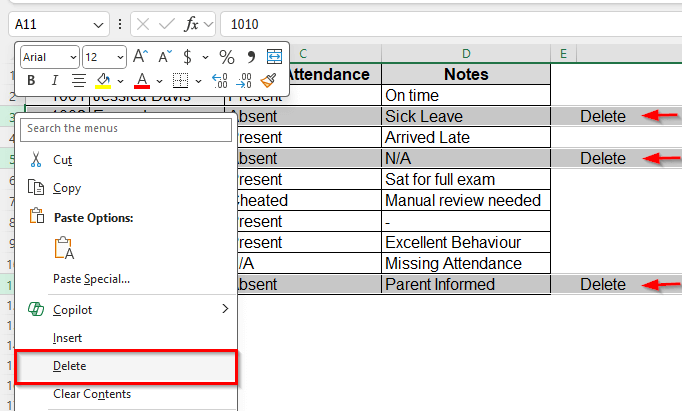
➤ Remove the helper column, column F, when done.

Note:
Use Search for partial matches and = for exact matches like
=IF(C2=" Absent", "Delete", " ")
Delete Rows Automatically Based on Specific Cell Content with VBA
For repetitive tasks, using a macro can save a lot of time. You can delete rows in one click based on what a cell contains.
Steps:
➤ Press Alt + F11 to open the VBA editor.
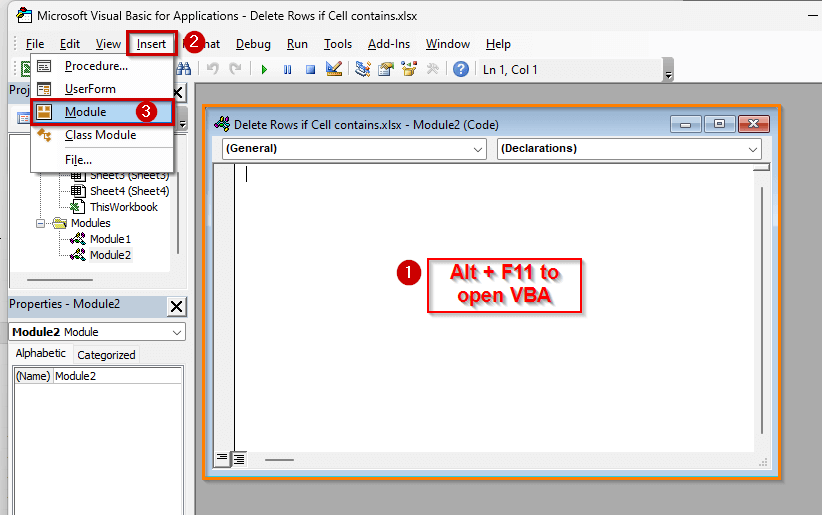
➤ Go to Insert > Module and paste this code:
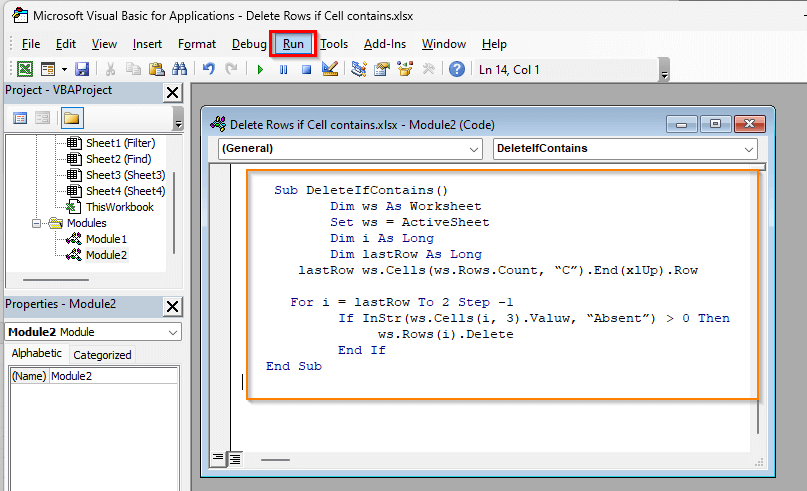
Sub DeleteIfContains()
           Dim ws As Worksheet
           Set ws = ActiveSheet
           Dim i As Long
           Dim lastRow As Long
       lastRow = ws.Cells(ws.Rows.Count, “C”).End(xlUp).Row
      For i = lastRow To 2 Step -1
            If Instr(ws.Cells(i,3).Value, “Absent”) > 0 Then
                 ws.Rows(i).Delete
            End If
     Next i
   End Sub
This checks Column C. If a cell contains “Absent”, it deletes that row.
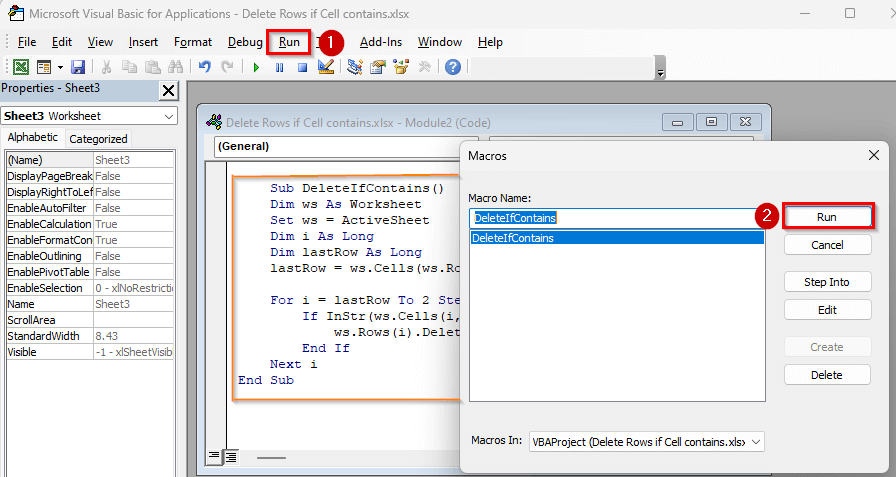
➤ Close the editor and click Run. All matching rows will be deleted automatically.
Note:
Always save your file before using VBA, and test on a copy if unsure.
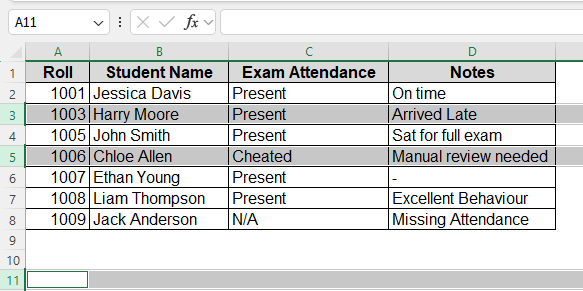
➤ Here is the result. You can remove the row for “Cheated” and “N/A” the same way.
Frequently Asked Questions
Can I delete rows based on multiple values?
Yes, use OR logic in formulas or modify the VBA to include more conditions.
Will this delete formulas too?
Yes. If a row is deleted, everything in it including formulas will be gone.
Can I undo VBA deletions?
Only if you haven’t saved after running the macro. Press Ctrl + Z right after.
What happens to blank rows?
You can adapt the same methods to delete rows where a cell is blank using =ISBLANK() in formulas or modifying the VBA.
Wrapping Up
Deleting rows in Excel if a cell contains a specific value can be done in many ways from filters to formulas to VBA. Each method fits a different situation. If you want control and safety, use the helper column. For speed, go with filters. And if you’re automating tasks, VBA is the way to go.
Now your Excel Sheet is cleaner, lighter, and easier to read. Let us know which method worked best for you.